| Subtotal | $0.00 |
USD
U.S. DollarEuroBritish PoundCanadian DollarsAustralian DollarsIndian RupeesChina Yuan RMBMore Info →

| Subtotal | $0.00 |
After you purchase your SSL, there are some essential things you need to do to make it work and to enable HTTPS on your website or device. These are:
You may also need to:
Please note that if you have Namecheap Shared Hosting, 1-year promo PositiveSSLs will be activated and installed automatically for any domains pointed to Namecheap Web-Hosting DNS. Find more details here. You can also install your PositiveSSLs and EssentialSSLs in just a few clicks with the Namecheap SSL plugin in cPanel, here's how.
On Namecheap EasyWP hosting's Turbo and Supersonic plans, there’s a free PositiveSSL provided by default. It can be installed just in a few clicks for the domain on our Web-Hosting DNS. Find more details here.
Manual activation is now required if you’re using other certificate types or if you’re going to install your certificate on a third-party server.
Now let’s go through each stage of enabling your SSL manually.
Before you can receive and install your SSL, you need to activate it. SSL activation is the process of submitting your website information and a Certificate Signing Request (CSR) code to the Certificate Authority (CA), so they can send you the SSL. You can activate your certificate via your Namecheap account panel.
Here’s a how-to video:
You can initiate the activation process right after you purchase the SSL on the "Thank you!" page. Click the "Manage" button next to the SSL.
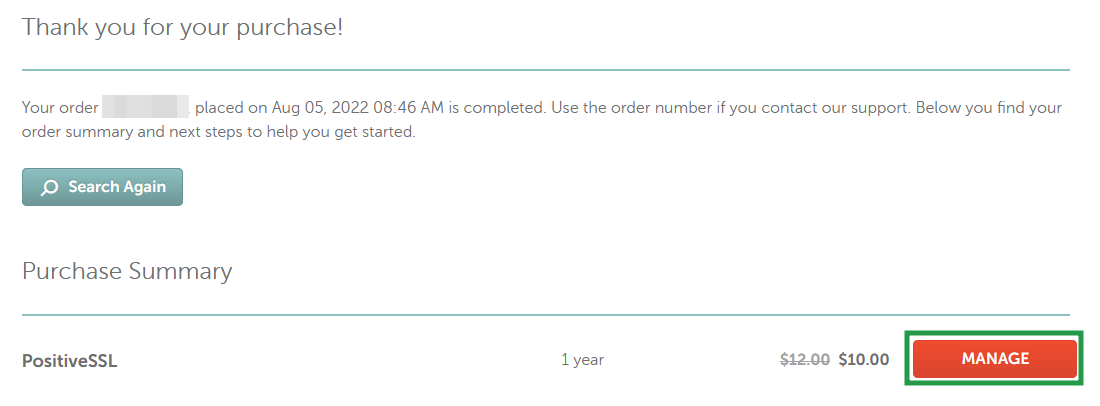
If you want to initiate activation later, you can find the SSL you bought in the Namecheap account panel.


Then, you'll be led to a page that asks you to enter the CSR code.

Let’s talk about what the CSR code is and where you can get one.
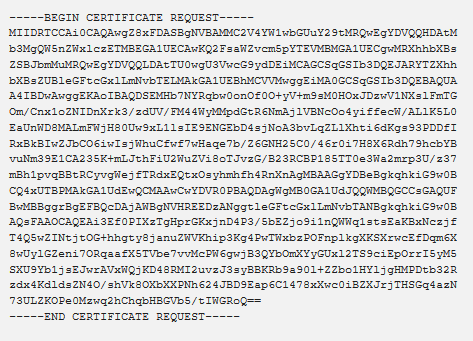
A CSR code is an encrypted code that contains your certificate's common name (the site or server name you want to secure with the SSL) and your contact details.
It looks like a random block of code:
The CSR can either be generated on the server hosting the domain or service you want to secure or by your hosting provider. Here's how to generate the CSR both ways:
NOTE: If your control panel doesn't have the functionality to generate a CSR code, you can use our online generator.
Here’s a list of two-letter country code abbreviations you’ll need to create your CSR code.
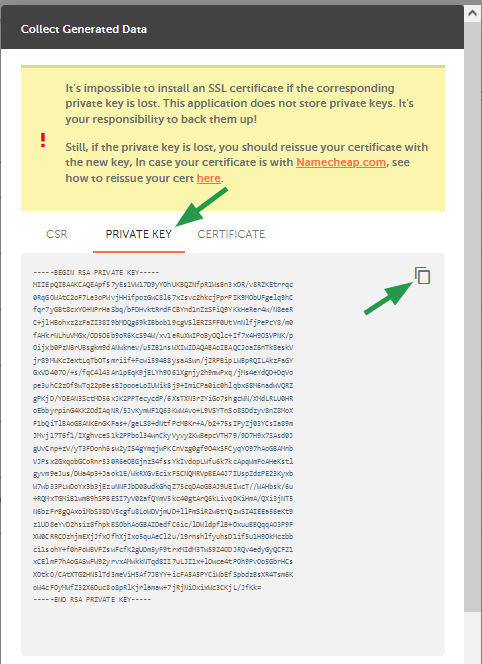
When you create your CSR, a matching Private key is generated simultaneously. This is an essential code you’ll need to install your SSL when it gets issued. You cannot use any Private key when installing your certificate - it must be the one you generated at the same time as your CSR. If you lose it, you’ll have to generate a new CSR code and Private key pair and reissue the certificate.
So you need to keep the Private key safe until SSL installation. If you generated your CSR on your server, then the Private key is usually stored there. However, if you used an online tool to generate the CSR (such as our decoder.link tool), make sure you back up your Private key manually to your computer. Save the file with the .key extension.
So, once you enter your CSR code on the first activation page for your SSL, the "Primary domain" field will be auto-filled with the domain from the CSR.

The next SSL activation step is choosing your domain control validation (DCV) method. DCV is how you can verify to the issuing CA that you are authorized to use the domain you seek to secure via SSL.
You’ll then be taken to the certificate management page, where you can view the Certificate & Order ID, the CA's order ID, and other certificate details.
IMPORTANT: If you’re activating an OV (Organization Validation) or EV (Extended Validation) certificate, you will be asked to submit your company contact information as well:

The "Representative" section is required only for OV certificates.
NOTE: Please keep in mind that changes to the company details for OV/EV certificates can be made during reissue, but only within the first 45 days of certificate issuance.
NOTE: SSL Certificates cannot be issued for domain names considered unsafe by Google Safe Browsing. All unsafe domain names will automatically be removed from Multi-Domain SSL Certificates by Comodo (now Sectigo). Check your site’s safety status here.
After activating your SSL, you’ll need to complete DCV for the domain name(s) you specified in the CSR. The CA initiates the DCV process as soon as you send the CSR with your SSL information to them via activation in your Namecheap account. Completing DCV will confirm that you have administrative rights and access to the domain name(s).
Note: The "Upload a validation file" DCV method was removed for Wildcard SSLs on October 21, 2021. Learn more.
Here’s how to complete DCV for each method:

NOTE
: The email-based validation with WHOIS email is not available due to the upstream provider updates.
NOTE: If you do not receive an approval email within 15 minutes (and have already checked your spam/junk mail folders), or the certificate has still not been issued after one hour, and you have confirmed that the file or record is publicly accessible, please contact our SSL Support Team via live chat or email us to sslsupport@namecheap.com for further assistance.
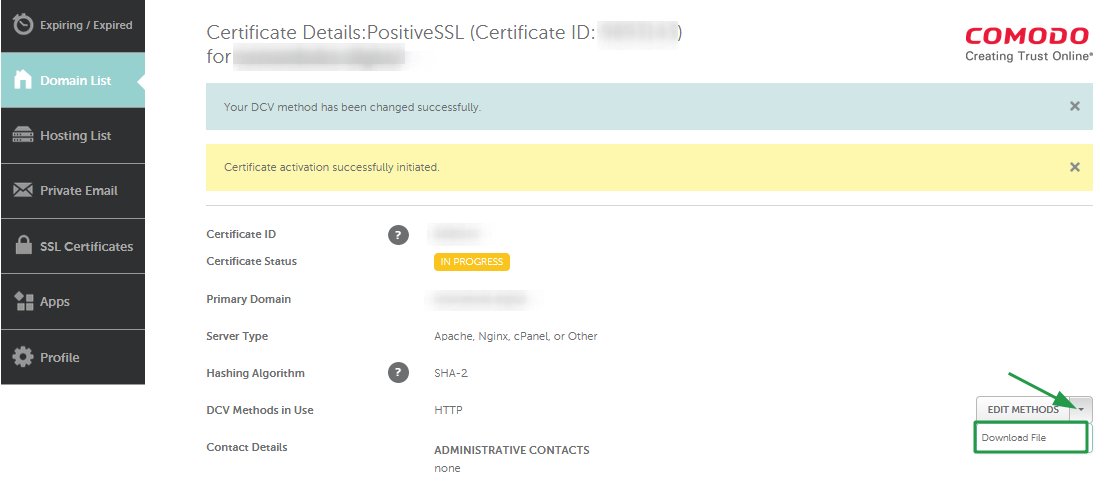
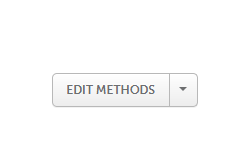
You can also switch the validation method after activation if you want to use a different method. Head to the "Details" page of your certificate, and click the "Edit methods" link in the yellow panel at the top of the page.
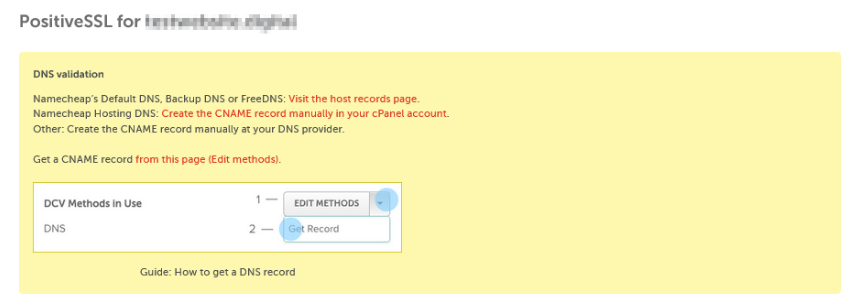
On the next page, click the "Edit methods" button on the right to select your preferred method from the drop-down menu.
Click "Save changes / Retry" to confirm the action.

Finally, if you have doubts about whether you’ve completed DCV correctly, please use the Sectigo Order Status Checker tool.
In this tool, you have a possibility to switch the order to the "DNS TXT random value" DCV method presented by Sectigo CA in January 2025. More details on how to use it are here.
Once you’ve completed DCV for a domain validation level SSL, your SSL files will be issued and emailed to you within 15 minutes. You can then proceed with the installation. If you have an OV or EV SSL certificate, you will need to get through the additional verification of your company.
During this process, Sectigo's CA validation staff must be able to locate your company’s legal information in your country or state's official governmental database or a trusted third-party database.
Find the requirements for OV certificates on this page and EV certificates in this article.
When the CA has finally issued your SSL, you can install it on the hosting server. Follow the instructions below:
Make sure you have the files your server type needs for installation. Double-check with your server provider on the exact certificate format necessary for installation on your service.
You can download the SSL certificate files from your Namecheap account right after issuance once the SSL status updates to "Active". Head to the "SSL Certificates" list and click the "Download" button next to the selected SSL.

The required files are:
The certificate and bundle files will be emailed to the administrative contact email address for the SSL order, so you can also download them from there.
The Private key will either be located in one of two places: the hosting server where the CSR was generated; or if you used an online tool for generating the CSR code, wherever you saved the Private key afterward.
You can now proceed with the installation if you have all the required files. There are two main options for installing your active SSL certificate:
Depending on the type of control panel and/or web server you use, please refer to our specific guides on manual installation:
Once you've installed the SSL, you should check and see that it was done correctly. You can do this by opening the Decoder tool, pasting the domain name, and clicking the Check button.
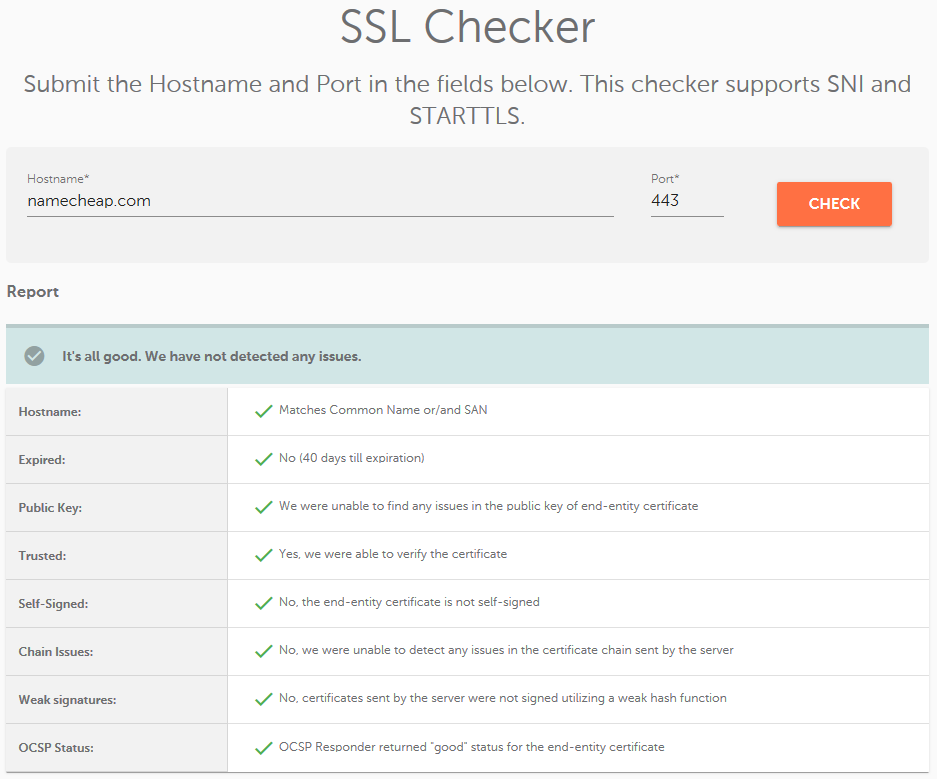
If you see the same status as the screenshot above, your SSL certificate was properly installed. Feel free to clear your web browser's cache and visit the website via https://. Otherwise, you can open it in your browser’s incognito mode.
Once you’ve installed your SSL correctly, your domain will be available via the https:// connection. You may still see a "Not secure" warning message displayed on the web page when you visit your website. This could mean automated redirection from http:// to https:// is not enabled on your server, especially if it’s the first time you’re using an SSL certificate on the server.
The installed SSL only makes your website accessible via a secure https:// connection. If you type in https:// manually before your website name in a browser, you will see the site opening via secure https://. But if the redirect isn’t enabled, if you don’t include https:// manually before your website name, the browser will visit the unsecure http:// version of the site.
That’s why you should create a redirection rule on the hosting server to make the https:// version of your website the default one.
Please choose your control panel or web server from the list below and follow the corresponding steps to enable the redirection:
Find the redirection guide for WordPress here.
Once the rule is created, your visitors will automatically be redirected to the https:// version of your site.
NOTE: The "URL redirect" option in the nameserver’s settings might not create the desired result. Moreover, it may result in redirect misconfiguration.
Another potential issue after a successful installation is receiving a "Mixed (insecure) content" warning message in your web browser while trying to access your website securely via https://.
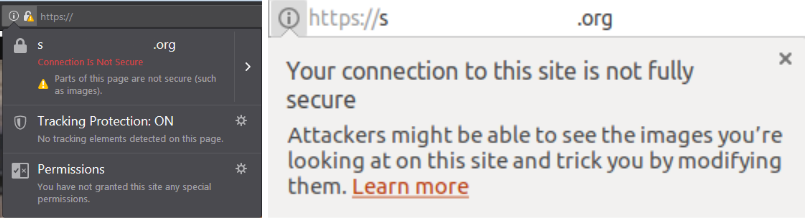
This message means that some of your website's content (e.g., images, fonts, scripts, etc.) has been downloaded from an insecure location. In other words, the content is loaded via http:// links instead of https:// ones.
This isn’t related to the SSL certificate itself or its installation; it’s a code debugging issue. We recommend researching it independently or contacting the responsible developer if such a case arises. Your main goal is to replace any 'http://' protocol at the beginning of all content source links with the 'https://' one.
NOTE: Find a workaround for solving insecure content issues on the dedicated page.
Here are some general tips:
Header set Content-Security-Policy "upgrade-insecure-requests" env=HTTPSYou can use this online tool to get a list of all the content mixed elements on your site. You can also do it in your Google Chrome browser:
That's it!
If you have any questions or doubts or need some assistance, feel free to contact our SSL Support Team via our chat or ticketing system.
Need help? We're always here for you.