
In this article, we’ll show you the basic steps for making your WordPress website work via the secure HTTPS web protocol. We’ll also show you several ways to remove insecure content from your site, which can prevent the padlock from appearing in the browser address bar, even when an SSL Certificate is installed.
The first and only requirement before proceeding with this guide is to have an SSL certificate for your domain activated and installed on your hosting server. Once that’s done, you can get started with enabling https://.
To make WordPress fully secured, you will need to adjust your WordPress website URL accordingly (so that it appears as https://yourdomain.com). Please make sure to check the fields “WordPress Address (URL)” and “Site Address (URL)” in your WordPress Admin Dashboard.
Head to Admin Dashboard >> Settings >> General: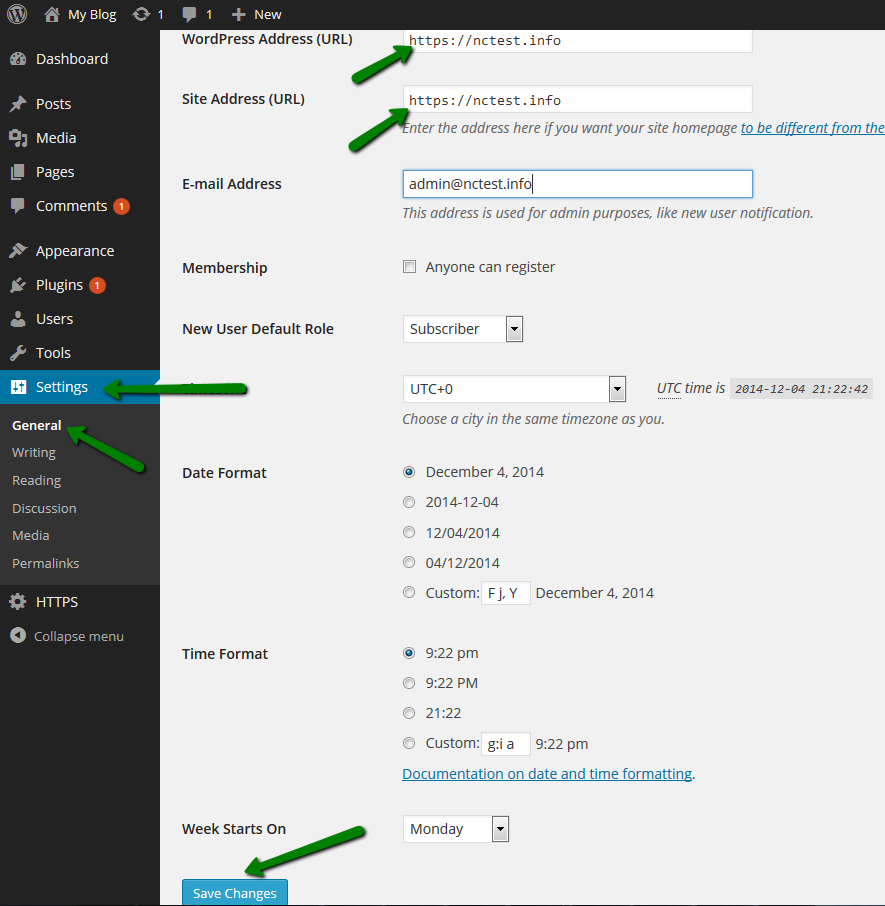
Great! From now on, all your WordPress website pages will be accessible via https:// links.
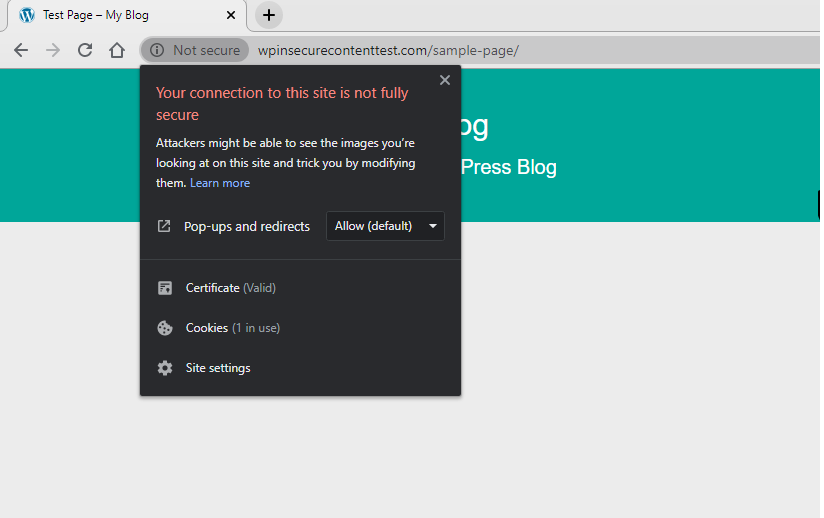
Although your website will be accessible via the https://yourdomain.com link after you install your SSL certificate, there may still be some insecure http:// links within your page’s code. If that’s the case, the padlock icon will not appear in the address bar and site visitors may get security messages warning them about insecure content.
This issue can be resolved by replacing the http:// links with their secured versions.
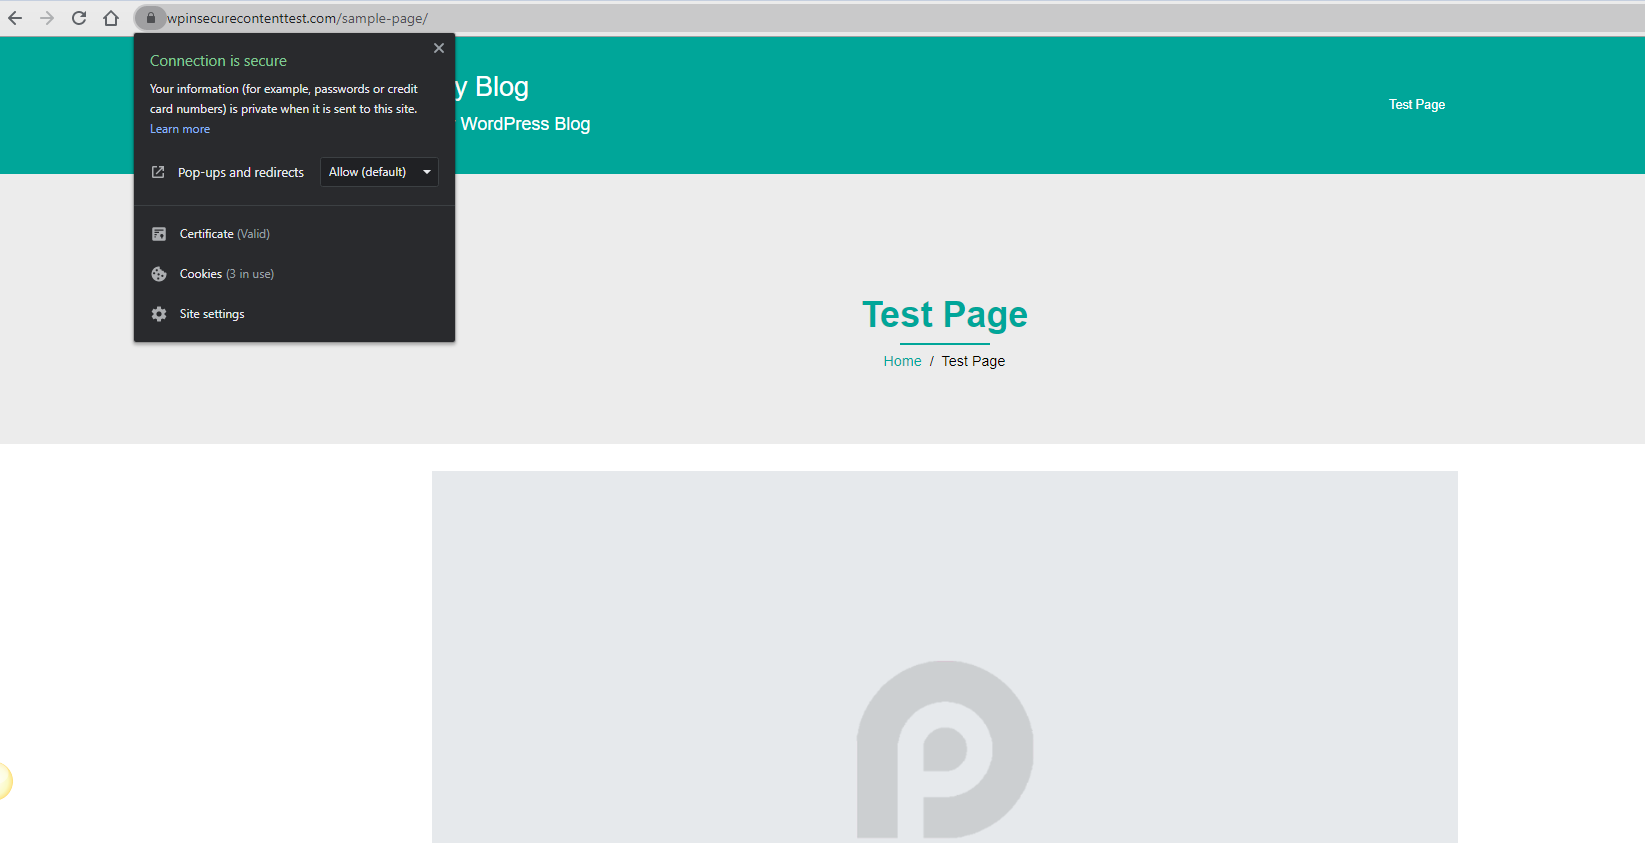
In the following example, we use a WordPress site with an SSL certificate installed featuring some http:// links within the site content.
When we try to access the website via https://, the aforementioned warning message appears. Here is an example:
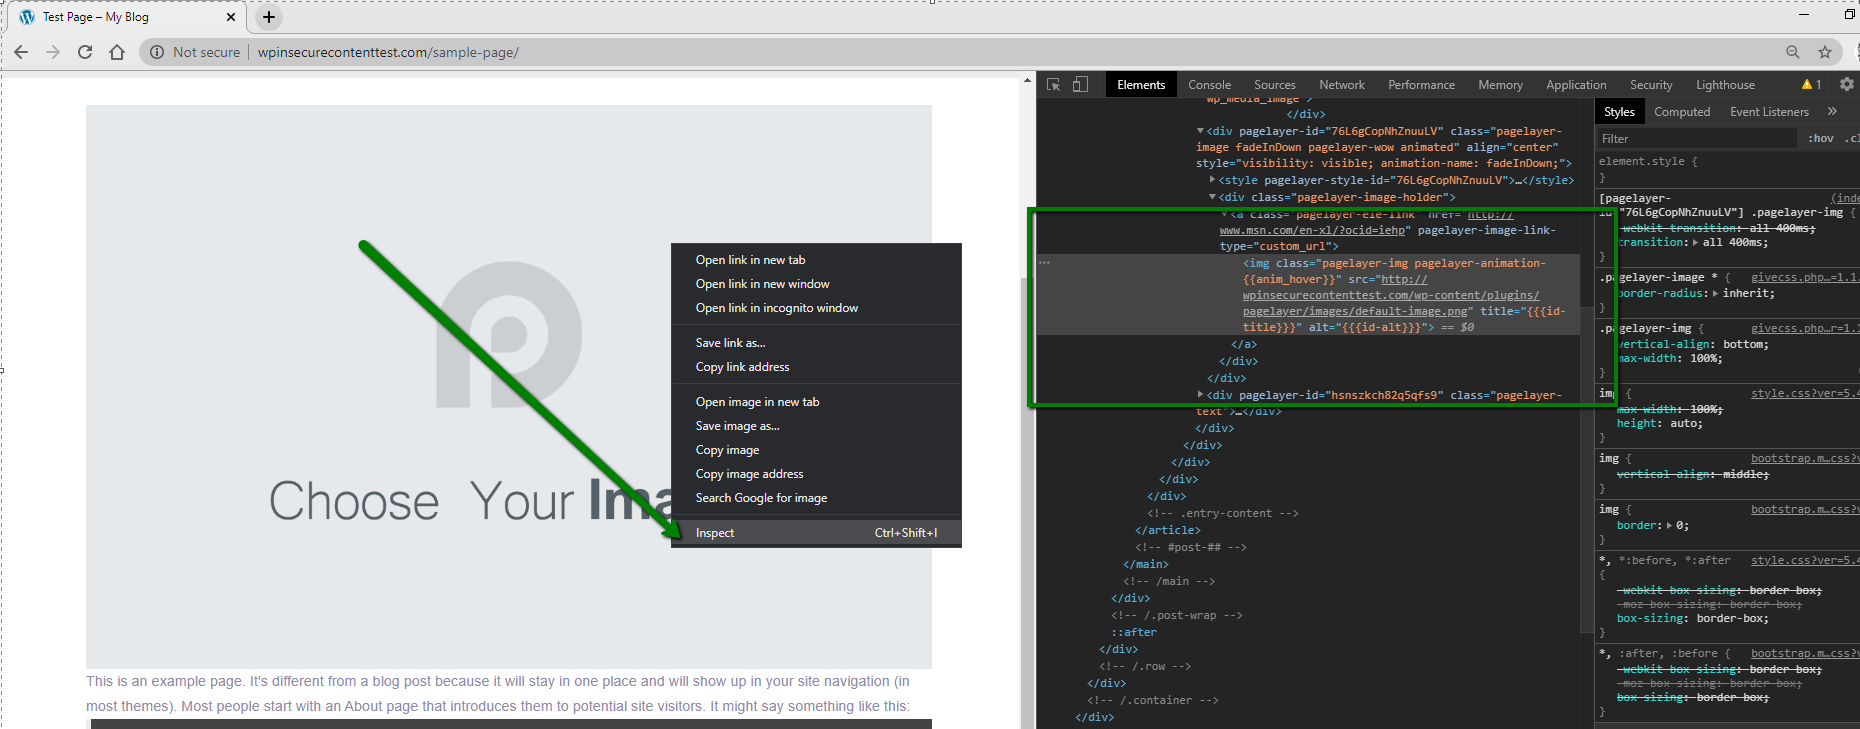
While you can use online checkers to find the issue, most modern browsers also provide developer tools that can give a list of the insecure content on your site.
For example, in Chrome, you can enable this tool by right-clicking on your page >> Inspect.
This tool will provide you with a list of insecure links on your website. However, finding their location can be hard in the case of complex websites like WordPress.
In the console below you can see the warning about the insecure element:
Most of the user-added content links are stored in the database.
In the above example, the Inspect tool shows that an insecure link to an image is causing the issue.
An alternative option for seeing insecure links on the website is to enter one of the following key combinations:
Ctrl + Shift + J (Chrome)
Cmd + Opt + J (Chrome for Mac)
Ctrl + Shift + K (Firefox)
These combinations will open the same window, but will also have the ‘Console’ tab visible.
All insecure links, as well as other issues, can be checked here as well.
There are several methods for finding and replacing insecure links:
Let’s review each of the methods in detail.
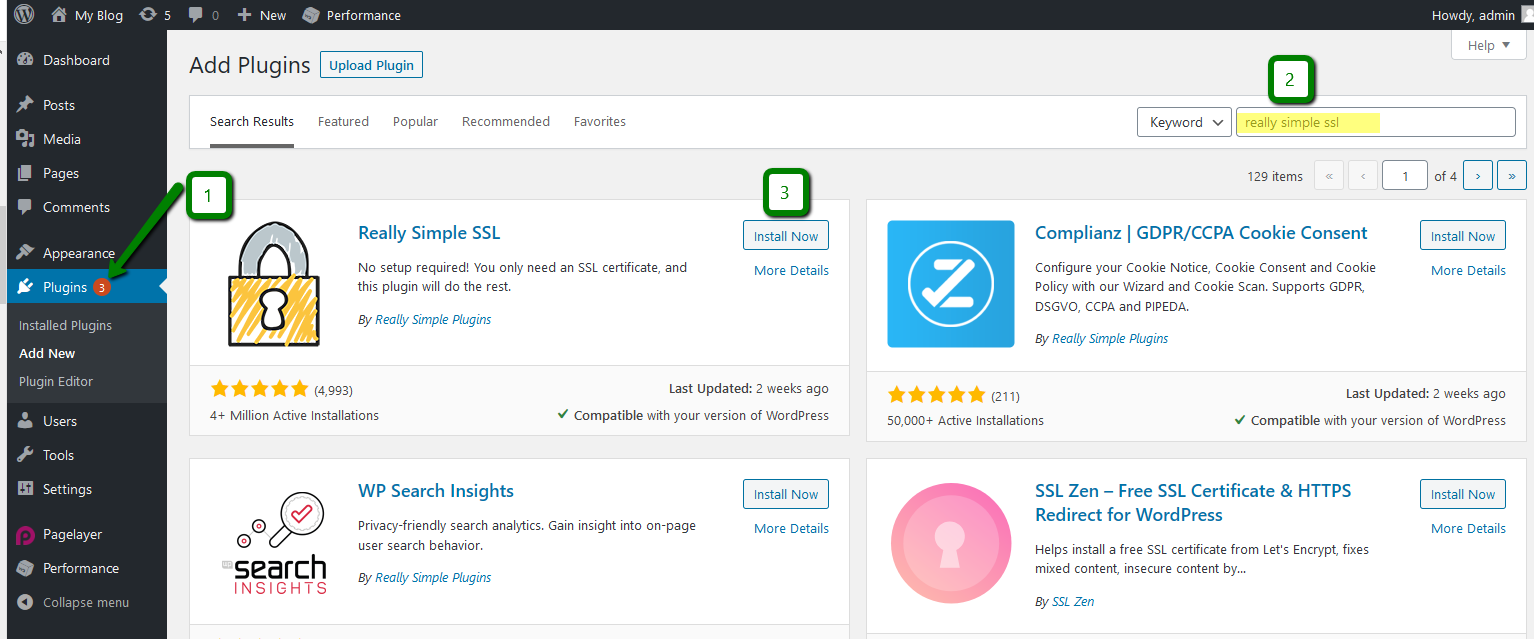
You can force all links to automatically redirect to https:// simply by installing one of the HTTPS plugins designed for this purpose.
In this example we use Really Simple SSL to force all pages to load through a https:// connection. You can install it in Plugins >> Add new menu:
NOTE: The plugin may be incompatible with other scripts, so to avoid redirect loops or any other issues, try deactivating other plugins first (such as those used for caching and protecting) or changing your theme to a different one.
You will need to install and activate the plugin. After that, the issue should be fixed:
You can also add the following header to your .htaccess file located in cPanel:
Header set Content-Security-Policy "upgrade-insecure-requests" env=HTTPS
Once the changes are saved, the insecure links will be changed to secured ones.
The issue should be fixed on the website almost instantly.
Mixed content can be fixed in two steps:
Step 1. Replace URLs
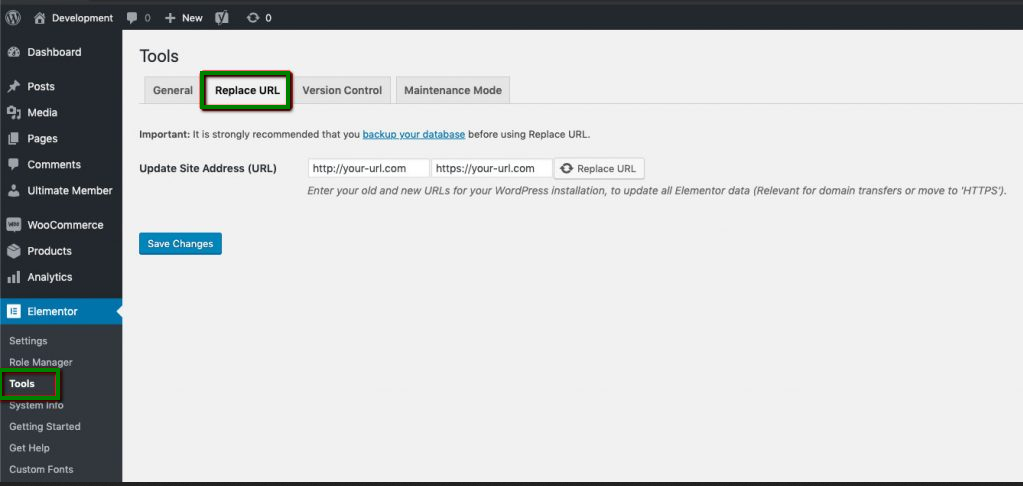
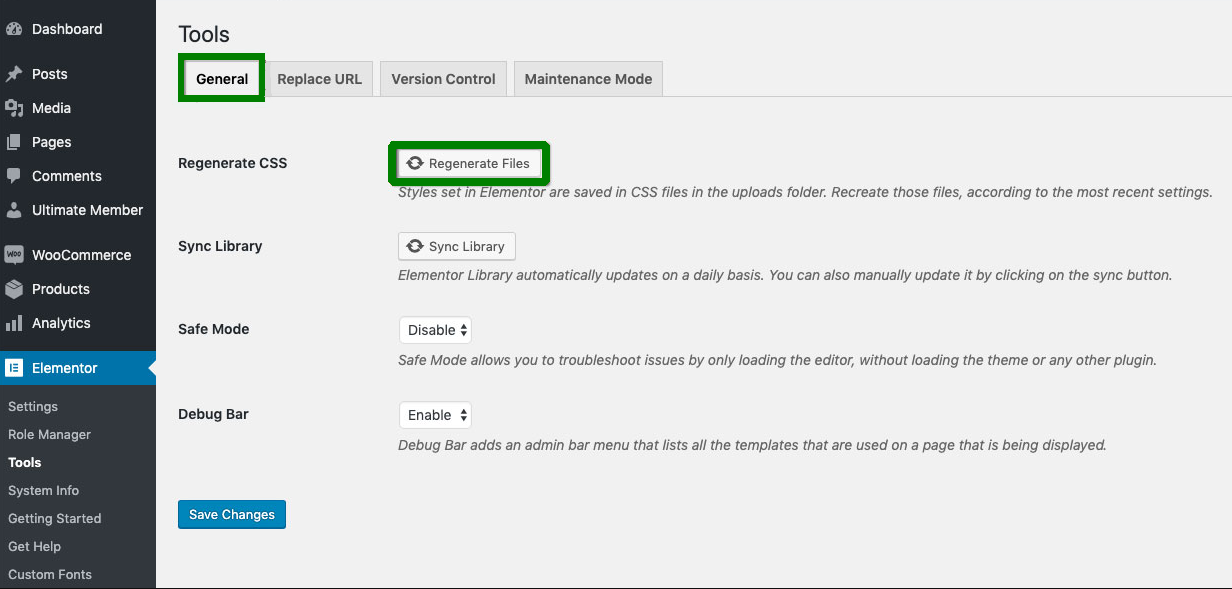
Step 2. Regenerate Files
This will update URLs throughout all the files Elementor plugin created during the build process, i.e the CSS (style sheet).
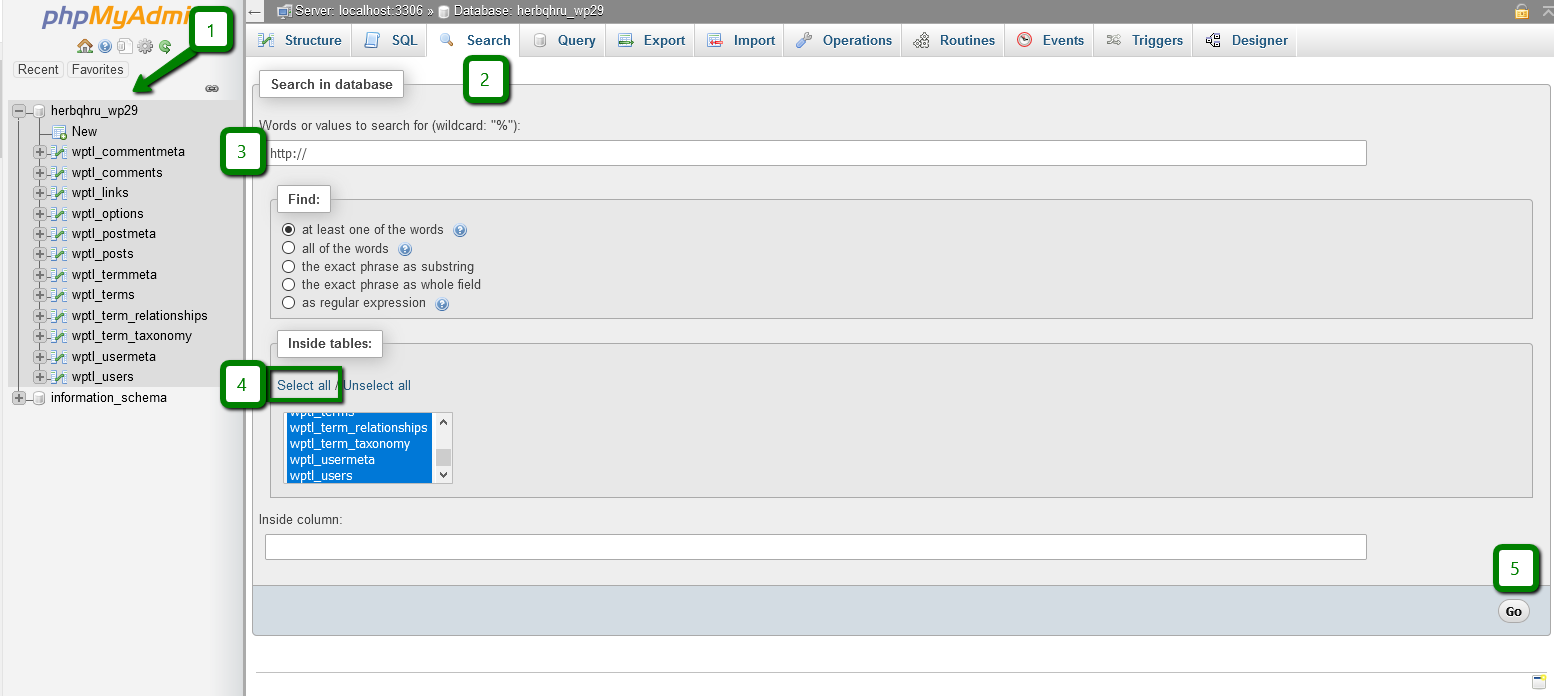
Important: We strongly recommend creating a backup of the database before making any changes.
You can search for http:// links through the database via the cPanel >> phpMyAdmin application by doing the following:
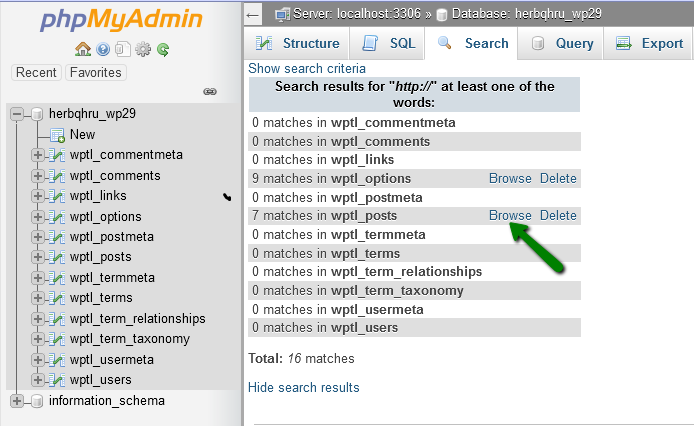

In this example, links to insecure fonts and stylesheets are present.
When you don’t know where exactly these links are located, you can use the search cron command below or run the same command in CLI via SSH.
grep -r "http://" /home/cPuser/public_html/ > /home/cPuser/report.txt
Ensure to replace ‘cPuser’ with your actual cPanel username.
NOTE: Setting up a cron job to run with the interval of less than 5 minutes may cause account resource overuse.
Once the search is finished, you can check the report.txt file where all scripts/files containing insecure http:// links will be specified. Here is an example of the output:
						/home/nctest/public_html/wp-content/themes/thbusiness/options.php:

'std' => 'http://www.google.com/+Themezhutthemes',

/home/nctest/public_html/wp-content/themes/thbusiness/languages/readme.txt: http://codex.wordpress.org/Function_Reference/load_theme_textdomain

/home/nctest/public_html/https/wp-content/themes/thbusiness/functions.php: wp_register_style('googleWebFonts', 'http://fonts.googleapis.com/css?family=PT+Sans:400,700,400italic');
As you may see, all the results are non-filtered, meaning that unrelated lines will be present as well, so you will need to either enhance the search command with regular expressions for a more precise search or closely inspect the results as they are.
In the raw results we can see the insecure link to fonts:
http://fonts.googleapis.com/css?family=PT+Sans:400,700,400italic
which should be changed to:
https://fonts.googleapis.com/css?family=PT+Sans:400,700,400italic
in the /wp-content/themes/thbusiness/functions.php file.
NOTE: Google treats http and https versions as separate websites. In order for Google to index the https:// version and for the website to not lose SEO, it is recommended that you add all URL versions to Google Webmaster Tools. Check this guide for more details.
That's it!
Need help? We're always here for you.