In this step-by-step tutorial, we describe how to move your WordPress site hosted on a Shared server to EasyWP. You can either do it manually or using the
All-in-one WP Migration plugin.
PLEASE NOTE: The free version of the All-in-one WP Migration plugin allows to restore backups up to 512 MB and EasyWP server limit is also set to
512 MB.
We recommend not to cancel the
Shared hosting account until you migrate your WordPress site fully and test it with EasyWP. It can also be a good idea to keep the old account active for a few days to verify that everything works as expected and no data was lost during the transfer.
1. Log into your WordPress dashboard on the hosting server. By default, the link is
yourdomain.tld/wp-admin. If the link doesn’t work, reach out the support team of the hosting provider.
In case you don't remember your password, use
this guide to reset it.
Go to
Plugins >> Add new >> and search for
All-in-one WP migration:
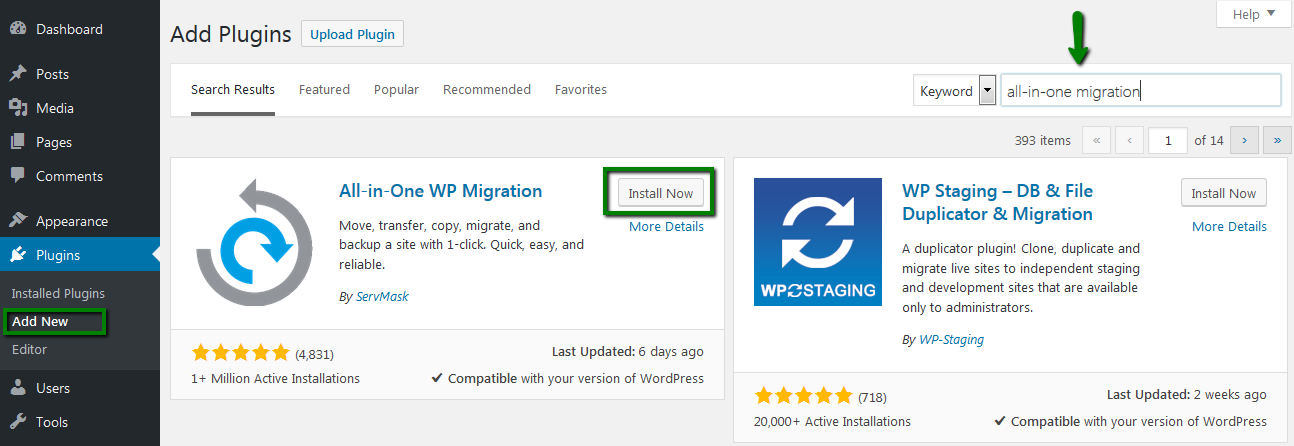
Click the Install Now button to install the plugin, then click Activate.
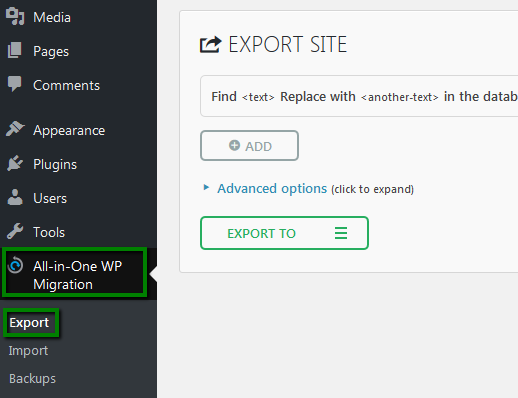
2. Go to Export in the new All-in-one WP Migration menu that appeared on the left sidebar:
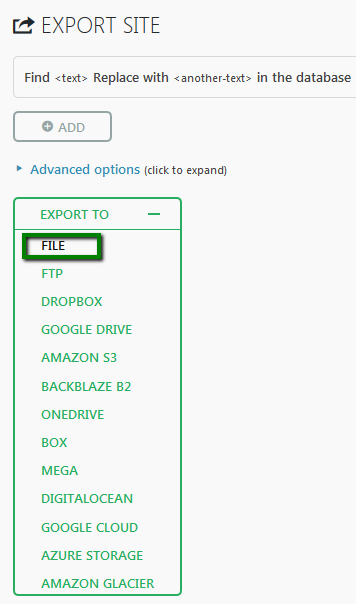
Click the Export To button. There you have several export options (like Dropbox, GoogleDrive, FTP, etc). Select the File option:
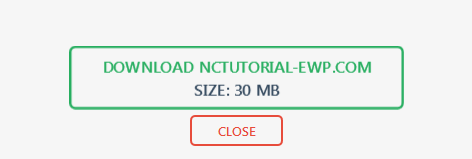
3. Wait for the files to be prepared and click the link to download the backup to your computer:
Step 2 - Create EasyWP website
Using the same domainIf you aren’t worried about your website being offline during the transfer, you can change DNS settings right away and install EasyWP directly on the same domain you use with Shared hosting.
Use
this guide to change nameservers to Namecheap BasicDNS. After that, log in to your
EasyWP dashboard (username and password are the same as to your Namecheap account) and
install WordPress.
Using a free subdomain (minimum downtime)If you want to avoid downtime, you can install your website on a free subdomain first (e.g., test.ewp.live), and then switch it to your primary domain once it is up and running. To do this, log into your
EasyWP dashboard (username and password are the same as to your Namecheap account) and install WordPress on a free subdomain using
these instructions.
Access the WordPress dashboard at yourdomain.tld/wp-admin replacing yourdomain.tld with your actual domain name, or that of the free subdomain. Make sure you are in the new dashboard. It should be the default WordPress one, without your posts, pages and apps.
Install the All-in-one migration plugin the same way you’ve installed it on the Shared hosting end.
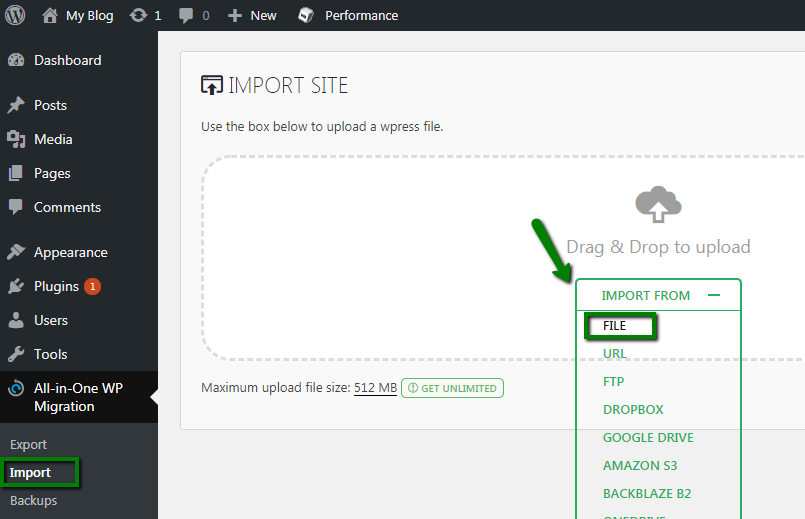
Step 4 - Import the backup
1. Go to All-in-one WP Migration in the EasyWP Dashboard >> Import and click the Import to button. Select File from the drop-down list:
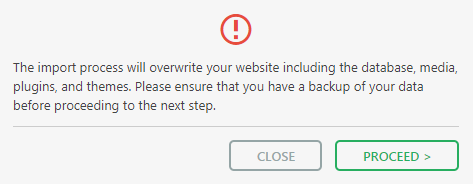
2. Select the .wpress backup file saved on your computer. A pop-up window with the warning will appear. Click Proceed:
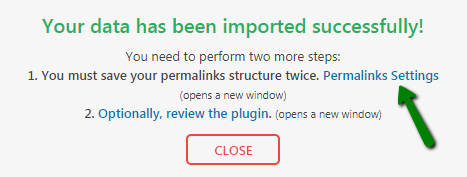
3. Wait for the import to complete. When a confirmation message appears, click Permalinks Settings:
PLEASE NOTE: You may need to re-log in to your WordPress dashboard. As the website has been transferred, use the login details that were set for the old WordPress dashboard.
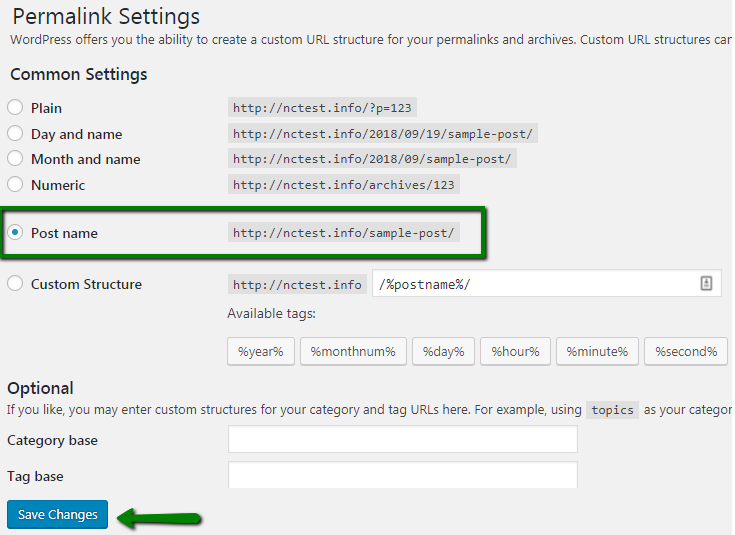
4. In the Permalinks window, select the permalink structure you prefer and click Save Changes.
If you are using the Custom Structure, copy it first. Select a different setting and click Save Changes. Then, paste the Custom structure and save it again:
The transfer is complete. You may visit your WordPress site to make sure that everything is working as expected.
Follow this step only if you used the free subdomain. After you make sure that the transfer was done successfully, you can change domain for the EasyWP installation.
First, set Namecheap BasicDNS or PremiumDNS for your domain as described in
this guide. If your domain is registered with another registrar, you may set up PremiumDNS or our
FreeDNS. After that, log into your
EasyWP dashboard and change the free subdomain to your actual domain. You can
find the instructions here.
Manual transfer:
To restore your WordPress website on the EasyWP subscription, you need to make a
backup of the website's files and the
database and download them to your device.
Using the same domainIf you aren’t worried about your website being offline during the transfer, you can change DNS settings right away and install EasyWP directly on the same domain you use with Shared hosting.
Use
this guide to change nameservers to Namecheap BasicDNS. After that, log in to your
EasyWP dashboard (username and password are the same as to your Namecheap account) and
install WordPress.
Using a free subdomain (minimum downtime)If you want to avoid downtime, you can install your website on a free subdomain first (e.g., test.ewp.live), and then switch it to your primary domain once it is up and running. To do this, log into your
EasyWP dashboard (username and password are the same as to your Namecheap account) and install WordPress on a free subdomain using
these instructions.
- From within your EasyWP Dashboard, select the website to which you plan to access, choose the SFTP Access tab, and click on the Access Files button. You may find the detailed information here.
- Once you connect to your EasyWP subscription via SFTP, navigate and select the files you wish to upload to the server in the left panel. On the right panel, choose the correct path for your files. FileZilla allows you to simply drag and drop files from one panel to the other to initiate an upload:
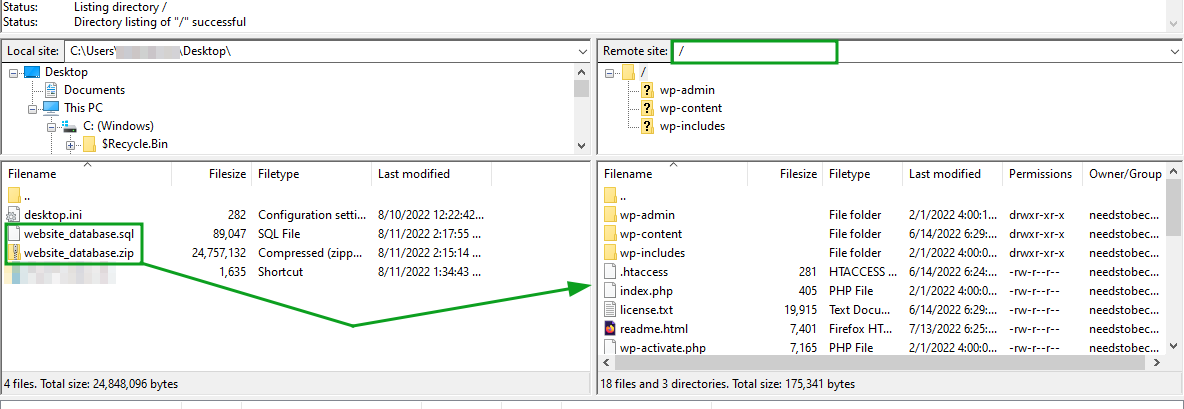
Your files will now be queued to be uploaded to the server.
Once you upload a backup of the website`s files and a database file, it is needed to contact our
Support Team to restore the backups on your EasyWP subscription.
That's it!
