You may face a situation when you need to provide another person (e.g. a developer) with an access to your hosting account. But, in some cases, sharing actual cPanel login details is not an option. For example, when several websites are hosted in the account and you do not want other people to access your data.
In this case, partial cPanel account access can be granted.
To give access to the folders and files, create a new FTP account using this guide.
To grant remote access to a single MySQL database, follow this guide.
If you are a WordPress website owner, you may need to create temporary accounts to give temporary access to the admin area. In this article we describe several ways to do that.
Creating new user via WordPress admin dashboard
Creating admin WordPress user via SQL query
Generating temporary admin access link using a plugin
Creating new user in WordPress admin dashboard
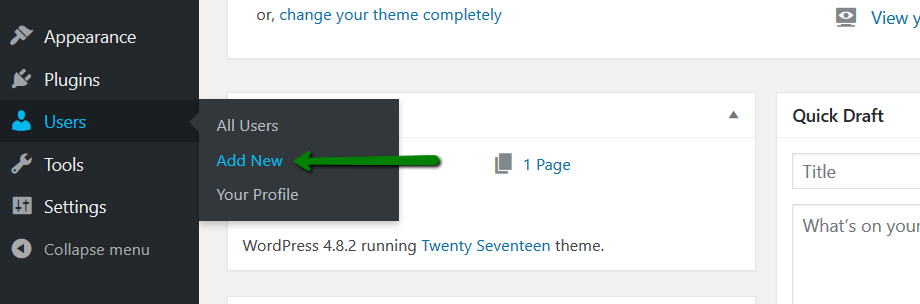
1. Log in to the WordPress Admin Dashboard, go to the Users menu. Click 'Add New':
2. Fill in the details:
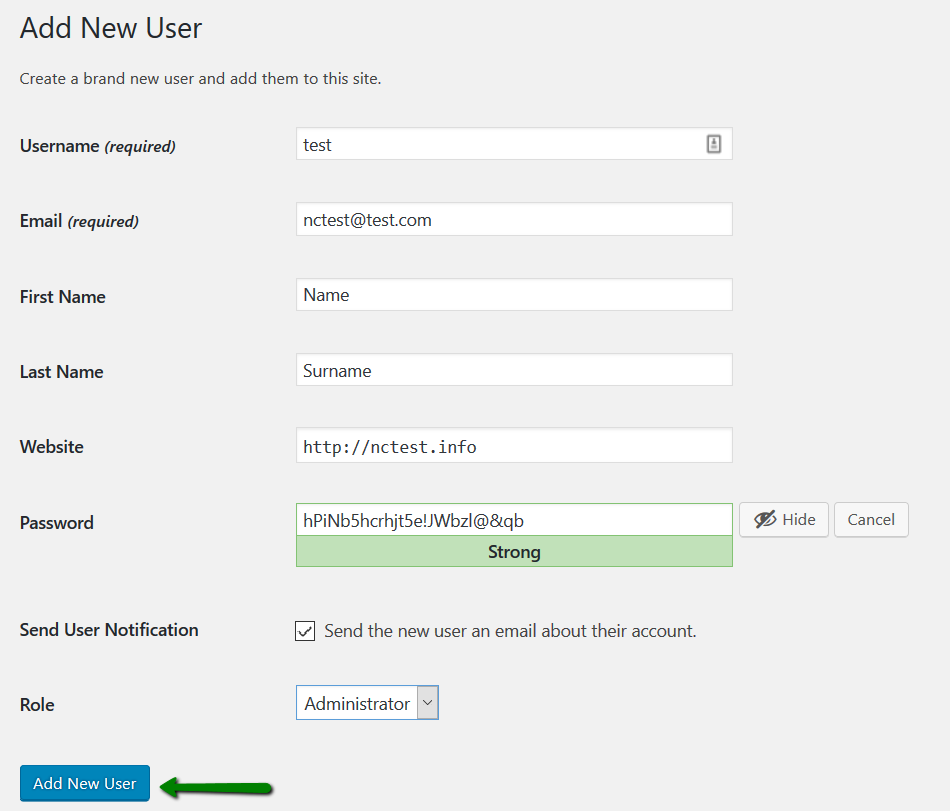
Next, click the 'Add New User' button. An email will be sent to the email address specified in the 'E-mail' field with instructions on how to log into your website.
Creating admin WordPress user via SQL query
NOTE: we recommend making a backup of your website/database before running any SQL queries.
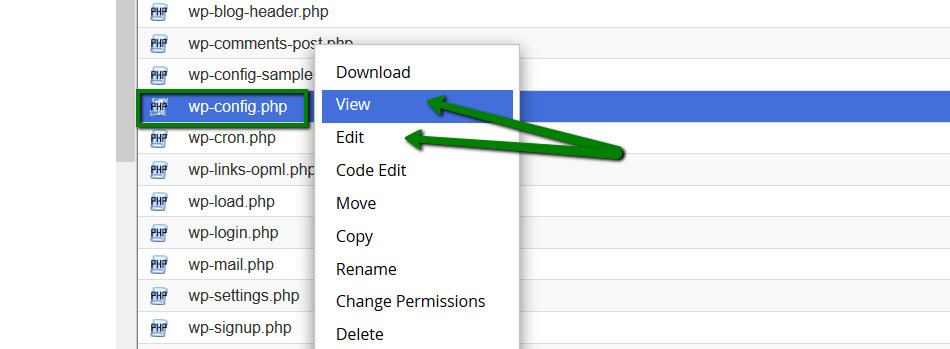
1. To find the name of your database in wp-config.php file: go to cPanel > Files section > File Manager.
Next, navigate to the root folder of your domain (by default, it's public_html for the main domain and addondomain.com folder for an addon domain) and find the wp-config.php file. Right-click on the file > View or Edit option:
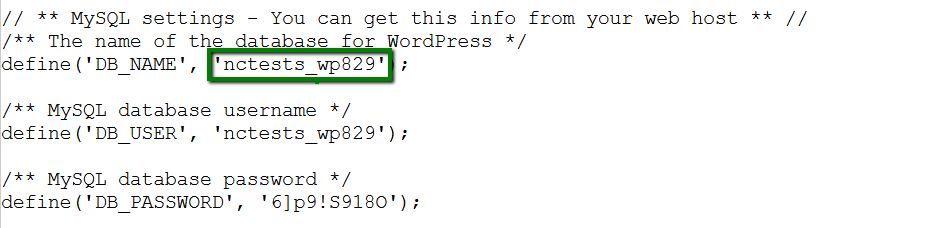
2. You will see the database name in this line:
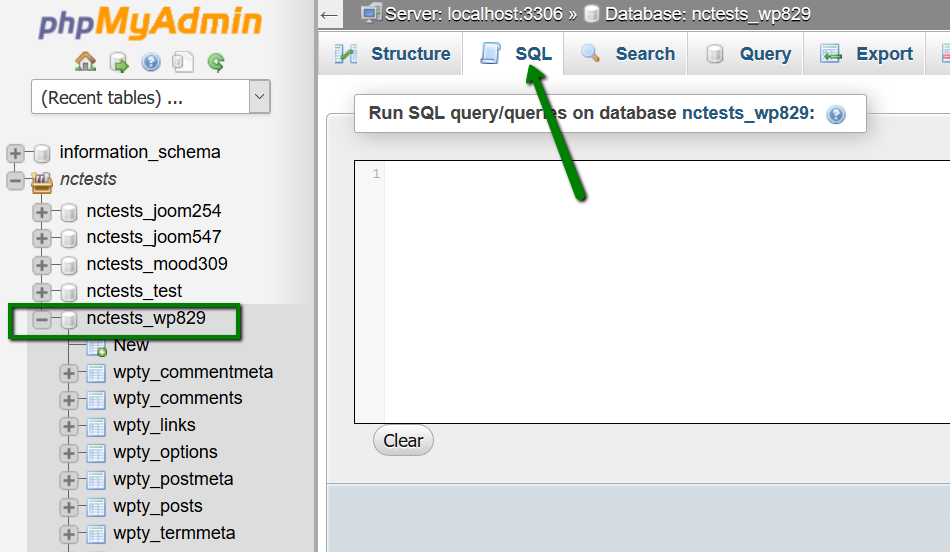
3. Next, go to cPanel > Databases section > phpMyAdmin menu > choose the necessary database from the left side > click the SQL option:

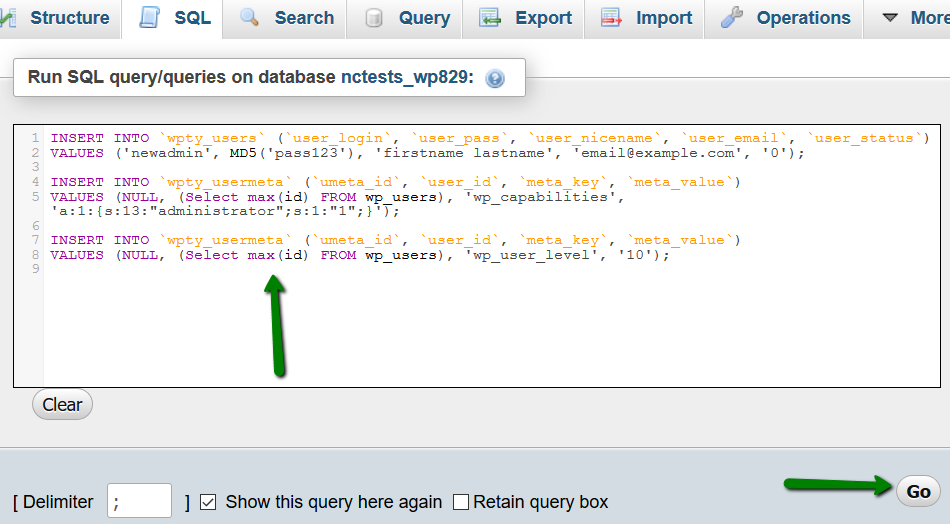
4. Here you need to run the following SQL query:
INSERT INTO `wp_users` (`user_login`, `user_pass`, `user_nicename`, `user_email`, `user_status`)
VALUES ('newadmin', MD5('pass123'), 'firstname lastname', 'email@example.com', '0');

INSERT INTO `wp_usermeta` (`umeta_id`, `user_id`, `meta_key`, `meta_value`)
VALUES (NULL, (Select max(id) FROM wp_users), 'wp_capabilities', 'a:1:{s:13:"administrator";s:1:"1";}');

INSERT INTO `wp_usermeta` (`umeta_id`, `user_id`, `meta_key`, `meta_value`)
VALUES (NULL, (Select max(id) FROM wp_users), 'wp_user_level', '10');
NOTE:
- prefixes of the tables (e.g. wp_users, wp_capabilities) should be changed to the table prefix set in your wp-config.php file;
- change 'newadmin', 'pass123', 'firstname lastname', 'email@example.com' to your own values
5. Hit Go to proceed with the changes:
6. Once done, you will see a new user in wp_users table:

Generating temporary admin access link using a plugin
Another way of granting temporary access to WordPress admin dashboard is using plugins. Such plugins create automatic login links and one can access the dashboard simply by following the link, no username or password are needed.
One of such plugins is Temporary Login Without Password.
NOTE: The plugin was not developed by us and we cannot guarantee its security and stability. You can use any other plugin with similar functionality. Our recommendations based only on our testing. Before proceeding with any changes, make sure that you generate a full backup of your website. If you've created your website using Softaculous script installer, feel free to refer to this guide.
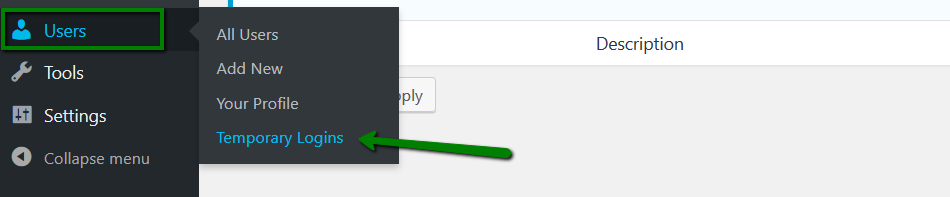
1. Once the plugin is installed and activated (the detailed instructions on the process can be found here), go to the Users menu > Temporary Logins option:
2. Click on 'Create New' and fill in the details:
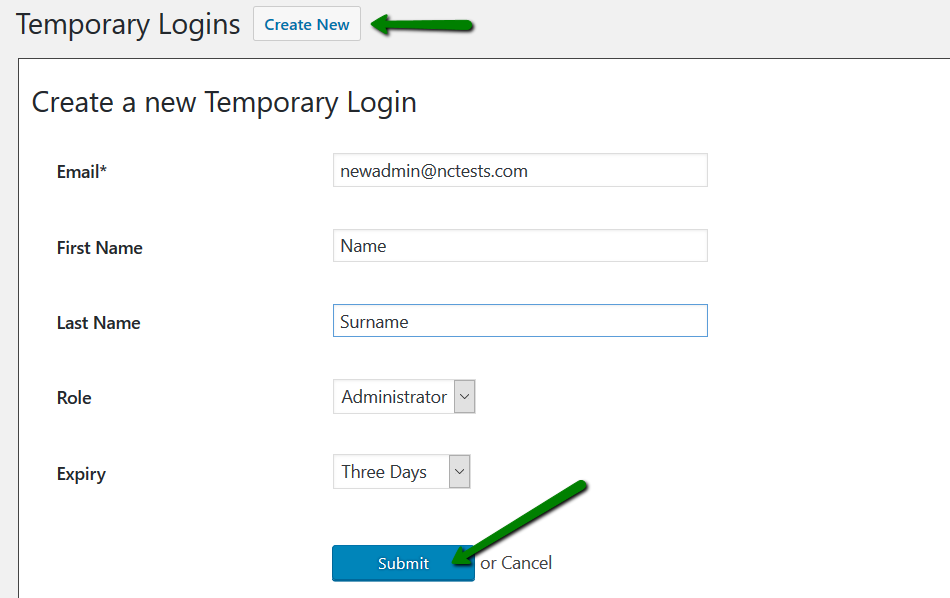
3. Once the details are entered, click Submit.
4. At the next page, you will see the generated link. The link can be used to access WordPress dashboard without knowing actual login details:
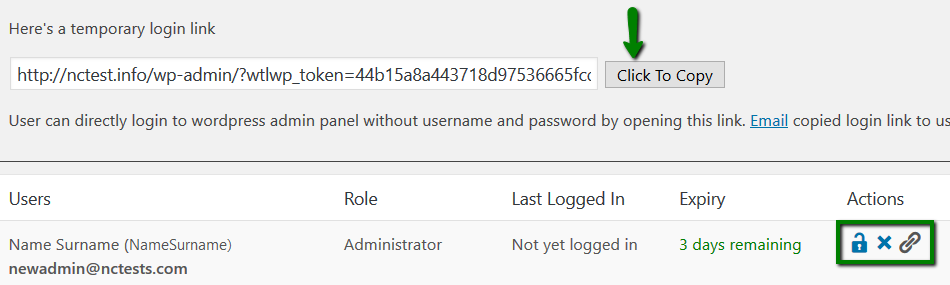
You can also manage temporary created user via Disable, Delete and Copy Login Link options in Actions section.
That's it!
