A plugin is a component intended for extension of the software capabilities and features. It offers various custom functions and allows maximizing website flexibility so that each user can adapt the site to his/her specific needs. WordPress plugins are available in different sources, a great range of free plugins can be found in the Official WordPress Plugin Directory.
NOTE: Before proceeding with any changes, make sure that you generate a full
backup of your website. If you've created your site using Softaculous script installer, feel free to refer to
this guide as well (step #4 – Backup software).
Plugin installation
Plugin activation
Plugin removal
Plugin installation
There are two ways of installing a plugin in WordPress: automatically from the WordPress Admin Dashboard or manually from a .zip archive.
Automatic installation
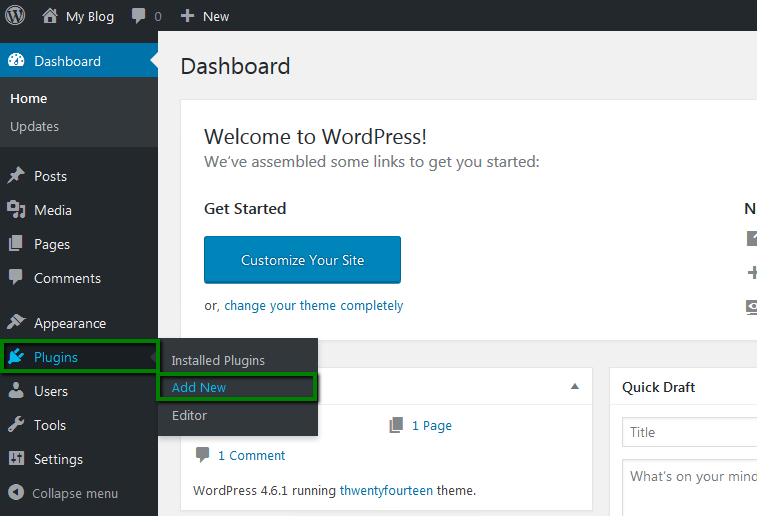
1. Log in to WordPress Admin Dashboard (you may use cPanel Shortcuts for the quick access) and navigate to Plugins menu on the left >> Add new:
2. In the search bar, type the name of the plugin you wish to install, its author or a descriptive keyword that will help you to find the necessary plugin:

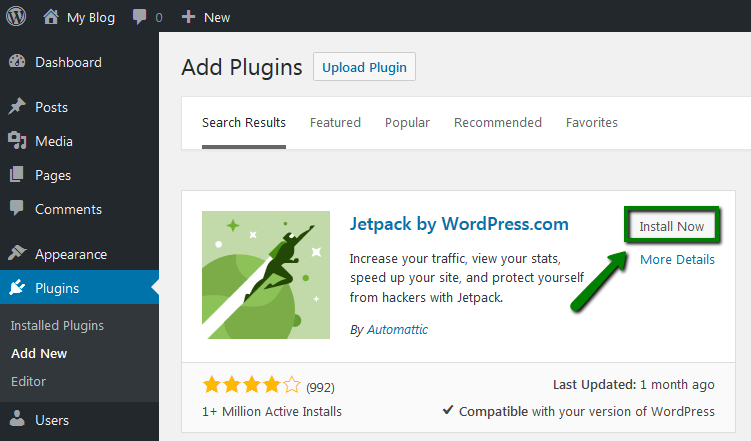
3. You will see the list of the plugins available by the key word. You can hit More Details to get more information about the plugin and instructions that may help you to set it up. Click Install Now to install the plugin:
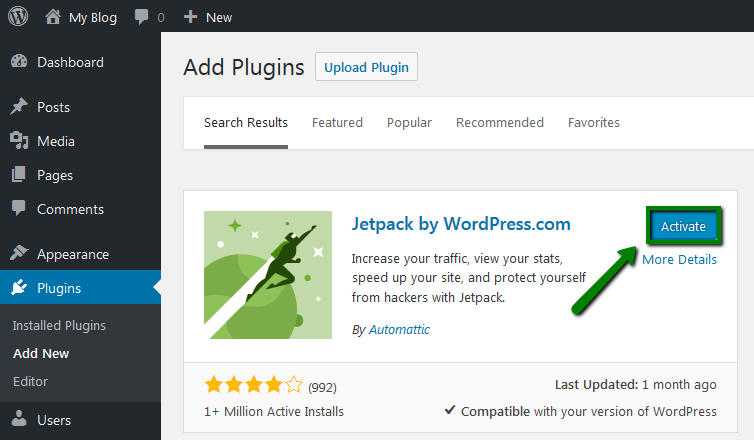
4. You will get the notification that the plugin has been installed, hit Activate to proceed:
Manual installation
Manual installation is necessary when you wish to control plugin installation process, or if you have obtained a plugin from a third-party vendor.
There are two ways how to manually install and activate a plugin in a .zip format:
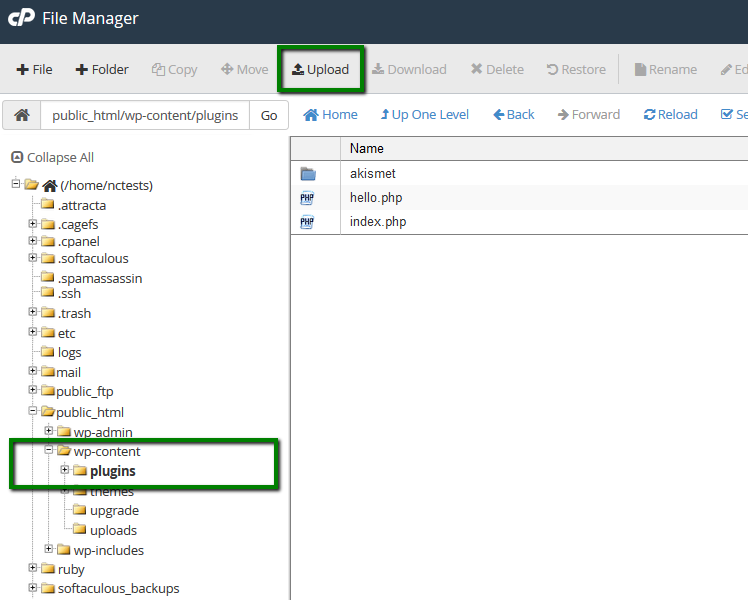
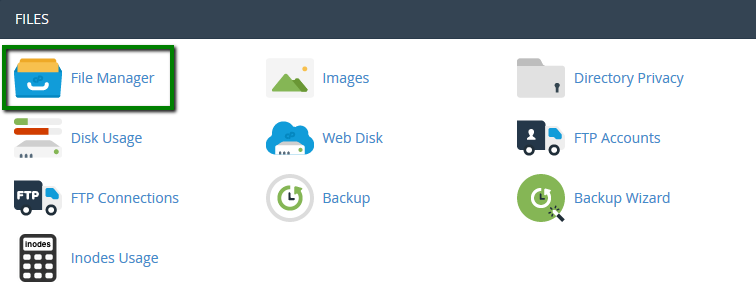
1. Log into your cPanel and navigate to File manager menu:
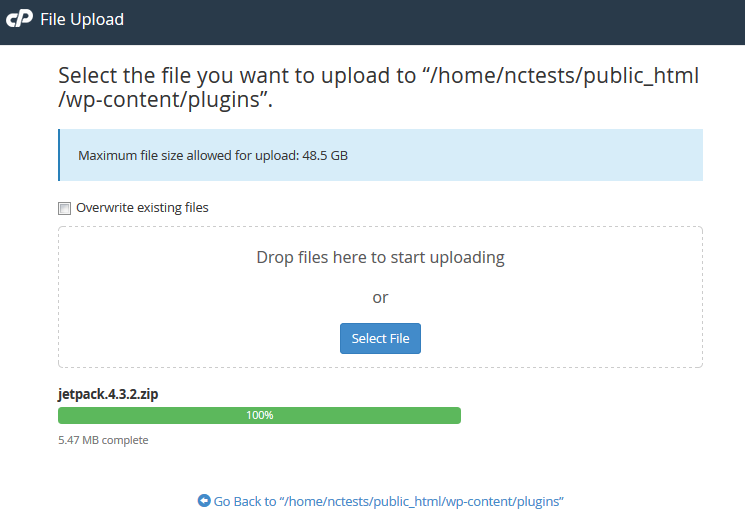
2. Go to /wp-content/plugins directory and hit Upload button in order to upload a .zip file from your local machine (or use FTP instead):
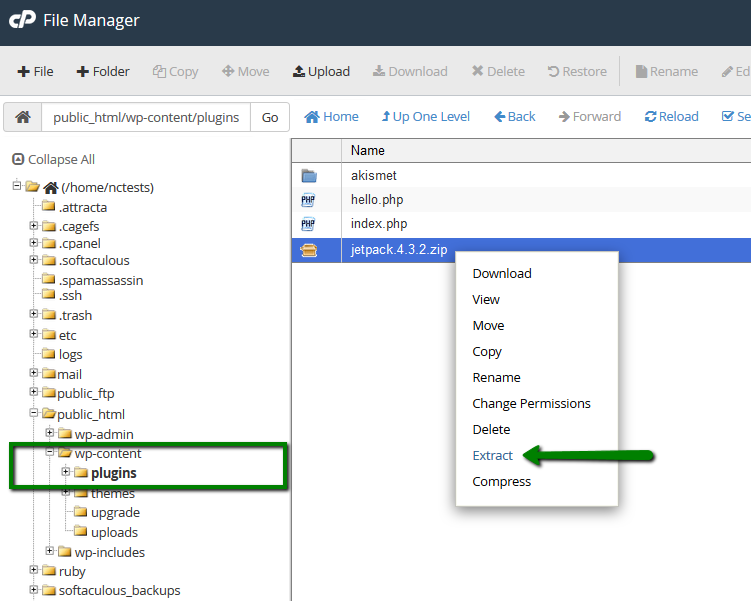
3. Once the archive is uploaded, right-click on the archived file > Extract option:
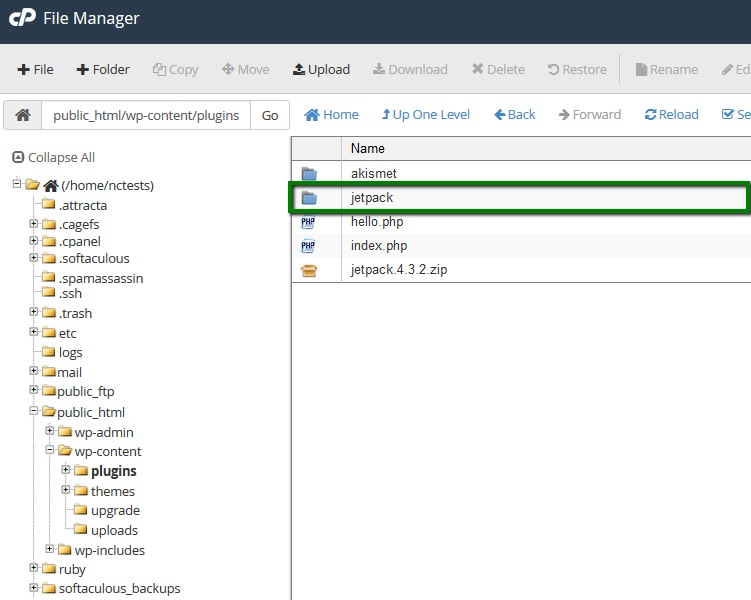
4. Once the archive is extracted, you will see the folder of your plugin in the corresponding directory of your WordPress installation:
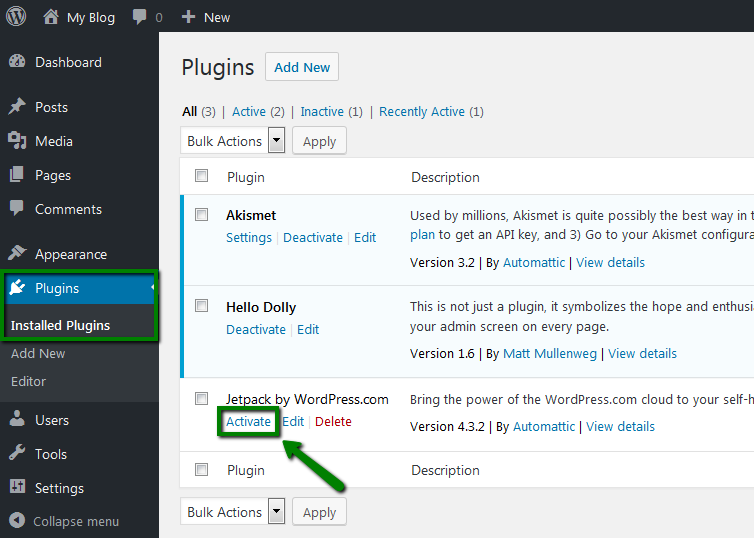
5. The plugin is now installed, you can go ahead and activate it in your Dashboard > Plugins menu:
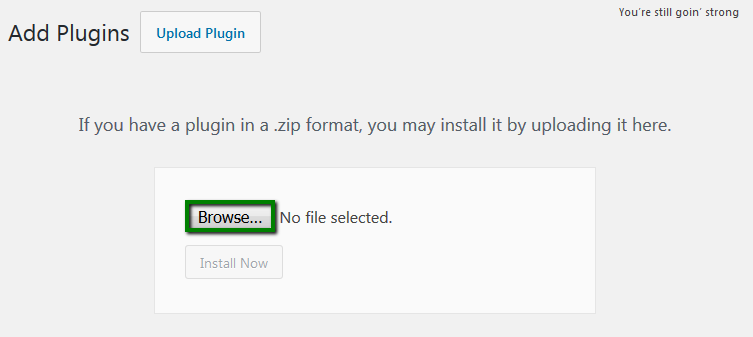
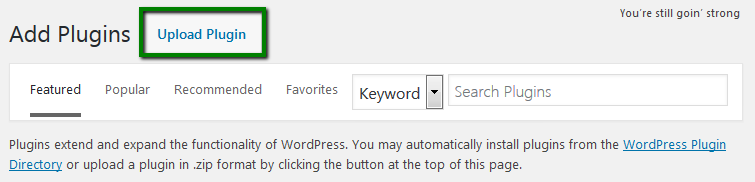
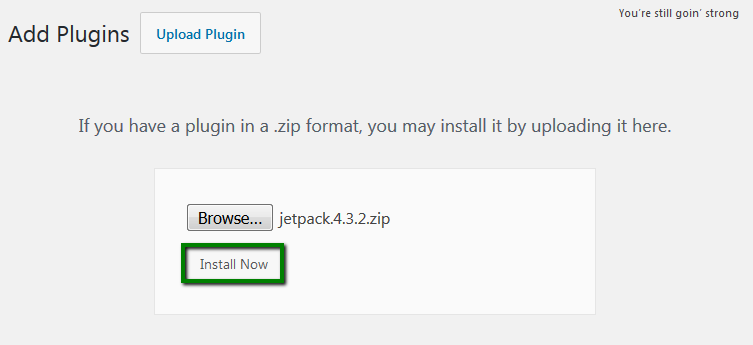
6. Alternatively you can use Upload Plugin option WordPress Dashboard:
7. Click on Browse button and select the plugin in a .zip format on your local machine. Then hit Install now:
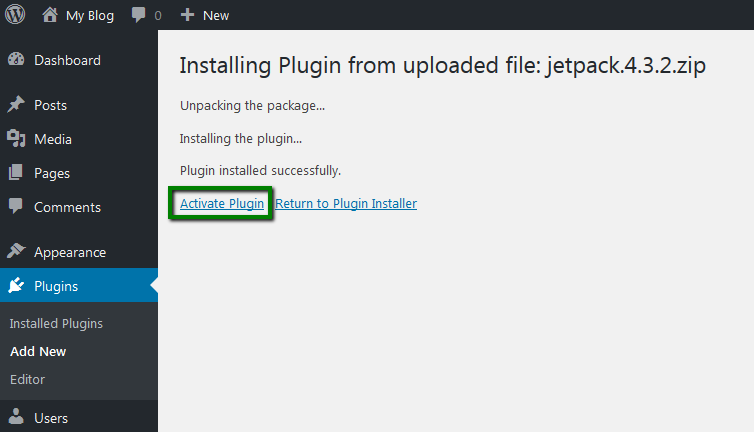
8. One done, you will get the corresponding notification that the plugin has been successfully installed from the uploaded file. At the same page, you may click Activate Plugin:
Plugin activation
In order to activate the installed plugin, access your WordPress Dashboard > Plugins > Installed plugins and click on the Activate button:
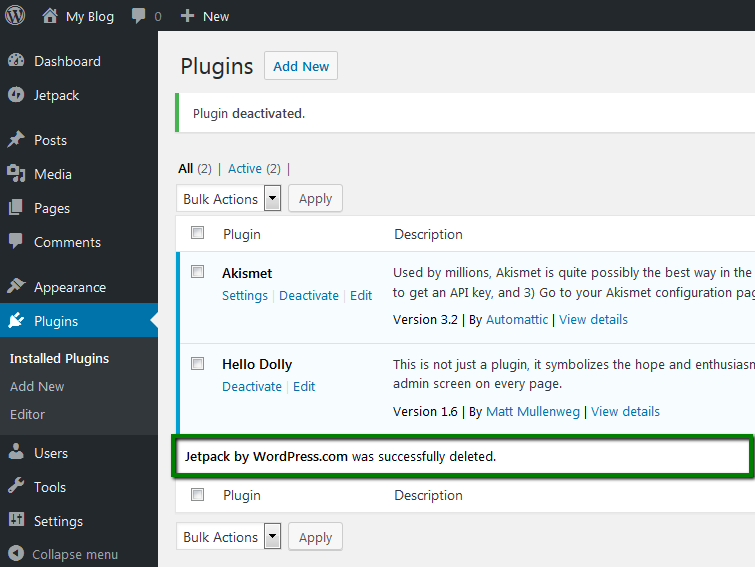
Plugin removal
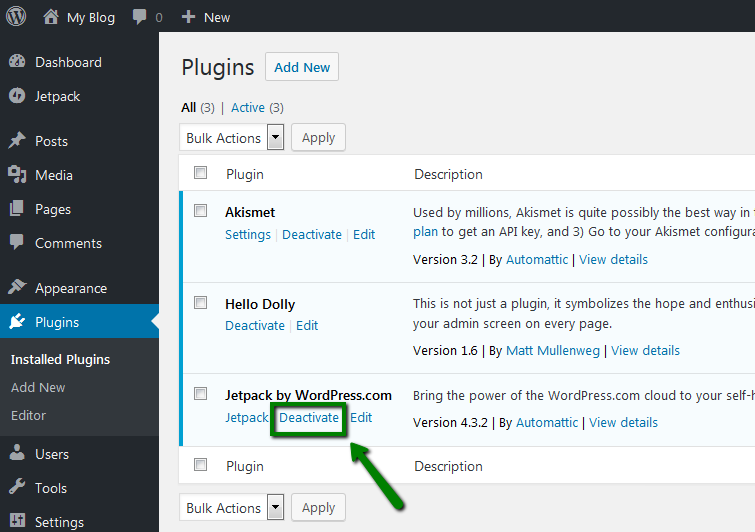
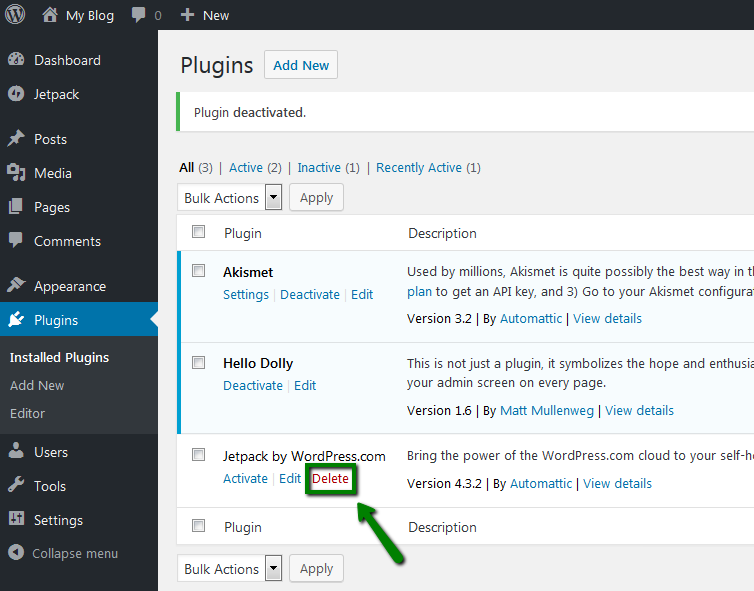
1. If you wish to uninstall, click on the Deactivate button. After this, the Delete button will appear:
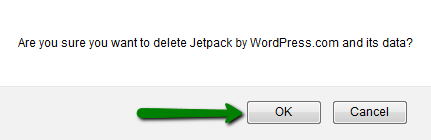
2. The corresponding notification will show up, you should confirm that you wish to delete the plugin and files associated with it, or on the contrary, abort the plugin removal:
3. When the plugin is removed, you will get the update that it has been deleted from your account. The folder of the plugin will be automatically removed from /wp-content/pugins/directory:
That's it!
Need any help? Contact our HelpDesk