
By default, WordPress uses standard login paths such as /wp-login.php and /wp-admin. Since these paths are widely known, they are often targeted by automated login attempts and bots. To reduce such requests and make the login link less obvious, you can hide it using a plugin. In this article, we will show you how to do that using the WPS Hide Login and Kadence Security plugins.
Please mind that it’s necessary to follow other security measures as well to keep your website safe. Feel free to check this guide for more details.
NOTE: Before proceeding with any changes, generate a full backup of your website. If you've created your site using the Softaculous script installer, feel free to refer to this guide as well (step #4 – Backup software).
WPS Hide Login is a very light plugin focused on changing the default WordPress login URL. It does not rename WordPress core files and restores the default login behavior once the plugin is deactivated.
Follow these steps to configure it:
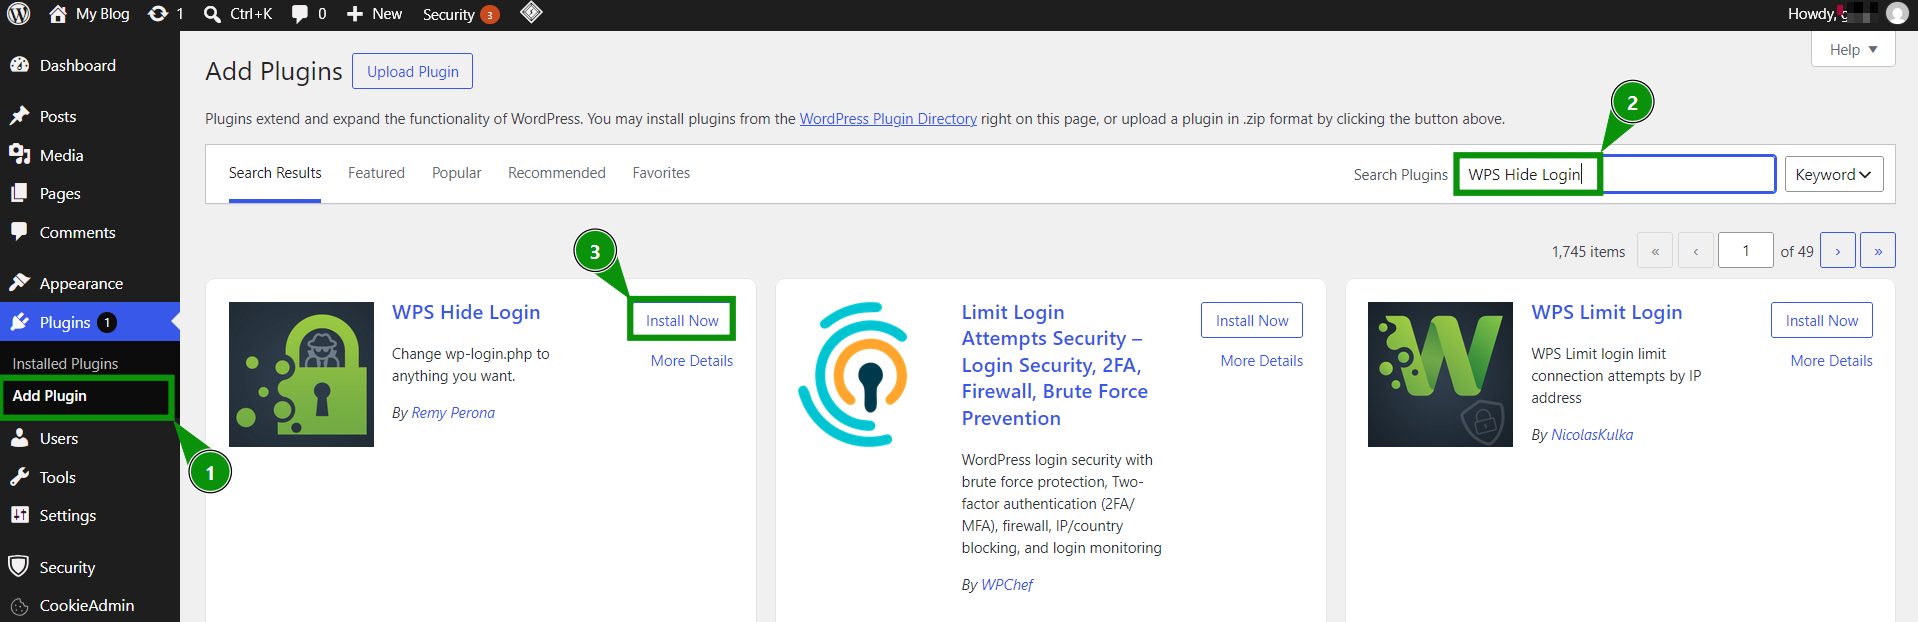
1. Go to the WordPress Dashboard >> Plugins >> Add Plugin. Search for the WPS Hide Login plugin and click Install Now:
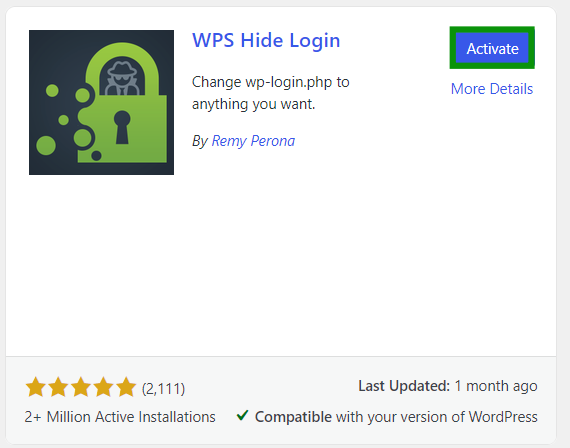
Activate the plugin:
2. This will redirect you to the Installed plugins tab, where you need to click on Settings under WPS Hide Login to proceed with the setup:

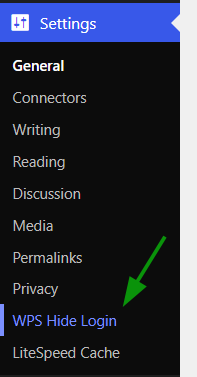
You can also access the required page via Settings >> WPS Hide Login:
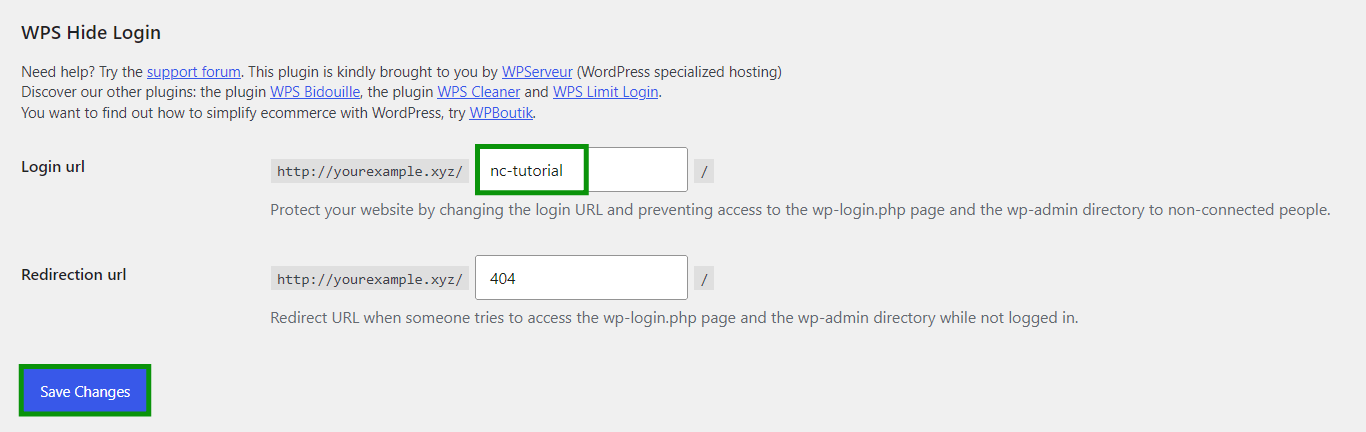
3. Settings here are quite intuitive. You just need to specify the new Login URL you wish to set and hit Save Changes:
Consider bookmarking the new login URL and ensure that you remember the login credentials.
In this example, the link the WordPress login URL will be changed from yourdomain.tld/wp-login.php to yourdomain.tld/nc-tutorial.
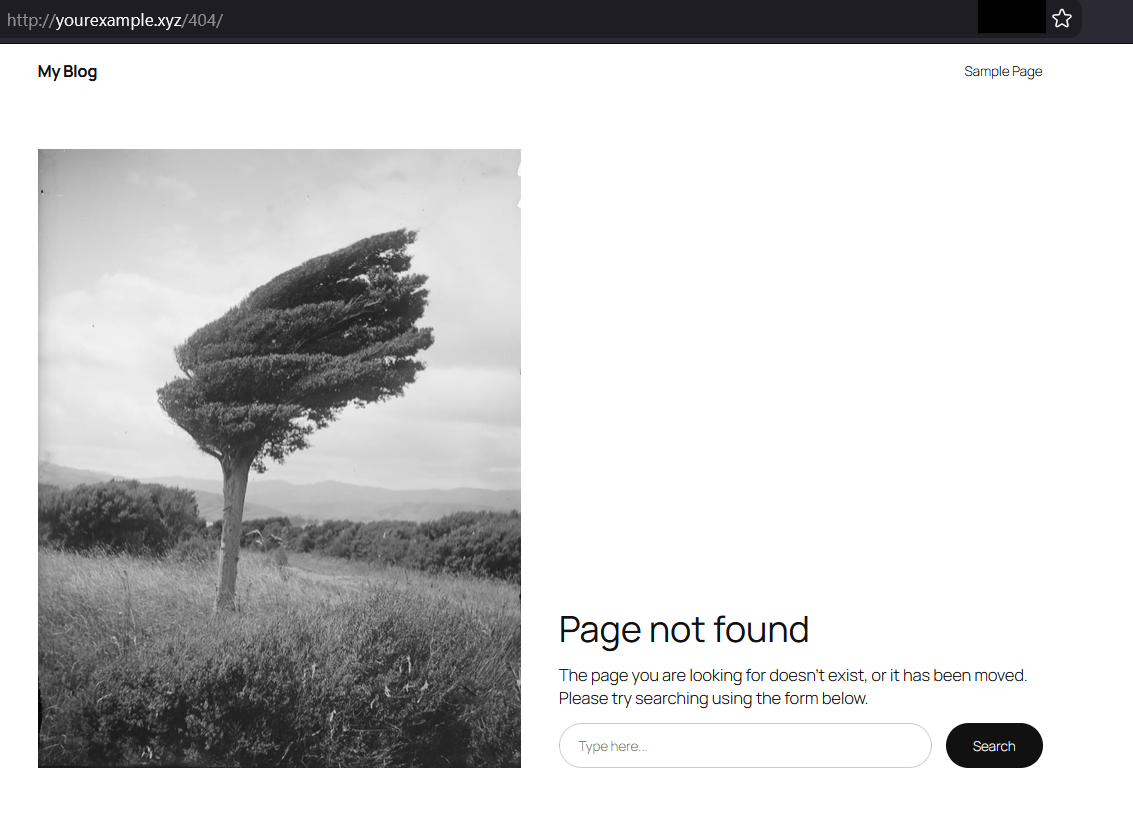
4. You can also specify the Redirection URL that should appear when someone tries to access /wp-login.php and /wp-admin. By default, the plugin specifies 404 and when someone tries try to reach the links, they will get the Page not found error:
Kadence Security is a more advanced security plugin that includes multiple features. One of them, Hide Backend, allows you to hide the default login URLs.
Follow the steps to configure it:
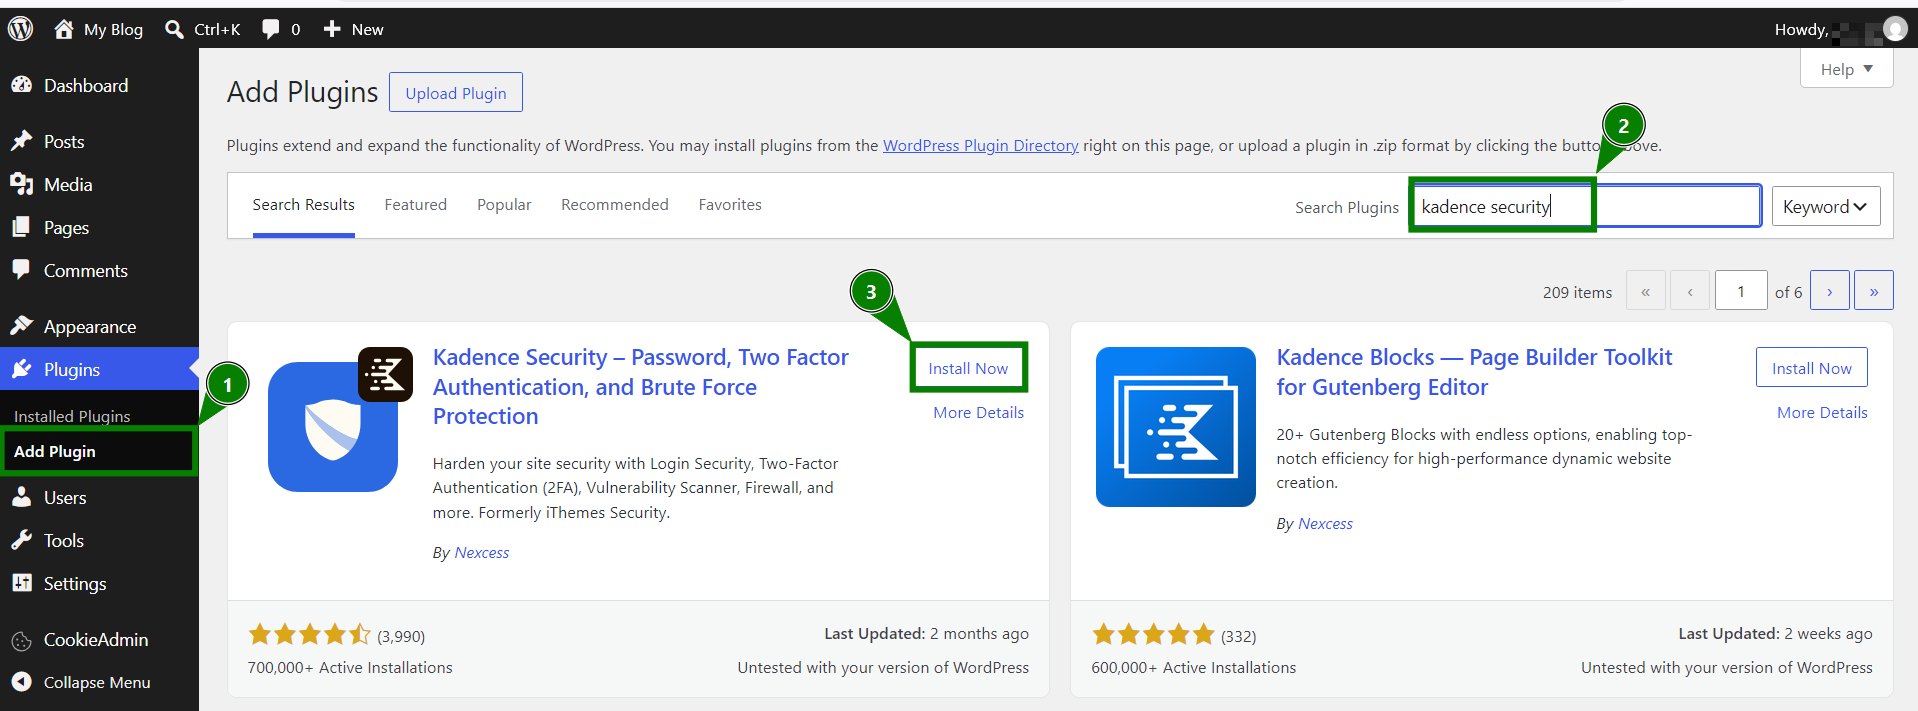
1. Go to the WordPress Dashboard >> Plugins >> Add Plugin. Search for Kadence Security and click Install Now:
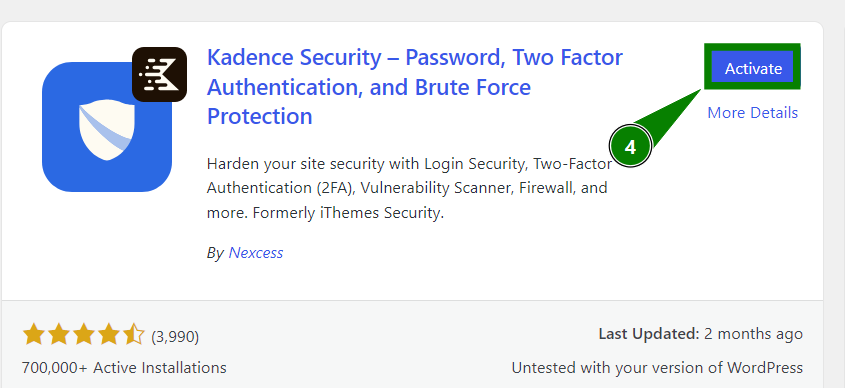
Activate the plugin:
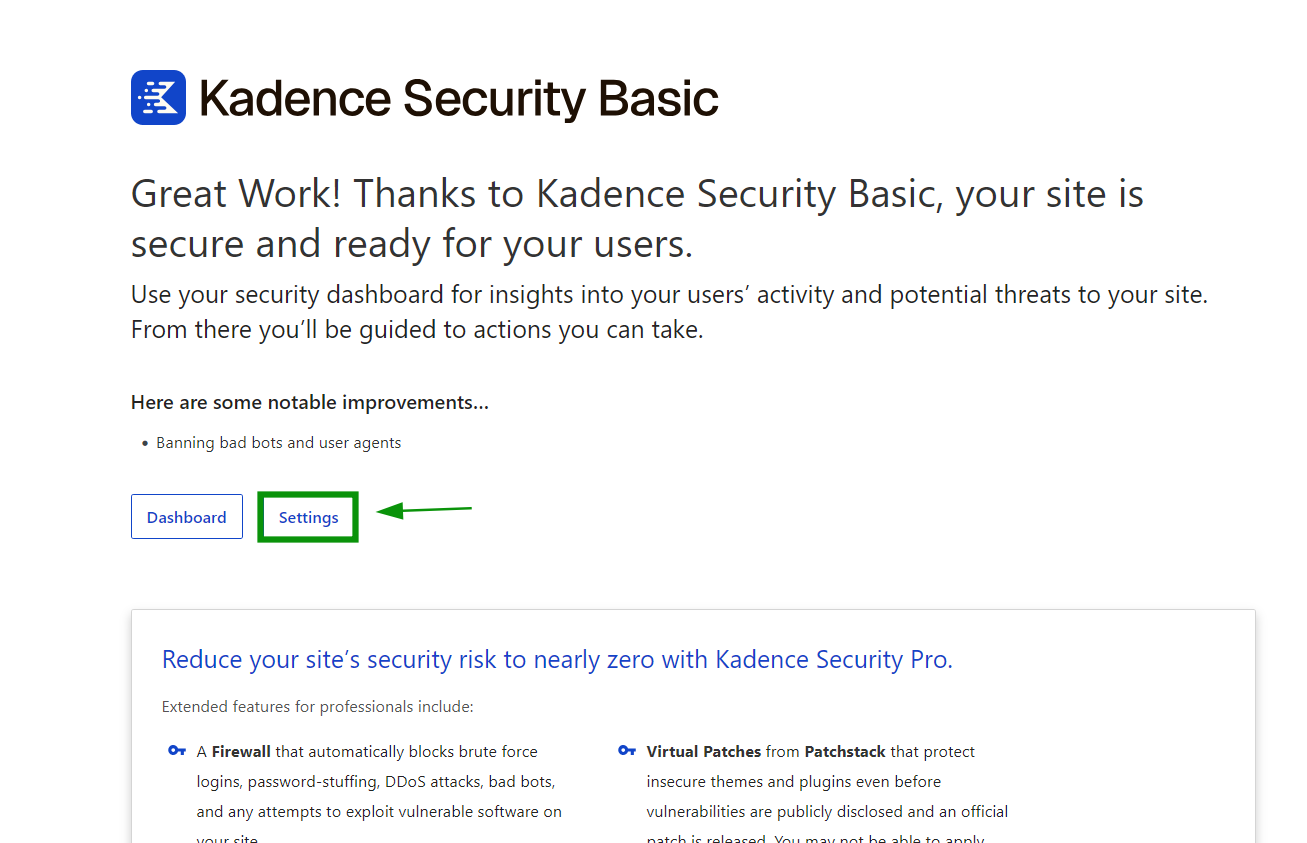
2. This will redirect you to the Installed plugins tab, where you need to click on Settings under Kadence Security Basic in order to complete the basic setup of the plugin:

For instructions on completing the initial setup, refer to the official Nexcess setup guide.
3. Once you complete the basic setup, the below page will appear. Click on Settings to proceed to the next step:
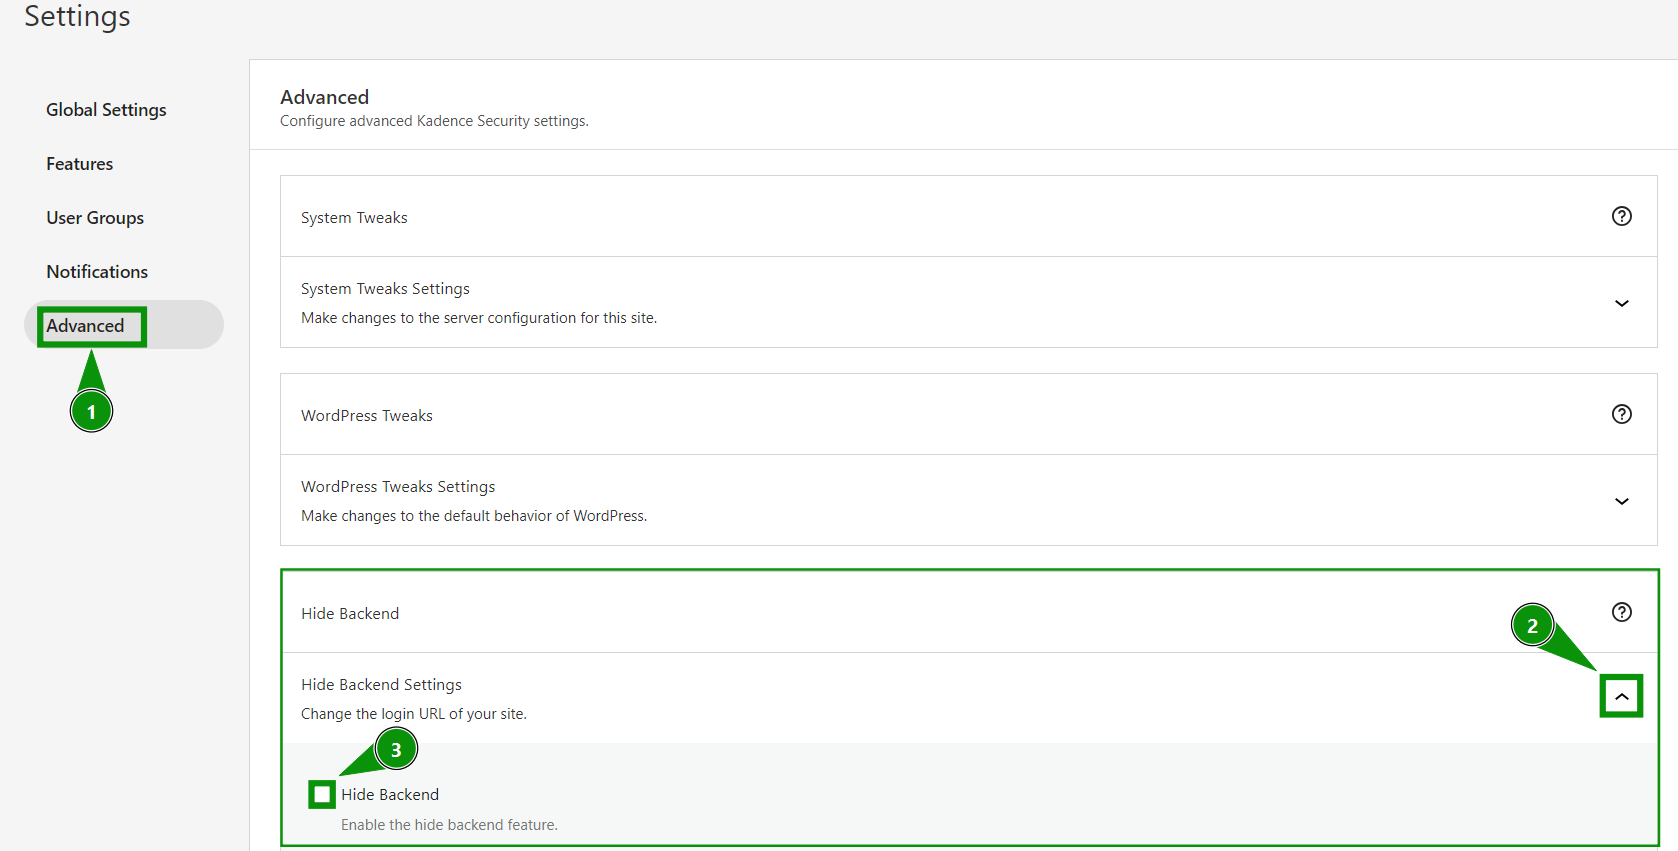
4. Open the Advanced section and locate the Hide Backend block. There, you need to expand the Hide Backend Settings section and check the box to enable the feature:
5. In the appeared menu, enter your new login URL location to the Login Slug field:
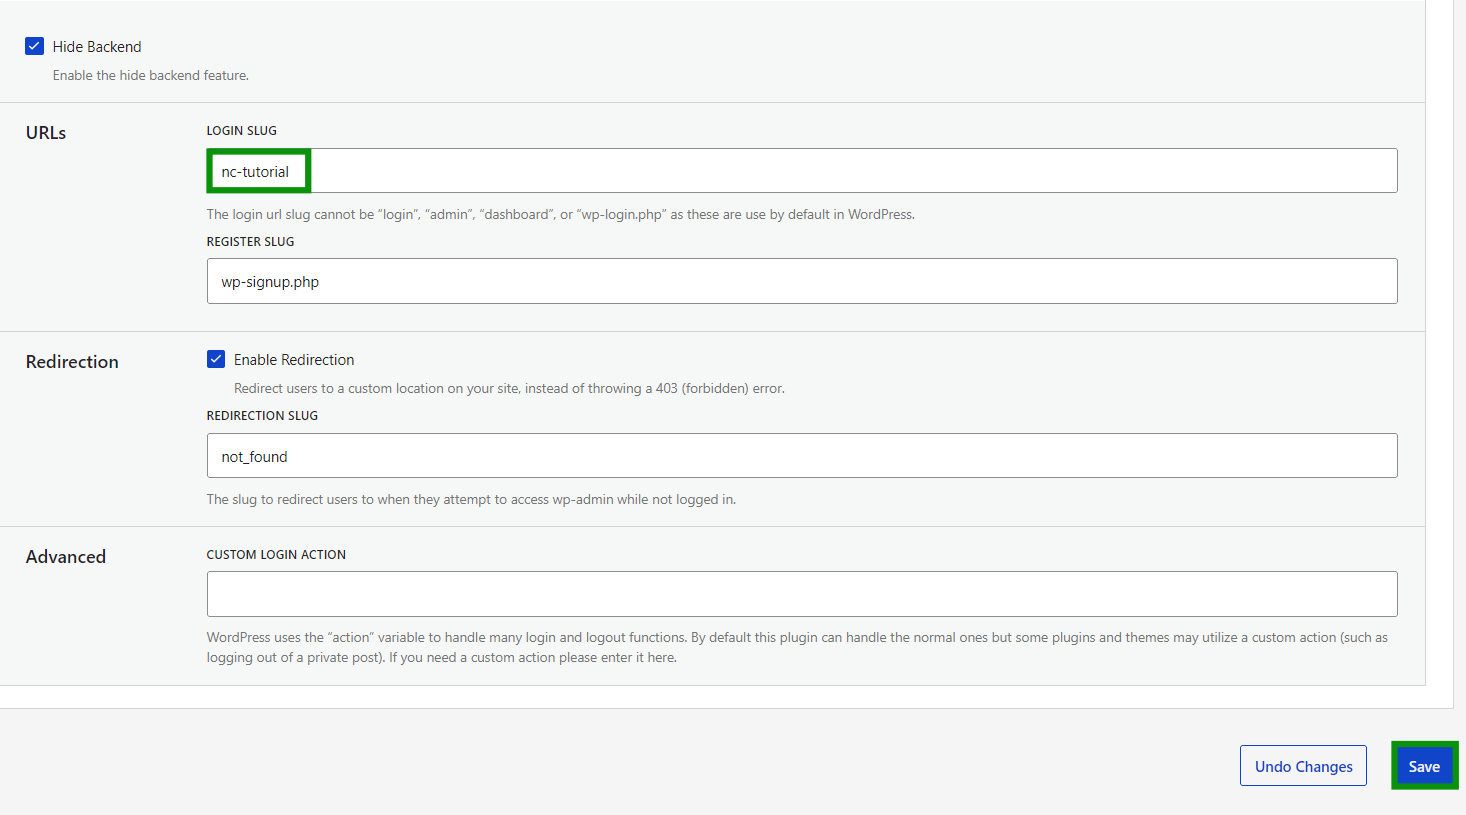
NOTE: The login slug cannot be login, admin, dashboard, or wp-login.php. Use only letters, numbers, hyphens (-), and underscores (_) in the custom slug. Other characters may cause the custom login URL to return a 404 error.
6. You can also specify the URL that should appear when someone tries to access /wp-login.php and /wp-admin via the Redirection Slug field. By default, the plugin specifies not_found, however, you can customize it.
7. Once your changes have been made, click Save.
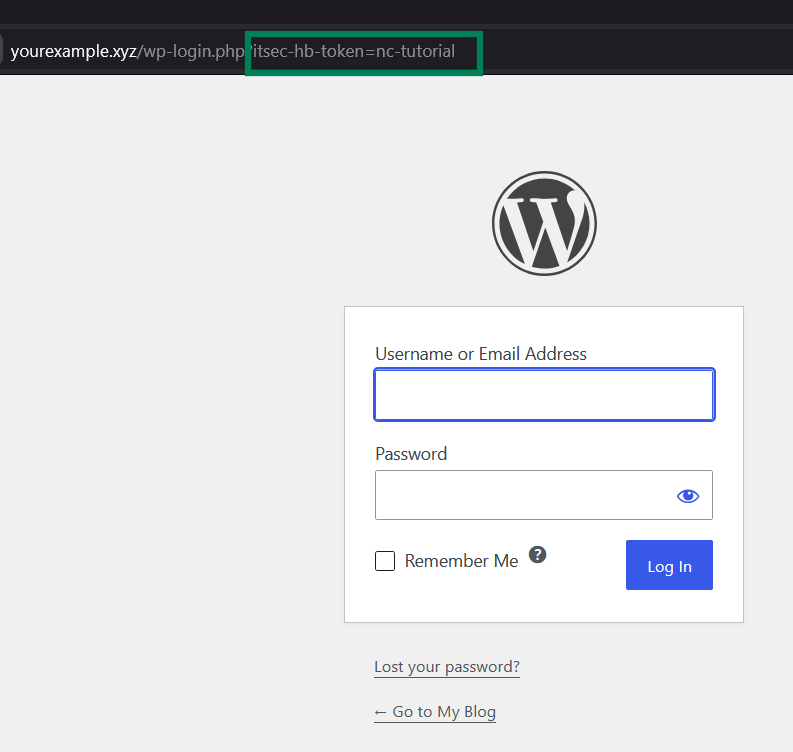
Now, the WordPress login page is yourdomain.tld/nc-tutorial. When you open the custom login URL, Kadence Security will redirect you to a URL similar to this one: https://yourdomain.tld/wp-login.php?itsec-hb-token=your-slug
You may temporarily disable the plugin you’ve used using File Manager or Softaculous.
Alternatively, you can restore the backup you’ve created before configuring the plugin.
Feel free to update you login credentials using one of the options from this article.
For WPS Hide Login, the default login paths should normally be inaccessible to logged-out visitors. If they are still accessible, you can try opening those URLs in a private/incognito browser and clearing the browser, website, cPanel, and CDN cache if applicable.
For Kadence Security, when you access the login page using your custom slug, a cookie is set for one hour. During this time, you can access /wp-login.php or /wp-admin on the same browser without needing the custom slug again.
To verify that the /wp-admin and /wp-login.php links are hidden from visitors, try opening those URLs in a private/incognito browser.
Need any help? Contact our HelpDesk
Need help? We're always here for you.