The Vesta Control Panel is a simple web-based control panel that allows you to install and manage core services of your webserver. It can be used as one of the free alternatives to WHM/cPanel to manage a personal server where the reseller features of WHM/cPanel are not required.
A detailed description of Vesta’s features can be checked on the official website:https://vestacp.com/
Some of the features can be implemented through paid plugins only; however, the core functionality of this control panel is completely free.
Pre-installation check
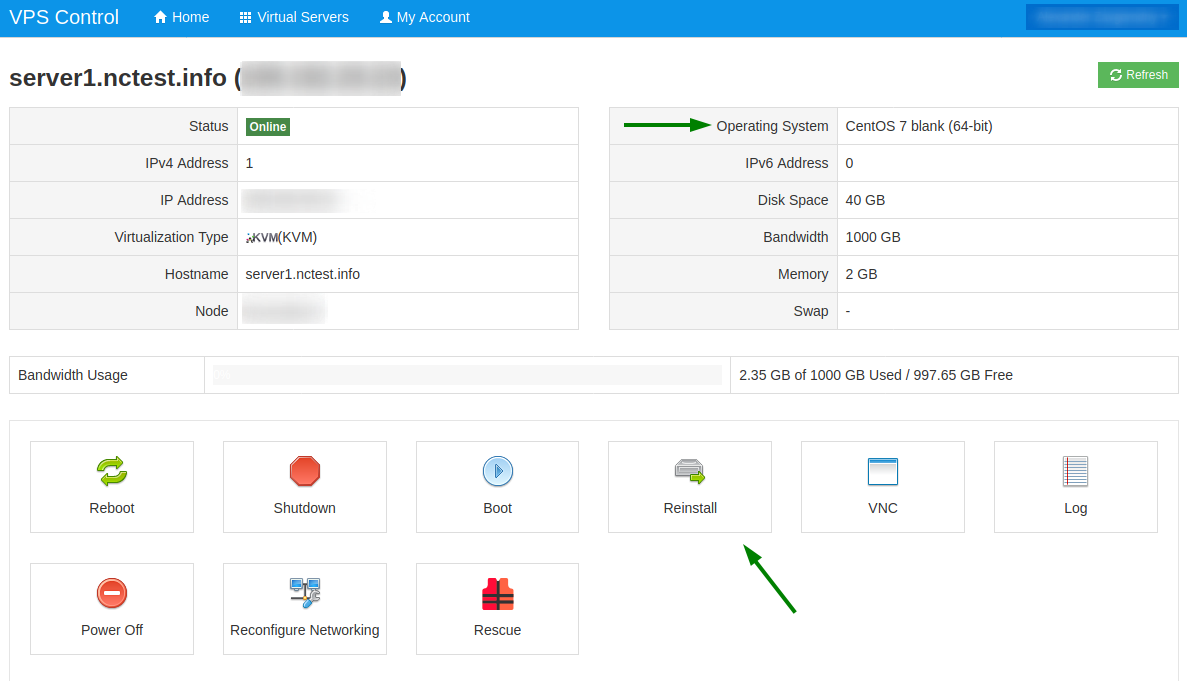
First of all, it’s necessary to check that the currently installed operating system (OS) is Supported by Vesta. You can do so on the installation page here:
https://vestacp.com/install/.
Vesta should be installed on the
blank template of the OS, so you will need to reinstall your OS to a
blank version in case you have selected “LAMP” during purchase, or manually installed some of the server software.
You can reinstall OS on a
Dedicated Server via IPMI, or ask us to install one of our OS templates by reaching out to our Billing/Sales department via
Live Chat or
email.
VPS owners can check the OS and reinstall it via
SolusVM. You may refer to
this article
for more details.
In order to install Vesta, you will need to access the
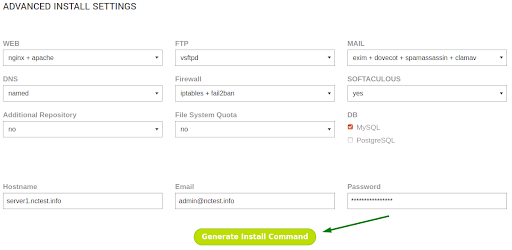
installation page and generate the installation commands. Select your preferred software and create Generate Install Command.
NOTE: Do not use special characters in the password on this page, as they may be incorrectly interpreted by the command line. You will be able to change the password later.
The necessary commands will be generated on the same page:
The first command Connect to your server as root via SSH is intended for Linux or MacOS desktops. In case you are running Windows on your PC you can check
this article
on how to connect to a server via SSH. You should use the following details:
- Hostname: the IP address of your server
- Username: root (the default admin username)
- Password: root password to your server
NOTE: If you are using Ubuntu, you will need to install the curl package before running the second command. You can do that by using the following commands:
apt update
apt install curl
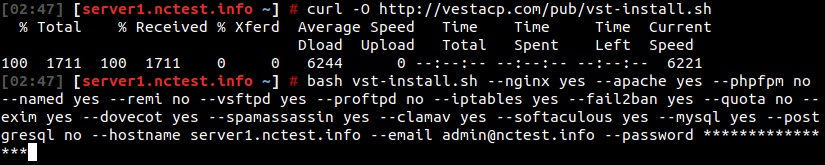
Once you have connected to your server (and installed curl in case of Ubuntu servers), you can start the installation by running the second and third commands:
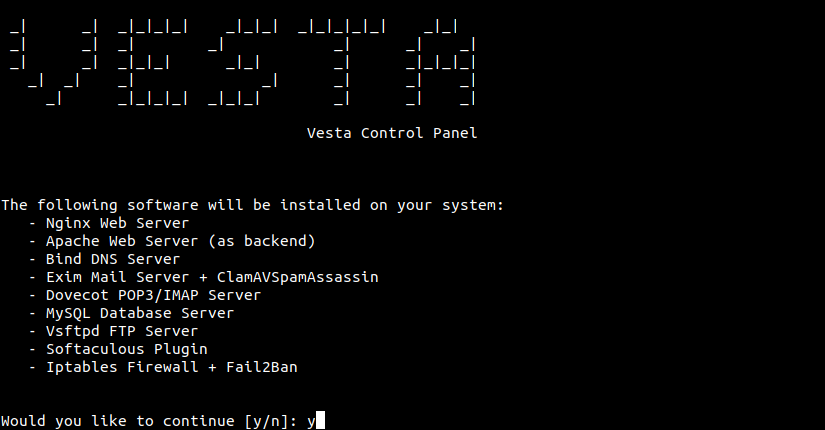
After running the third command, a Vesta installation screen will appear, listing the installation options and prompting you for confirmation. Type “y” and press Enter to proceed:
The installation process should take between 10-15 minutes. Most of the time you will see a verbose log of the current progress. However, there will be a few instances with zero output for 3-5 minutes and the process may appear stuck. When this happens, do not interrupt the installation since this is expected.
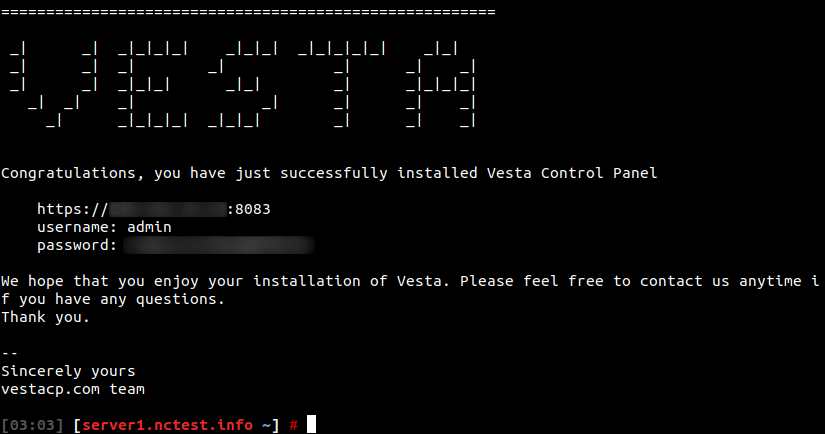
Once the installation is completed, a welcome screen with the control panel access details will appear:
Initial Configuration
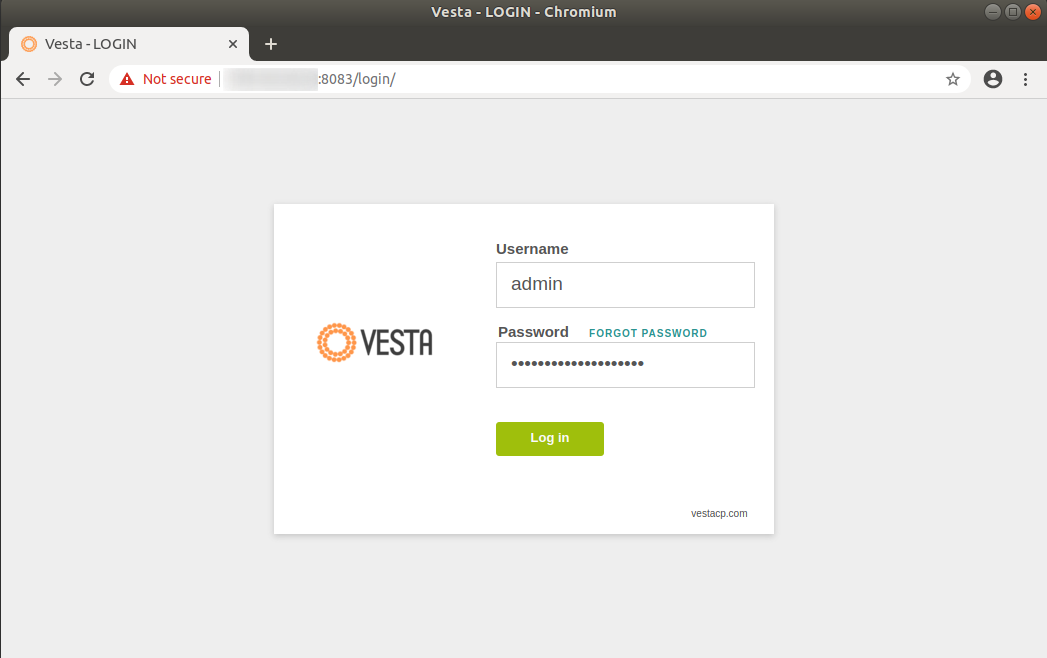
Now that the Vesta Panel is installed, we can access it via the web browser and perform the initial configuration of your domain name.
First, you will need to open the IP-based URL provided after the installation and log in using the details from the welcome screen.
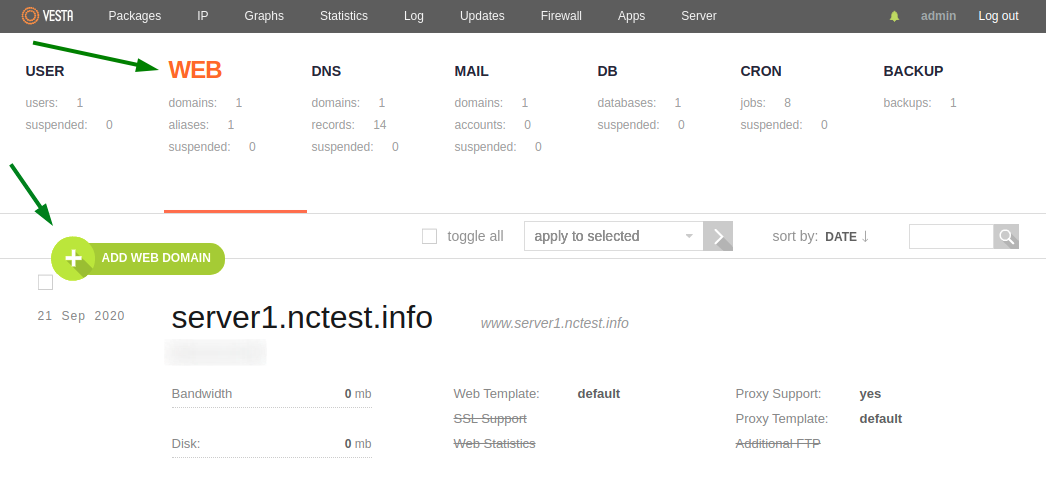
Once you are logged in, you will need to open the Web tab and create a new domain web domain name:
You will then be redirected to the Adding Domain screen. There you can fill in the name of your domain and add it to the server.
NOTE: Always add your domain without the “www.” part, as the alias for “www.domain.tld” will automatically be created by the control panel.
Make sure to leave the DNS Support enabled in order to be able to use Personal Nameservers with your server.
You can also open Advanced Options at this stage and enable SSL Support for this domain name (you will be able to enable SSL Support later if you do not wish to do it right away).

Now that your domain name is added, you will need to configure the Personal Nameservers for this domain name in order to be able to point it to your server. This can be done in the DNS tab of the control panel:
First, click on the Add Record button and create two “A” records for your future Personal Nameservers. In this example, we will be creating “dns1.nctest.info” and “dns2.nctest.info” nameservers, and therefore, we will need to create “A” records for “dns1” and “dns2” subdomains using the IP address of your server:
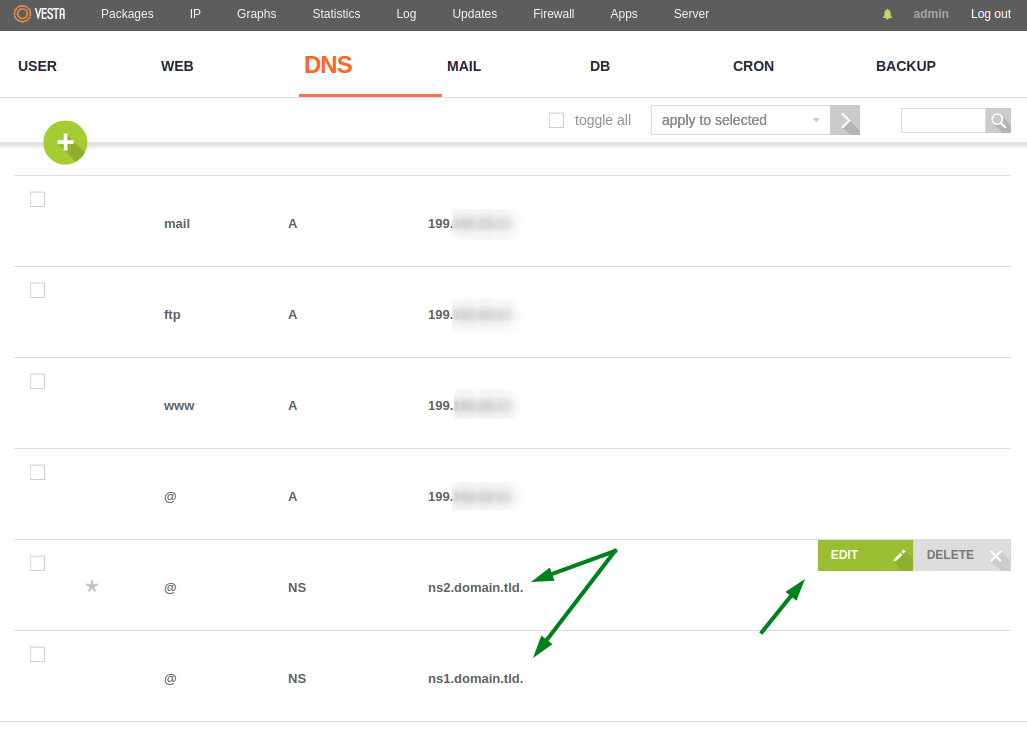
After the records are created, go back to the DNS tab and click on the List N Records button to open all the DNS records of your domain name.
You will need to find the NS type records there and change their value to the Personal Nameservers we are going to use:
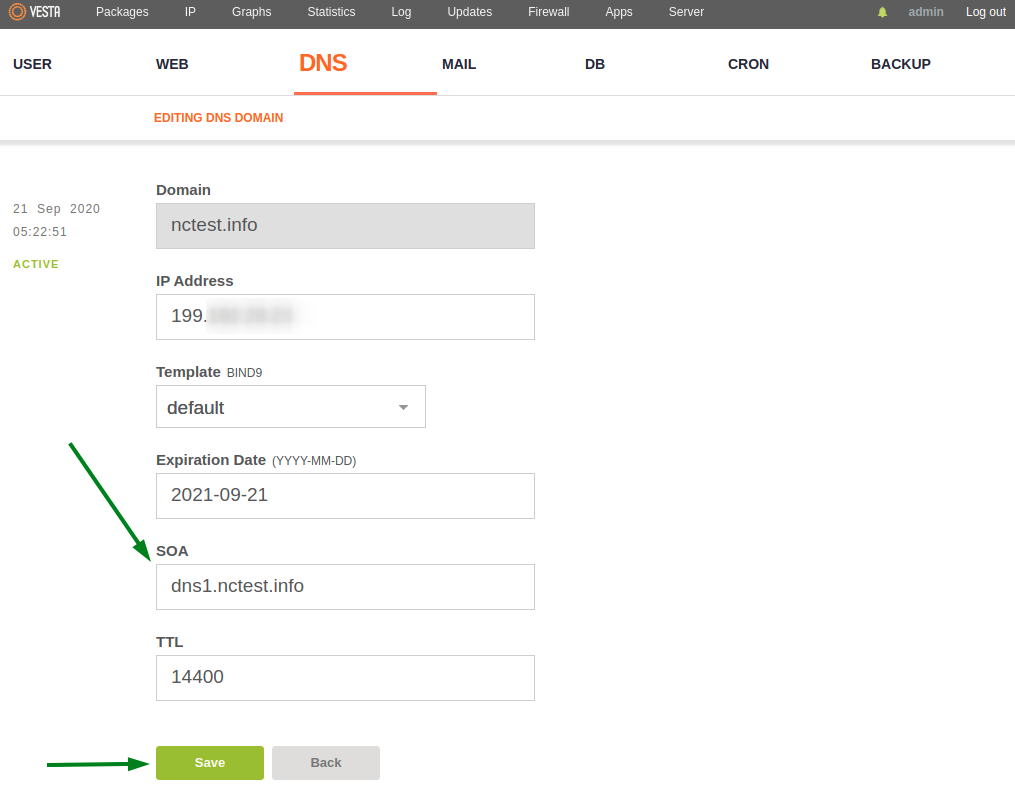
Lastly, you will need to go back to the DNS tab once again and click on Edit next to your domain name to modify the SOA record and fill in your private nameserver there:
This now concludes the server-side configuration of your personal nameservers. All you need to do now is register them with your Domain Name Registrar. (For Namecheap domain names,
here’s how to register.)
Once your nameservers are registered, you can switch your domain name to your personal nameservers and it will be pointed to your server 24-48 hours after DNS propagation. Feel free to check
this article
on how to point a Namecheap domain name to your personal nameservers using the
Custom DNS option.
Getting Started with your websiteGood news! Everything is in place to start your website. One of the ways to upload the content of your website to the server is to connect to it via an
FTP (File Transfer Protocol). You can use the same details you used to access the Vesta Control Panel in order to connect using an FTP client:
- Host: Your server’s IP address
- Port: 21
- Username: admin
- Password: your admin password
Once connected you can find the root folder of your website via the following path:
/web/domain.tld/public_htmlNOTE: Replace the
domain.tld with your own domain name.
This concludes the introduction to the Vesta Control Panel. You can find more official details on the various features of this control panel
here. In case any issues arise, the
official forum
is a good place to seek additional help.