| Subtotal | $0.00 |
USD
U.S. DollarEuroBritish PoundCanadian DollarsAustralian DollarsIndian RupeesChina Yuan RMBMore Info →

| Subtotal | $0.00 |
Where to find the validation file
Before proceeding with uploading the file, please make sure that you have initiated SSL activation with the CSR code and downloaded the validation file from your Namecheap account.
You can locate the validation file for download in your account by following these steps:
1. Log into your Namecheap account;
2. Go to the SSL Certificates list;
3. Click Details next to the Pending SSL certificate in question;
4. Click the 'from this page (Edit methods)' link:
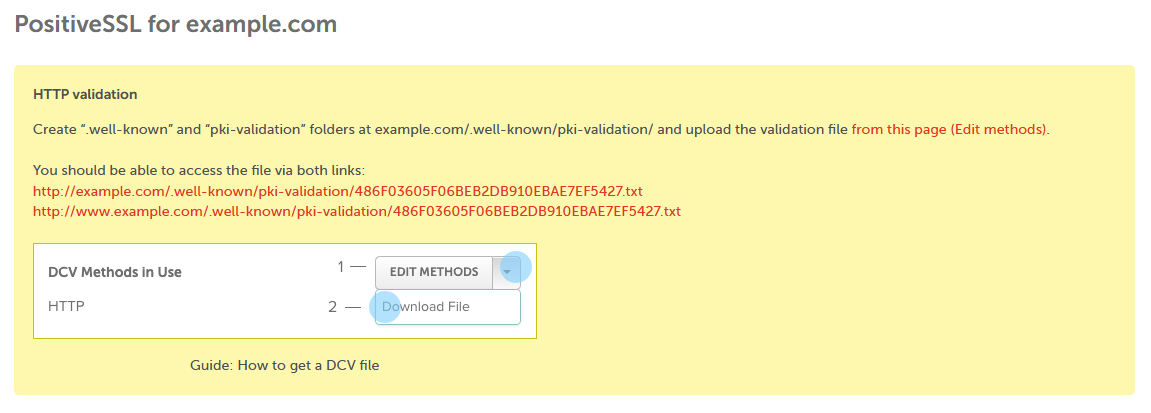
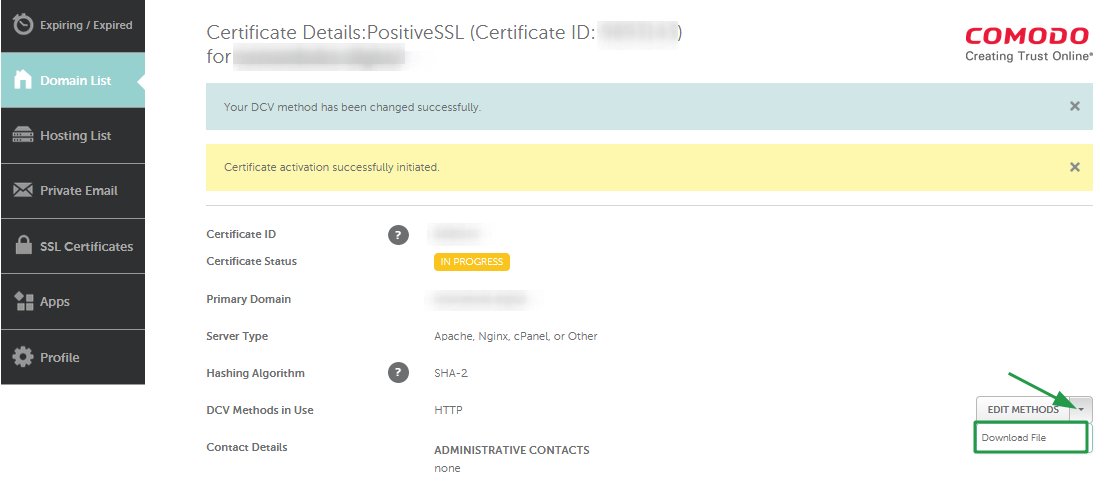
5. Click the drop-down near the Edit methods button and choose the Download File option:
The validation file is a .txt file named with numbers and letters (example: AN2D4C5H7F01823KRIDHJ.txt). When uploading the file, please do not change the file name or its content.
After you have downloaded the validation file, it is necessary to upload it to your hosting server/panel. The file should be uploaded into the .well-known folder and pki-validation subfolder of the document root directory for the domain name.
As a result, the validation file should be accessible via the requested path for the validation: http://yourdomainname.com/.well-known/pki-validation/AN2D4C5H7F01823KRIDHJ.txt , where ‘yourdomainname.com’ is the domain name in the certificate and ‘AN2D4C5H7F01823KRIDHJ.txt’ should be the exact name of the validation file downloaded from the Namecheap account without changes.
If you have a Single-Domain SSL, the validation file should also be accessible via http://www.yourdomainname.com/.well-known/pki-validation/AN2D4C5H7F01823KRIDHJ.txt.
If you have a Multi-Domain SSL, the file should be accessible for all of the hostnames you specified during the activation process.
You can check if the validation file is accessible in the browser by pasting the validation link into the URL and accessing it. In most cases, if a simple text line is shown on the screen, the validation file is accessible.
However, Comodo (now Sectigo CA) servers check the record using the direct checking methods, so please make sure that you have set up the correct permissions allowing the file to be checked and seen worldwide.
Also, in order for the file to be shown correctly, the domain name should be pointed to the hosting server IP address properly and resolve to it. For Single-domain SSLs, the www subdomain should also be pointed.
If your domain name has been registered with Namecheap, you can check this guide about how to point the domain name to the hosting server.
Additionally, please make sure that you have turned off the Namecheap parking page in the Namecheap account for the domains registered with us. You can check this in the Domain List by locating the domain name, clicking Manage near it, and checking the Parking Page section at the bottom of the page.
Please keep in mind that it is necessary to set the file to be accessible via HTTP connection. If your website already has an SSL certificate installed and working, and your website automatically redirects HTTP to HTTPS, the validation might be delayed or not come through at all.
In this case as well as to check the progress status and take action to expedite your Certificate issue, use the convenient SSL Validation Tool.
Sectigo servers will check the validation file in 5 minutes after the activation's been submitted, and then 15 minutes later, then in 45 minutes, and the next check will be performed in 30 hours later. Thus, if the files is placed correctly within first 20 minutes after the SSL activation, it should be verified automatically.
If it takes longer than that, and if the certificate is still shown as "In progress" while the file is set correctly, contact our Support team to take a deeper look at the issue.
How to place the validation file on different servers
Below you can find more detailed guides about validation file upload using the most popular hosting panels and server types.
Also, please keep in mind that some hosting panels do not permit you to upload these files.
For instance, it is not possible to use the HTTP-based validation if your domain name is hosted on Ghost Machine from Namecheap.
If you encounter trouble during the file upload to your hosting server, contact your hosting provider support team for further detailed assistance.
cPanel
Once your domain name is pointed correctly, you can access the cPanel for your domain name via the direct link: http://yourdomainname.com/cpanel.
After you are logged into the cPanel, the File Manager option can be found in the Files section.
Usually, the document root folder for the main domain of the cPanel is named ‘public_html’. For add-on domains or subdomains, the document root folder might be created by default, either as a subfolder in the ‘public_html’ folder, or as a separate folder with the name of the domain under the root folder.
Please use the + Folder (New folder) button and create the folder ‘.well-known’ in the document root folder for your domain name:
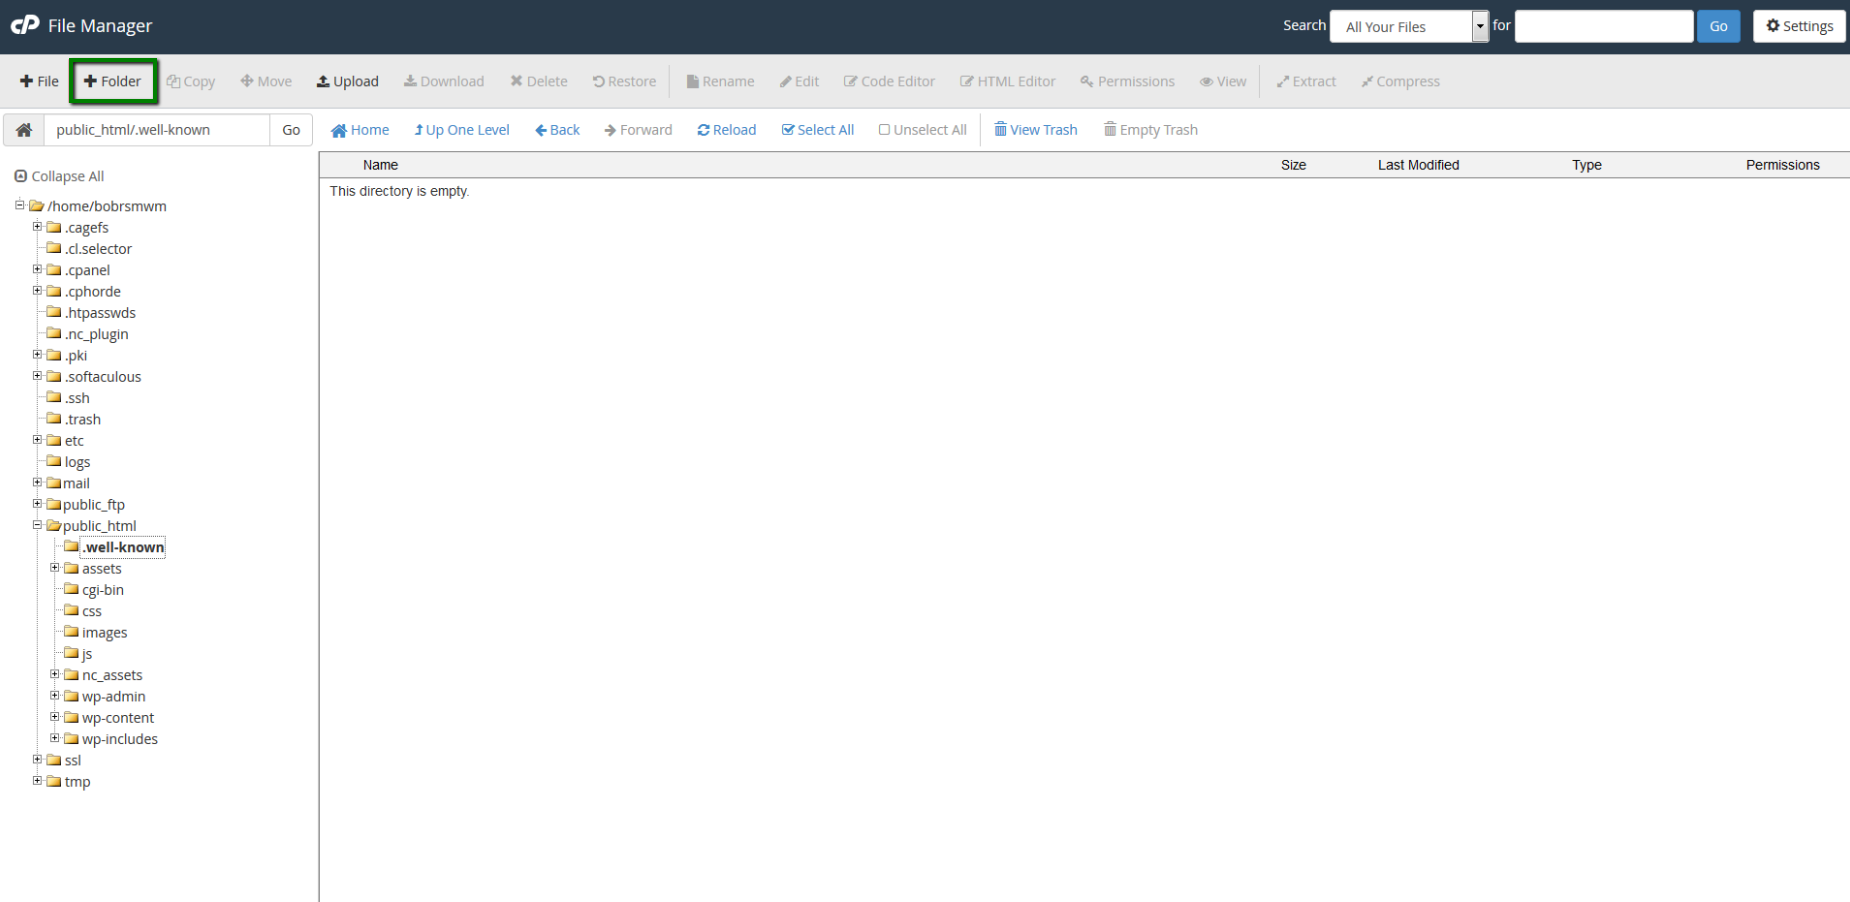
The folders starting with a dot are the hidden folders. In order to view them, make sure that you have enabled the ‘Show hidden files’ option in the Settings menu in the top right corner of the File Manager page.
Once you are in the ‘.well-known’ folder, use the same + Folder (New folder) button and create the ‘pki-validation’ subfolder within it.
Then navigate to the ‘pki-validation’ folder and use the Upload button to upload the validation ‘.txt’ file to this subfolder:
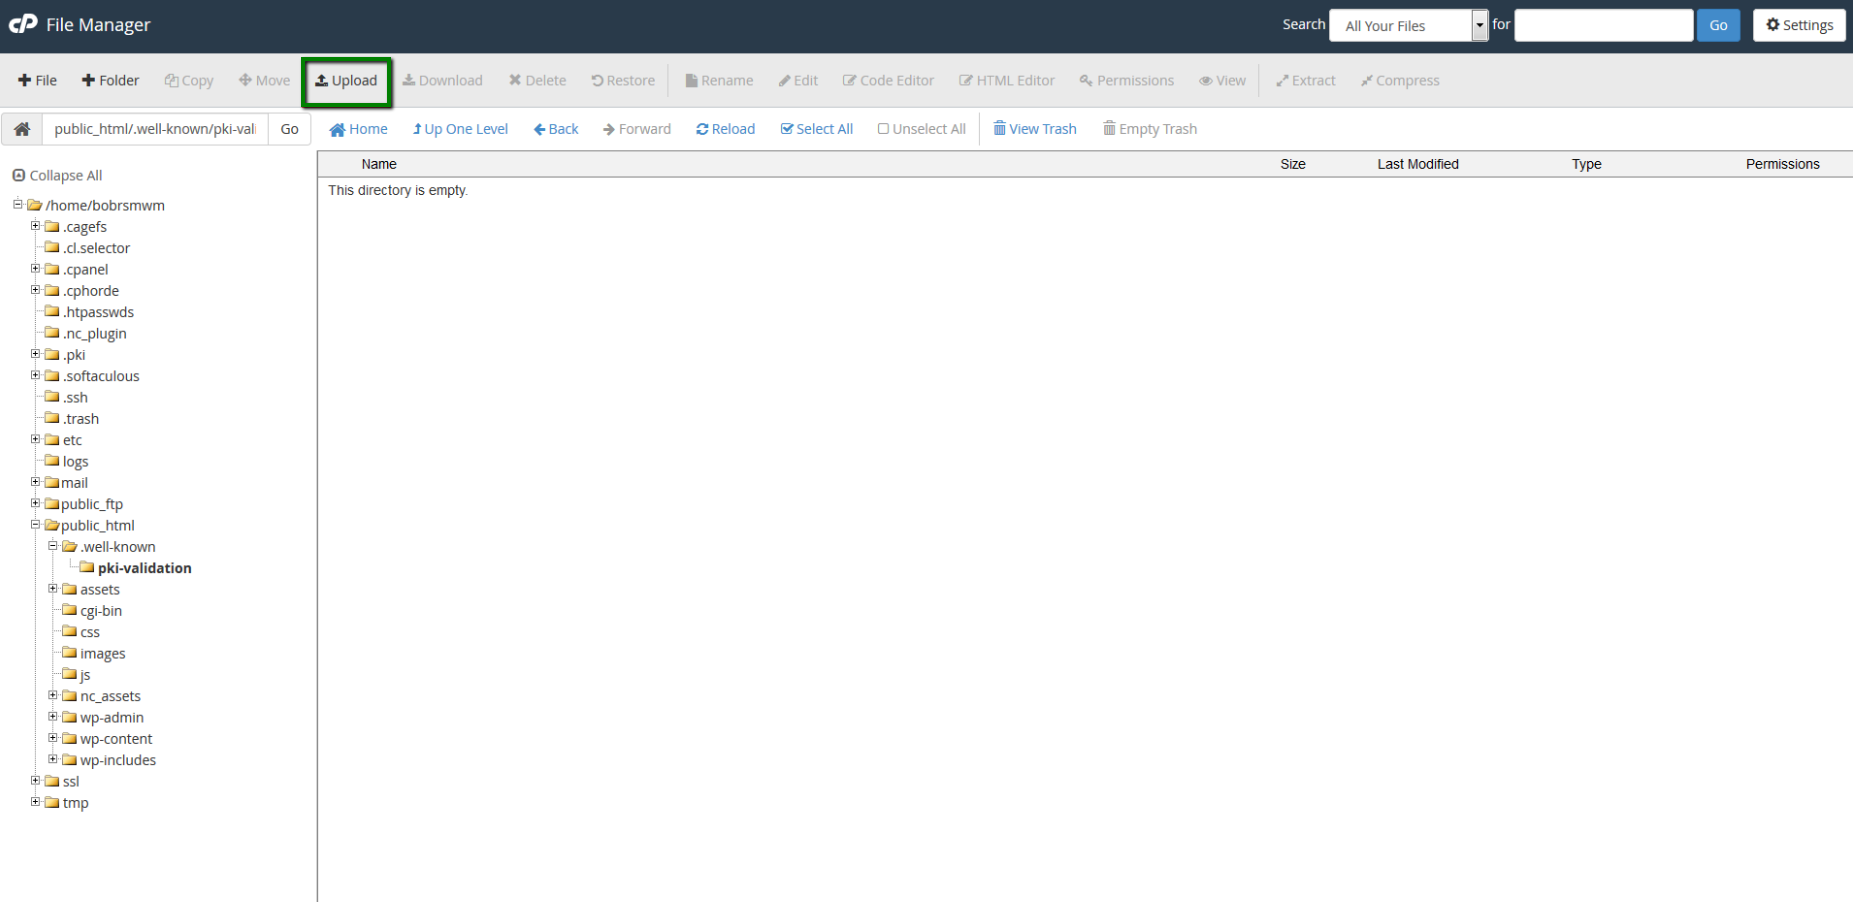
As a result, the validation file should be accessible in browser via the link: http://yourdomainname.com/.well-known/pki-validation/yourfilename.txt.
Namecheap VPS and dedicated servers
For cPanel accounts on a VPS or dedicated server, the process of file upload in the cPanel File Manager is the same as for cPanel accounts on Namecheap Shared hosting.
If your VPS or dedicated server does not have cPanel installed over the Apache web server type, feel free to check the instructions for the Apache server type described below.
If you use another control panel installed on the dedicated hosting server, you can upload the file using the file upload options in this panel.
Namecheap EasyWP hosting
HTTP-based method can be performed by uploading the file over SFTP. Make sure you connected EasyWP to your FTP client before proceeding with HTTP-based validation method.
Apache/Nginx or other Linux-based webserver
It is possible to upload the validation file to a Linux-based server like Apache or Nginx in one of two ways: using FTP client or using SSH access to the server (terminal, command line interface (CLI)).
1. To use the FTP connection, you can use FTP clients like FileZilla, CyberDuck and so on.
Once installed over the web server in use, they will allow you to manage your hosting server files with an easy-to-use graphic user interface.
The document root folder for the website hosted on Apache is usually the folder ‘/var/www/html/’. There, you can create the ‘.well-known’ and ‘pki-validation’ folders on the hosting server and then upload the file to ‘pki-validation’.
The result should be the same – after upload, the validation file should be shown accessible via the validation link: http://yourdomainname.com/.well-known/pki-validation/(yourfilename).txt.
2. To place the validation file using the terminal, you need to log into your server via SSH connection. This can be done using SSH clients like PuTTY (for Windows) or Terminal (for Mac OS). You will need to specify your IP address (or servername or domain name), as well as the username and password to log into the SSH client. The SSH connection to the server should be set up beforehand.
Please keep in mind that, for security reasons, passwords are not displayed on the screen while entering them.
Once you are logged into the terminal, it will be necessary to know the exact document root folder for the domain name. This is specified in the configuration file enabled for this domain name, and shown in the ‘DocumentRoot’ line of that configuration file.
Also, in order to check the document root for the domain name, you can run the following command for Apache:
apachectl –S
or this one for Nginx:
nginx -T
The needed document root will be shown in the ‘Main Document Root’ line of the output.
You can use the cd command for navigating to the exact directory with the full path to it specified, as shown in the following example:
cd /etc/
Once you are in the root directory for the website, you will need to create the ‘.well-known’ folder. To do this, run the following command:
mkdir .well-known
Then navigate to ‘.well-known’ folder with cd and create the needed subfolder here:
mkdir pki-validation
The next step is to create the empty file in the ‘pki-validation’ folder with the name of the downloaded validation file (for example, ‘AN2D4C5H7F01823KRIDHJ.txt’).
You can do this by running nano AN2D4C5H7F01823KRIDHJ.txt in the ‘pki-validation’ folder.
Open the validation file on your PC and copy its contents. Then return to the terminal and paste the copied code by right-clicking in the terminal window.
Once the text is shown on the screen, press Ctrl+O, then Enter, and Ctrl+X to save the changes and exit the text editor window.
Now the validation file should be accessible in the browser via the link: http://yourdomainname.com/.well-known/pki-validation/(yourfilename).txt.
IIS (10)
On IIS, the validation file uploading starts by locating the Explore button in the IIS panel:
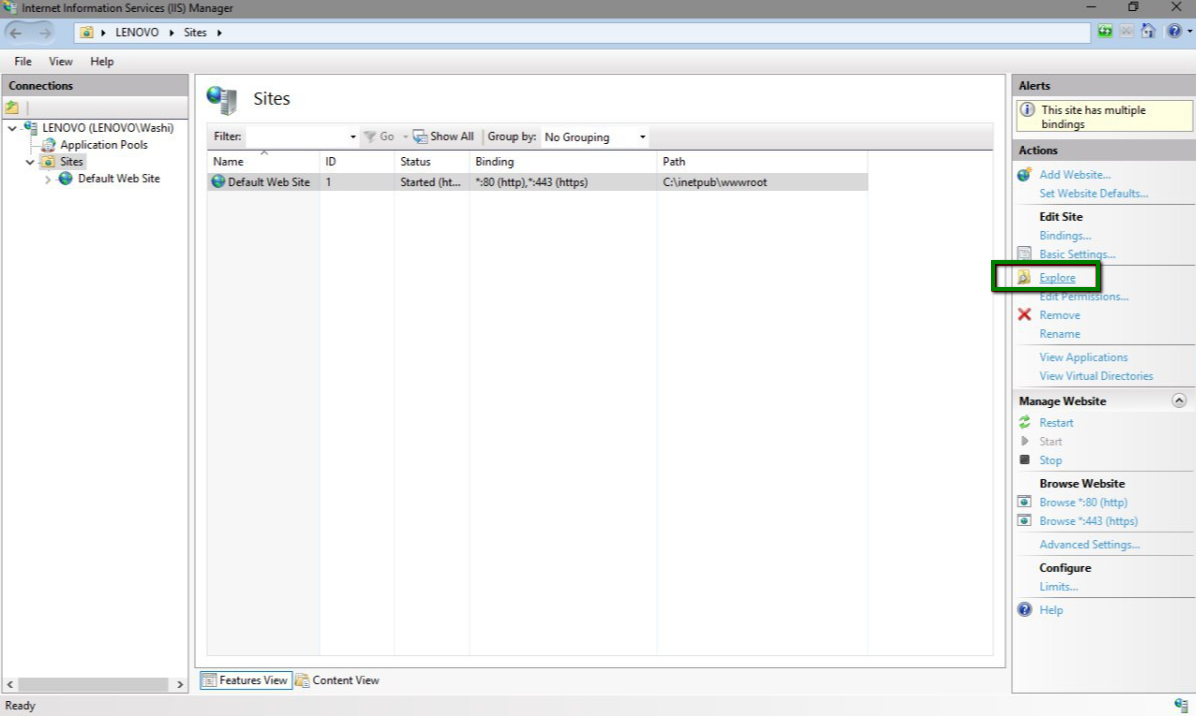
When clicked, this button opens the File Explorer window, allowing you to create and manage files and folders.
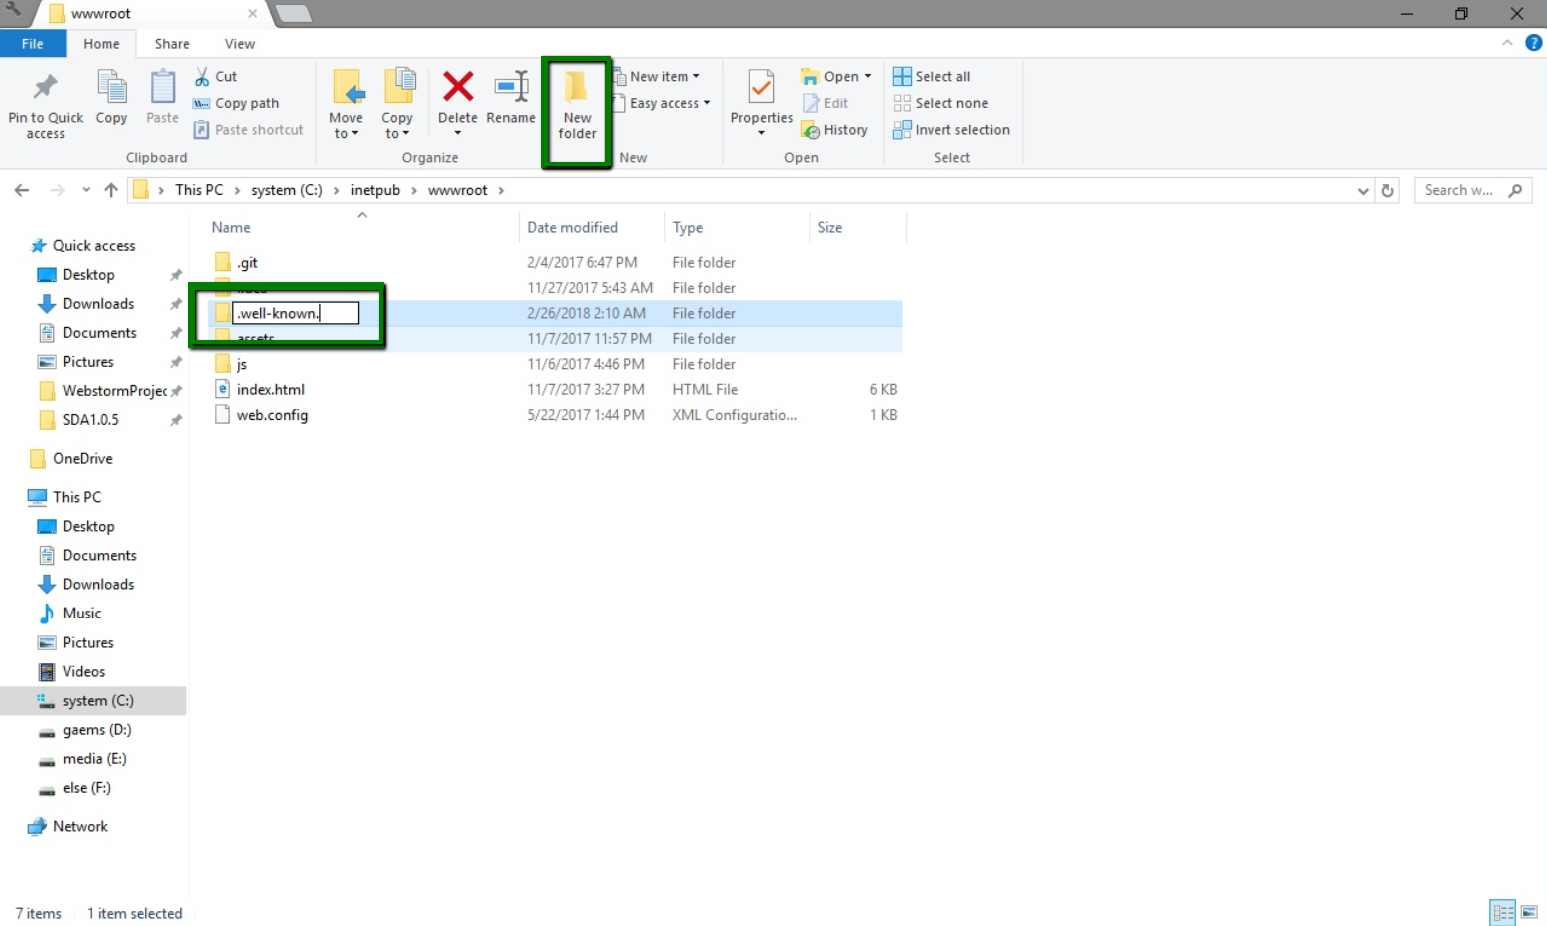
The path to the document root folder for the website on IIS is C:\\inetpub\wwwroot\.
In this step, you’ll notice that it does not seem possible to create a ‘.well-known’ folder with the dot at the beginning.
However, you can try a couple of workarounds to make this folder.
1. First, try creating the ‘.well-known.’ folder with the second dot at the end. In this case, the second dot will be removed automatically by IIS, and the exact needed folder will be created.
2. The other way to create the folder starting with dot is to open a command prompt (for Windows 7 or older - Start > Run > ‘cmd’ > OK; for Windows 8 and newer - Search > ‘cmd’ > OK), navigate to the document root folder (using the cd command) and enter the following line:
mkdir .well-known
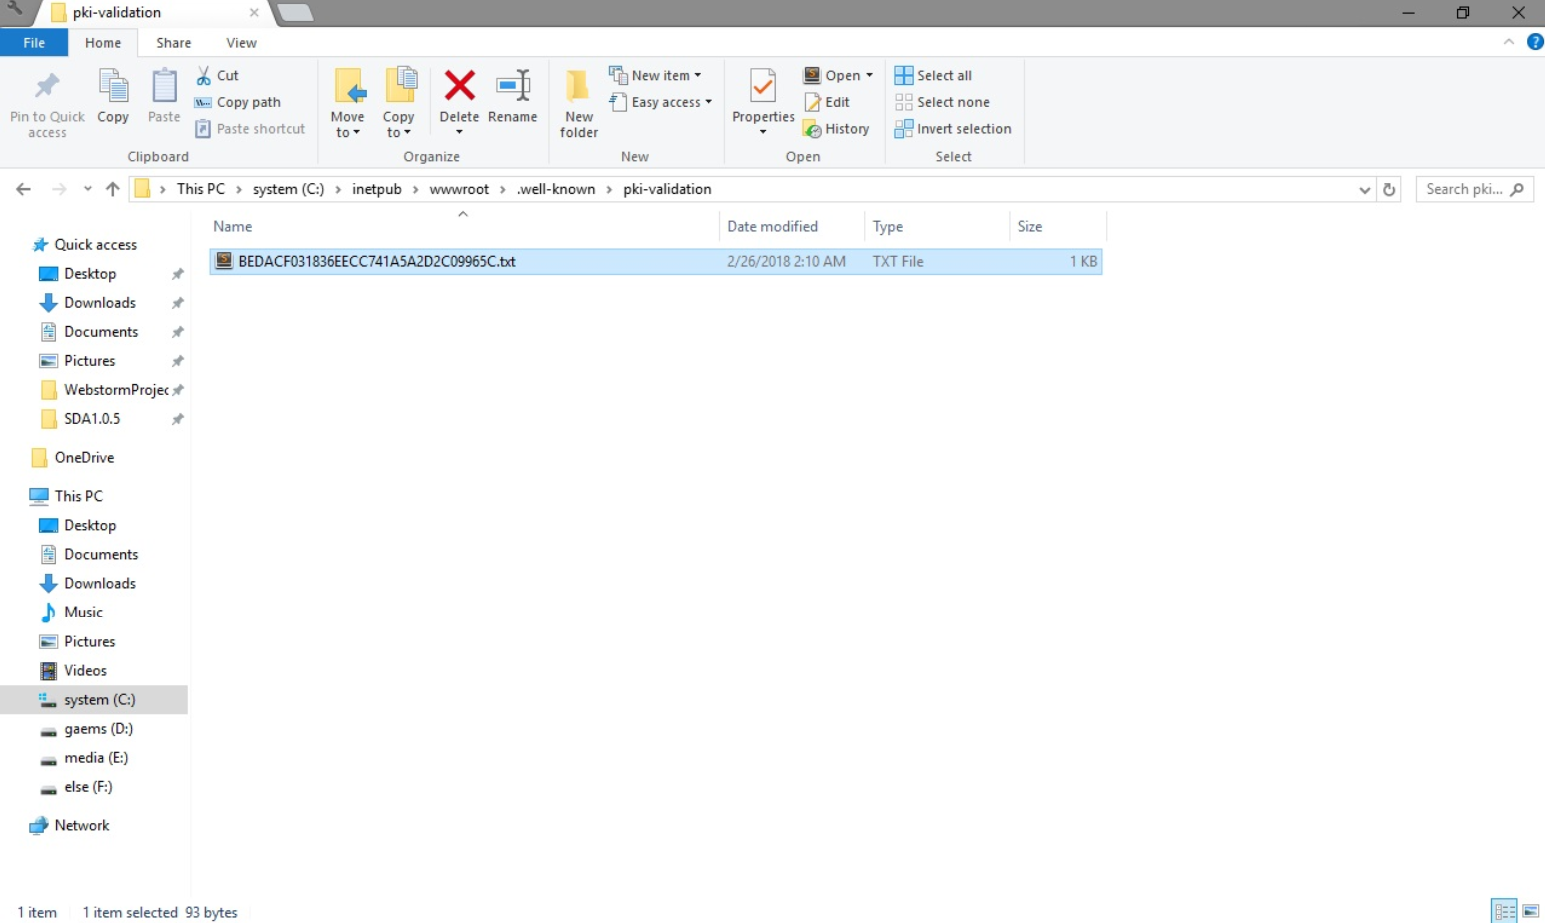
Once the .well-known’ folder is created, you’ll need to create the ‘pki-validation’ folder inside of it and then upload the validation file.
Just drag and drop it from the other Explorer window with the downloaded file inside it.
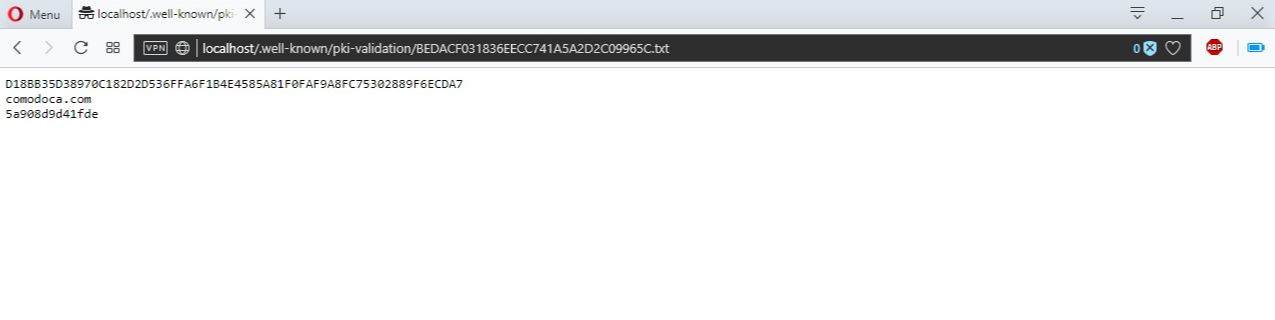
As a result, the file should be accessible on the localhost path as shown there:
Plesk
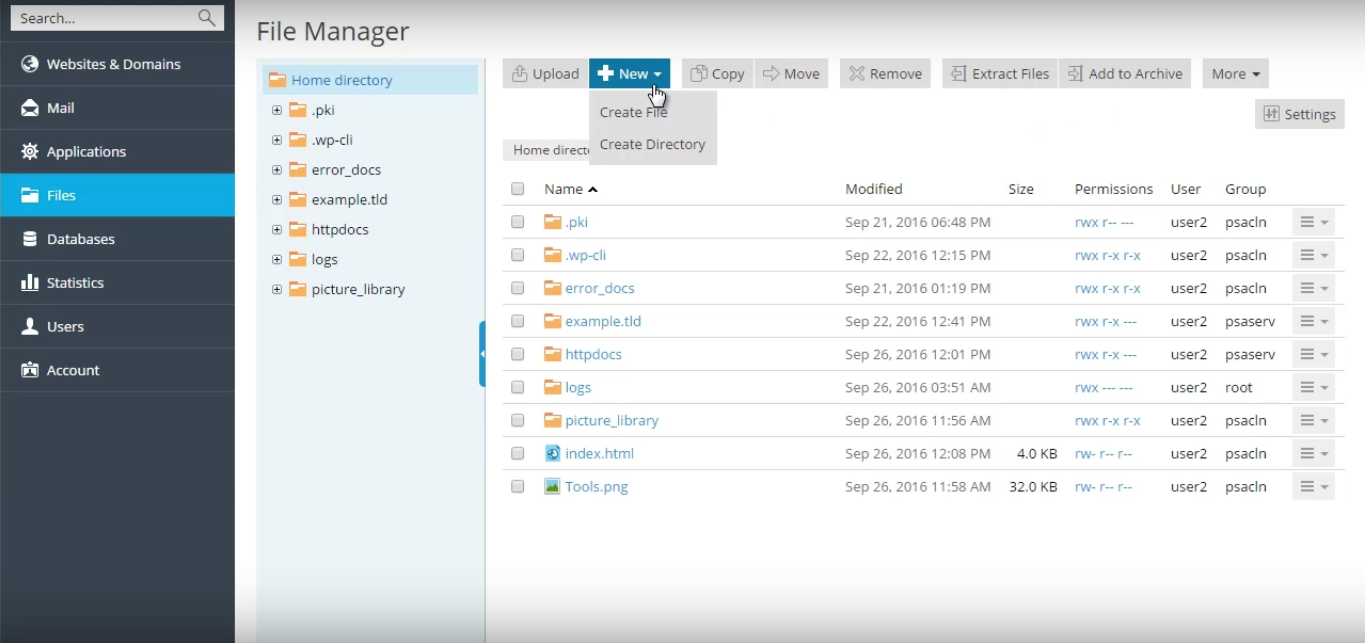
In order to upload the validation file using the Plesk panel, you can use the ‘File manager’ option.
Navigate to the Files section in the right-side menu where you will see the folders structure of the files on your hosting server.
The default document root folder for the main domain of the Plesk panel is ‘httpdocs’. Thus, the ‘.well-known’ folder should be created there in ‘httpdocs’.
Select ‘New > Create Directory’ to make the new folder:
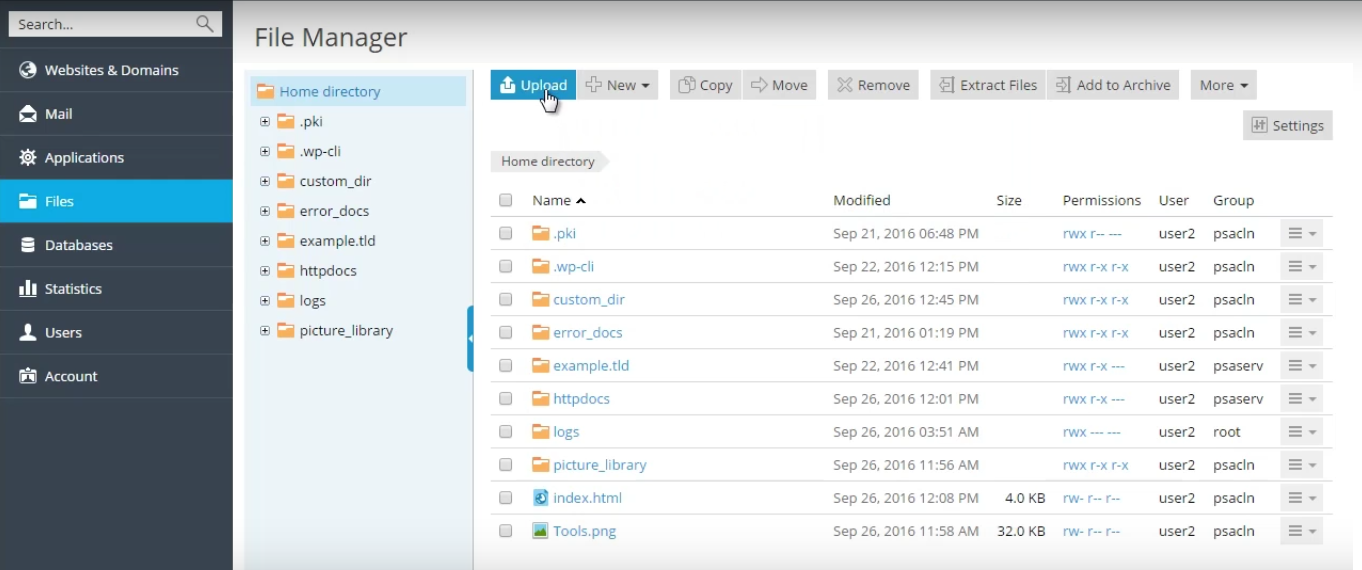
Then, create the ‘pki-validation’ subfolder in ‘.well-known’ folder as well.
The validation file can be uploaded into the ‘pki-validation’ folder using the Upload button in the same panel:
Here is a helpful video guide about File Manager usage on Plesk.
Webmin
You can upload the file using the HTML or Java File Manager options in the Webmin panel.
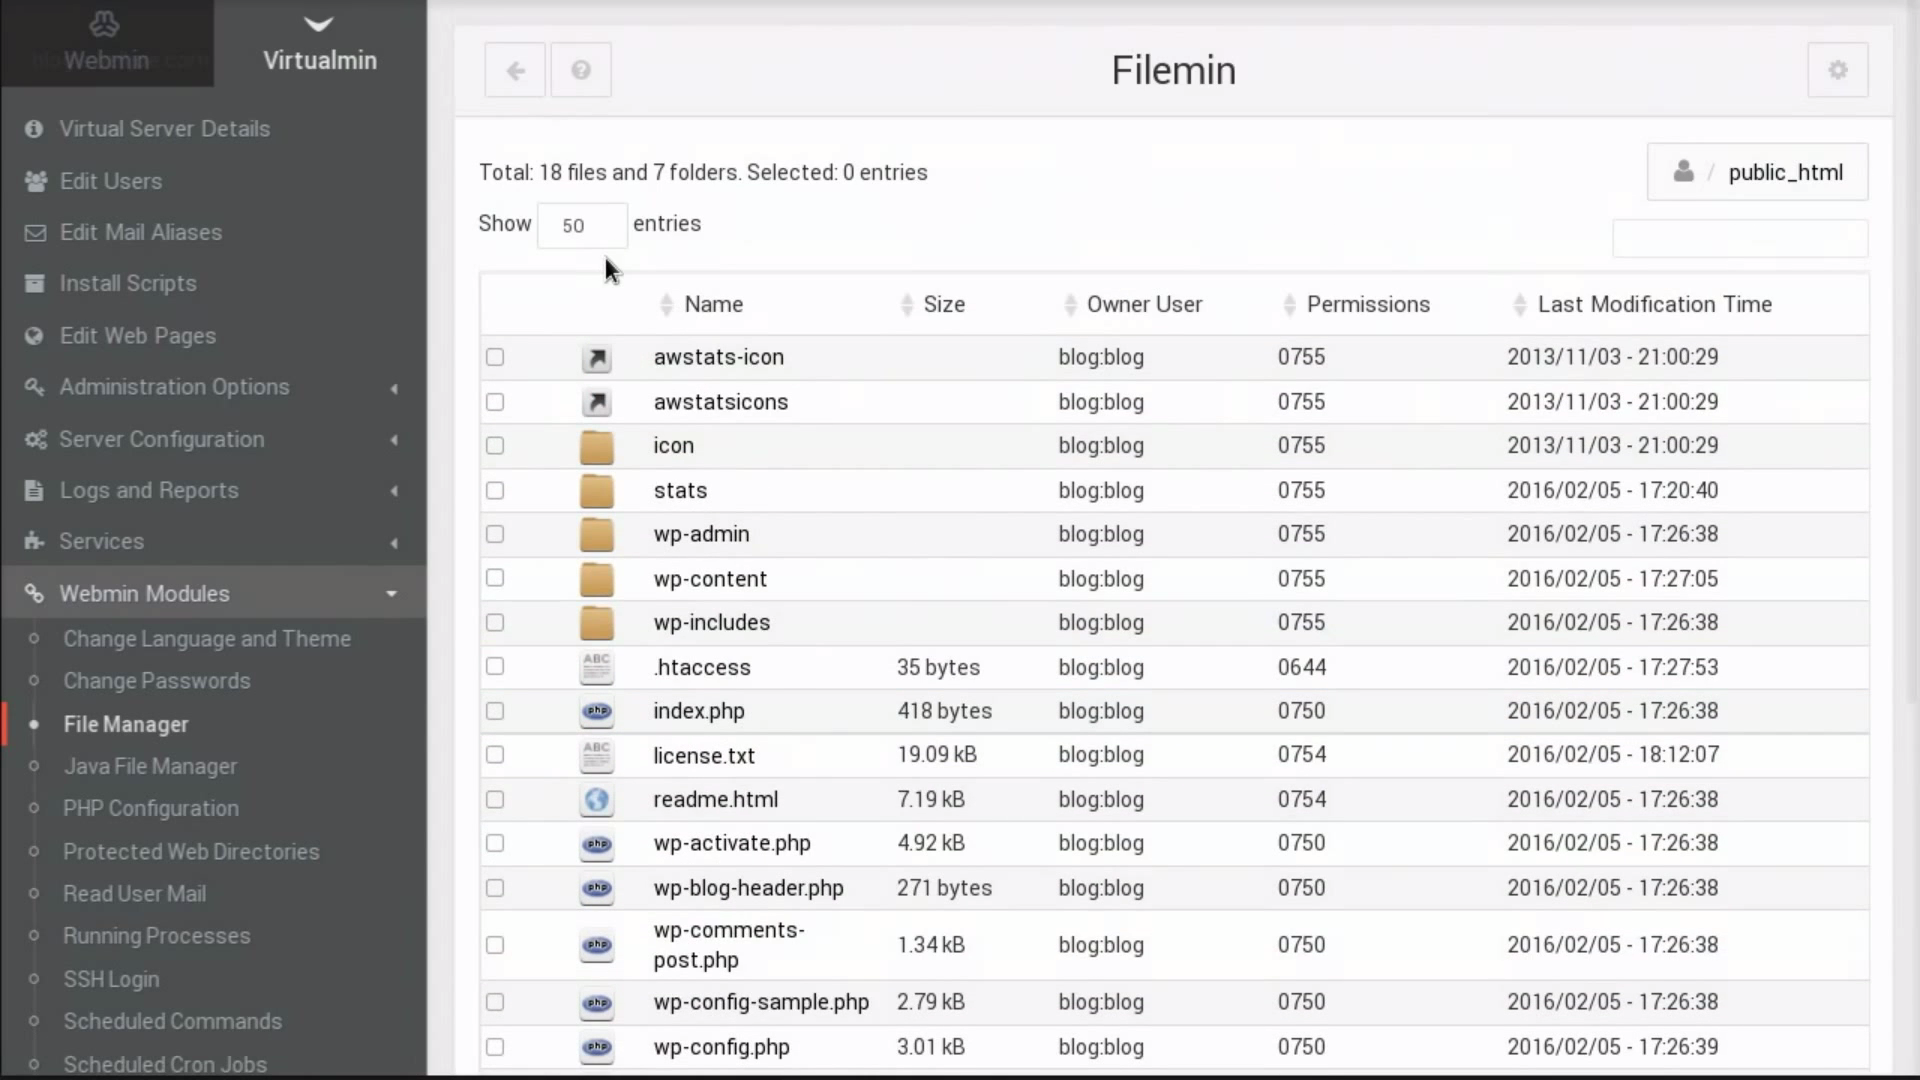
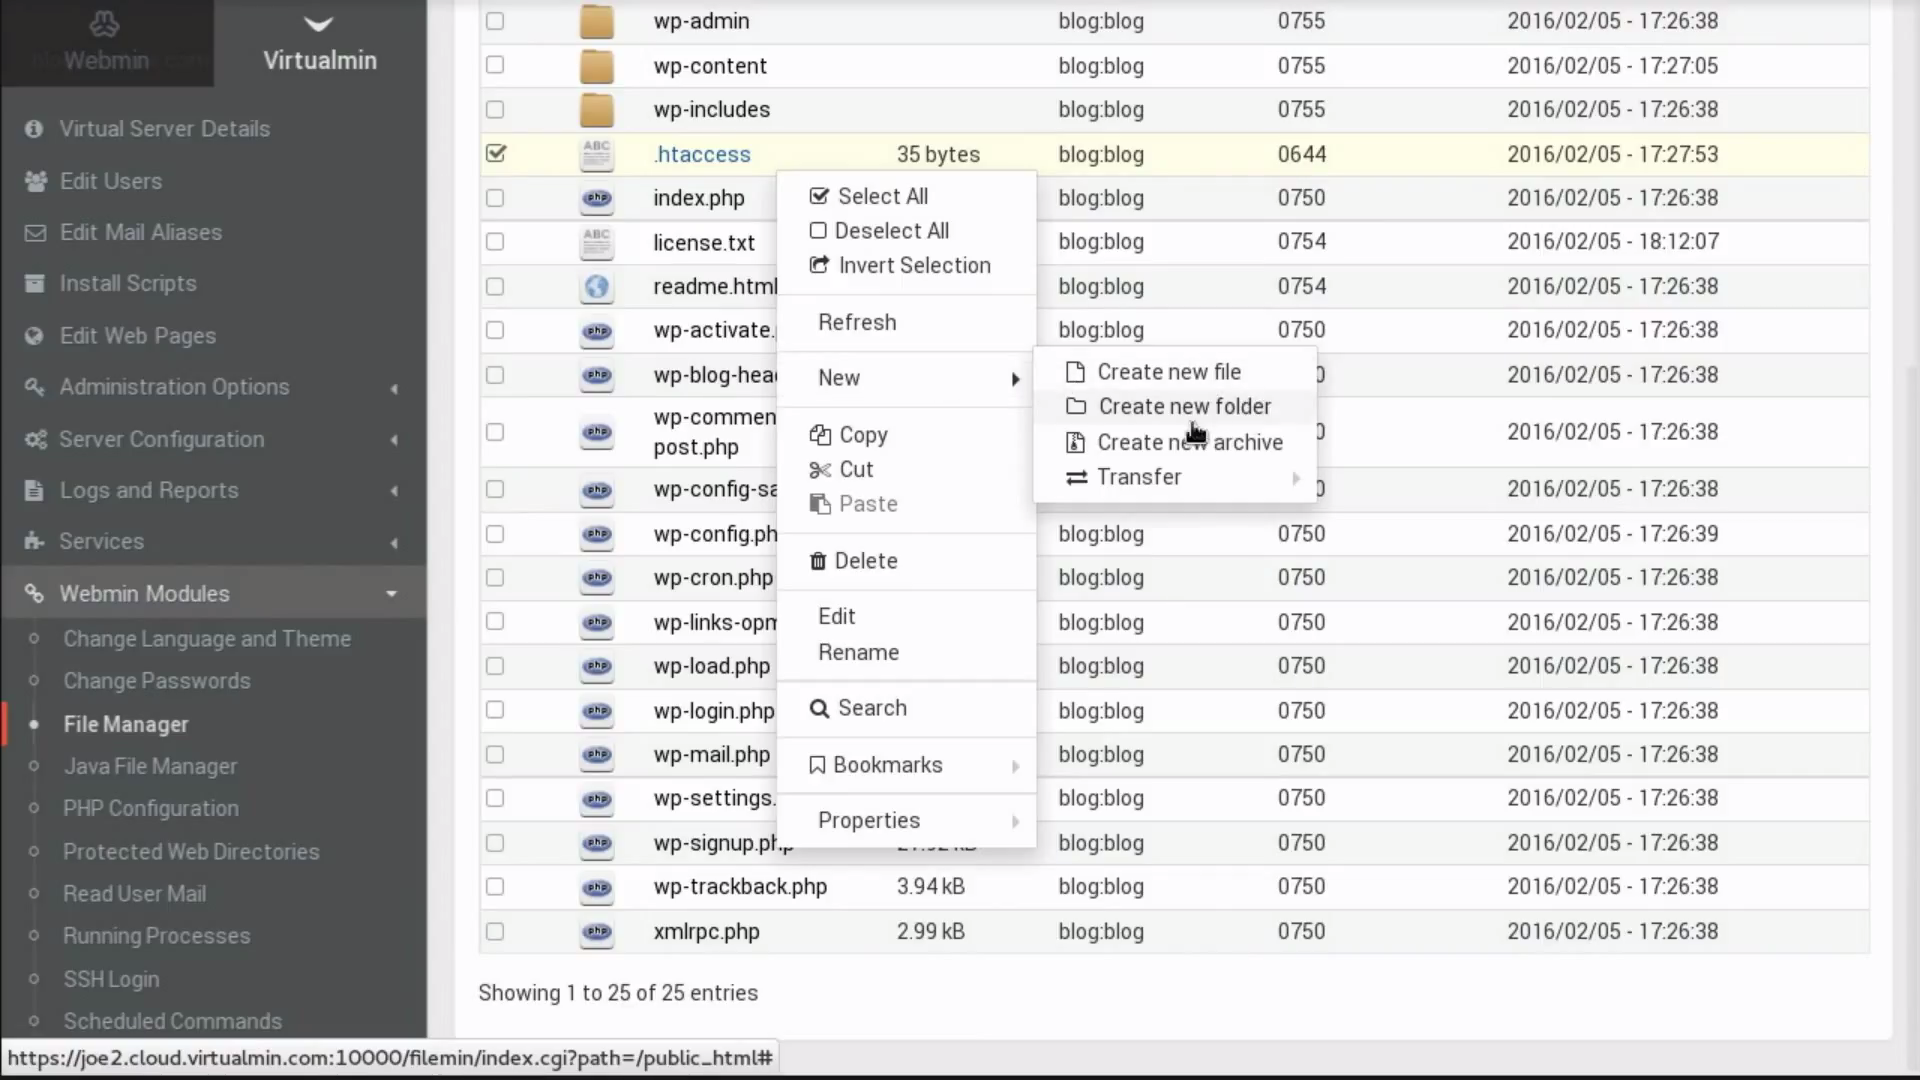
First, find the root folder for the website, right-click on it and select New >> Create new folder. Name the folder ‘.well-known’. The same way a 'pki-validation' folder should be created inside of the '.well-known'. Then put the validation file inside of the 'pki-validation' folder.
The HTML File Manager module also offers two methods for creating new files. You can either create a text file from scratch, or upload data from the host that your web browser is running on.
A more detailed video guide about File Manager usage can also be found here.
Tomcat
When uploading the file to Tomcat, please keep in mind that the file should be accessible via the standard ports - 80 (for a non-secure connection) or 443 (for a secure one). By default, Tomcat uses the 8080 and 8443 ports, respectively.
If the file will be accessible via the default Tomcat ports 8080 and 8443 only, the validation will not be completed.
The document root folder for the website on Tomcat can be found in the ‘server.xml’ file in the following line:
<Context path="/" docBase="/some/full/path/to/document/root/folder" />
Usually, the server root folder is located in the folder set under the variable $CATALINA_HOME, and the document root folder for the website is set to the particular folder under the server root folder.
You can create the ‘.well-known’ and ‘pki-validation’ folders for placing the validation file using the command line with standard Linux commands like mkdir for the folder creation and cd for navigating between the folders. Then, you can create the empty file with the exact name of your validation file with the command nano AN2D4C5H7F01823KRIDHJ.txt, copy and paste the full contents of the validation file into this file and save it with the standard Nano keys: Ctrl + O > Enter > Ctrl + X.
The file upload might be more convenient if you already have the working servlet for file uploading and management. You can see an example of such a servlet here.
MacOS X Server
If you run MacOS X on your computer, it is possible for you to use the built-in FTP client or the Command Line Interface (CLI) to connect to your server and then upload the file to it.
For FTP, below are listed the standard steps to initiate FTP connection on your Mac:
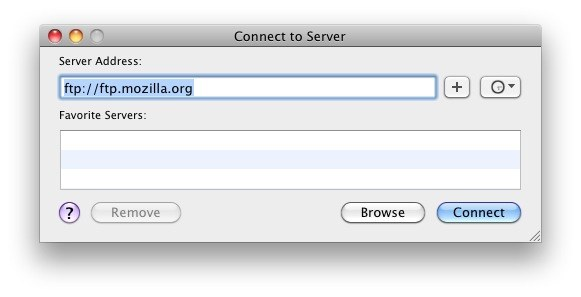
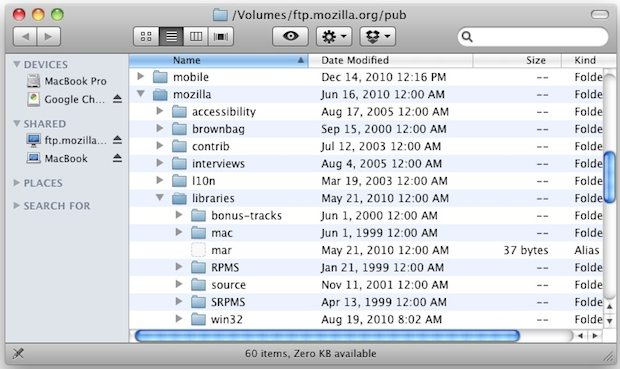
The other method is to use the Command Line Interface for placing the file on the Mac OS X server.
As the Mac OS X server is of Apache web server type by default, you can use the section about the file upload for Apache to proceed (create the totally new file using ‘nano’ text editor in the command line and then copy and paste the content of the file into the created empty file on the server).
Otherwise, you can use the following command to proceed with the file upload using the Secure Copy protocol based on SSH:
scp AN2D4C5H7F01823KRIDHJ.txt
your_username@hostname.tld:/Library/WebServer/Documents/.well-known/pki-validation
where ‘AN2D4C5H7F01823KRIDHJ.txt’ is the validation file name, ‘your_username’ stands for the username you use to get access to your server, ‘hostname.tld’ is your Mac OS X server hostname, and ‘/Library/WebServer/Documents/’ is the default path to the document root folder.
Need help? We're always here for you.