This article is valid for both new plans (purchased on or after June 2, 2026) and legacy Private Email plans (purchased before June 2, 2026).
If your domain is pointed to Cloudflare nameservers, follow these steps to configure email DNS records:
for Private Email email service
for cPanel Email email service
How to set up Private Email DNS records at Cloudflare
1. Log into your Cloudflare account at https://www.cloudflare.com/a/login.
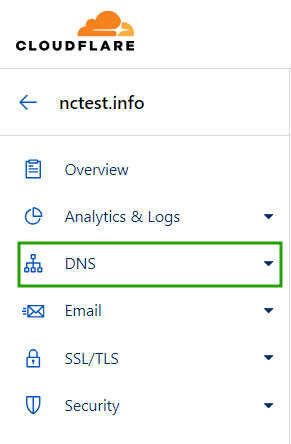
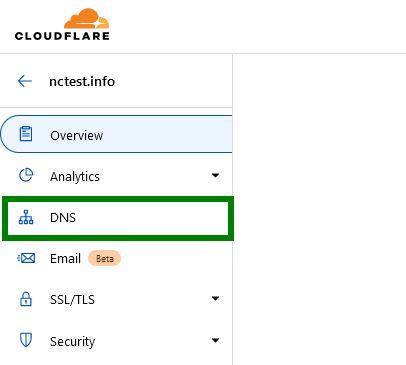
2. Go to the DNS menu:
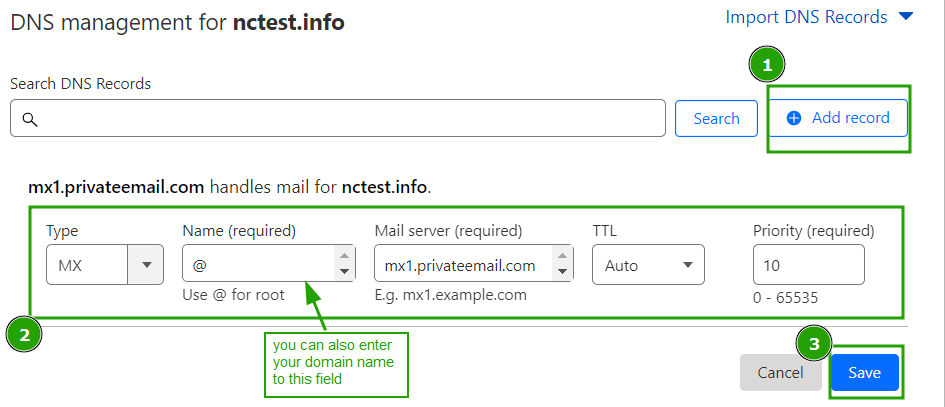
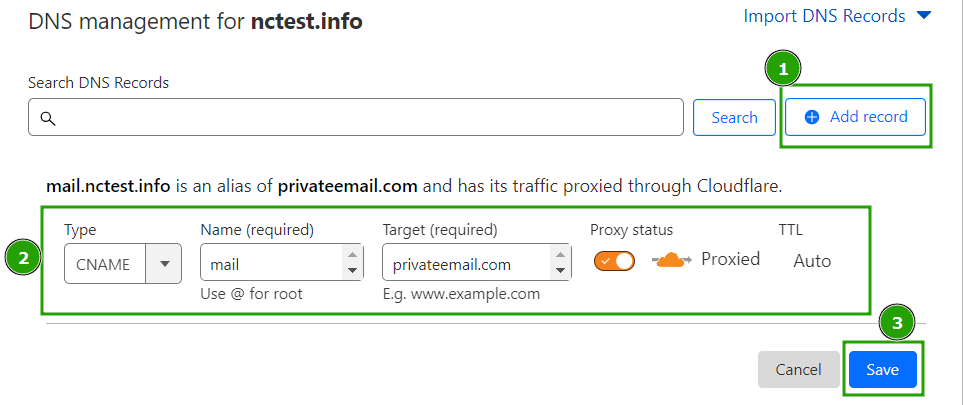
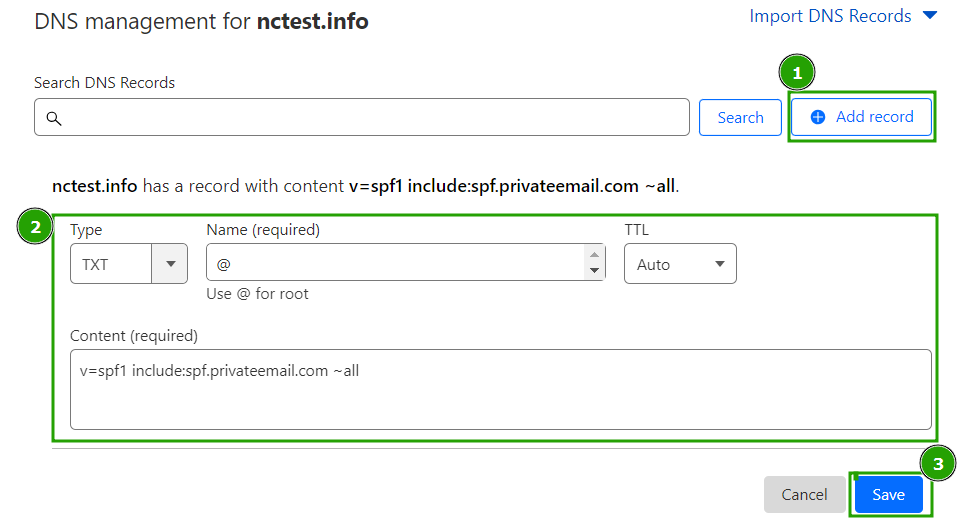
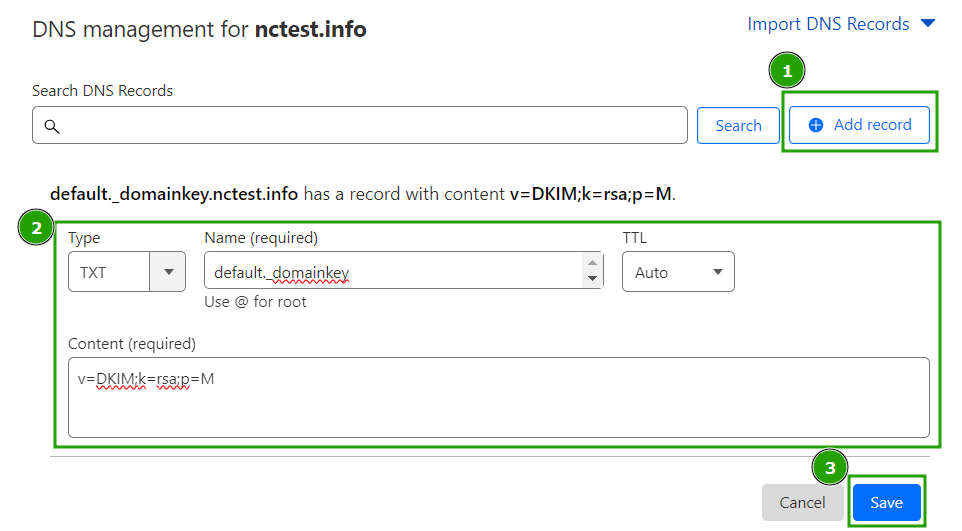
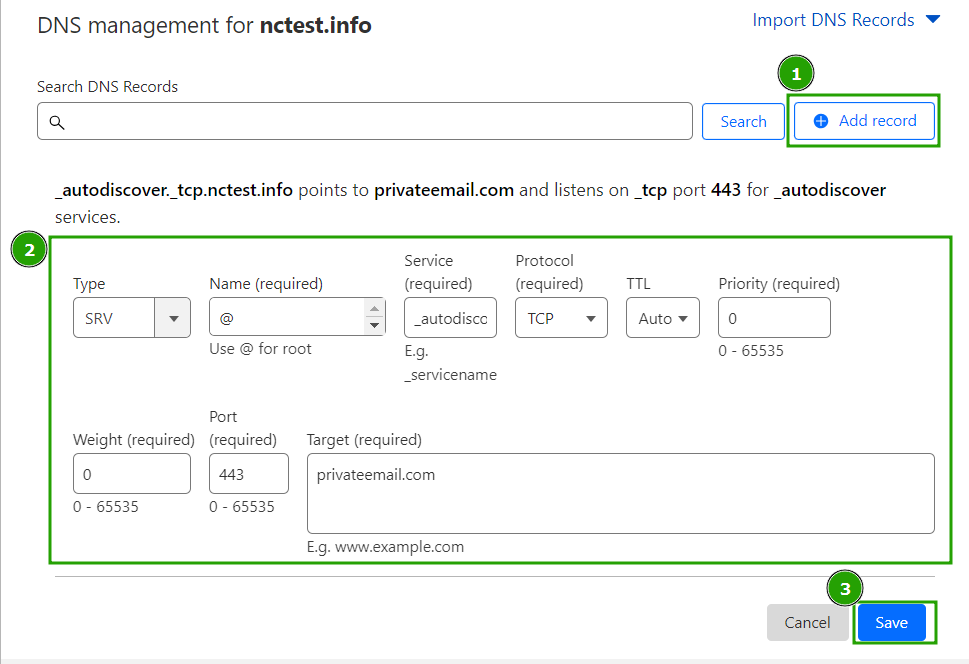
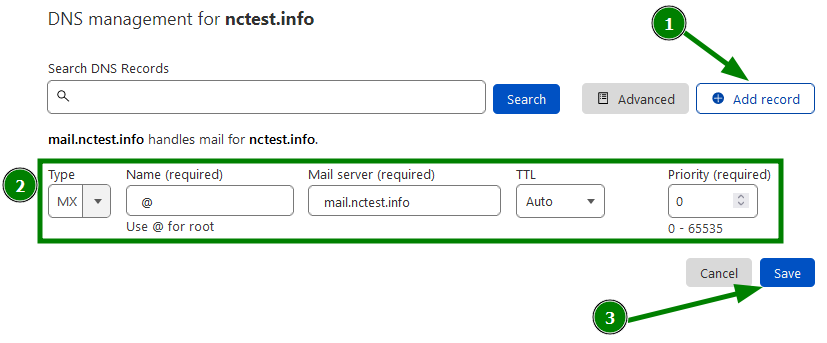
3. Add the following DNS records using 'Add Record' option:
Type: MX | Name: @ | Server: mx1.privateemail.com | Priority: 10 | Automatic TTL
Type: MX | Name: @ | Server: mx2.privateemail.com | Priority: 10 | Automatic TTL
Type:CNAME | Name: mail | Domain name: privateemail.com | Automatic TTL
Type: CNAME | Name: autoconfig | Domain name: privateemail.com | Automatic TTL
Type:CNAME | Name: autodiscover | Domain name: privateemail.com | Automatic TTL

Type: TXT | Name: @ | Content: v=spf1 include:spf.privateemail.com ~all | Automatic TTL
Type: TXT | Name: default._domainkey | Content: generate and copy string using this guide
NOTE: For Private Email subscriptions purchased on or after June 2, 2026, DKIM record's name is privateemail._domainkey. This DKIM record is available immediately upon ordering the PE subscription - creating a mailbox is no longer required.
Type: TXT | Name: _dmarc | Content: v=DMARC1; p=reject; rua=mailto:postmaster@yourdomain.com
NOTE: SPF, DKIM and DMARC records is a mandatory entry to ensure outgoing mail works correctly. It can be generated only after a mailbox has been created.
Type: SRV |
Service name: _autodiscover |
Protocol: TCP
| Name: yourdomain.com
| Priority: 0
| Weight: 0 |
Port: 443
| Target: privateemail.com
| Automatic TTL
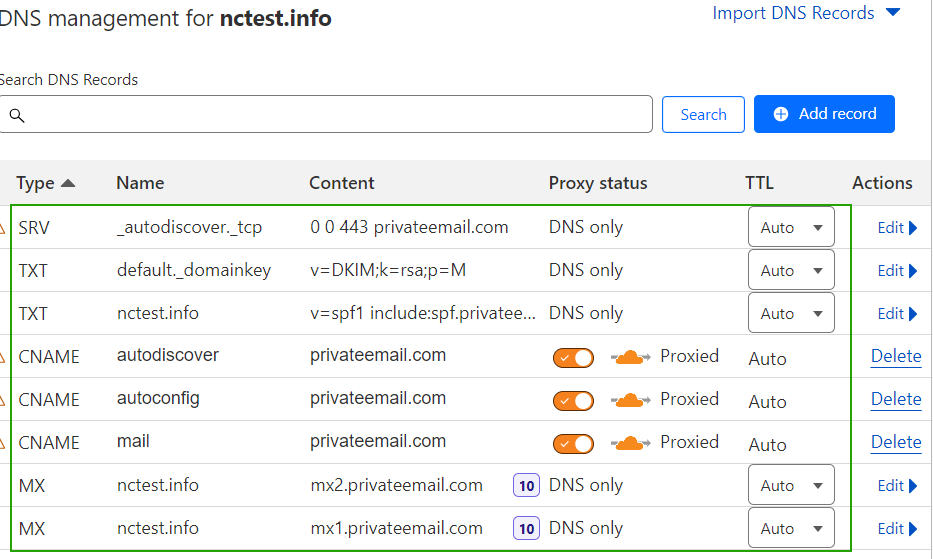
4. Check that all the records are added and wait 30-40 minutes for the records to propagate:
How to set up cPanel Email DNS records at Cloudflare
1. Log into your cPanel and Cloudflare accounts in two separate browser tabs.
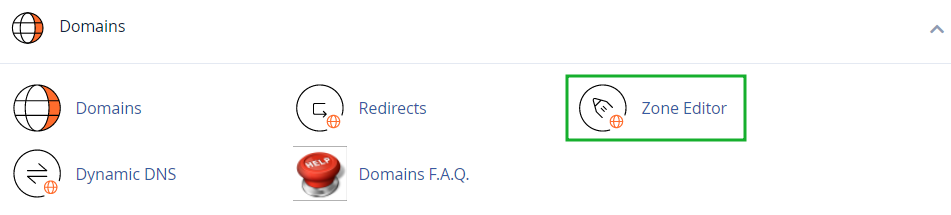
2. 1. Go to cPanel > Domains section > Zone Editor menu:
3. Click the Manage button next to the domain which DNS zone you would like to edit:

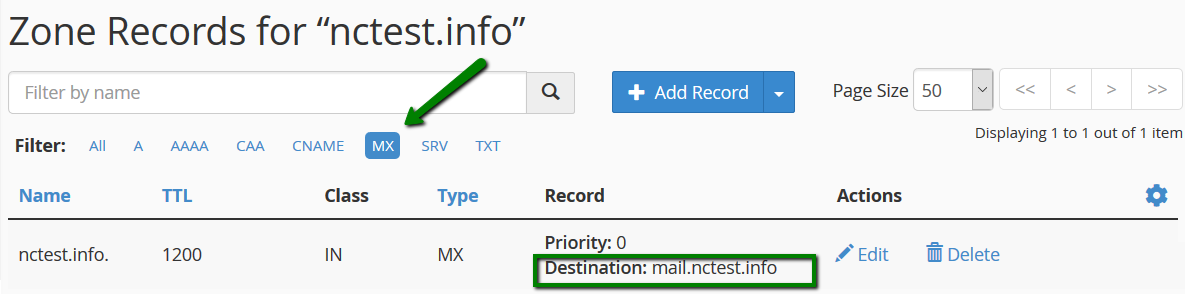
Choose the MX type and copy the MX record(s). You will see either a default email MX record (custom MX record):
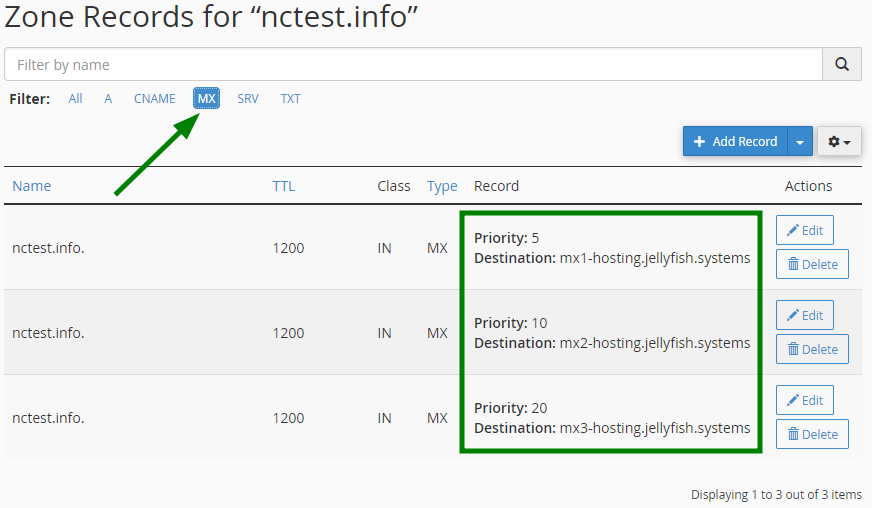
or Jellyfish MX records:
3. Go to Cloudflare > DNS:
Add the MX record(s) you copied using the 'Add record' option:
Type: MX | Name: @ | Server: the record you copied | Priority: copy the priority | Automatic TTL
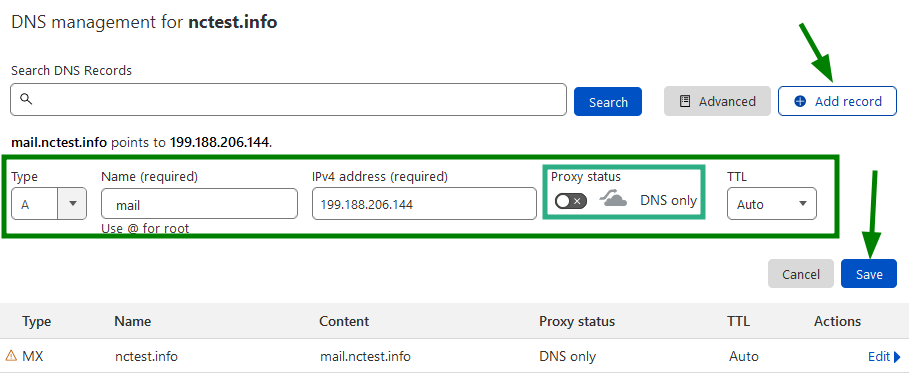
IMPORTANT: When you're setting up MX record for the cPanel email service, it is also needed to add an A record for the "mail" subdomain with the necessary cPanel IP address:
Type: A | Name: mail | IP address: cPanel IP | Automatic TTL
Also, make sure that the proxy status is disabled for this record so that your emails were routed correctly.
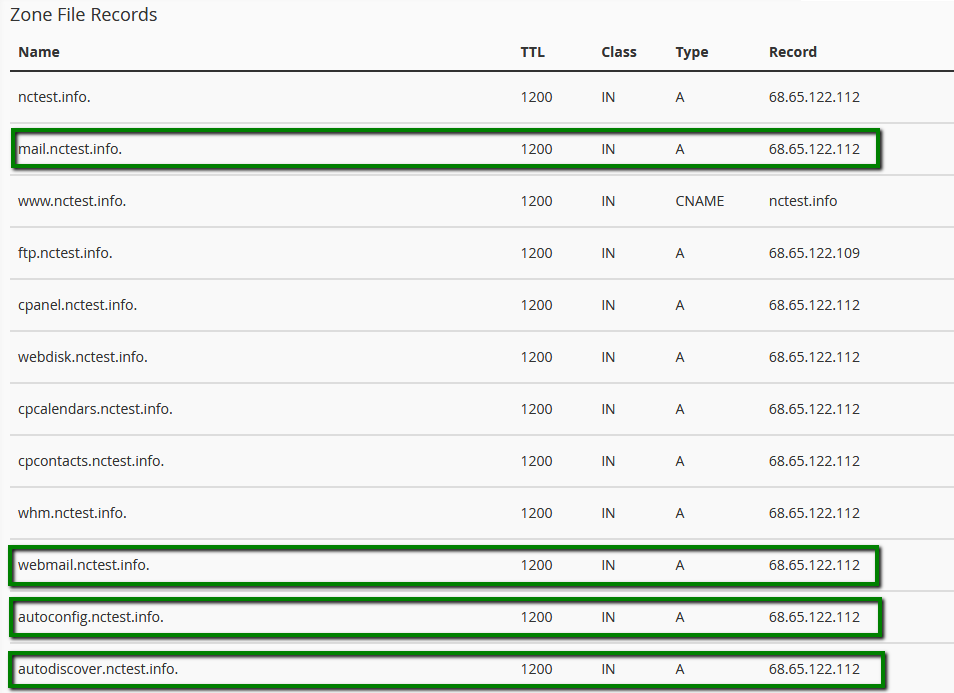
4. Go back to cPanel > Zone Editor > Manage > All and copy the following DNS records to Cloudflare:
Type: A | Name: webmail | IP address: cPanel IP | Automatic TTL
Type: A | Name: autodiscover | IP address: cPanel IP | Automatic TTL
Type: TXT | Name: @ | Content: v=SFP_value...| Automatic TTL

Check that all the records are added and wait 30-40 minutes for the records to propagate.
That's it!
