
DKIM is one of the essential records for an email service to function correctly. Messages signed with a valid DKIM signature are often prioritized in the delivery process, increasing the chances that they will reach their recipients' inboxes (rather than being filtered as spam or phishing attempts).
DKIM record is available immediately upon ordering the PE subscription and is unique to each subscription. If you already have a record entry in your account, refer to the second part of the guide to copy it.
IMPORTANT: DKIM should be configured together with SPF and DMARC records as part of a complete email authentication setup. Modern email providers increasingly rely on all three authentication methods to validate sender legitimacy and improve email deliverability.
To generate the DKIM record for Private Email in your Namecheap account:
1. Log in to your Namecheap account.
2. Go to the Private Email menu:

3. Then, click on Manage next to your domain:

4. Click on the Generate button under DKIM

5. Once done, you will see a message appear saying "DKIM has been generated", and you will see the values for the record:

6. Here, you'll also see the fields with your DNS records as well as your Public key.
Next, you'll need to add the corresponding TXT record to the DNS zone file for your domain:

7. Click "Copy" the DNS record field and add the DKIM record to the DNS zone of your domain by using these details:
NOTE: For Private Email subscriptions purchased before June 2, 2026, DKIM record's hostname is default._domainkey.
NOTE 1: For domains on BasicDNS, the TXT record should be configured automatically. If your domain is using our Web Hosting DNS (dns1.namecheaphosting.com and dns2.namecheaphosting.com), the TXT record should be
Normally, it takes 60 minutes for the changes to come into effect.
1. Sign in to your Namecheap account.
2. Go to the Private Email menu:
3. Then, look for your Private Email subscription in the list and click on Manage next to it:
4. Click on the Show DKIM button under DKIM:

5. After that, you'll be able to review the fields with the DNS record, as well as Public key value:

6. Now you can copy the required data from the DNS record field:
NOTE: For Private Email subscriptions purchased before June 2, 2026, DKIM record's hostname is default._domainkey.
NOTE 1: If your domain is pointed to our Basic or Premium DNS, the record is to be added manually in your Namecheap account. If your domain is pointed to our Web-Hosting nameservers (dns1.namecheaphosting.com and dns2.namecheaphosting.com), the TXT record should be added manually in your hosting cPanel.
Important: When adding a DKIM record, make sure not to enter only the beginning part (for example, v=DKIM1; k=rsa;) in one field and place the rest in another. Instead, the record should be split correctly: the first field should contain as much of the value as possible, and the remaining part of the record should go into the second field. This ensures that the DKIM record is recognized properly and passes validation.
For domains on third-party nameservers, the TXT record should be set up on the side of your current DNS provider.
Once the record is configured, it can take up to 60 minutes for it to start working properly.
If a DKIM record is not valid, it can cause issues with email delivery. Incorrectly configured DKIM records can cause legitimate emails to be marked as spam or rejected by receiving servers. Therefore, it is very important to verify that the DKIM configuration is correct as soon as it is added to your DNS zone. Ensure that the DKIM record is added correctly; this will help maintain the security of your messages and increase the reliability of their delivery.
There are many tools online that allow you to verify a record. For instance, you can use Google Toolbox: https://toolbox.googleapps.com/apps/dig/#TXT/
NOTE: Make sure you check an entry that is configured for the subdomain: privateemail._domainkey.domain.com. Here is an example of how to check the DKIM record for the nctest.us domain:


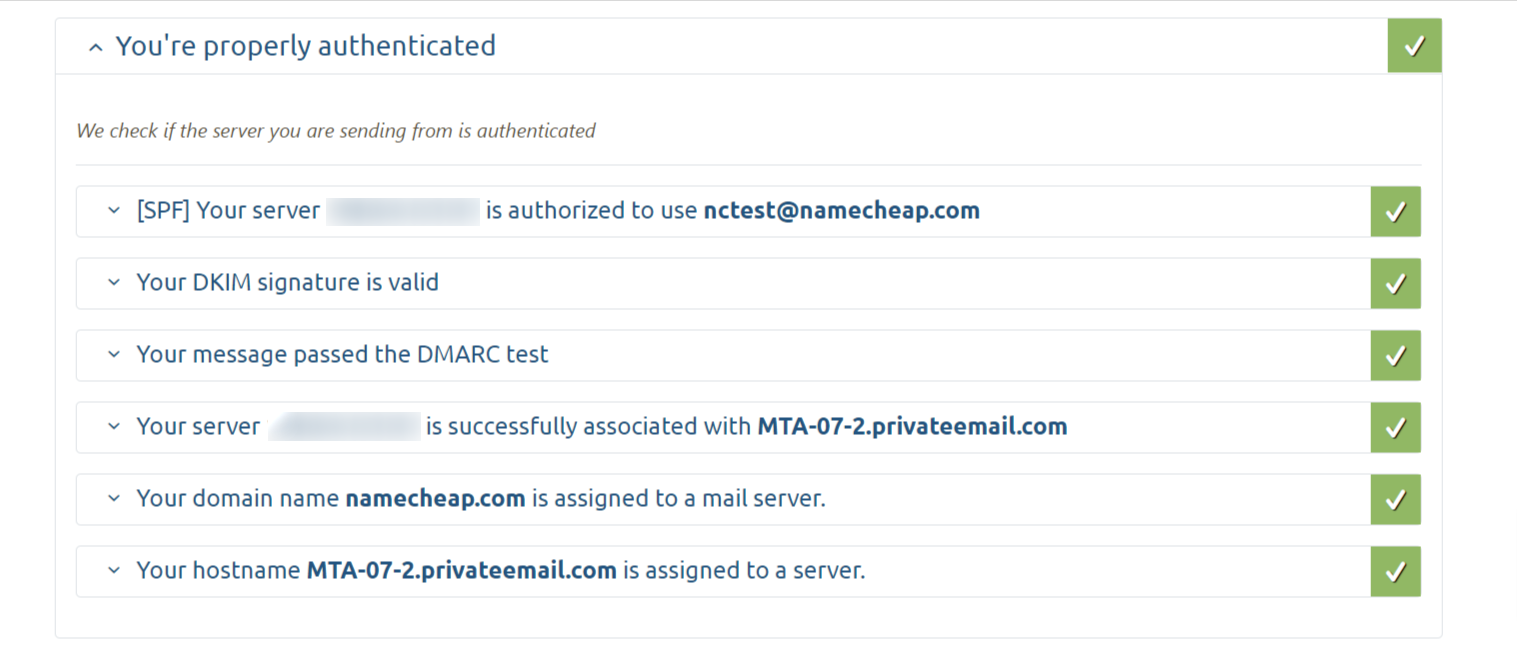
We also recommend that you use Mail Tester, which checks the necessary records required for domain authentication (including DKIM), and the spam score of your messages: https://www.mail-tester.com/
If you have specific questions or concerns about DKIM, it is best to contact our Support Team.
Need help? We're always here for you.