
Need a hand installing your SSL? We can do it for you.
As soon as an SSL certificate is activated, and all validation requirements are met, the SSL certificate will be issued and sent to your administrative contact email address. You can also download the SSL certificate in your Namecheap account. When the SSL certificate is received, you are welcome to start the installation process.
The most frequent SSL tasks for Plesk panel are described below:
Depending on the Plesk account type, you can see two web interfaces:
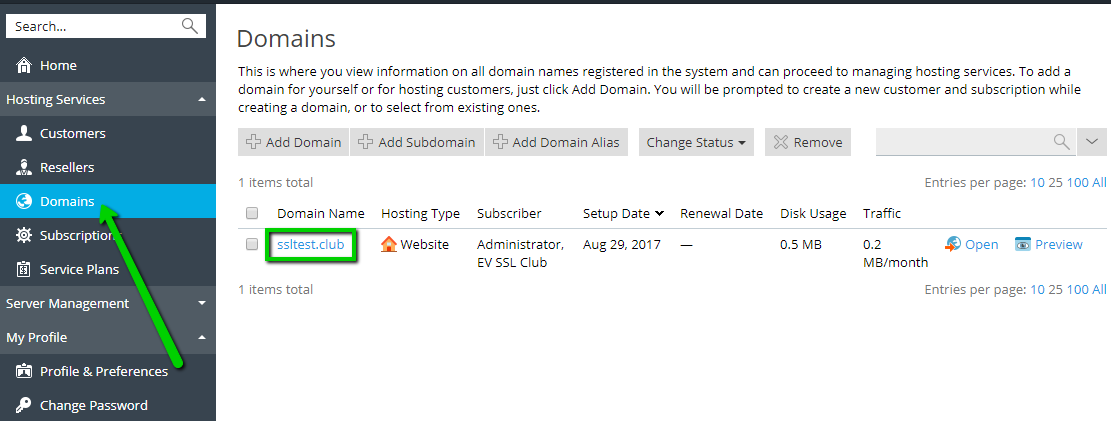
1) For Service Provider view, go to Domains section and click on your domain name that you are going to secure:
2) Click on SSL/TLS Certificates.
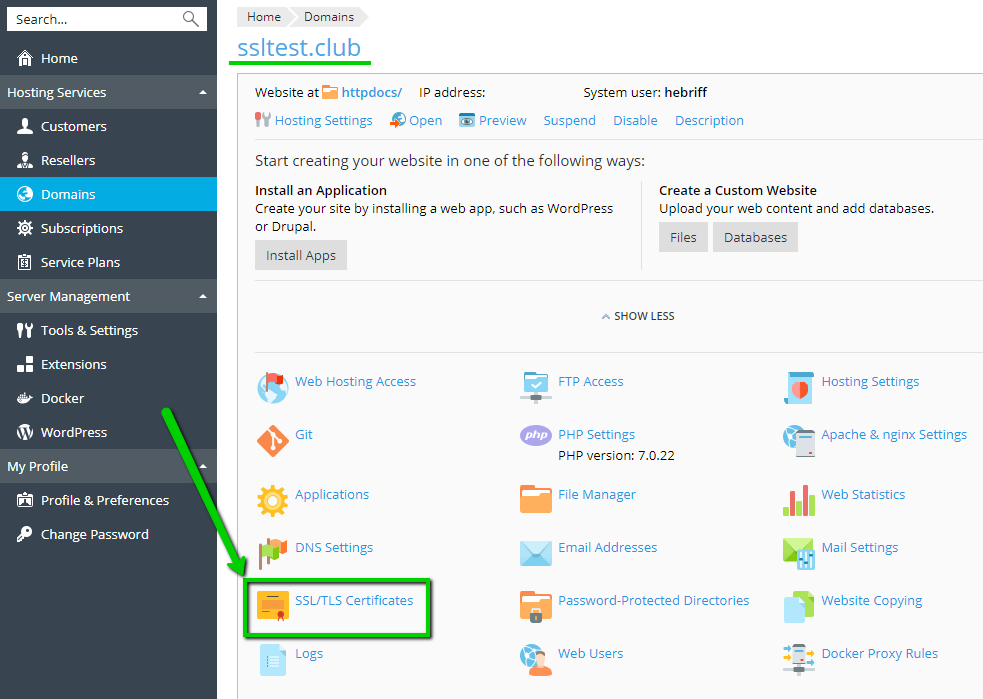
3) For Power User view, go to Websites & Domains >> Find the right domain name and click SSL/TLS Certificates.

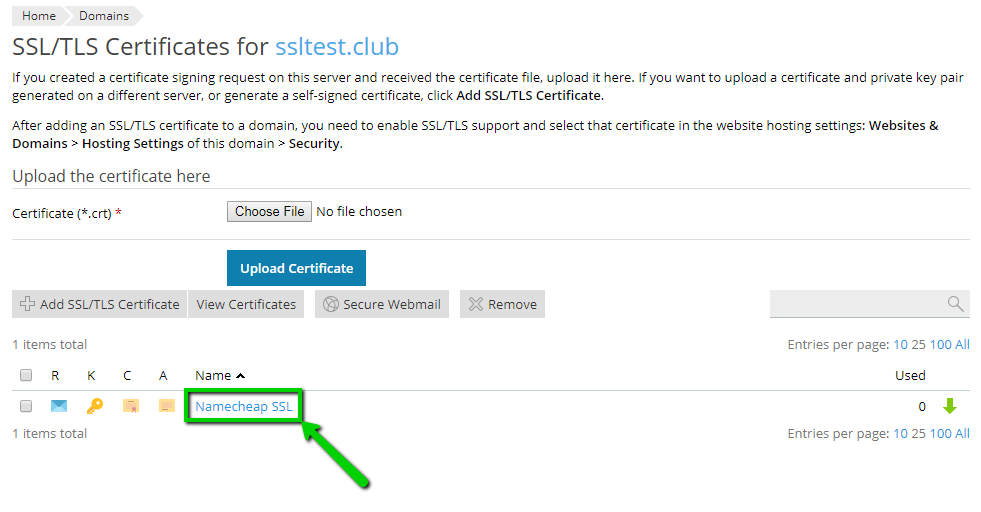
4) Further instructions will be the same for both views. You will see the title of your SSL for which CSR code was generated, click on it to proceed. The faded C (certificate) and A (CA certificate) icons indicate that SSL certificate file and CA bundle have not uploaded yet.
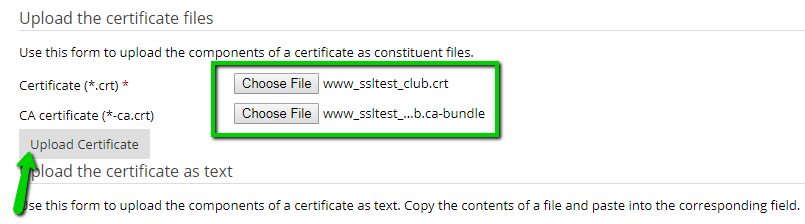
5) On the next page you will see the option to upload SSL certificate file (.crt) and CA certificate (.ca-bundle) which can be downloaded in your Namecheap account.
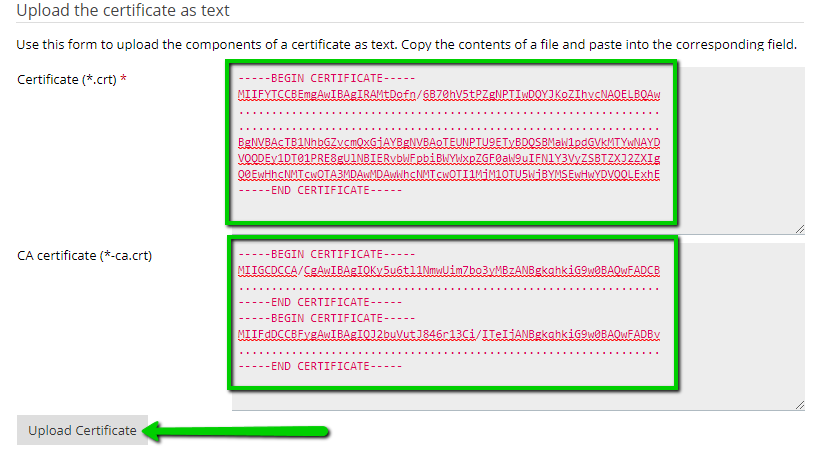
6) Also, it is possible to upload SSL certificate and CA certificate in text format. Make sure that there are no extra spaces in CA certificate code:
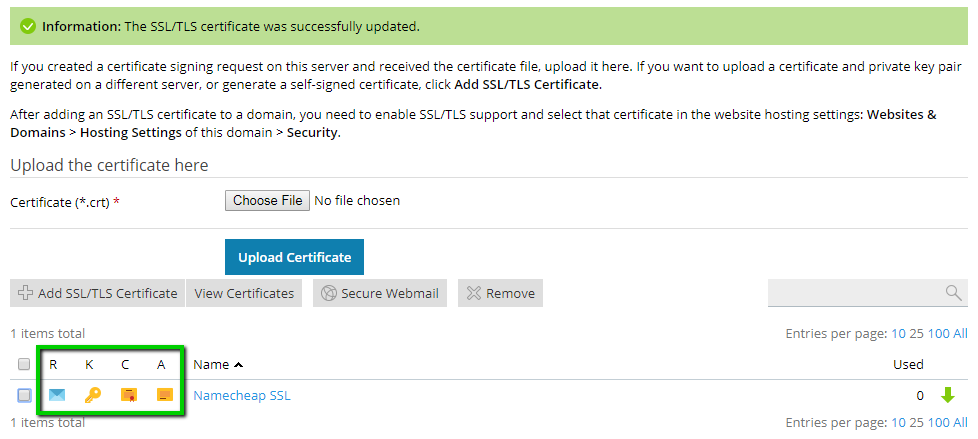
7) Once done, you will see the successful message and certificate (C) and certificate authority (A) icons will become brighter.
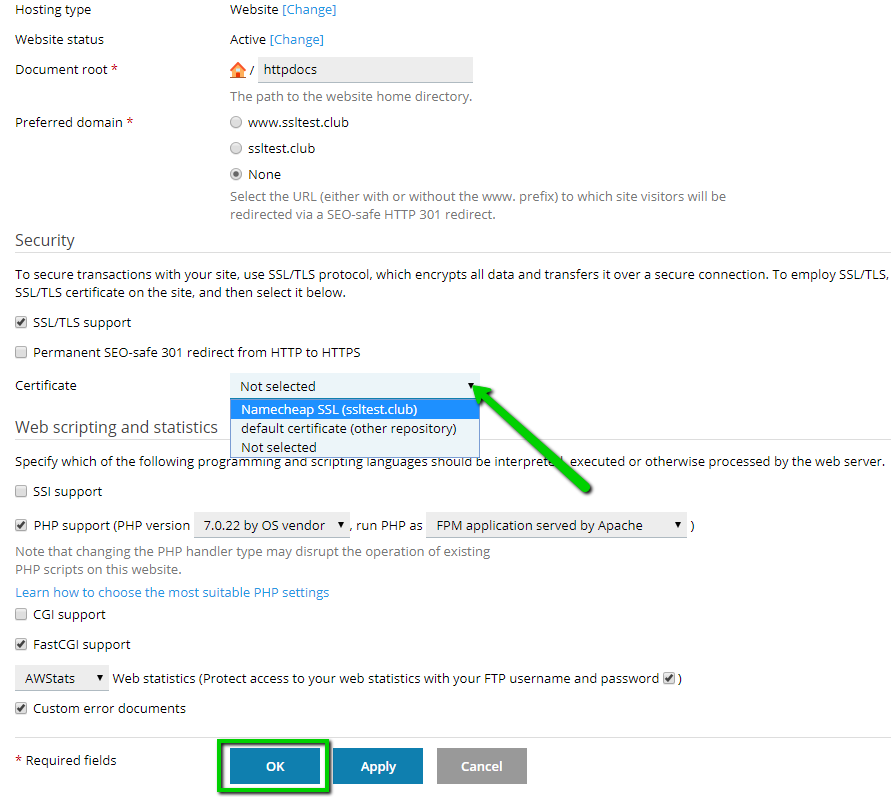
8) Next step is to assign SSL certificate to the hosting services:

9) Find your SSL certificate in drop-down list and click OK.
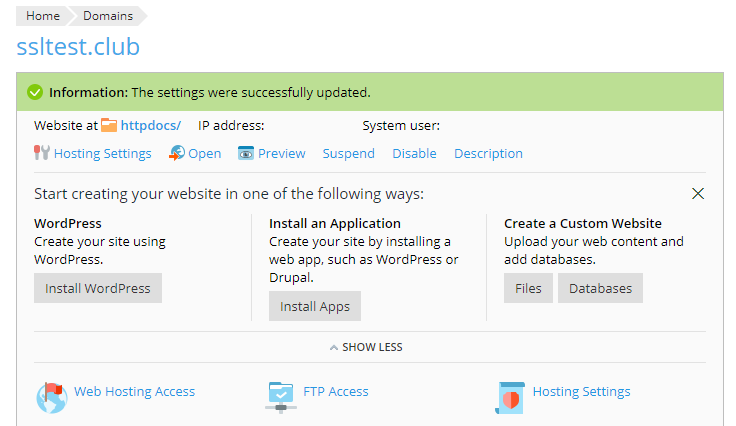
10) Successful SSL installation will be indicated with this message.
You can also check it using this tool: https://decoder.link/sslchecker
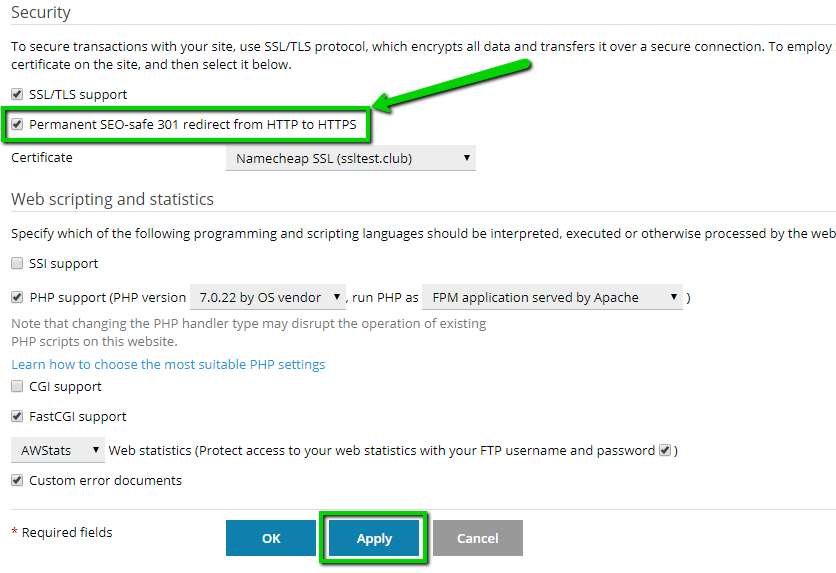
To force HTTPS connection, you need to choose Hosting settings (step 8 in the first section), tick Permanent SEO-safe 301 redirect option and click Apply.
1) Go to Domains section and choose your domain name for Service Provider view (step 1-2 in the first part) or Websites & Domains (step 3 in the first section).
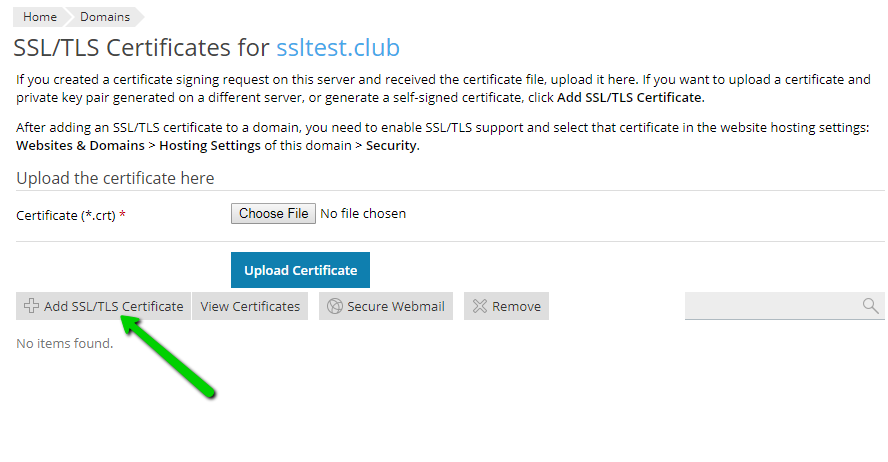
2) Click Add SSL/TLS Certificate.
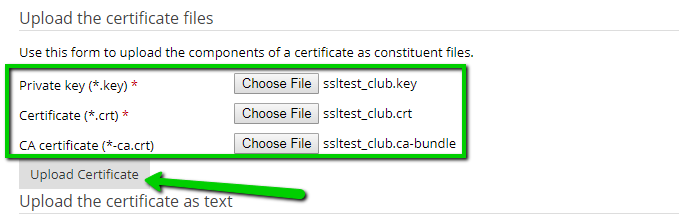
3) Put the name of SSL certificate, upload Private key, SSL certificate and CA certificate (CA bundle) either in separate files:
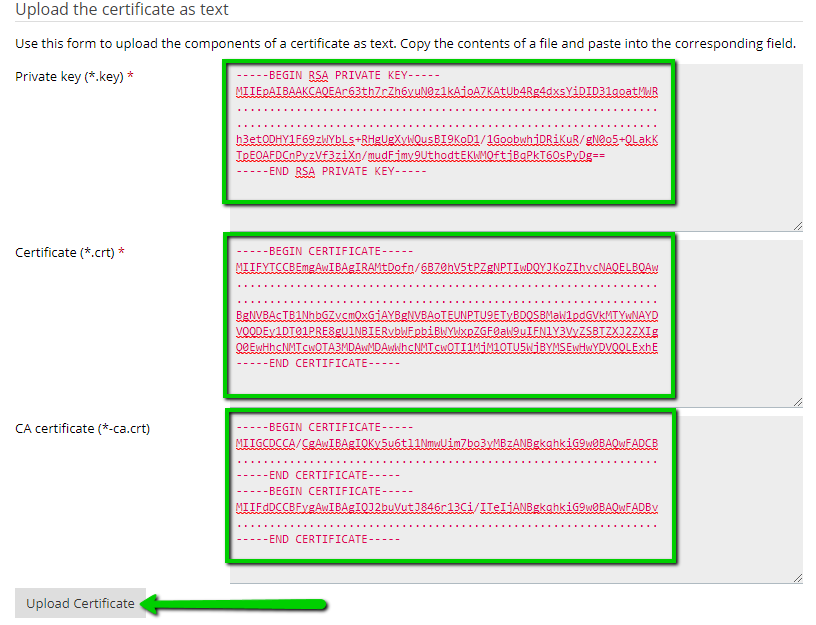
OR in text format:
4) Choose the domain name (steps 1-2 OR 3 from the first section) and complete steps 8-10 in the first part to assign this SSL certificate to the particular domain name. SSL installation can be checked by this tool: https://decoder.link/sslchecker
In order to use the same SSL certificate (Multi-Domain, Wildcard, etc.) for other domain names, or hosting servers the private key is required.
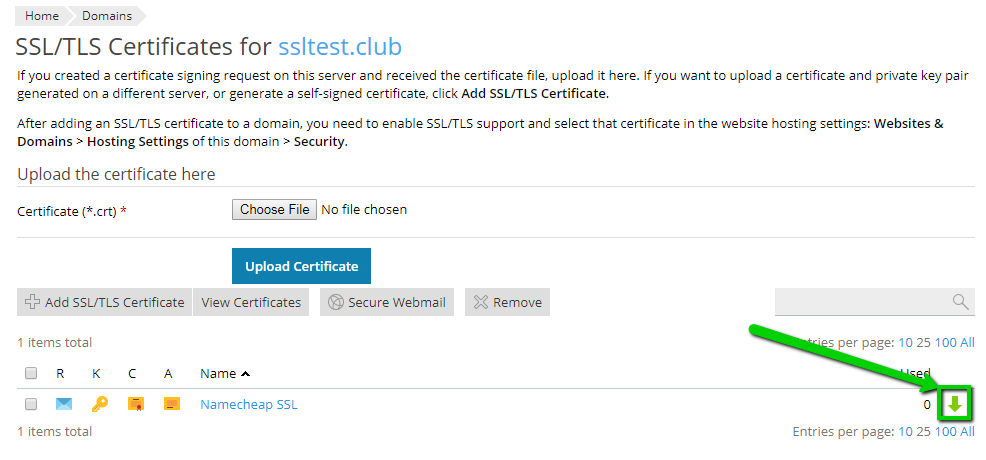
If you successfully installed SSL certificate to the Plesk Panel, the private key along with all SSL certificates can be downloaded following the steps 1-3 from the first part and clicking on green arrow. The SSL certificates and the private key will be provided in PEM format.
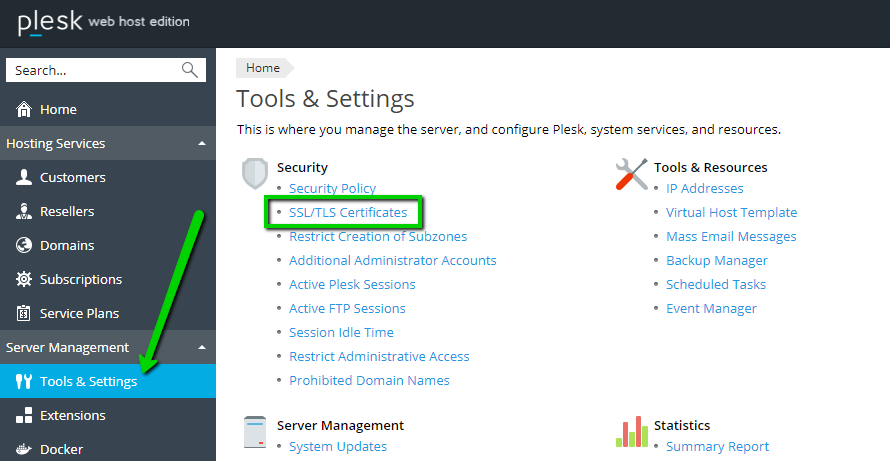
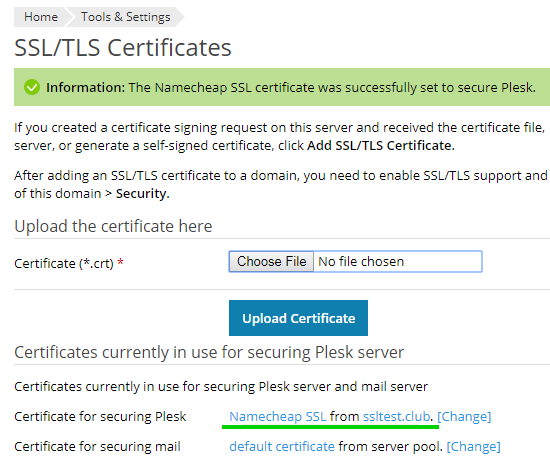
1) In order to secure Plesk login page and mail services (SMTP, IMAP, POP3) you need to login as Administrator or have administrator privileges. Go to Tools and Settings and click SSL/TLS certificates.
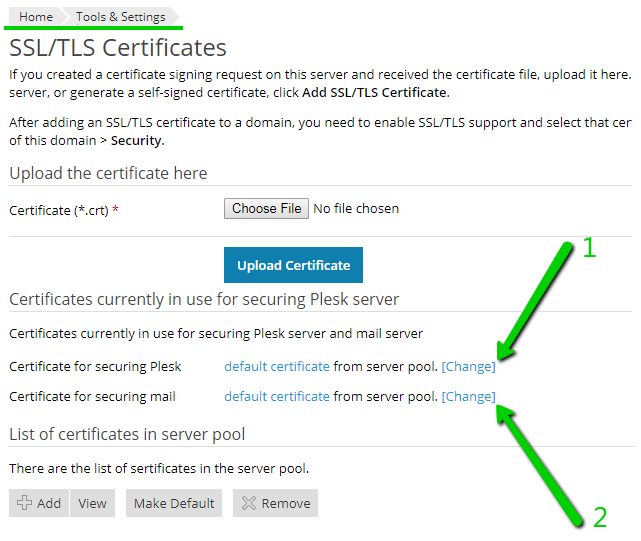
2) You will see two options: 1) Securing Plesk (login page) and 2) Securing mail.
3) Choose correct SSL certificate and click OK:
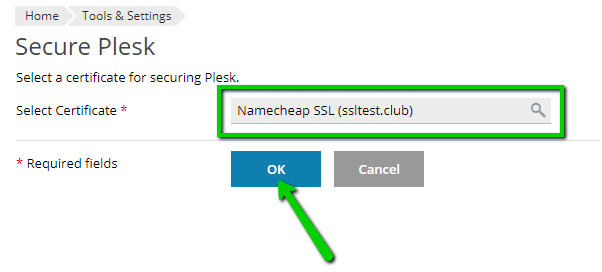
4) The successful installation will indicate the following message:
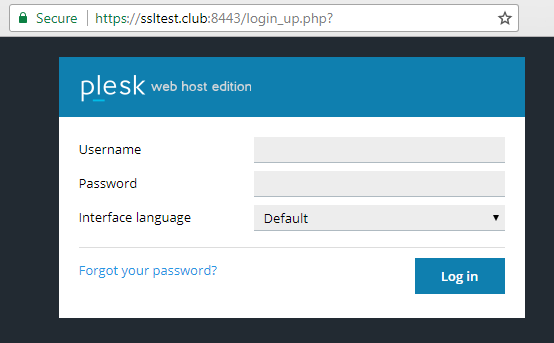
5) You can check the login page by entering your domain name and 8443 port:
6) To secure mail services SMTP (25, 465), POP3 (110, 995), IMAP (143, 993) with SSL certificate, follow steps 1-2 from this part and click on the second option Change. The SSL installation process will be the same as shown in steps 3-4 in this part.
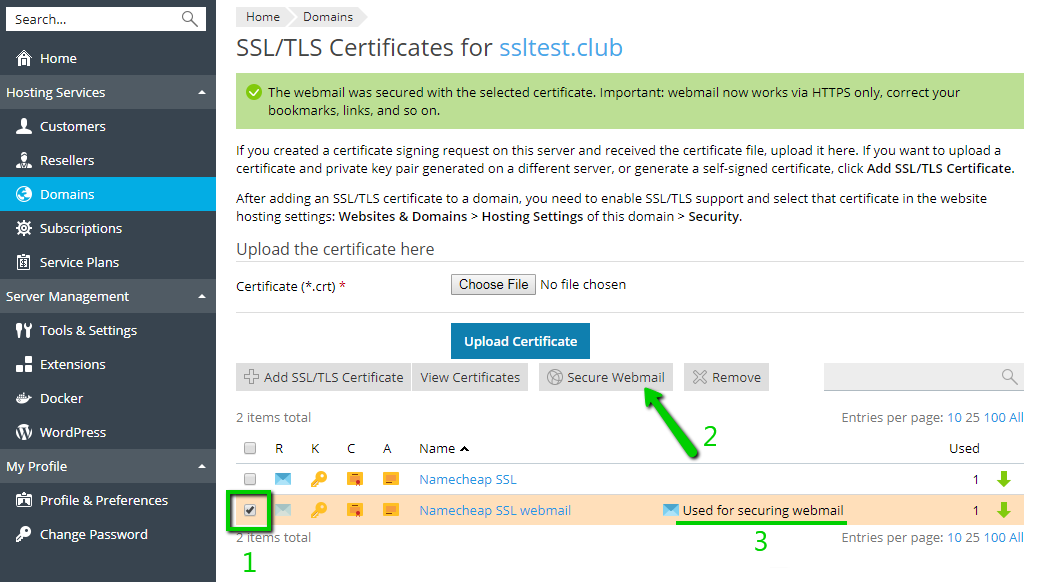
1) To secure webmail interface, go to Domains section and choose your domain name for Service Provider view (step 1-2 from the first part) or Websites & Domains (step 3 in the first part) and click SSL/TLS Certificates.
2) Choose SSL certificate, click Secure Webmail and check a successful notification.
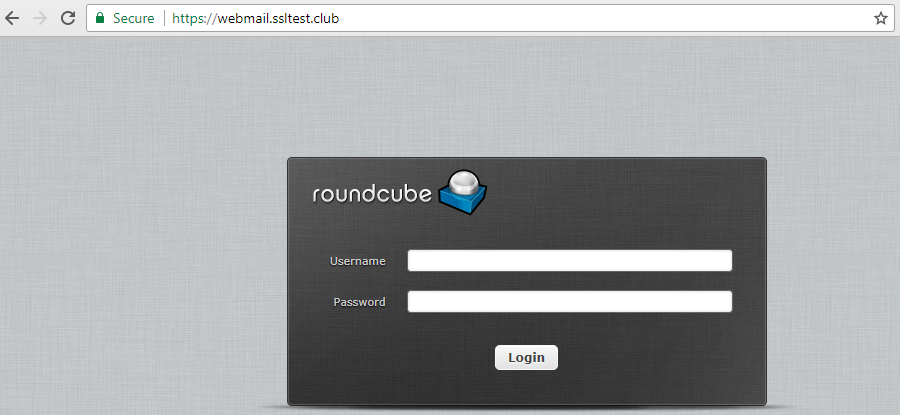
3) You can check the webmail service using webmail subdomain along with your domain name in this format: https://webmail.example.com:
That’s it!
Need help? We're always here for you.