To create your WordPress website, EasyWP lets you use a free temporary domain name or your real domain name.
If you would like to change the domain name for your existing EasyWP website, you’ll find the instructions below:
For a third-party domain
For a Namecheap-registered domain and third-party domains with Namecheap FreeDNS
How to point your domain using ALIAS records
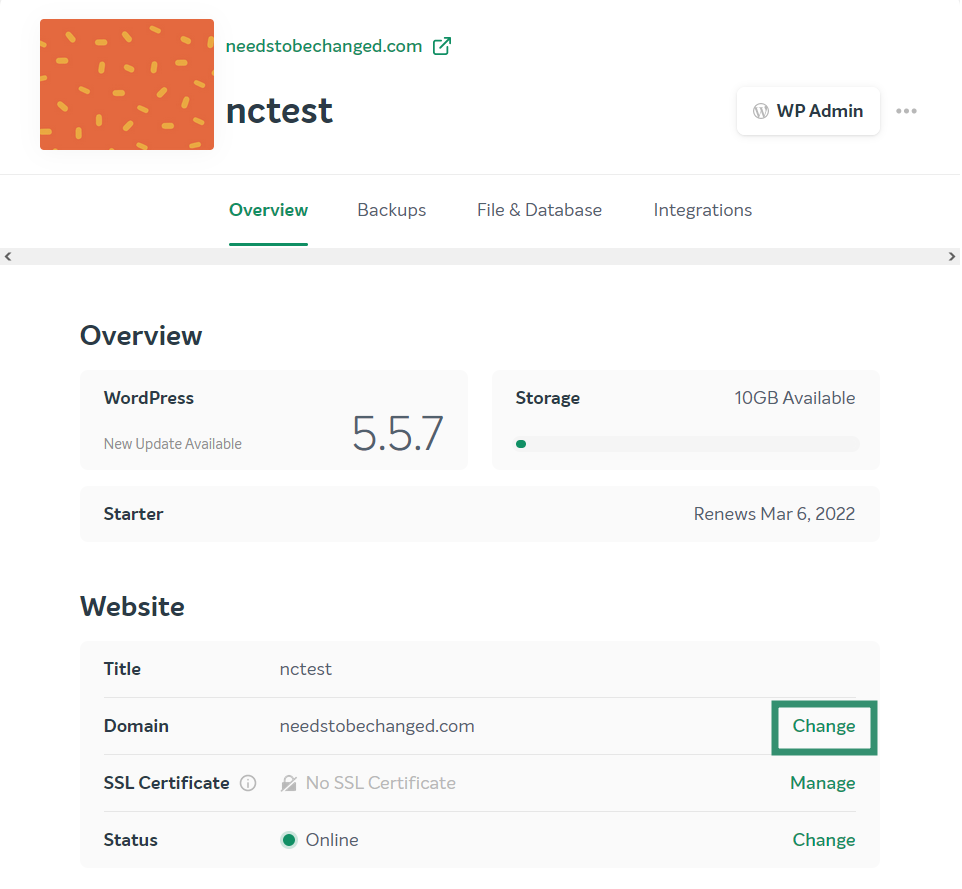
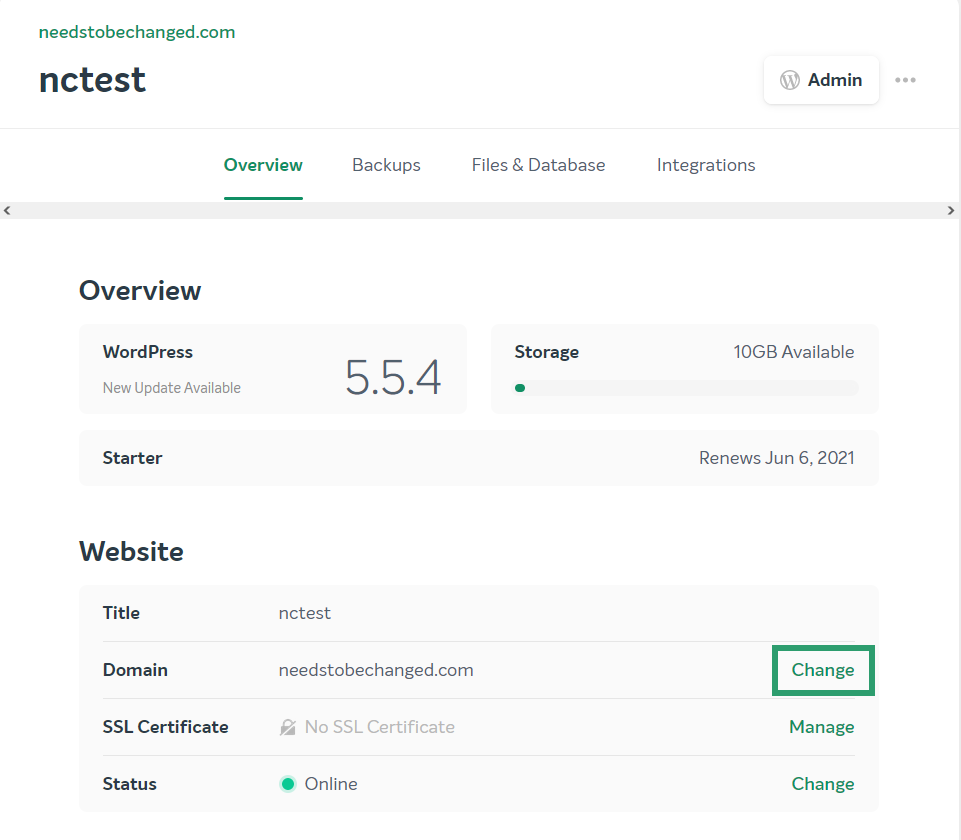
1. Within your
EasyWP dashboard, choose the current domain name and click the Change button next to it:
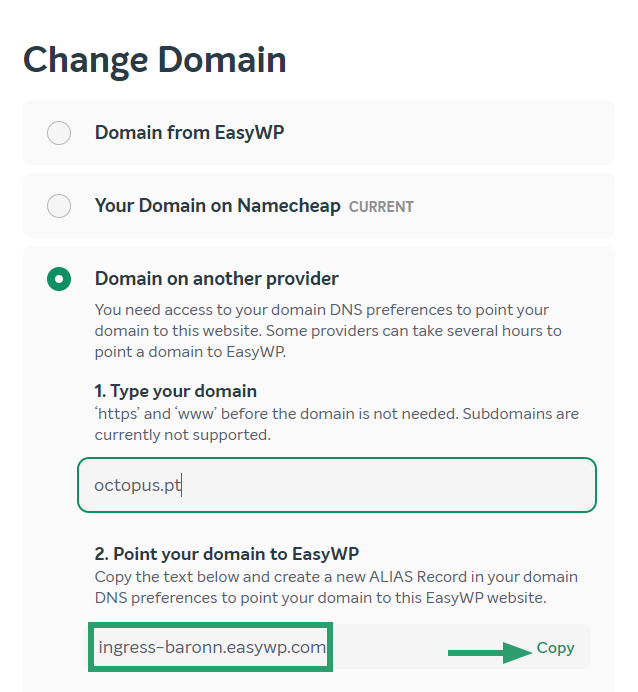
2. Select the Domain on another provider option and paste the domain name into the required field:
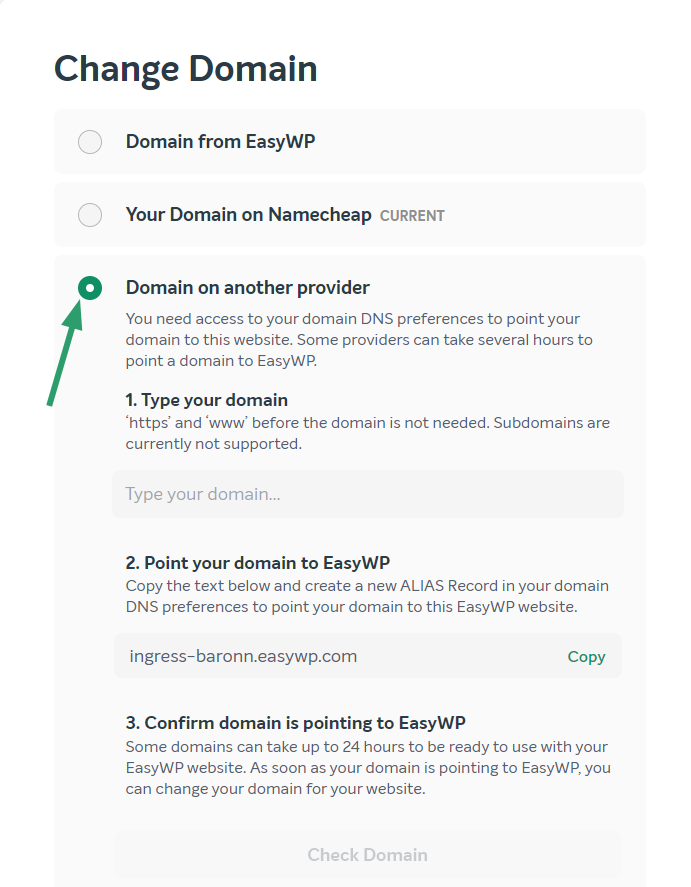
After choosing a domain name, the ALIAS record will be generated for it. Copy the generated ALIAS and create the corresponding records for your bare domain name (it is set up for '@' sign with most registrars) and the 'www' subdomain on the side of your DNS provider:
NOTE 1: If you are adding the provided records on CloudFlare's side or in a similar service where your host records can be proxied, make sure to disable proxying as proxying will disconnect records from EasyWP server due to the ALIAS/CNAME records specifics.
NOTE 2: After the ALIAS record has been copied and added to the host records, it can take up to 24 hours to take effect for the domain.
You can check if the propagation completed successfully clicking on the Check Domain button.
If the domain is already pointed to EasyWP, you will see the next record:

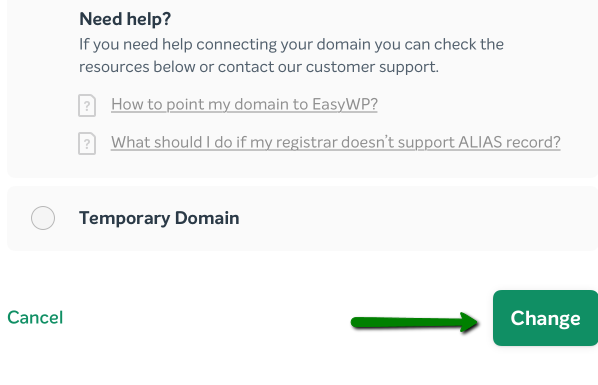
Feel free to proceed with the domain change by clicking on the Change button:
PLEASE NOTE: In some cases, the
ALIAS record feature can have another name on the third-party registrar's side, like
ANAME record,
CNAME Flattening, etc. Using these options, instead of the ALIAS one, will be acceptable too. As CloudFlare has CNAME Flattening enabled on their end, you can use their CNAME records to point your domain to the EasyWP servers too.
Not all domain registrars support ALIAS records. If your registrar does not provide this option, you can
point your domain via A records directly. You would need to create A record for your bare domain name (it is set up for '@' sign with most registrars) and the 'www' subdomain per each IP assigned to your server.
These are the records you would need to configure using the IP addresses specified in the table below:
1) Name: @ >> Type: A record >> Value: IP address (1) according to your ALIAS record
2) Name: @ >> Type: A record >> Value: IP address (2) according to your ALIAS record
3) Name: www >> Type: A record >> Value: IP address (1) according to your ALIAS record
4) Name: www >> Type: A record >> Value: IP address (2) according to your ALIAS record
Please use both IP addresses from the list when creating A records to configure a reliable connection to the server.
Bellow, you can find the list of ALIAS records that can be assigned to your EasyWP subscription and their IP addresses respectively:
| ALIAS records | IP addresses |
|---|
| 1. | ingress-alpha.easywp.com | 162.255.118.65
162.255.118.66 |
| 2. | ingress-anacreon.easywp.com | 162.255.118.67
162.255.118.68 |
| 3. | ingress-bonde.easywp.com | 63.250.43.1
63.250.43.2 |
| 4. | ingress-cil.easywp.com | 63.250.43.3
63.250.43.4
|
5.
| ingress-comporellon.easywp.com | 63.250.43.5
63.250.43.6 |
6.
| ingress-cygni.easywp.com
| 63.250.43.7
63.250.43.8
|
7.
| ingress-baronn.easywp.com
| 63.250.43.9
63.250.43.10
|
8.
| ingress-cinna.easywp.com
| 63.250.43.11
63.250.43.12
|
9.
| ingress-daribow.easywp.com
| 63.250.43.13
63.250.43.14
|
10.
| ingress-derowd.easywp.com
| 63.250.43.15
63.250.43.16
|
11.
| ingress-earth.easywp.com
| 63.250.43.128
63.250.43.129
|
12.
| ingress-eos.easywp.com
| 63.250.43.130
63.250.43.131
|
13.
| ingress-erytho.easywp.com
| 63.250.43.132
63.250.43.133
|
14.
| ingress-euterpe.easywp.com
| 63.250.43.134
63.250.43.135
|
15.
| ingress-florina.easywp.com
| 63.250.43.136
63.250.43.137
|
16.
| ingress-fomalhaut.easywp.com
| 63.250.43.138
63.250.43.139
|
17.
| ingress-haven.easywp.com
| 63.250.43.144
63.250.43.145
|
18.
| ingress-helicon.easywp.com
| 63.250.43.146
63.250.43.147
|
NOTE: In case the IP addresses assigned to a specific ALIAS record have changed, you would need to update them manually on your registrar's side again. If you are using ALIAS records, no additional changes to your existing records will be required.
Another option to change the EasyWP domain name to an external one would be to set up
FreeDNS. For more information, feel free to refer to
this guide.
NOTE 1: If you set up FreeDNS for your domain name, the ALIAS record should be added to the DNS records as well. Please
follow these steps to add the ALIAS record in the Namecheap account.
NOTE 2: In case your domain is pointed to PremiumDNS, the domain will be available in the Domain on Namecheap drop-down menu.
You can find detailed instructions on how to connect your domain from the most popular providers to EasyWP in the Associated articles' part at the bottom of the page.
For a Namecheap-registered domain and third-party domains with Namecheap FreeDNS
1. Choose the current domain name from the EasyWP Dashboard and click the Change button next to it:
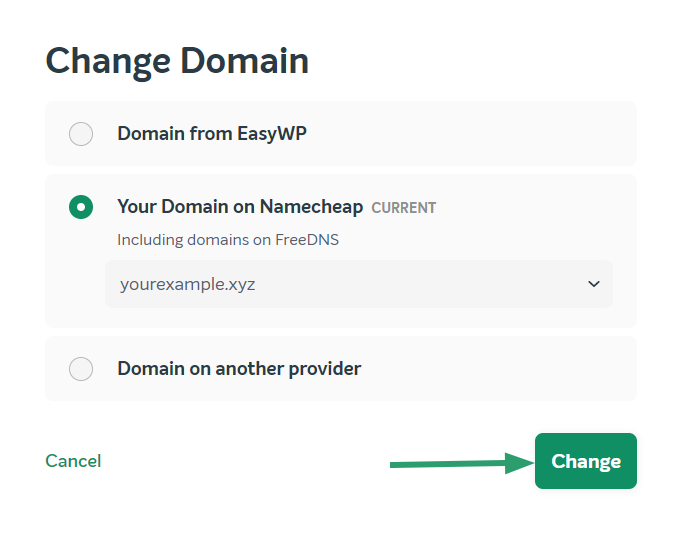
2. Click on the Your Domain on Namecheap option and choose the domain name from the drop-down menu. Once you’ve done this, click the Change button to apply the changes to your website:
PLEASE NOTE: The domain should be pointed to our BasicDNS, PremiumDNS or FreeDNS.
No files or settings will be deleted. The new domain name will display the content of the old domain name, and the site/home URL will change automatically. Also, the host records for the new domain will be set up automatically after the domain change.
3. Wait for the system to make the changes and check the Current Domain section to see the new domain name.
Congrats! Now you know how to change the domain name for your EasyWP website.
That's it!