There are two options to use your Hover domain with EasyWP: set up our FreeDNS or create a redirect.
To connect a domain name to EasyWP, feel free to set up our
FreeDNS as described in
this guide.
Another option will be to create a redirect for the domain. To perform the actions, follow the next steps:
1. Create a new EasyWP website using a free temporary domain by following the instructions provided here.
2. Sign into your Hover account.
3. Click on the domain name you would like to forward to your EasyWP website:

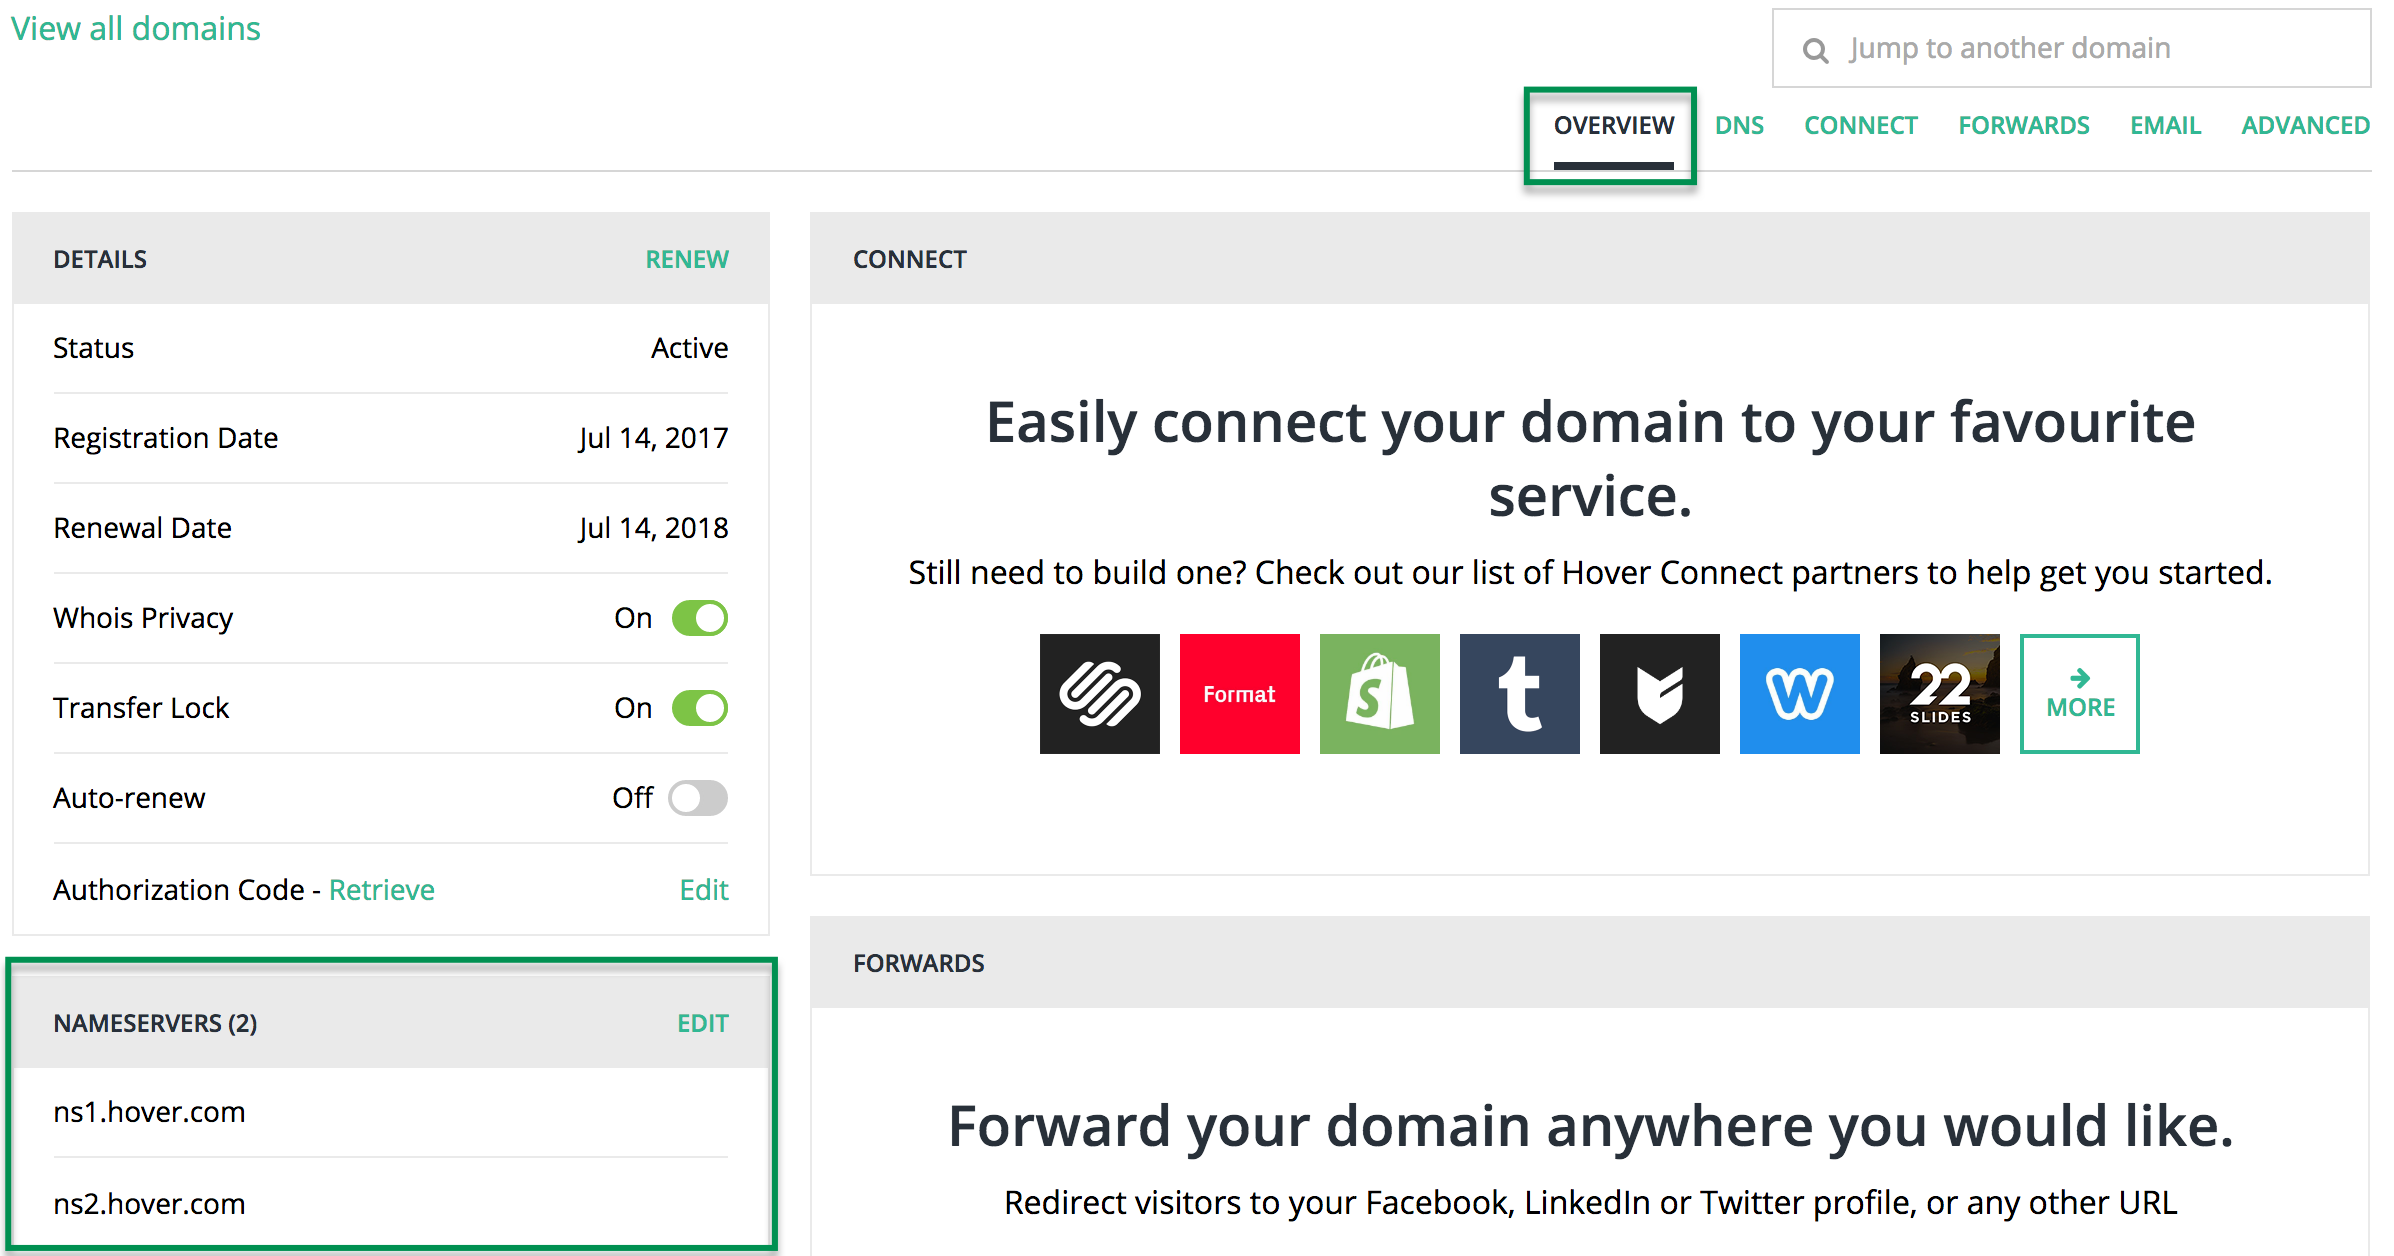
4. On the Overview tab make sure that your domain name is pointed at Hover nameserversns1.hover.com | ns2.hover.com:
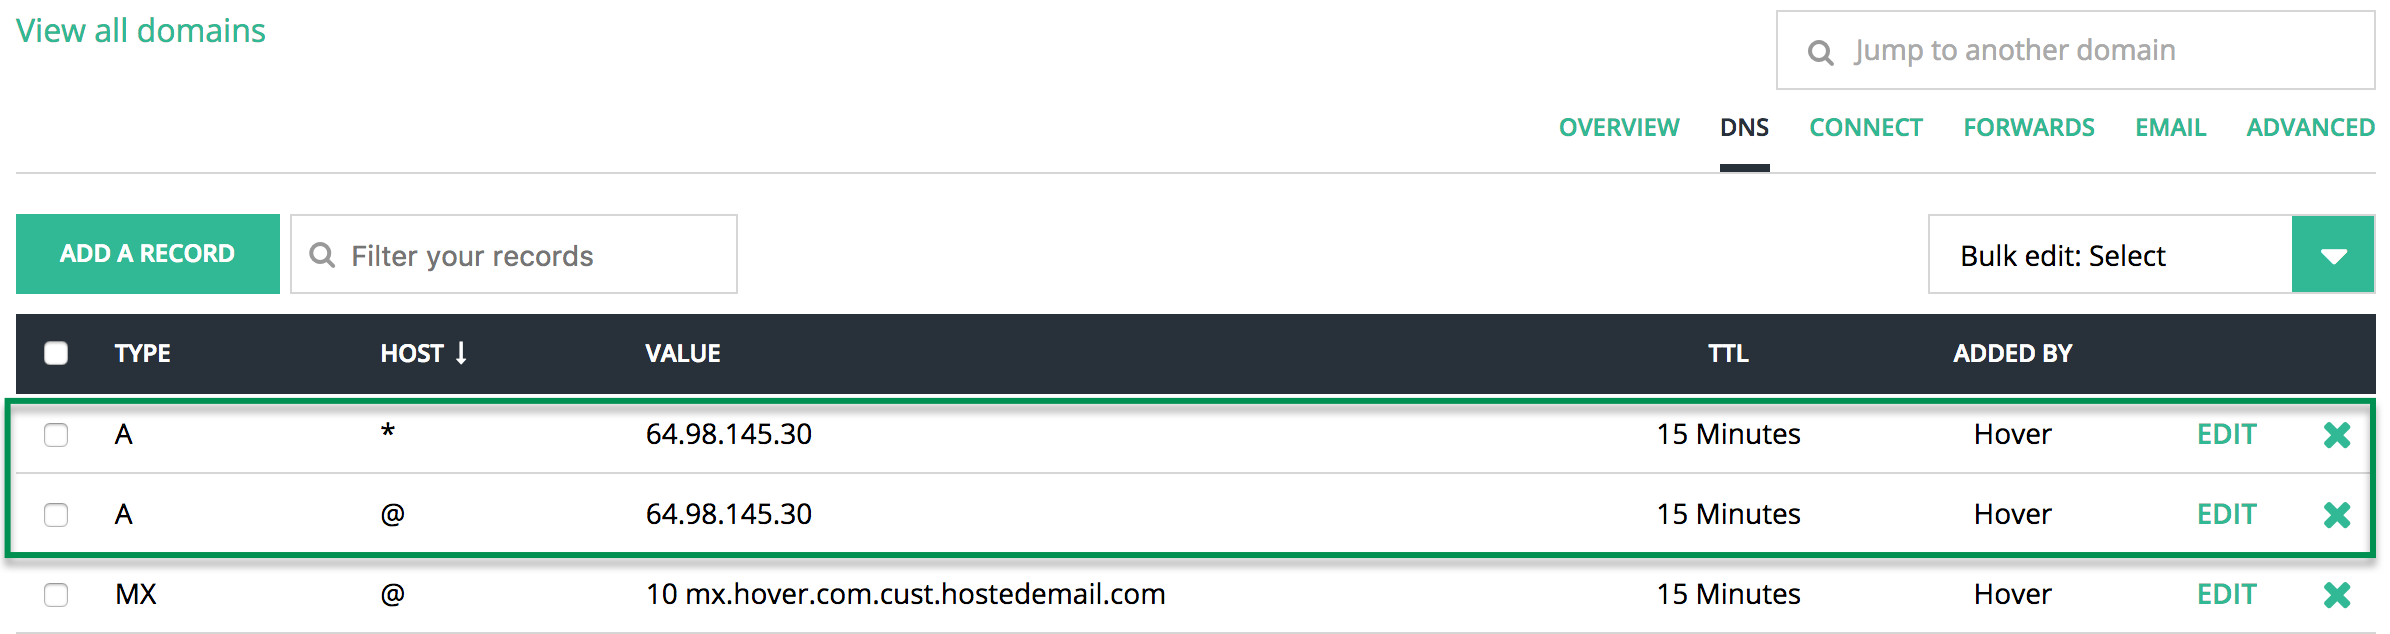
5. Select the DNS tab and make sure that the bare domain (@) and wildcard (*) A records are pointed at 64.98.145.30:
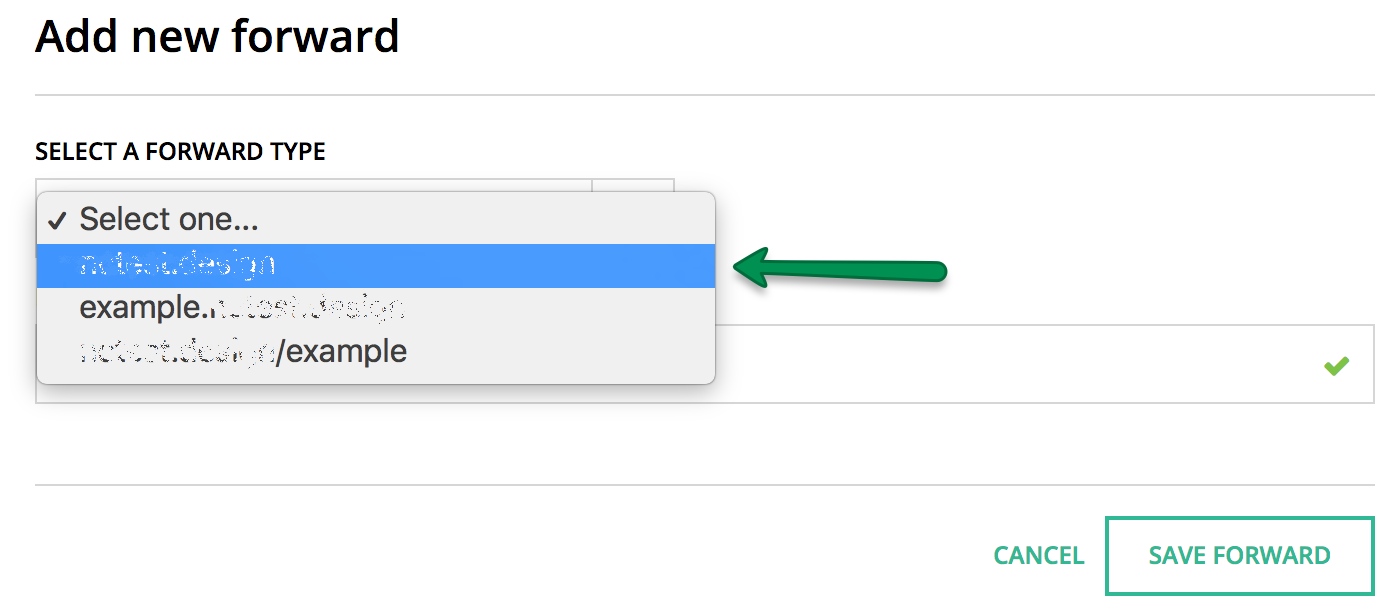
6. Get back to the Overview tab > navigate to the Forwards section > click on the FORWARD THIS DOMAIN button:

7. Choose your bare domain name from the drop-down:
8. Enter the full EasyWP FREE address (e.g. https://blog-user.ewp.live) in the Forwarding To field:
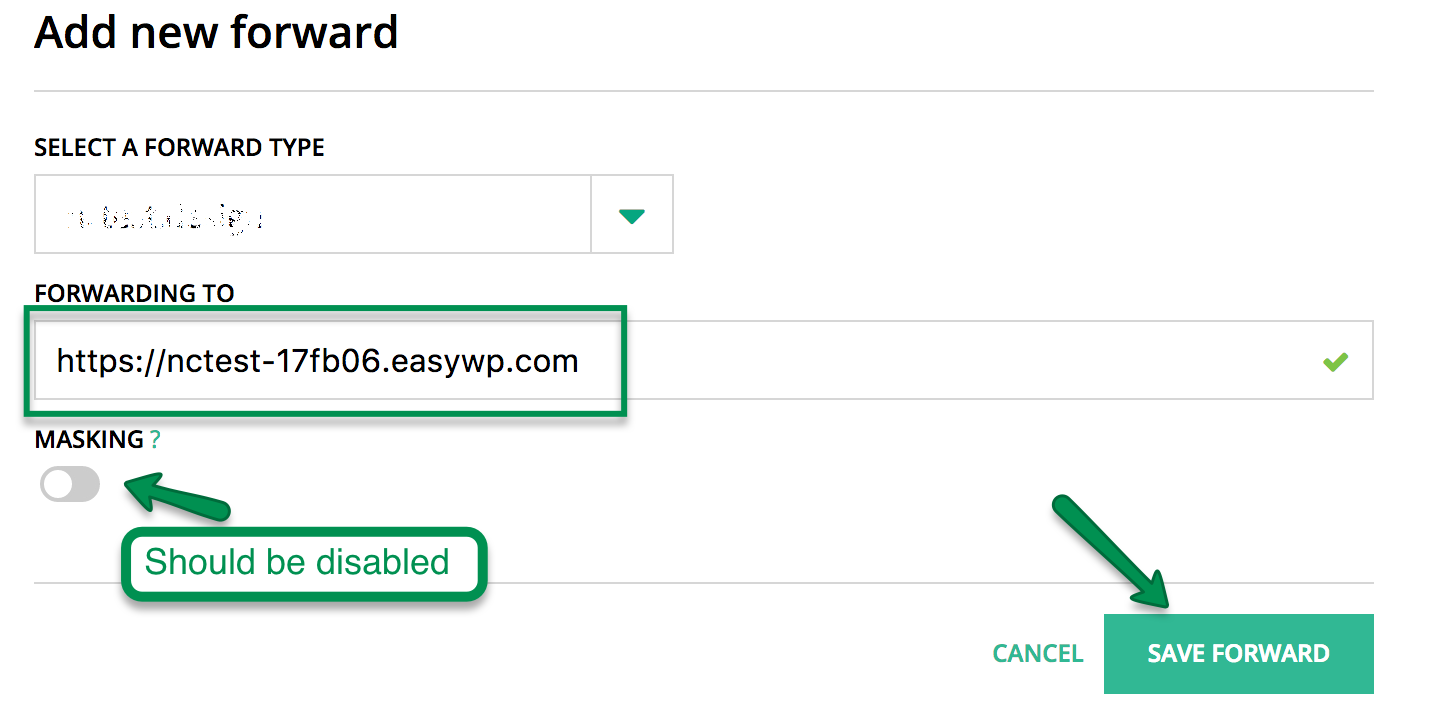
9. Click on the SAVE FORWARD button.
That’s it!
If you have any questions, feel free to contact our Support Team.
