If your domain is registered with Cloudflare or uses Cloudflare DNS, you can point the domain to your EasyWP website with the help of CNAME records.
Because it’s not possible to create an EasyWP website on a Cloudflare domain directly, first you’ll need to
create a website using our temporary domain name. It only takes a few minutes. After that, you’ll be able to change the temporary domain name to your Cloudflare domain.
Follow these steps:
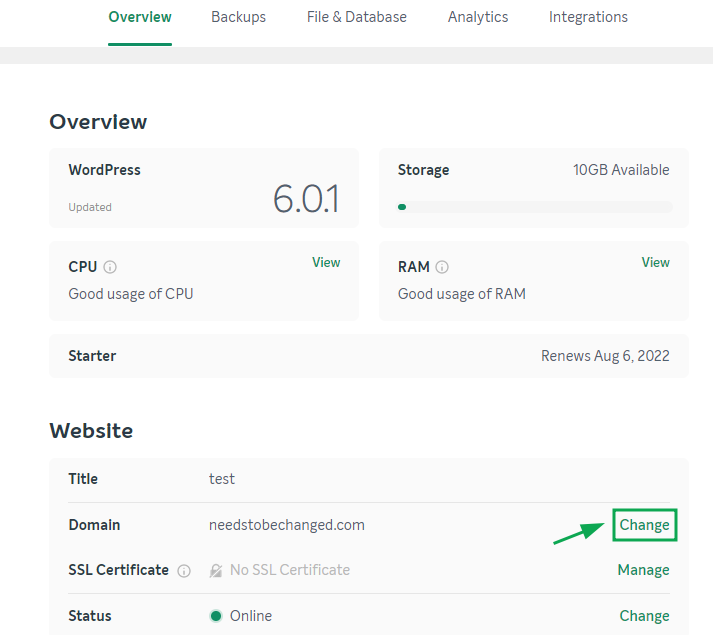
1. Login to your
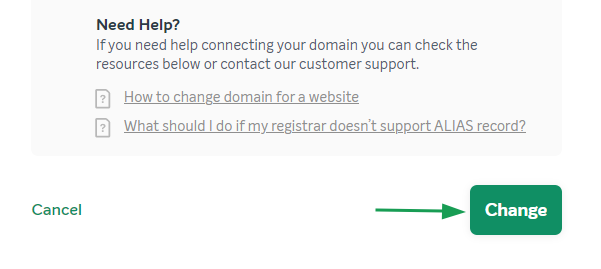
EasyWP dashboard. Choose the current domain name listed and click the Change button next to it.
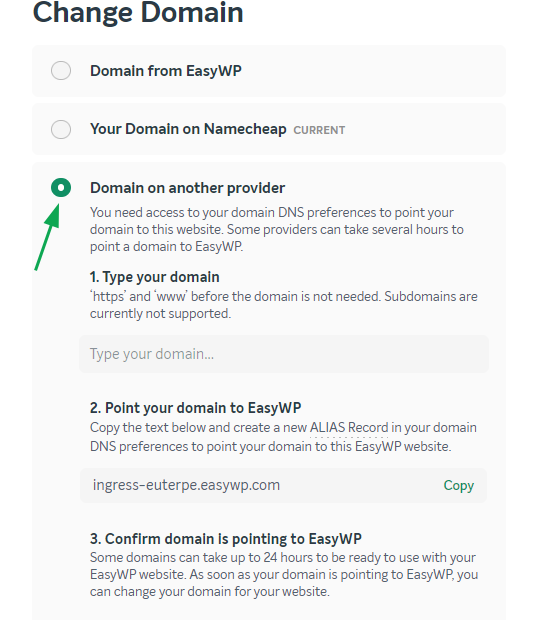
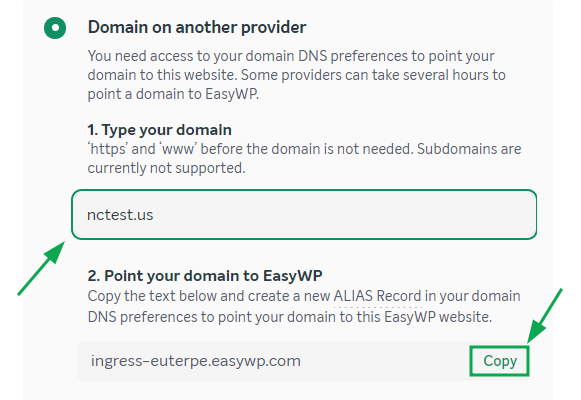
2. Select the Domain on another provider option. Cut and paste the domain name into the required field.
An ALIAS record will then be generated for it, which will be used for CNAME records. Copy the ALIAS record, so you can paste it into your Cloudflare account.
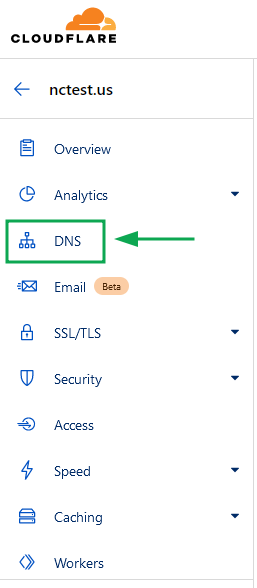
3. Login to your Cloudflare account, and find the domain you want to use. Click the DNS option.
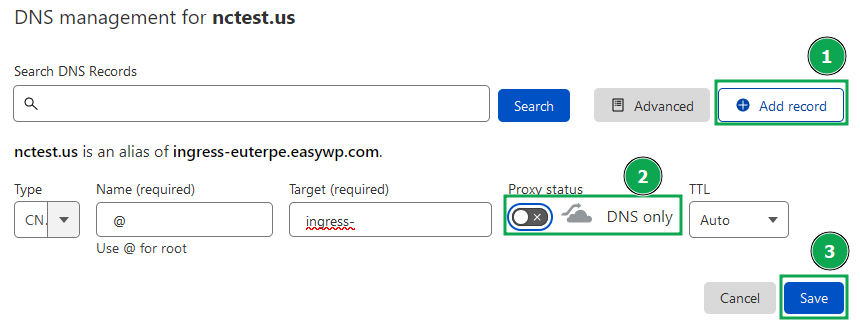
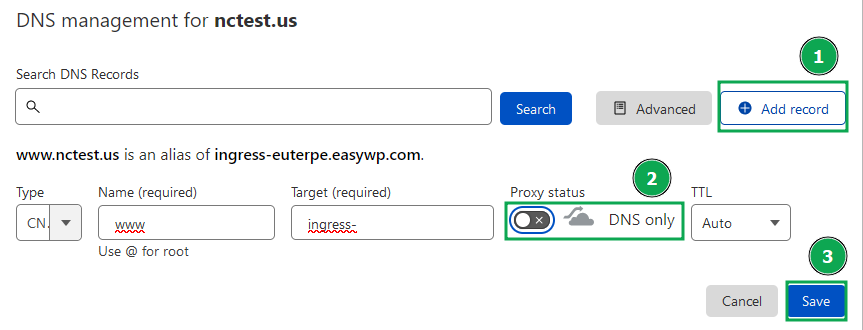
 4. On the next page, click the Add record button and create two CNAME records for the bare domain (@) and www subdomain.
NOTE: Make sure to disable proxy mode in Proxy Status. It should say DNS only. However, keeping the DNS Only status after it has been validated by the EasyWP server may lead to the Cloudflare SSL service work incorrectly. Therefore, if the domain name got connected with the EasyWP instance, it is fine to change the proxy status of DNS A or CNAME records back to "Proxied".
If you are not able to add a CNAME record because the same A record is already added, remove the A record and replace it with the CNAME one. These are the details to use:
Type: CNAME
Name: @
Target: the copied record from your EasyWP Dashboard
TTL: Auto
Type: CNAME
Name: www
Target: the copied record from your EasyWP Dashboard
TTL: Auto
NOTE: By default, updates to DNS records in your Cloudflare account will appear within 5 minutes. However, local DNS caches may take longer to refresh, so it might take more than 5 minutes for the changes to be visible across all locations.
Also, please note that Cloudflare has
CNAME Flattening enabled on their end that can affect the work of the email service for the domain. In order to avoid such an issue, you can create
A record for your bare domain name (it is set up for '@' sign with most registrars) and the 'www' subdomain per each IP assigned to your server using
this guide.
5. See if the propagation has been completed by clicking on the
Check Domain button. If the domain is correctly pointed to EasyWP, you will see the following:
6. Now you’re all set. You simply need to click the Change button.
All done!