There are a few different ways to configure EasyWP for domains registered with GoDaddy; read through the following steps to get your EasyWP website up and running in just a few minutes.
Firstly, choose the following options to connect a domain to EasyWP:
NOTE: The Free PositiveSSL feature is supported by Namecheap domains. However, the domains which are registered with another Registrar can use the Free PositiveSSL feature as well. It can be done only if the domain has our FreeDNS and it is added to the EasyWP dashboard using the Your Domain on Namecheap option.
Set up FreeDNS
The FreeDNS service can be enabled before your website is created. In this case, you’ll be able to select your desired domain name for your website right away in the EasyWP dashboard.
Another option is to create your website using EasyWP’s free temporary domain name and changing it to your GoDaddy domain name after it’s set up with FreeDNS.
Feel free to follow
this guide to proceed with the FreeDNS setup.
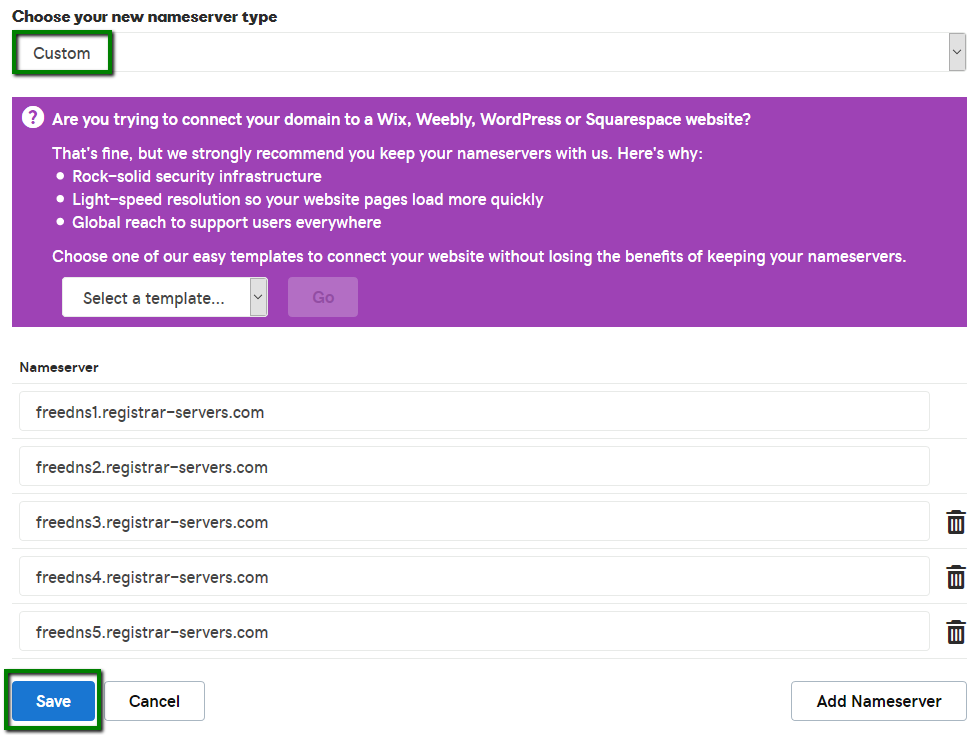
To use EasyWP with a GoDaddy domain name, you’ll be prompted to add the next nameservers on your GoDaddy account:
freedns1.registrar-servers.com
freedns2.registrar-servers.com
freedns3.registrar-servers.com
freedns4.registrar-servers.com
freedns5.registrar-servers.com
To do this, log in to your GoDaddy account and locate the DNS option:
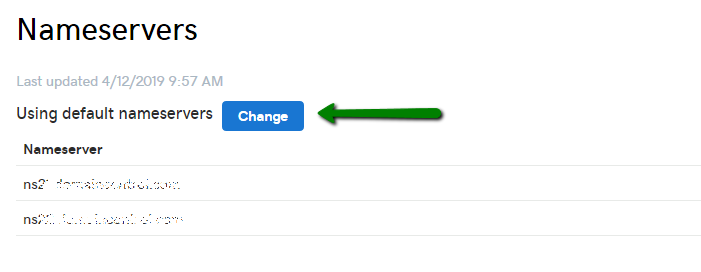
Once you’ve done this, scroll down to the Nameservers section and click the Change button:
Choose Custom DNS from the drop-down menu, paste all the DNS records required, and press the Save button:
After the records are added, go back to the Namecheap account to finish the installation.
NOTE: The domain propagation for the nameservers can take up to 48 hours. After this time, you’ll be able to point your domain name to EasyWP.
Set up A records
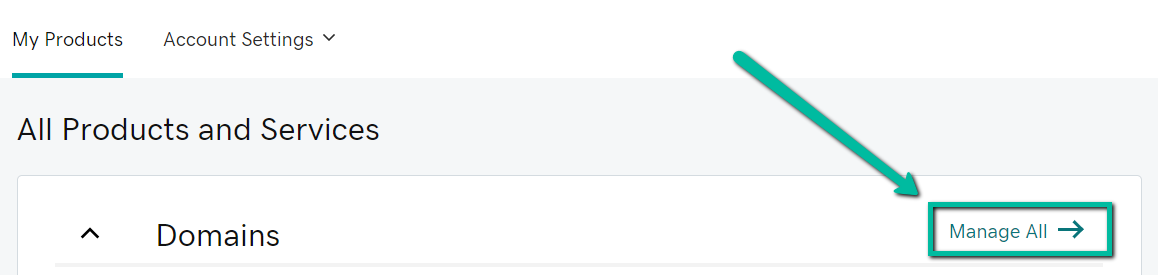
1. Log into your GoDaddy account and press
Manage All next to the
Domains section:
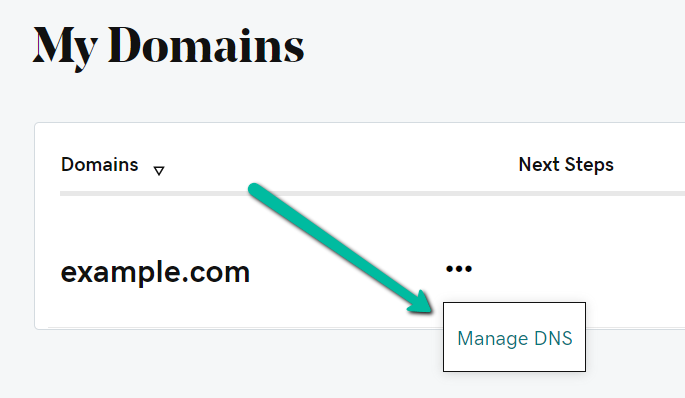
2. Click on three dots under the
Next Steps table and go to
Manage DNS:
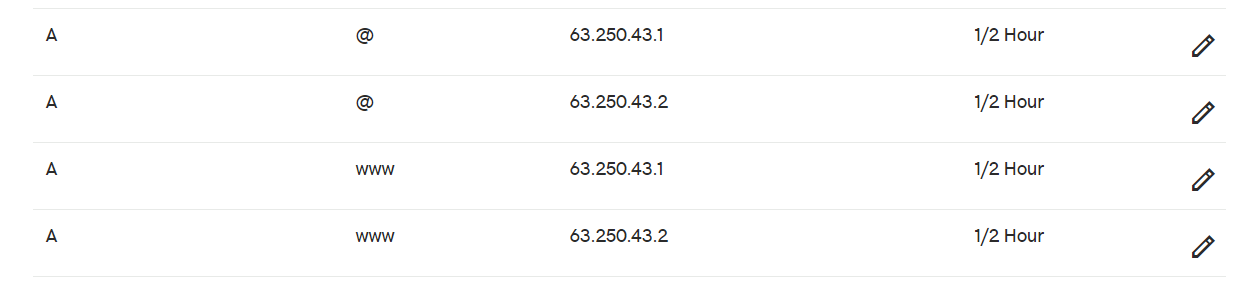
3. Create A records for '@' and 'www' as the
Host value pointing them to IPs of your
EasyWP server:
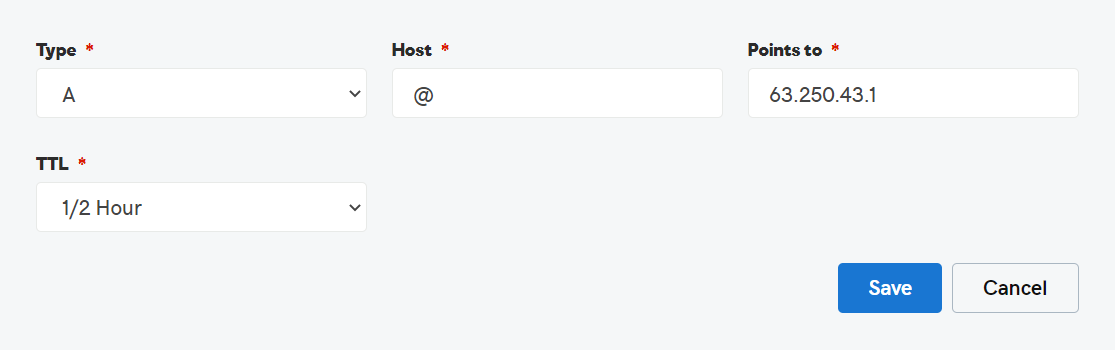
In this example, you can see the host records that point a domain to
ingress-bonde.easywp.com:
You can find out how to check your
EasyWP server and its
IP addresses in this article.
NOTE: New host records require up to 60 minutes to take effect worldwide, as well as editing already existing ones (the exact time will depend on the configured TTL value). So, your EasyWP website may not start resolving immediately. Be sure to
clear your browser cache to ensure that you see your EasyWP website via a browser as soon as the DNS changes have propagated.
1. Create a new EasyWP website using a temporary domain name by following the instructions provided
here.
2. Sign into your GoDaddy account.
3. In the product list, click on the
DNS button next to the domain name you would like to forward to your EasyWP website:

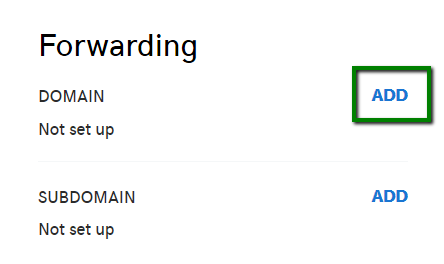
4. You will be redirected to the
DNS Management page. Scroll down the page to find the
Forwarding section. Click on the
ADD button:
5. Fill in the required details:
- Select http:// or https:// as the FORWARD TO option and enter the EasyWP free temporary domain name (e.g. blog-user.ewp.live) to which you wish to forward your real domain
- Select Permanent (301) or Temporary (302) redirect as the FORWARD TYPE. For more information about the difference between Permanent and Temporary redirect check this guide.
- Forwarding SETTINGS should be set to Forward only.
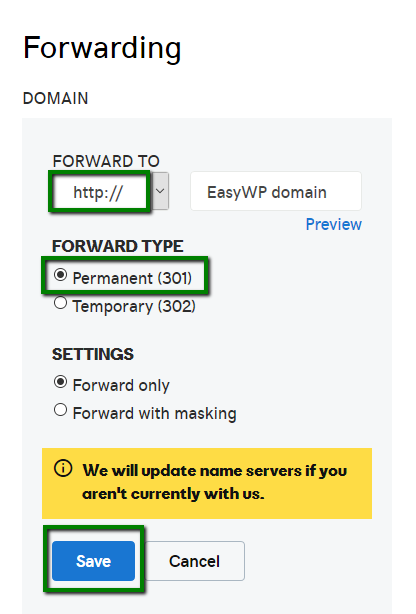
6. Click
Save.
That’s it!
If you have any questions, feel free to contact our Support Team.