By default, SSL is enabled on FREE addresses (like
yourapp-username.ewp.live). To add an SSL to the WordPress site linked to your
real domain name, follow the steps provided in this article.
NOTE:
We provide a Free SSL option to our customers with all EasyWP packages.
If you already have the necessary certificate files for SSL installation, feel free to proceed with the steps described in the
SSL installation section. Otherwise, check the
Pre-requisites first.
Pre-requisites
- Purchase an SSL certificate before installing it. You may browse the SSL certificates offered by Namecheap or choose a third-party provider.
- If you use an SSL certificate from Namecheap, follow this guide to activate it after the purchase.
- Once all the activation steps are done and the domain validation is completed, your SSL order will be issued, and you'll receive two files from the Certificate Authority: an SSL certificate (a file with the .crt extension) and a CA Bundle (a file with the .ca-bundle extension).
An email with the files will be sent to the administrative contact email address for the SSL order, you will also be able to download the files in your Namecheap account.
- To add an SSL certificate to your website, you will need to upload, paste as plain text or just drag-and-drop the following files via an SSL installation wizard. If you paste the text codes, ensure you keep the "BEGIN" and "END" tags included in every code.
Private Key - use the file with the ".key" or with the ".txt" extension that you saved after the CSR code generation.
SSL Certificate - use the SSL Certificate files with the ".crt" extension received from the CA.
CA Bundle - it's the file with the ".ca-bundle" extension received from the Certificate Authority via email or downloaded to your account panel.
SSL installation
1. Log in to your EasyWP panel: on the Namecheap account Dashboard, open the Apps tab and click on the EasyWP icon.
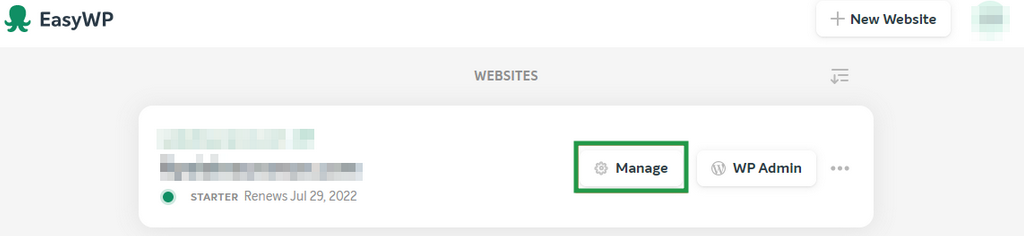
2. Then click on the
Manage button show in the picture below:
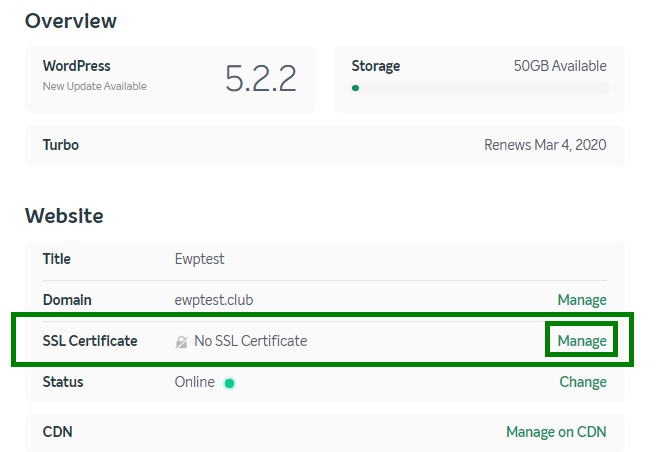
3. In the
Website section, find the domain name in question >> click
Manage next to the
SSL Certificate.
4. Click Add on the next page.
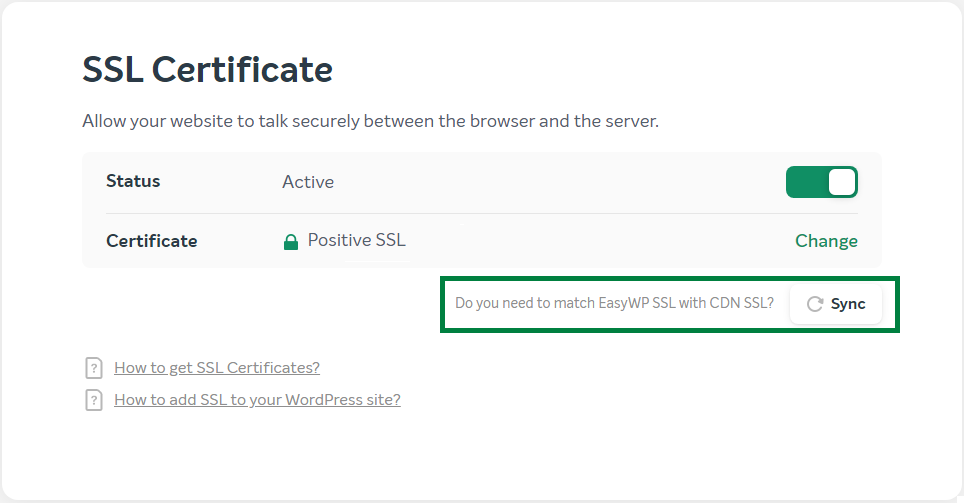
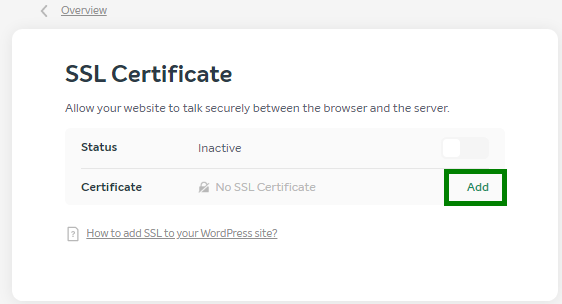 Note: If another SSL has been installed before and you wish to replace it (e.g., during the SSL renewal), you will see the option 'Change' instead of the usual button. Click on it to initiate installation of a new certificate.
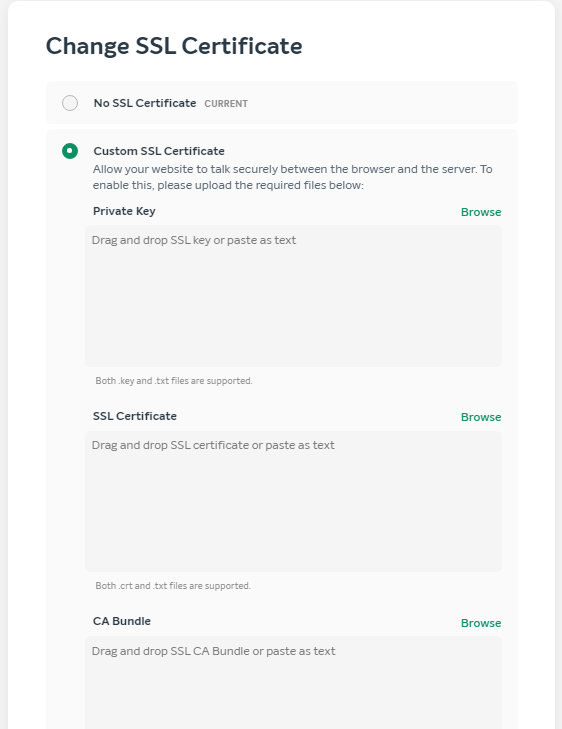
5. Tick the Custom SSL Certificate option.
The
Private Key,
SSLCertificate and
CA Bundle boxes will appear. You can paste the corresponding codes, browse the Certificate and Private key or drag-and-drop the corresponding files from your PC.
Important note: Please use the full CA Bundle, with the CA Root Certificate included, for filling out the CA Bundle box, or, browse the corresponding file. You can find the full CA Bundles in this article.After filling in the boxes, click
Change to enable your custom Certificate.

On the next page, you will see the certificate installation status. The toggle will switch automatically to "Active" as soon as the SSL gets installed at the back-end. This may take a few minutes, usually, about 10 minutes.
Note: If you have a CDN service enabled for the website, the Sync option will appear at this stage shortly after the certificate has been enabled. Click the Sync button in order to get the same certificate installed on CDN. Keep in mind that for the website with the CDN option turned On, it is obligatory to have an SSL certificate installed on both the EasyWP and CDN services.
Note: We recommend keeping the Private key file stored on your side after SSL installation. You may need this file to install the certificate at any other server or to re-install it on EasyWP later once again.
Note: To get to the SSL wizard (if you are not there yet) from within your EasyWP dashboard, click the needed website Domains.