CSR generation on Exchange 2010

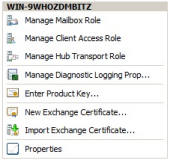
Below you will find 2 different ways on how to generate a Certificate Signing Request, a so-called CSR, on your Exchange 2010 server.

In order to generate a CSR, it is possible to use the following options:

- Exchange Certificate Wizard
- Exchange Management Shell

The instructions will help you to create a CSR for activating your certificate purchased with Namecheap.

CSR generation using the New Exchange Certificate Wizard

  1. Start the Exchange Management Console by going to Start >> Programs >> Microsoft Exchange 2010 >> Exchange Management Console.
  2. Click the link to Manage Databases:
  3. csrex1

  4. Select Server Configuration in the menu on the left, and then New Exchange Certificate from the actions menu on the right:
  5. csrex2

    csrex3

  6. You will be asked for a friendly name - enter a name by which you will remember this certificate in the future. This name is meant purely for your own convenience and is used by the server to display the certificate in the GUIs. Once done, click Next:
  7. csrex4

  8. Under Domain Scope, you are opted to check the box if you generate the CSR for a Wildcard certificate. If not, just go to the next screen.
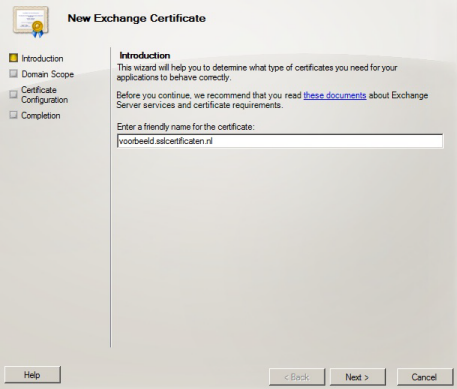
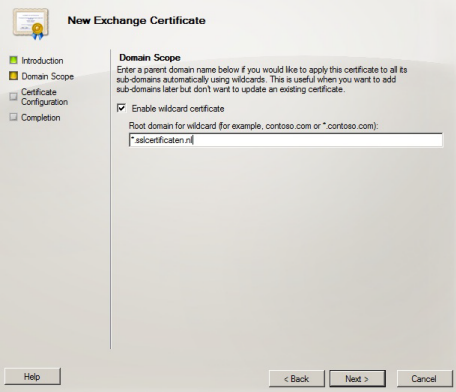
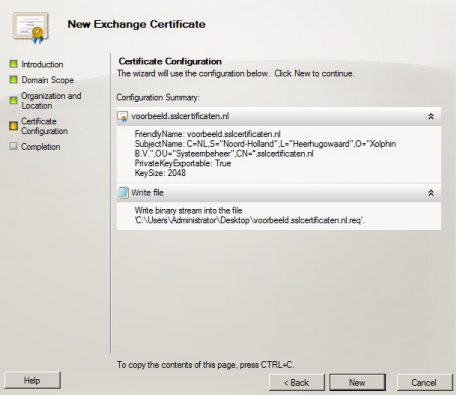
  9. Note: If you indicate you want to use this CSR for a wildcard certificate, the system will skip step 7 automatically. Click Next:

    csrex5

  10. In the Exchange Configuration menu, select the services which you plan on running securely and enter the names through which you connect to those services as prompted:
  11. csrex6

  12. The next screen allows you to review a list of the names which Exchange 2010 suggests you include in your certificate request. It is not possible to add extra domain names on this page; this has to be done through our application page in your Namecheap account. Please indicate which domain name you wish to use as Common Name and click Next:
  13. csrex7

  14. Enter the organization data, click Browse and indicate the path to the location you want the CSR to be saved to.
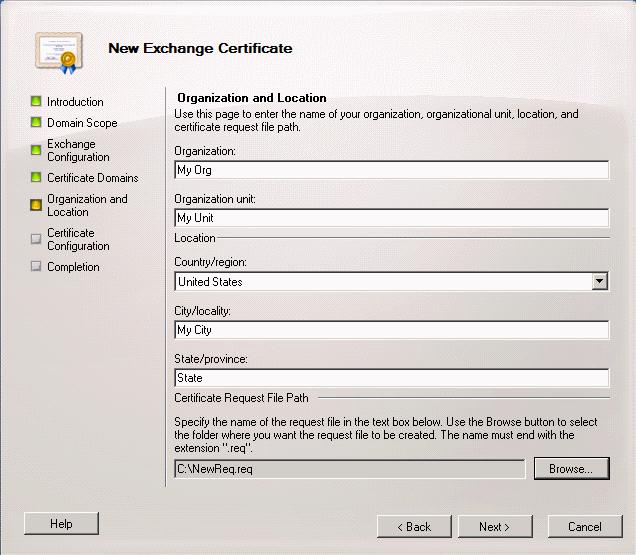
  15. Your Organization: full legal name of your company
    Your Organization unit: your department within the organization
    If there is no organization, please put NA in these boxes.
    Country/Region: country where your organization is located
    City/Locality: city where your organization is located
    If you do not have a state/province, enter the city information again:

    csrex8

  16. When the path to the file is indicated, click Save, then Next, then New, and Finish:
  17. csrex9

  18. When you complete the CSR generation process, you will be able to open the CSR with any text editor (for instance, Notepad) and copy and paste it into the CSR submission form during the activation process.

CSR generation using the Exchange Management Shell

  1. To start the Management Shell, go to Start >> Programs >> Microsoft Exchange 2010 >> Exchange Management Shell:
  2. csrex10

  3. Type the following text in the Exchange Management Shell command line:
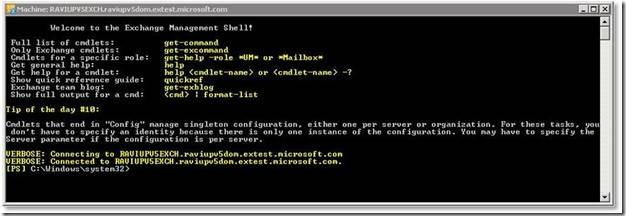
  4. New-ExchangeCertificate -GenerateRequest -KeySize 2048 -SubjectName "c=YourLocalityOrCity ( 2-letter abbreviation, for instance, US/GB/AU etc.)*, s=YourStateOrProvince*, o=YourCompanyInc*, cn=YourFirstDomain.com*" -DomainName YourSecondDomain.com, YourThirdDomain.com* -PrivateKeyExportable:$true

    The command above should be put in one line into the management shell. The details marked with the * sign should be replaced with the details of your own organization.

    NB: The first domain name you would like to secure should be listed inside the "-SubjectName" after "cn=", and additional domain names should be added after the -DomainName parameter separated with commas. This parameter is applicable for Multi-Domain certificates. You can add as many additional domain names as necessary ( the maximum quantity is 99 as the maximum amount of SANs for Comodo (now Sectigo) certificates is 100).

  5. When you run this command, your CSR file will be printed to the management shell. In order to copy it from the management shell, it is necessary to right-click and choose "mark". Now you can copy and paste your newly generated CSR including the BEGIN and END tags into the CSR submission form during the first step of certificate activation.

Please keep in mind that if you want to create a CSR file automatically on your machine after running the CSR creation command, use the following line immediately after the file generation:

Set-Content -path "C:\your_CSR_name.csr" -Value $Data

Once your CSR is ready, you can go further with the certificate activation; the detailed guide on how to do it can be located here.

Updated
Viewed
38008 times

Need help? We're always here for you.

notmyip