| Subtotal | $0.00 |
USD
U.S. DollarEuroBritish PoundCanadian DollarsAustralian DollarsIndian RupeesChina Yuan RMBMore Info →

| Subtotal | $0.00 |
Try our SSL installation service for easy website security.
A website SSL Certificate Assign can only be issued for a FQDN (fully qualified domain name). So first you’ll assign the domain to your Synology DDNS service, or the server IP.
The DDNS service is offered free for Synology users on https://myds.synology.com. Connect your FQDN by creating a CNAME record for the domain. Alternatively, you can set up an A record to point the domain to your static server IP.
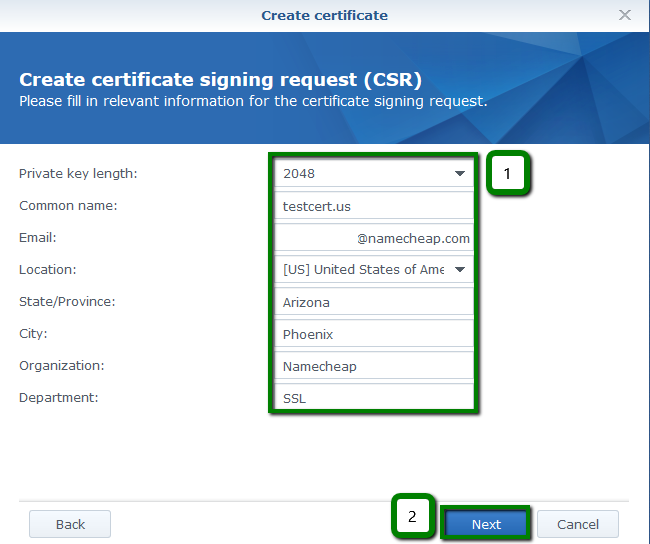
Note: The example domain we’ll use for this guide is testcert.us. Ensure to replace it with your own domain or subdomain that is going to be secured.
SSL activation starts with the CSR code (Certificate Signing Request). This code contains basic information about the Certificate, including your website name and contact details. Be sure that the CSR needs to be created on the hosting server where the SSL Certificate will be installed.
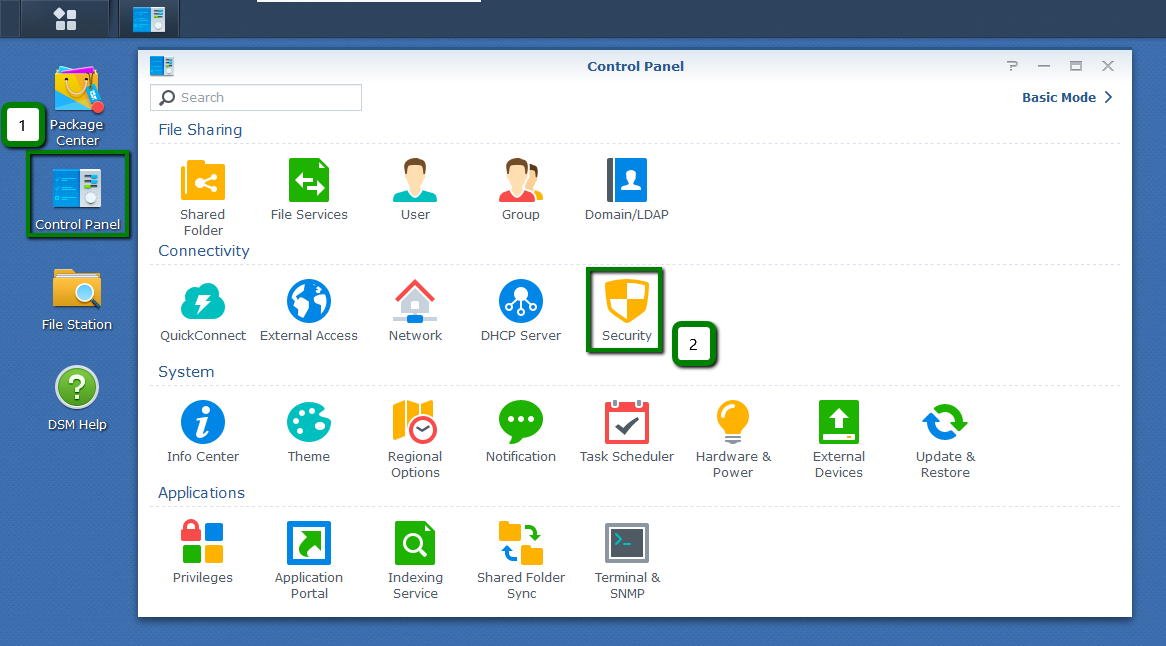
Step 1: Certificate management panel
Log into your server, navigate to the Control Panel menu, and click Security.
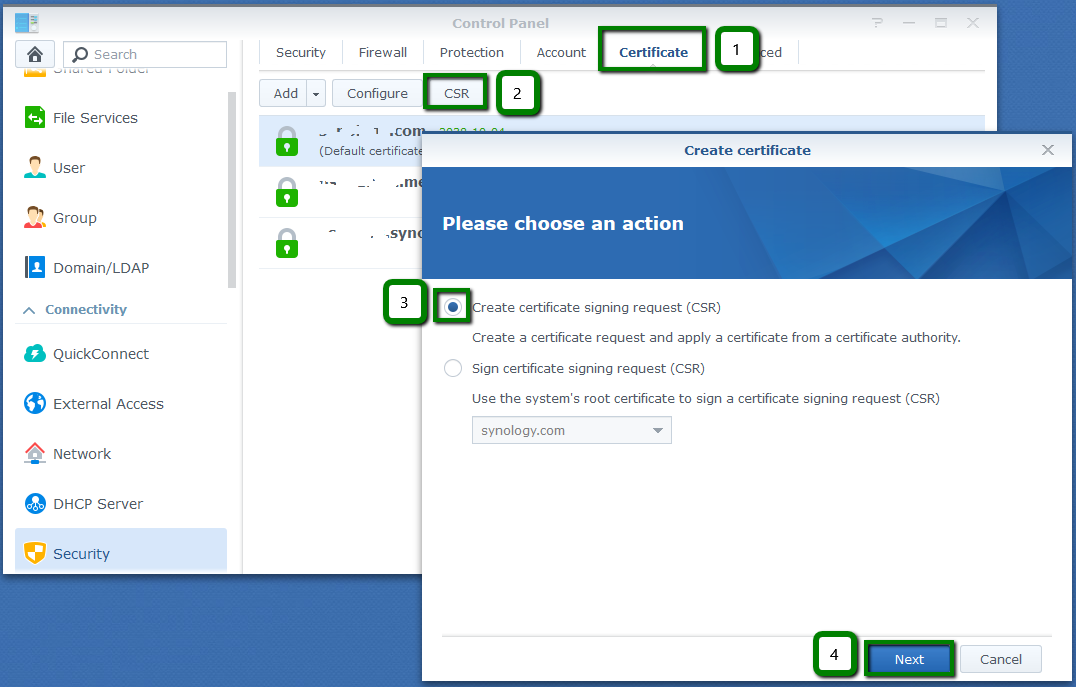
Step 2: Certificate tab
Select the Certificate tab in the top menu. Click CSR, check the Create certificate signing request (CSR) option in the pop-up window, and click Next.
Step 3: CSR code details
3. On the next screen, fill out the CSR details, using this example illustration for guidance. Once completed, click Next.
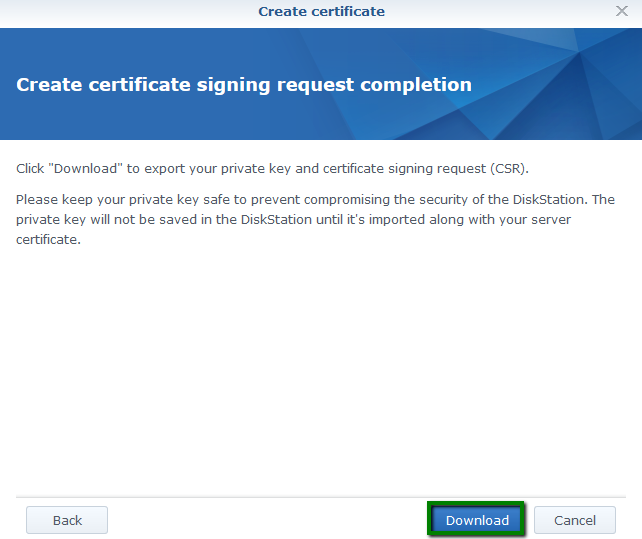
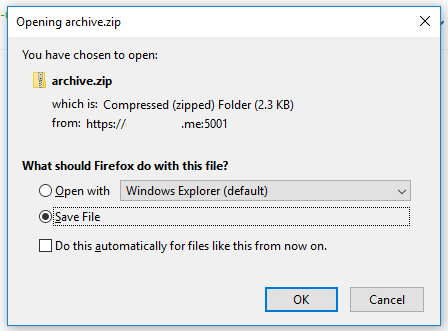
Step 4: Download CSR file
Click Download to save the archive.zip folder containing your CSR code (.crt file) and Private key (.key file) on your computer.
Important: the matching Private key is essential for the SSL installation process. It must always match the CSR code that downloaded with it. Synology server doesn’t store the CSR code and Private key on their platform, so be sure to keep the Private key safe on your computer for when you need them.
Next you’ll go to the location on your computer where you saved the zipped file and extract 1) the CSR (file with .csr extension) and 2) the Private key (file with .key extension) so they can be opened.
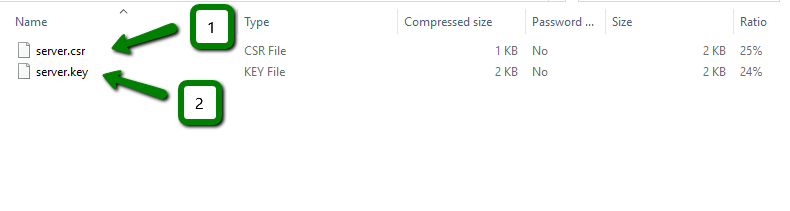
You’ll keep the Private key file safe for later use. Open the .csr file using Notepad or another text editor. Copy the code including -----BEGIN CERTIFICATE REQUEST----- and -----END CERTIFICATE REQUEST----- tags. Now you’re ready for the SSL activation process.
Need help? We're always here for you.