DKIM (DomainKeys Identified
Mail) is another way of email authentication. This method uses
information about the domain which is published by the domain owner. That
information allows the receiving server to verify if the email message was
sent by the legal owner of that domain name.
Once the TXT record, which contains DKIM, is added to the DNS zone, a
special code is added to the headers of outgoing emails. Receiving
servers compare these headers with the information in the DNS zone, and if it
matches, then the email is delivered.
NOTE: DomainKeys(DK) and DomainKeys Identified Mail (DKIM) are separate things.
DomainKeys(DK) are not available on our shared servers as DK
implementation was converted to DKIM and extended in a number of ways as
of cPanel 11.32 and later releases.
Some of the differences between DomainKeys and DKIM include:
- multiple signature algorithms (as opposed to just one available with DomainKeys);
- more options with regard to canonicalization, that validates the header and body;
- the ability to delegate signing to third parties;
- the ability for DKIM to self-sign the DKIM-Signature header field – to protect against its being modified;
- the ability for the wildcard option on some parameters;
- the ability to support signature timeouts in DNS.
If
having DomainKeys for you is a must, we suggest upgrading to
a VPS/Dedicated server, where you will be able to set up this feature.
These simple actions will make you sure that no one can
send spam on your behalf and your email will not be delivered to spam
folders.
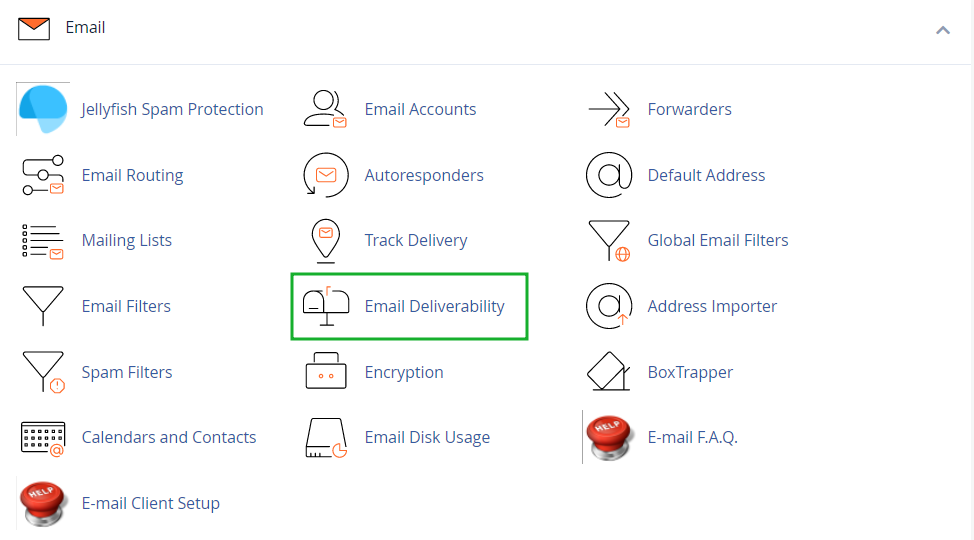
To configure the SPF and DKIM records, log in to
cPanel > the
Email section > the
Email Deliverability menu:
This section allows you to perform the following actions:
1. Repair — this feature allows the system to repair domain invalid records:
NOTES:
- This option is unavailable if the system does not control the domain DNS records. Thus, you will be able to use the Repair option only in case your domain name is pointed to our Shared hosting nameservers.
- You cannot simultaneously update two or more domains whose records exist in the same zone. The bulk records update is possible only in case domain records exist in separate zones.
- Reloading the interface does not interrupt the repair process.

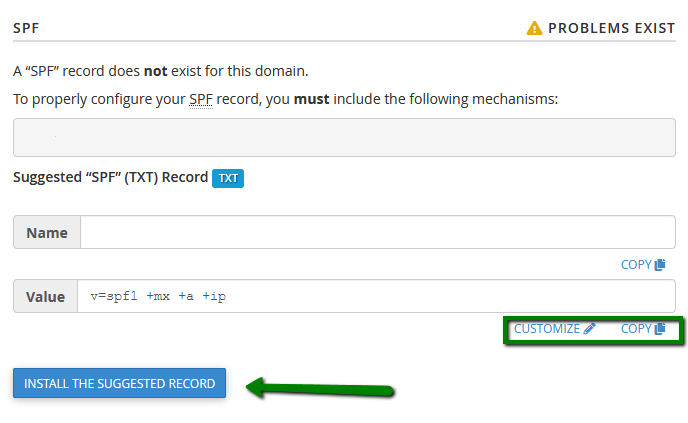
In the window that appears upon clicking
Repair, you can review and confirm the system recommendations for any invalid records. You can also
Copy or
Customize a suggested record before you approve the system repairs. Click on
Repair, and the records will be added to the DNS zone of the domain/subdomain automatically:
This process can take up to
five minutes, depending on the server. When the records are set up, you will receive a corresponding success message:
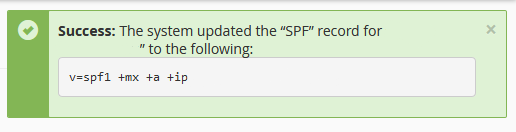
Allow some time for the records to propagate and refresh the page afterwards.
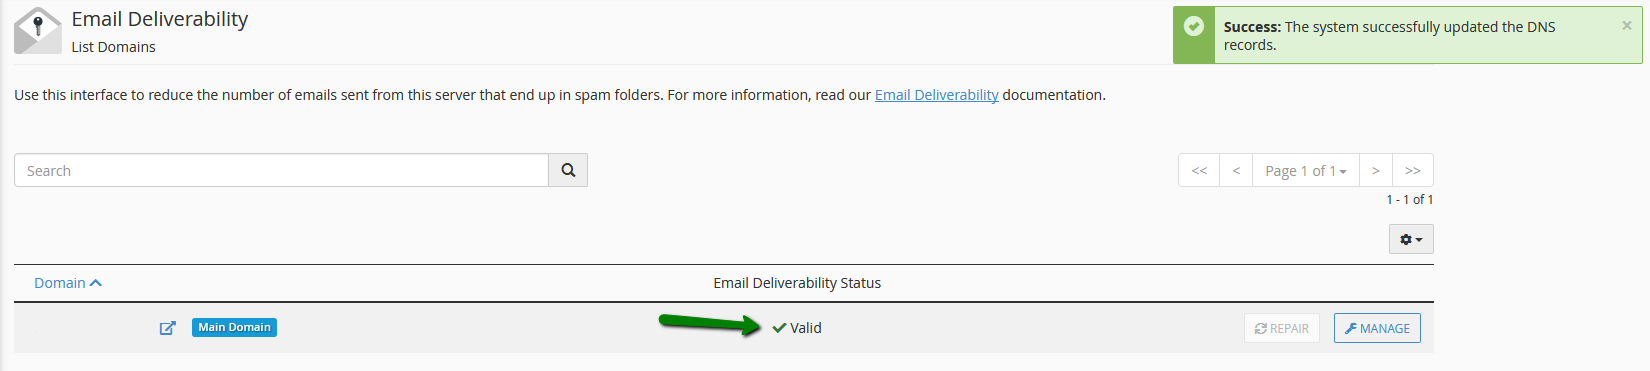
The
Email Deliverability Status will be then changed to
Valid:
2.
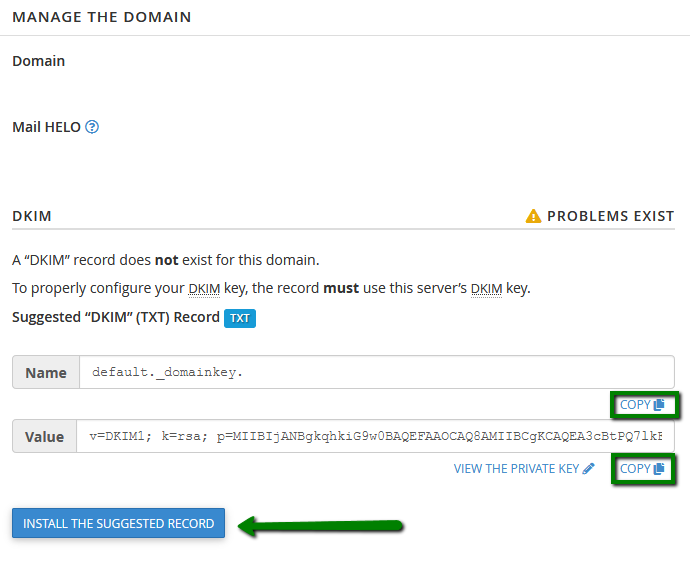
Manage - this option allows you to manually configure the mail-related DNS records of a domain.
The Manage the Domain section already displays the properly-configured DKIM, SPF and DMARC record values. So in most cases, you just need to Copy them and paste manually to the DNS zone of your domain. Alternatively, you can click Install the suggested record to have the records added to the DNS zone automatically:
NOTE: The
Install the suggested record option is available only in case your domain name is pointed to our
Shared hosting nameservers.
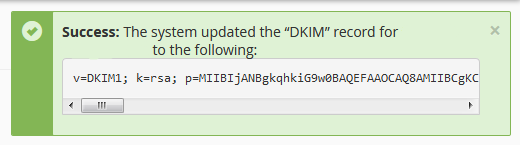
After the record is installed, you will receive the confirmation message:
In the
SPF section, you will also have the option to
Customize the SPF record recommended for a domain by the system:
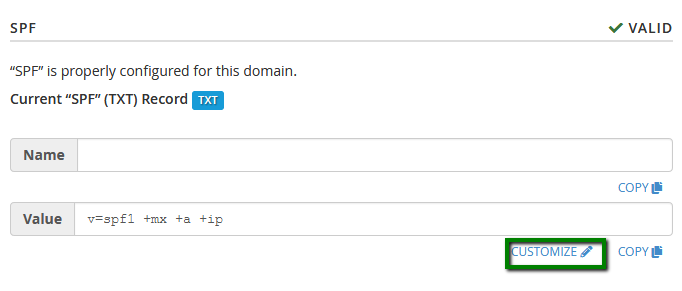
The interface displays the domain current SPF name and value in the
Current "SPF" (TXT) Record section if one exists as well as the system recommendations in the
Suggested "SPF" (TXT) Record section:
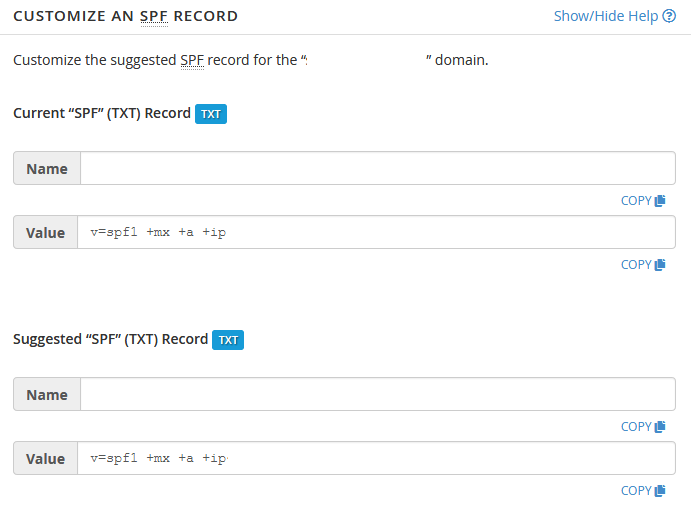
You can configure the following settings:
1.
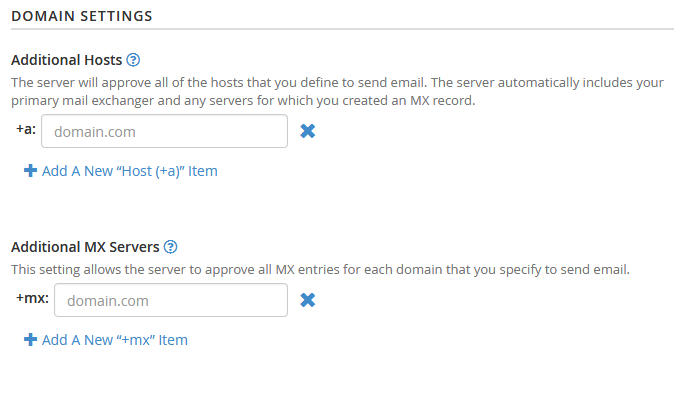
Domain Settings - this section allows you to define the hosts or MX servers allowed to send mail from your domain:
2.
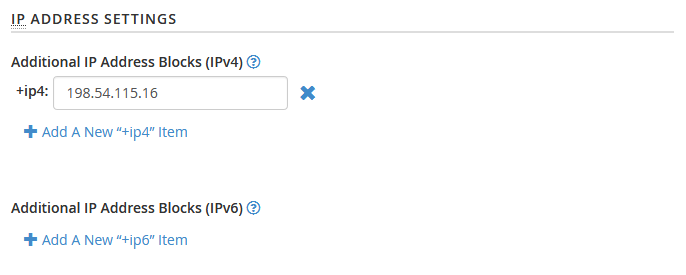
IP Address Settings - this section allows you to add additional IP Address blocks to your SPF record. The system automatically includes your server main IPv4 or IPv6 addresses in these lists:
3.
Additional Settings - this section allows you to modify additional SPF record settings.
4. Preview of the Updated Record- this section displays what the updated SPF record will look like, based on its current modifications. Click the Install a Customized SPF Record tab to install the new record:

After configuring the SPF and DKIM records, you can move on to setting up the
DMARC record.
DMARC (Domain-based Message Authentication, Reporting & Conformance) is a technical protocol designed to prevent email abuse such as phishing and spoofing. It works by using DNS to verify that an email aligns with valid SPF and DKIM records, ensuring that the “From” header — also known as the 5322. From or Display From address — is consistent with those records. By doing so, DMARC helps detect and block attempts to forge sender identities, thereby reducing the risk of fraudulent emails reaching recipients.
Many major email providers now require domains to implement a valid DMARC policy to protect users from spam and phishing. Without proper configuration, legitimate messages from your domain may be flagged as spam or even rejected by mail servers.
NOTE: For DMARC to work correctly, your domain must have valid SPF and DKIM records.
A default DMARC record installed for domains in cPanel looks like the following:
Name:
_dmarc.example.com
Type:
TXT
Value:
v=DMARC1;p=none;Below is a breakdown of what each tag in this record means:
| Tag | Parameter | Description |
| v=DMARC1 | Version | Specifies the DMARC protocol version. It must always be DMARC1. |
| p=none | Policy for the domain | Instructs receiving mail servers to take no action (i.e., only monitor and report) when a message fails DMARC checks.
Other possible values are:
p=quarantine - moves to spam/junk
p=reject - blocks the email. |
This configuration allows you to monitor DMARC results. It’s typically used as a starting point before enforcing a full quarantine or reject policy across the domain.
If you need to set a custom record, you can always use a DMARC generator tool.
To create a DMARC record for a domain hosted with Namecheap, log in to your cPanel account > navigate to the
Zone Editor menu and create the corresponding record as a
TXT one as it’s described
here.
That's it!
Need any help? Contact our
HelpDesk 