This article is valid for both new plans (purchased on or after June 2, 2026) and legacy Private Email plans (purchased before June 2, 2026).
If you want to configure a Private Email service for your domain which is using our default nameservers (for example: dns1-2.registrar-servers.com) or is only using Namecheap DNS (Free DNS or Premium DNS) but your domain is registered elsewhere, you should add Private Email DNS records in your Namecheap account. There are two key methods to do this:
1. Automated setup if you want to use only a Private Email service for your domain
or
2. Manual setup if you want to use multiple email services or to add MX records to a subdomain.
Automated setup:
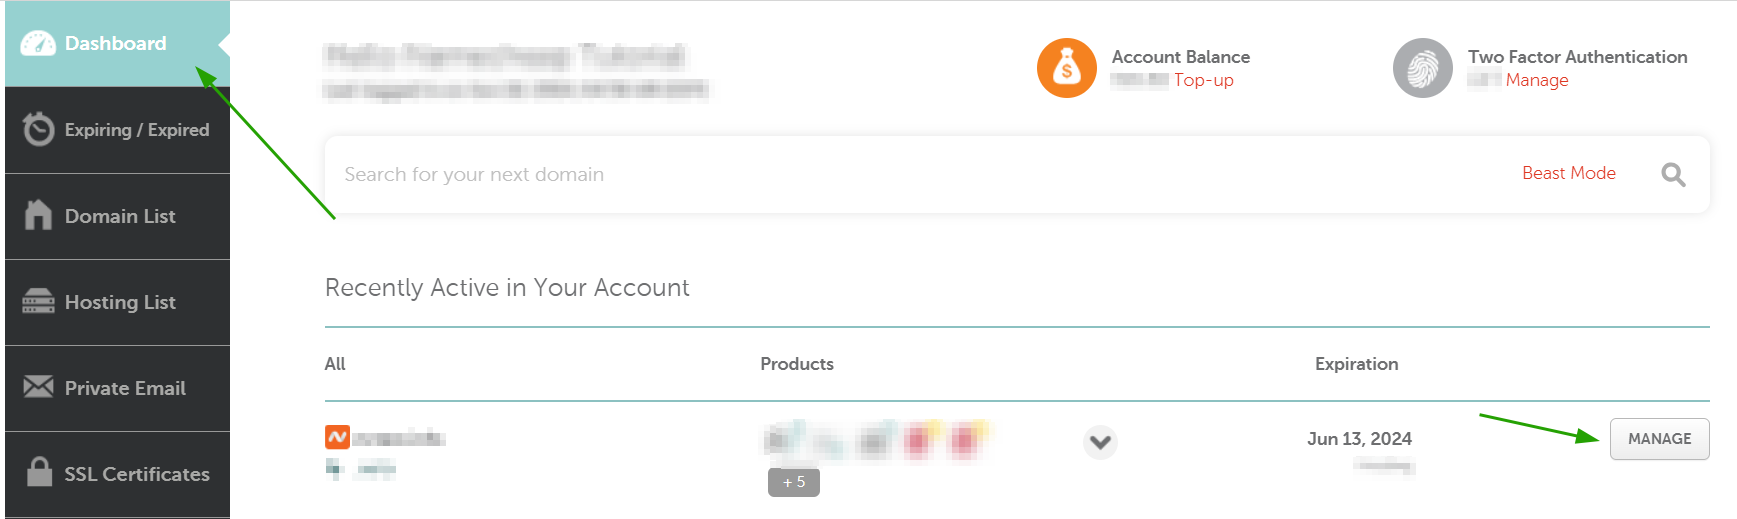
- Sign in to your Namecheap account.
- Navigate to your Dashboard, and click Manage next to the domain your Private Email plan is linked to:
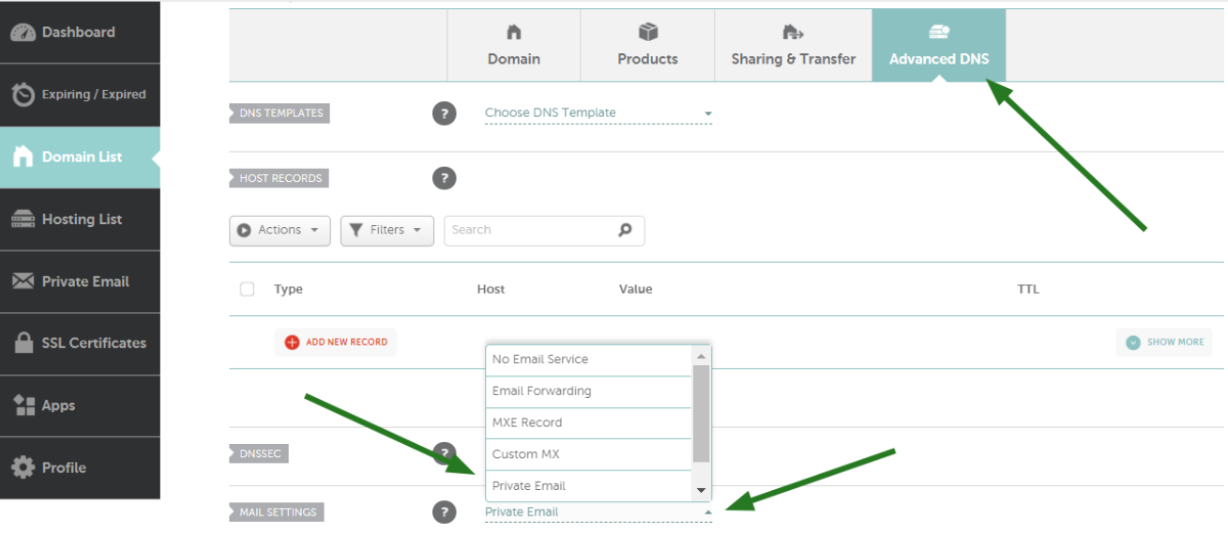
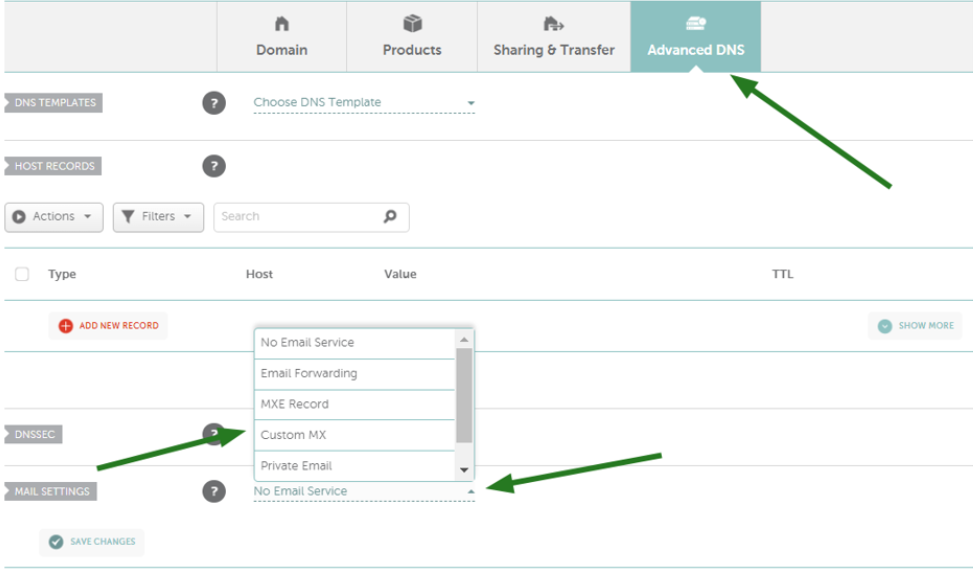
- Choose Advanced DNS from the tabs at the top, scroll down to Mail Settings, and choose Private Email in the drop-down menu:
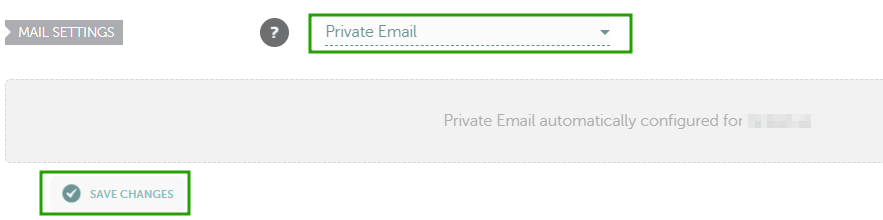
- Make sure you click Save changes, and the Private Email DNS records you need will be set up automatically:
- Next, we need to configure DKIM and strongly recommend configuring a DMARC record as well. A DKIM record contains the information about the domain which is published by the domain owner. Emails that are signed with DKIM appear more legitimate to recipients and are less likely to end up in the junk or spam folders. To set this record, go up to the Host Records section and add the Private Email DKIM record by clicking the Add New Record button.
NOTE: The DKIM can only be generated after a mailbox has been created. More information can be found here.
Type: TXT Record | Host: default._domainkey | Value: should be generated and copied in your Namecheap account by following these steps
NOTE: For Private Email subscriptions purchased on or after June 2, 2026, DKIM record's hostname is privateemail._domainkey. This DKIM record is available immediately upon ordering the PE subscription - creating a mailbox is no longer required.
Modern email providers (including Microsoft Outlook, Hotmail, Gmail, and Yahoo) increasingly rely on DMARC as part of their sender reputation and anti-spam validation systems. Domains without a properly configured DMARC record are more likely to experience deliverability issues, spam folder placement, or reputation-based restrictions.
To configure DMARC, you will first need to generate a DMARC record using an online DMARC generator tool (for example, MXToolbox DMARC Record Generator) and then add it as a TXT record to your domain’s DNS zone.
Example DMARC record:
Type: TXT
Host: _dmarc
Value: v=DMARC1; p=reject; rua=mailto@yourdomain.com
NOTE: The DMARC policy can later be adjusted depending on your email setup and monitoring preferences.
If your domain is registered with Namecheap, you can refer to this tutorial for help: Video: How to add DMARC record for a domain in Namecheap account.
You’re all set! Once the changes to the DNS zone are applied, it can take up to 30 minutes for the email service to start working properly.
Manual setup:
- Sign in to your Namecheap account.
- Navigate to your Dashboard, and click Manage next to the domain your Private Email plan is linked to:
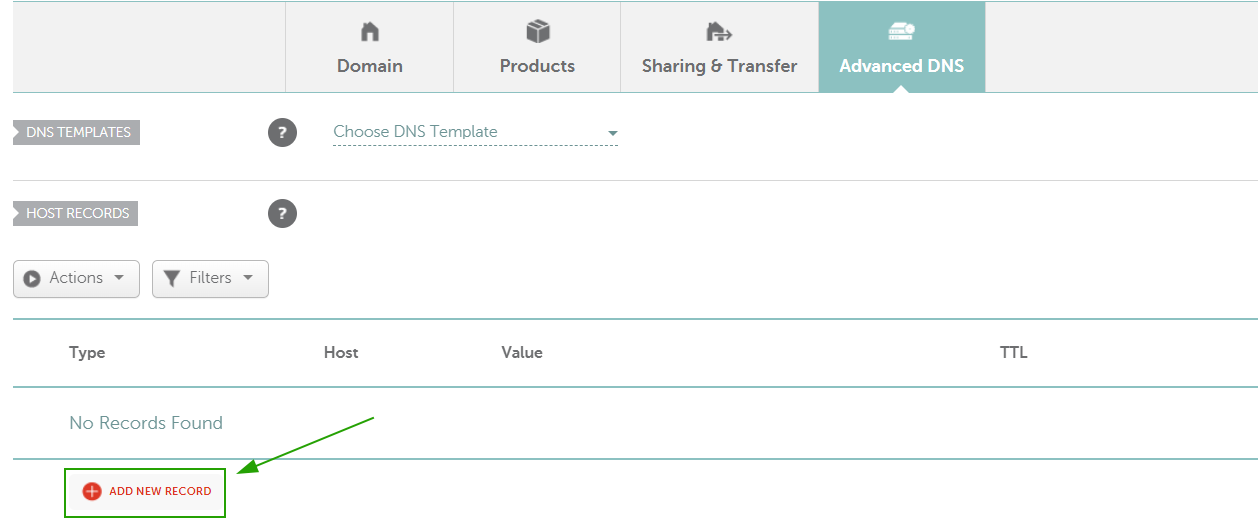
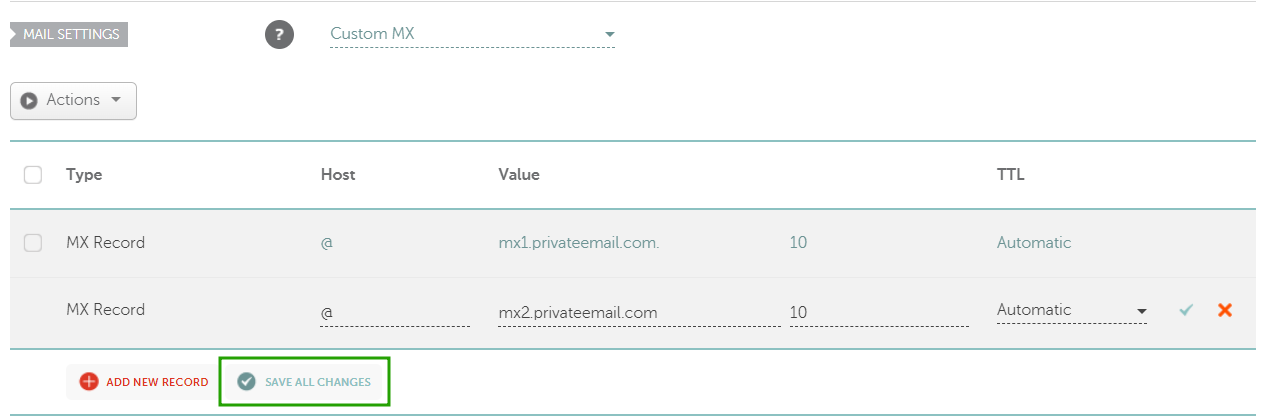
- Choose Advanced DNS from the tabs at the top, scroll down to the Mail Settings section, and choose Custom MX:
Here you need to add the following records:
Type: MX Record | Host: @ | Value: mx1.privateemail.com | Priority: 10 | TTL: Automatic
Type: MX Record | Host: @ | Value: mx2.privateemail.com | Priority: 10 | TTL: Automatic
Make sure to click Save changes:
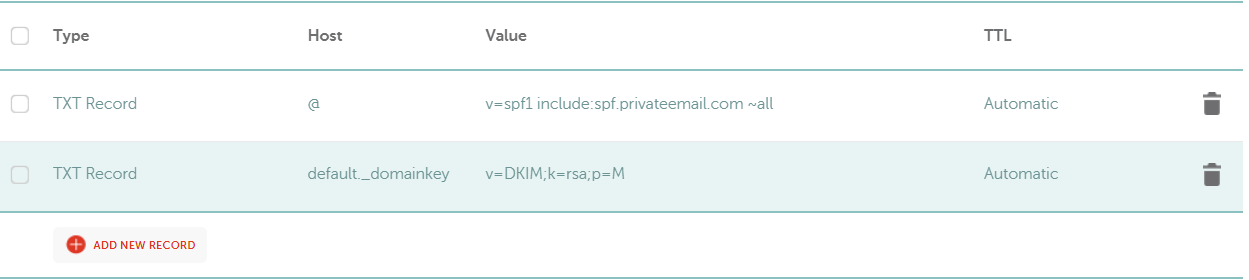
- Also, we need to configure SPF, DKIM, and DMARC records, which are a mandatory entry for outgoing mail to work correctly. To set these records, scroll up the page to the Host Records section and add SPF and DKIM records. Next, create two TXT records by clicking the Add New Record button.
NOTE: The DKIM can only be generated after a mailbox has been created. Feel free to use this guide.
Click on the Add New Record button:
Type: TXT Record | Host: @ | Value: v=spf1 include:spf.privateemail.com ~all | TTL: Automatic
Type: TXT Record | Host: default._domainkey | Value: should be generated and copied in your Namecheap account by following these steps
NOTE: For Private Email subscriptions purchased on or after June 2, 2026, DKIM record's hostname is privateemail._domainkey. This DKIM record is available immediately upon ordering the PE subscription - creating a mailbox is no longer required.
Type: TXT Record | Host: _dmarc | Value: v=DMARC1; p=reject; rua=mailto:postmaster@yourdomain.com
NOTE: An SPF record can have several ‘include’ parts. Please remember that if the domain has a few SPF records with the same Hostname, they interfere with each other work and none of the email services work properly. If you would like to use a few email services for sending emails and, therefore, to have several SPF records for your domain, please make sure that these records are consolidated into one by following this guide.
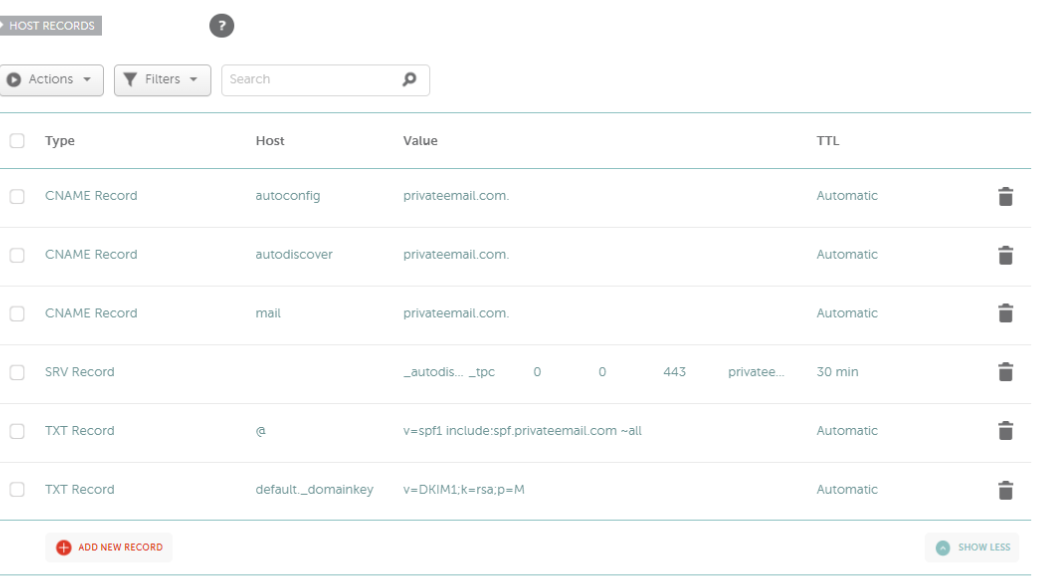
- In this step, you can add the additional records (they will not affect email delivery itself and can be skipped):
- Type: CNAME Record | Host: mail | Value: privateemail.com | TTL: Automatic
- Type: CNAME Record | Host: autodiscover | Value: privateemail.com | TTL: Automatic
- Type: CNAME Record | Host: autoconfig | Value: privateemail.com | TTL: Automatic
- Type: SRV Record | Service: _autodiscover | Protocol: _tcp | Priority: 0 | Weight: 0 | Port: 443 | Target: privateemail.com
A CNAME record maps a subdomain such as www or mail to the domain hosting that subdomain's content. When you add a CNAME record for mail.domain.com with the value "privateemail.com", you will be redirected to Private Email webmail once you fill in the browser search bar mail.domain.com.
As for CNAME records with host "autodiscover" and "autoconfig" and the SRV record, these records enable email clients (Microsoft Outlook, Thunderbird, etc. ) to automatically discover and configure access to your email accounts.
- Save changes.
Your records will look like this:
Allow up to 30 minutes for the records to propagate and check the work of your email service.
That’s it!
We hope these steps allow you to successfully connect your Private Email. If you need any help, our Customer Support team is available 24/7 to guide you through any issues you may have.