You may have experienced VPN block issues by the Windows firewall. Usually, it’s a default setting, but there’s always a way to get around it and get connected again. You may refer to the solutions below.
Add VPN Exclusion
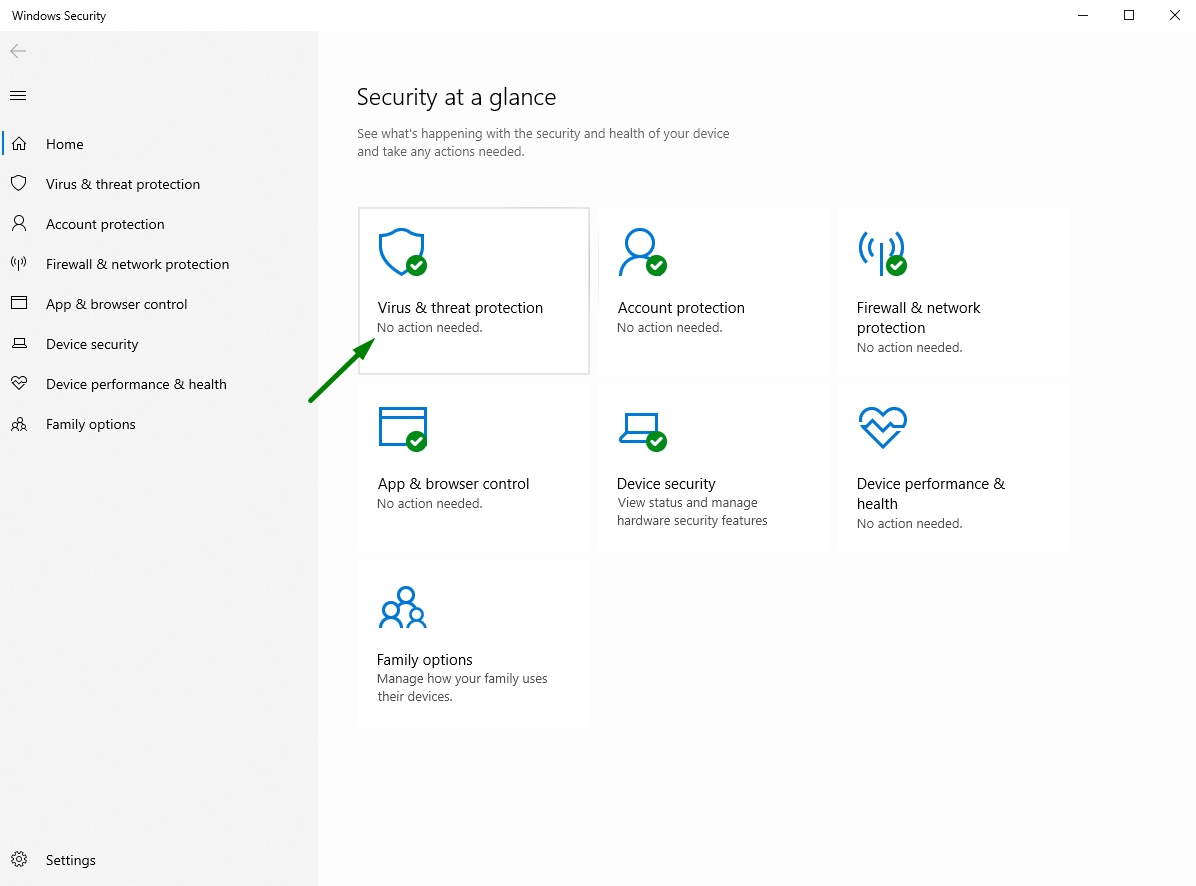
1. Open Windows Defender Security Center.
2. Go to Virus & Threat protection settings:
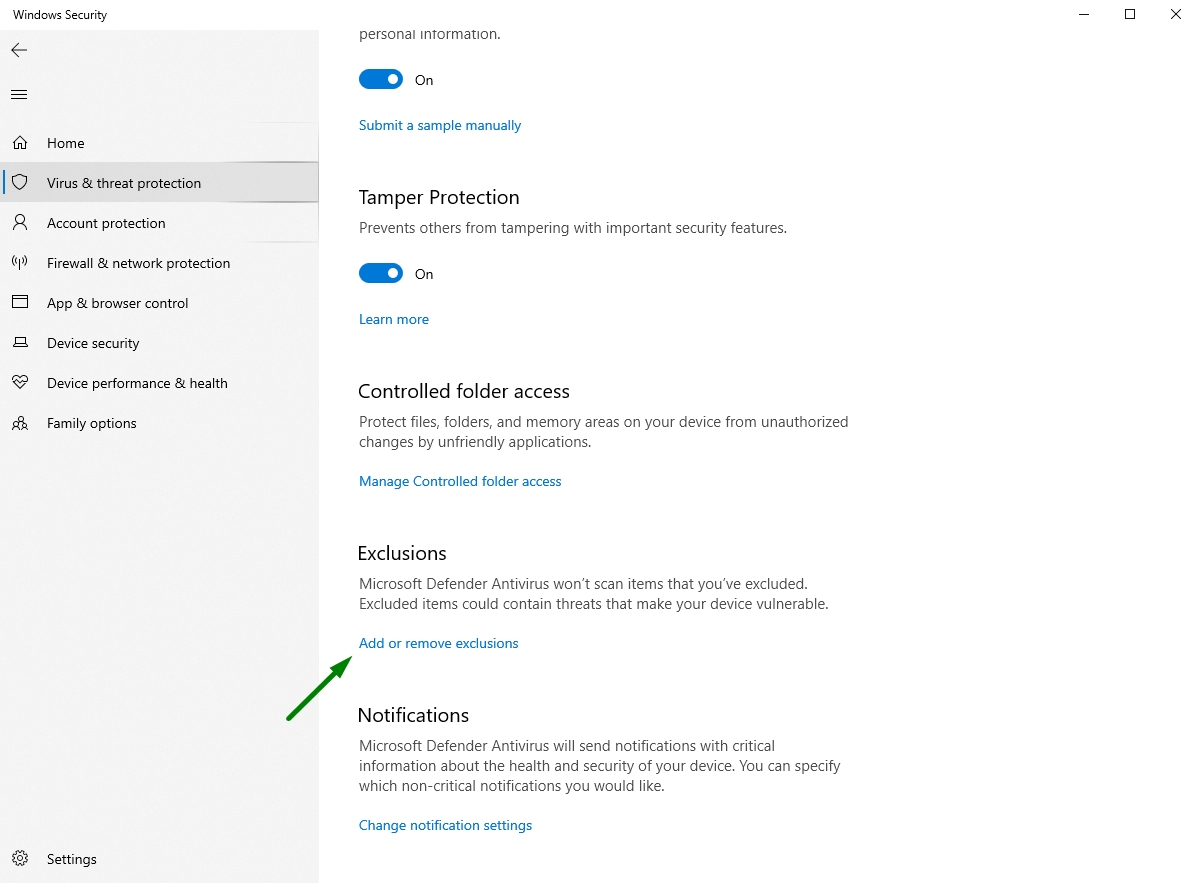
3. Select Exclusions > Add or remove exclusions:
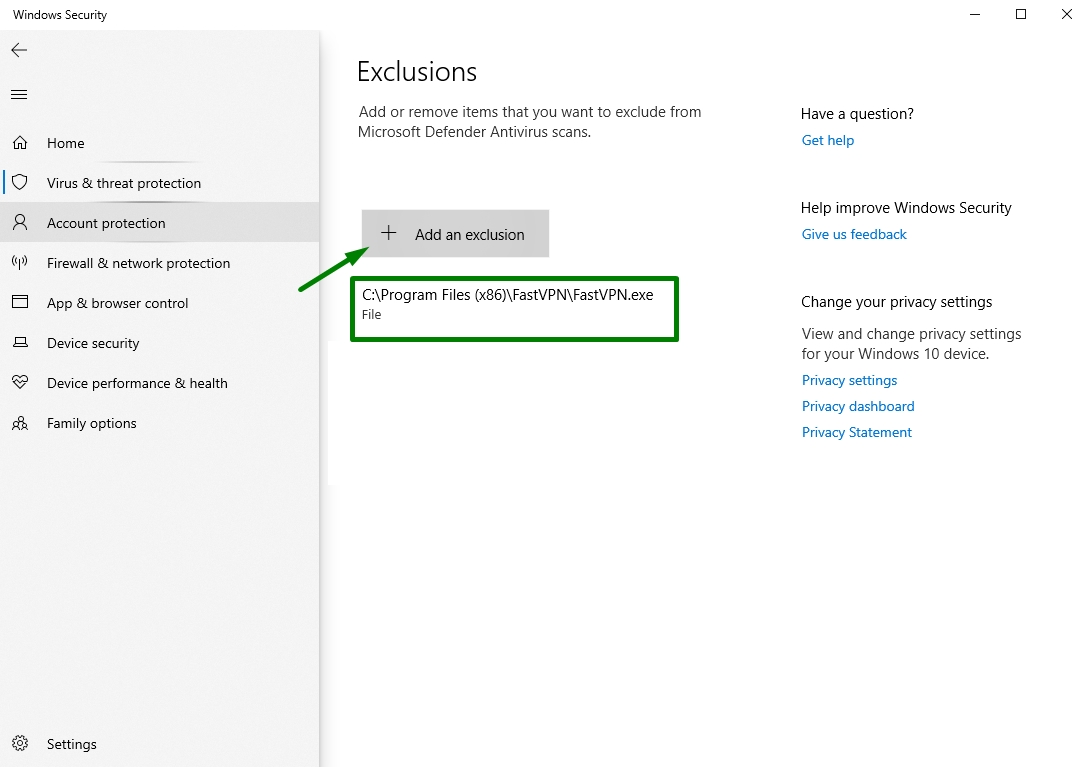
4. Select Add an exclusion and add FastVPN app (C:\Program Files (x86)\FastVPN\FastVPN.exe):
Change allow app settings
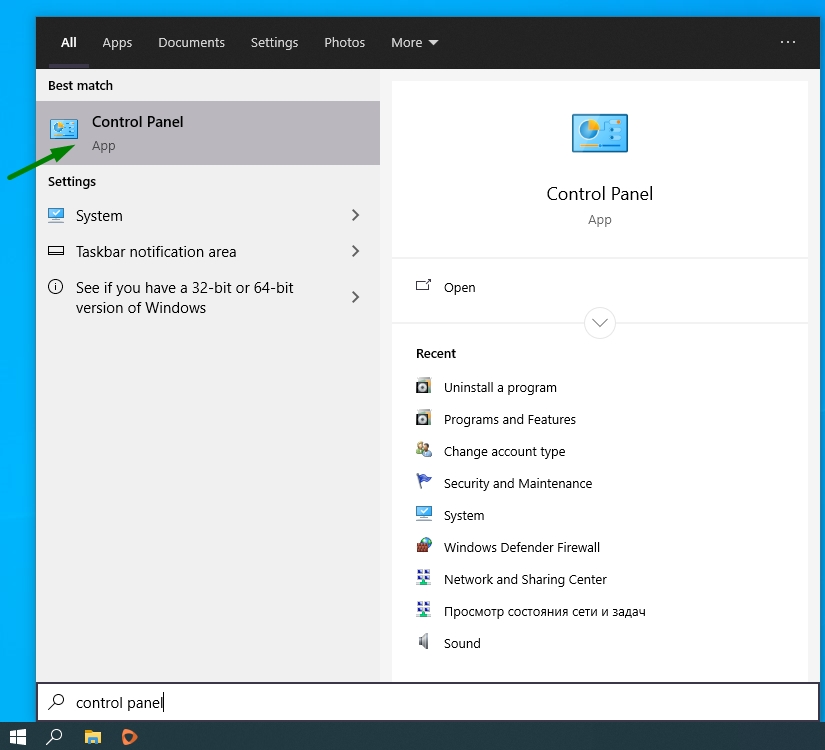
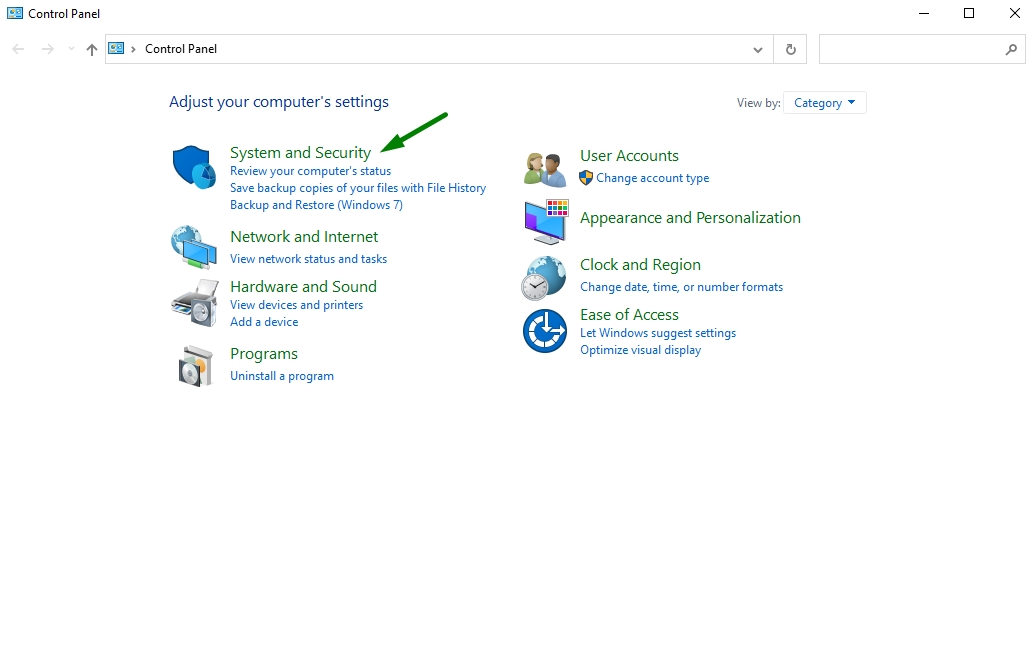
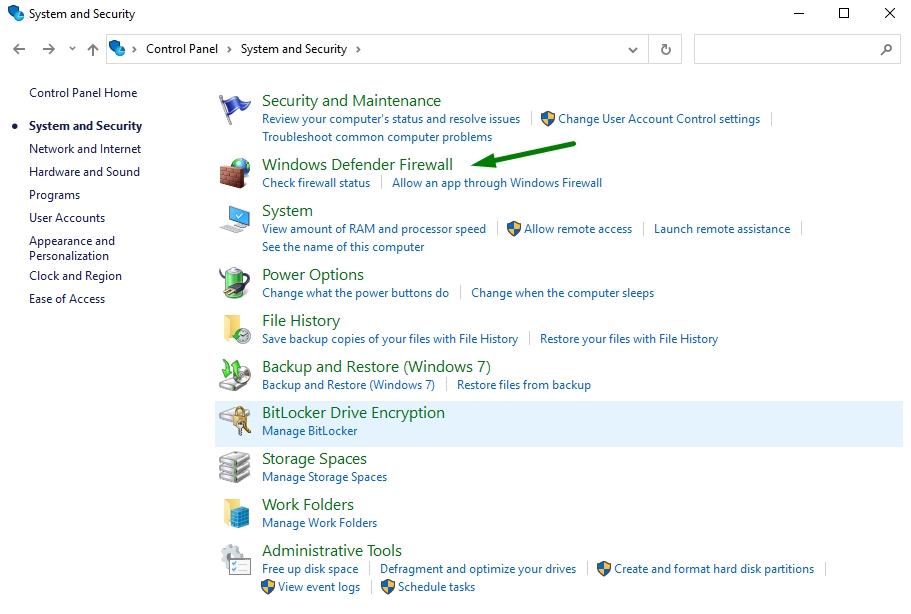
1. Open Control Panel:
2. Select System & Security:
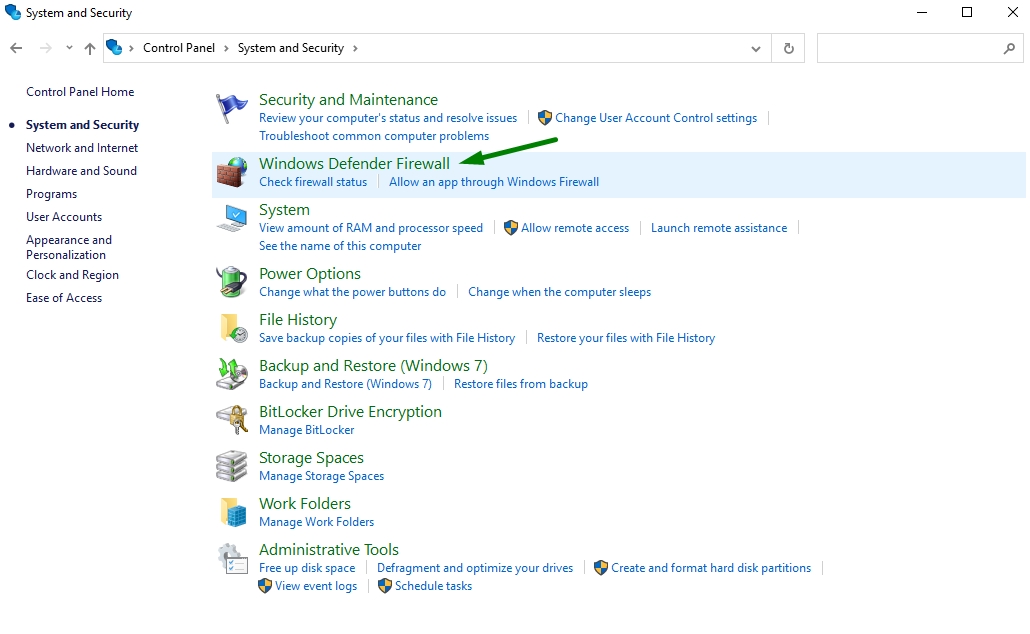
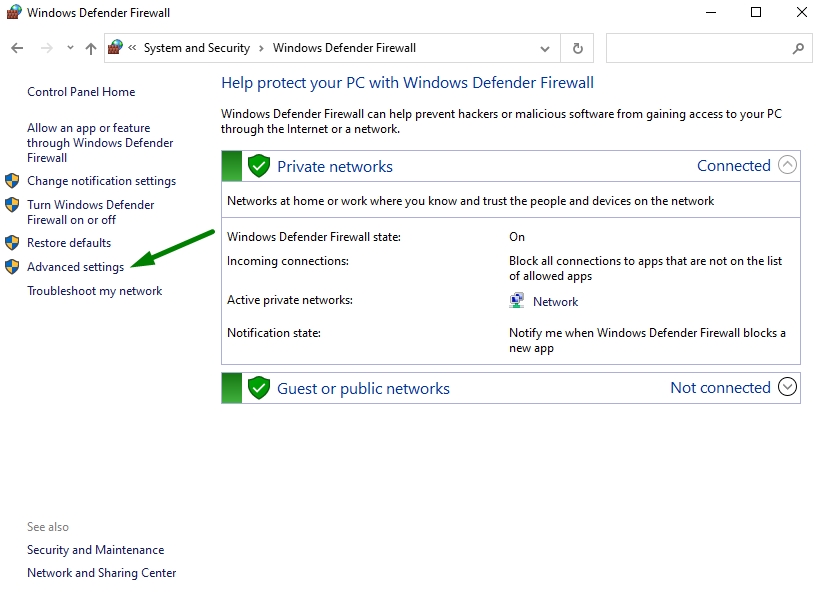
3. Click Windows Defender Firewall:
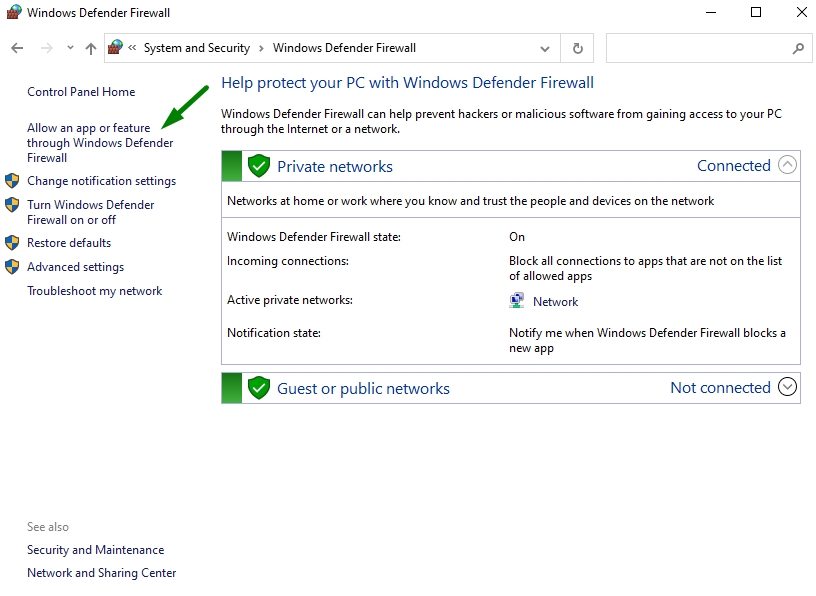
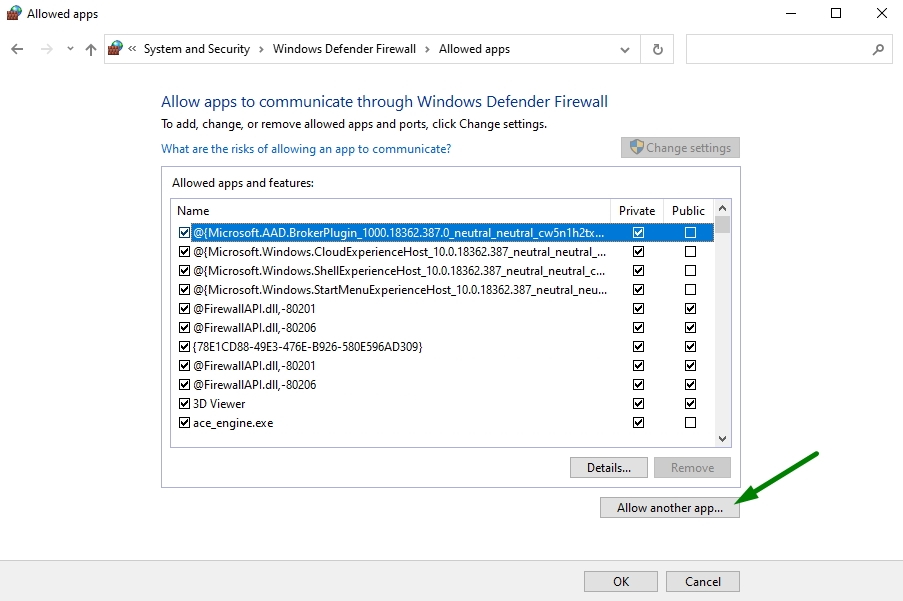
4. On the left panel, click Allow an app through Windows Firewall. A window in which you can allow or prevent any app will appear:
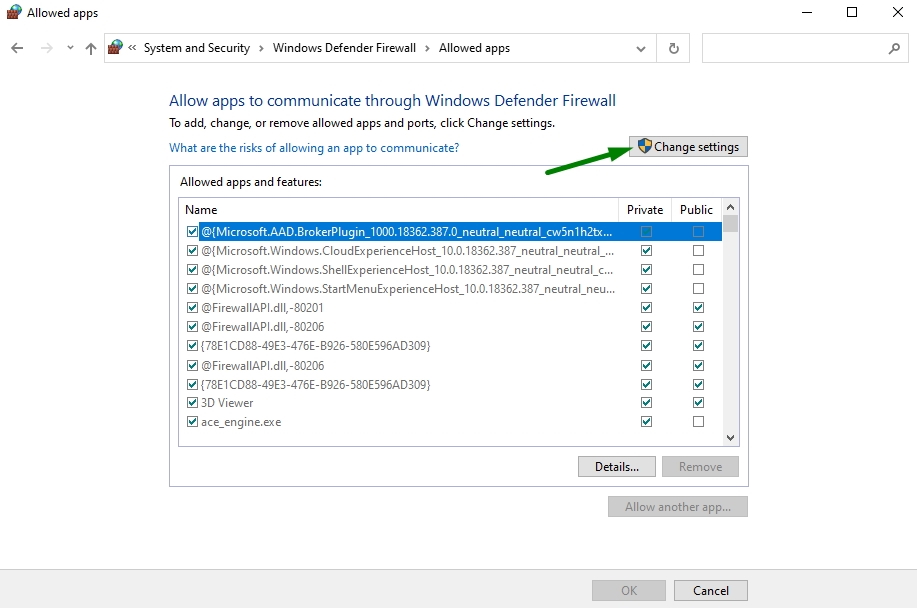
5. Click Change Settings:
6. Check for your VPN from the list of programs and apps you want to allow through your firewall.
7. Check Public or Private to select the network type on which you want the VPN to run.
8. If you cannot find FastVPN app, click
Allow another app:
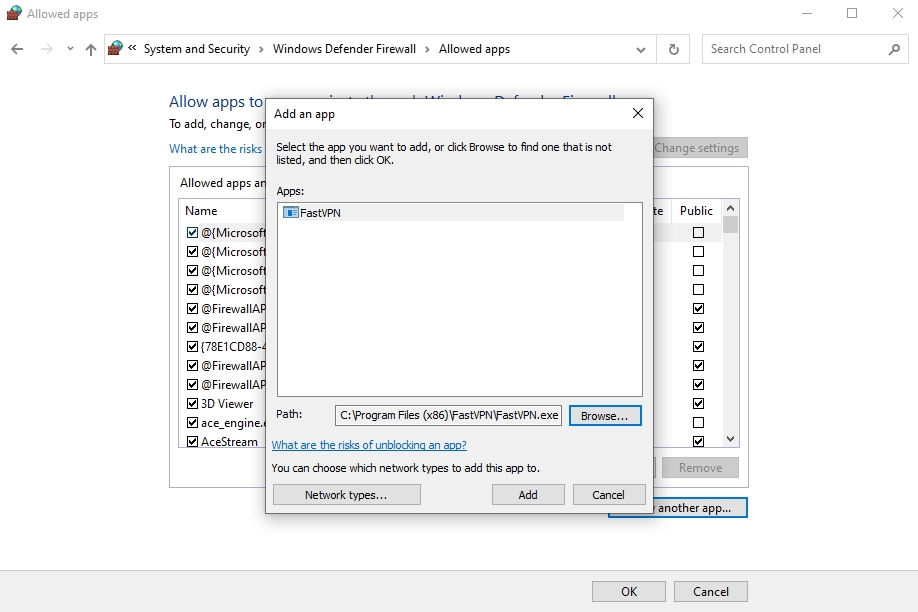
9. Select FastVPN (C:\Program Files (x86)\FastVPN\FastVPN.exe) then click Add and OK:
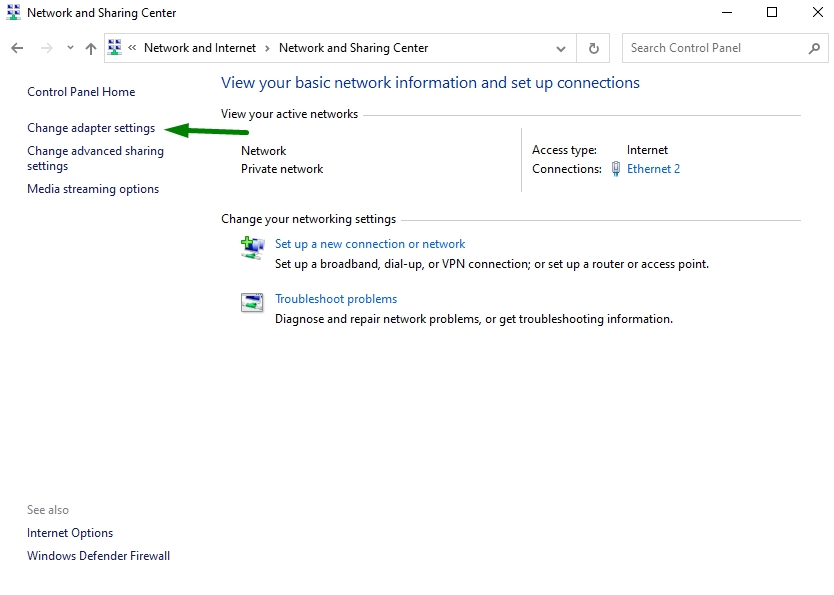
Change Adapter Settings
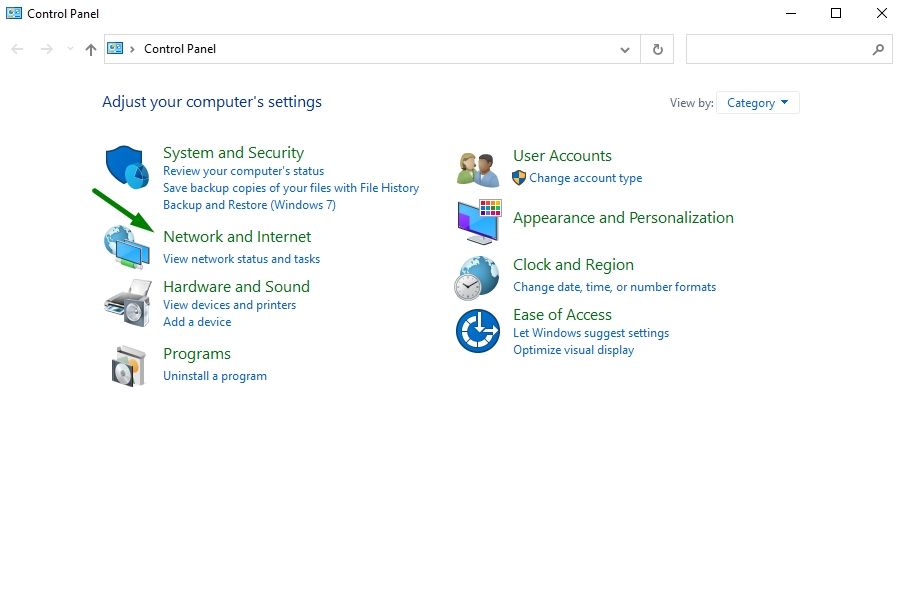
1. Open Control Panel and select
Network & Internet:
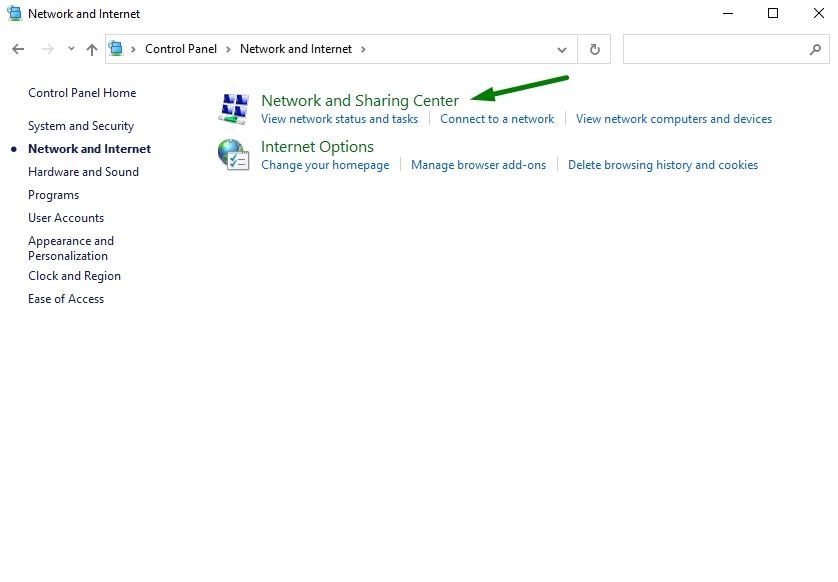
2. Select Network and Sharing Center:
3. On the left pane, click Change adapter settings:
4. Click
File button.
5. Select New incoming connection.
6. Select all users you want to access your VPN connection.
7. Check Through the Internet option.
8. Click Next.
9. From the list of protocols, mark the Internet protocols you want your VPN to connect to.
10. Double click Internet Protocol Version 4 (TCP/IPv4).
11. Go to Control Panel again and select Windows Firewall:
12. Click Advanced Settings:
13. Click Inbound Rules > Actions:
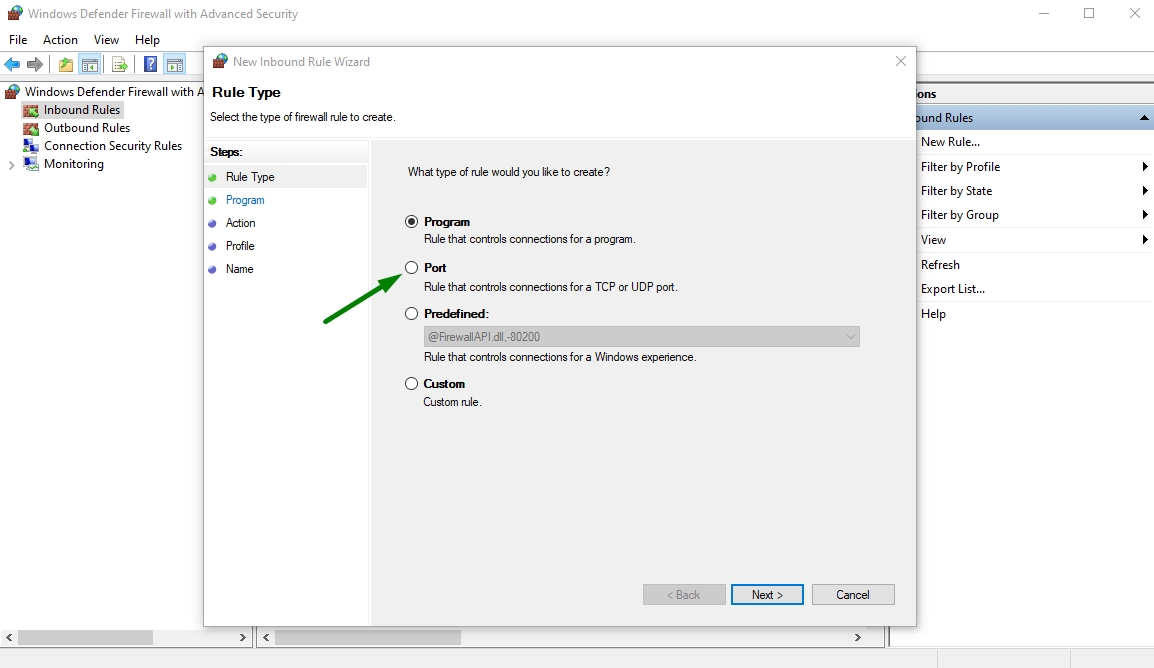
14. Click New Rule:
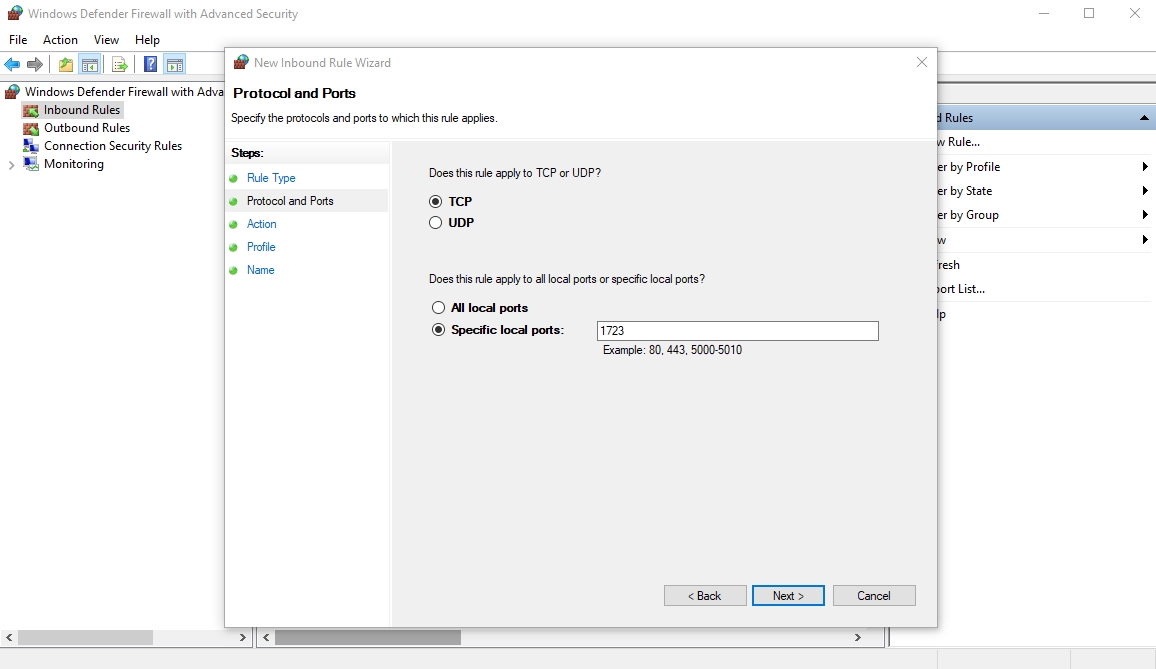
15. In the Wizard, choose Port and click Next. Most VPN clients use ports 500 and 4500 UDP, and port 1723 for TCP. You can use TCP and insert 1723 in Specific remote ports field:
16. Click Next.
17. Select
Allow the connection and click Next:
18. When asked "When does this rule apply?", select all options (
Domain, Private, Public) and apply the rule to all.
19. Choose a name and description to fill the Name and Description.
20. Click Finish.
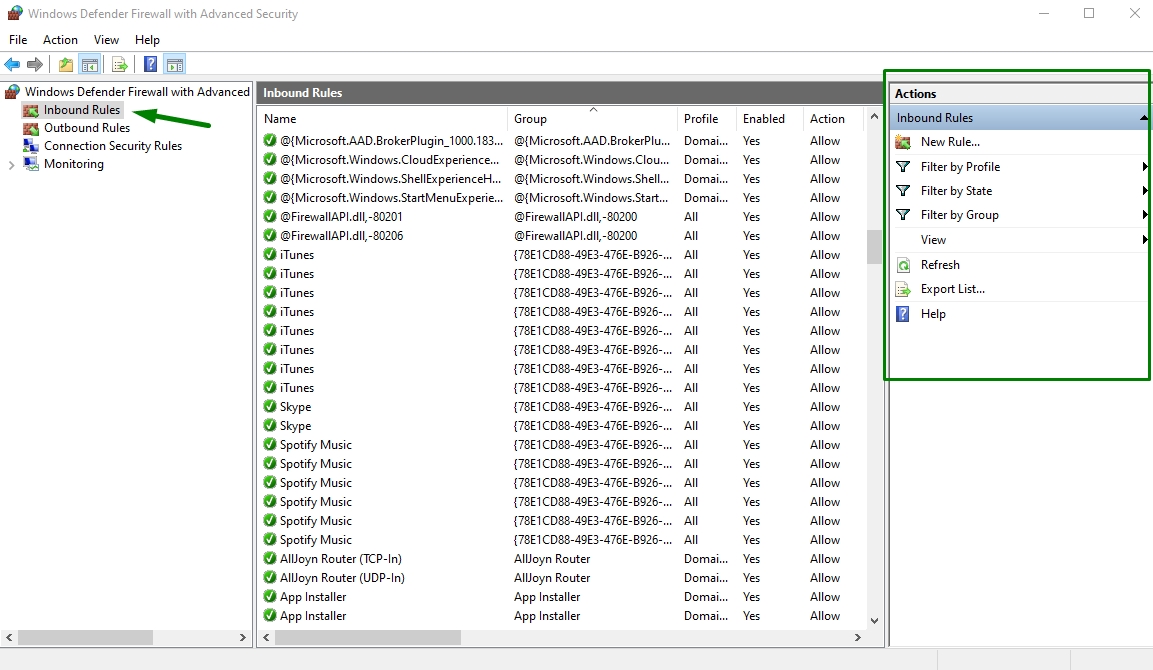
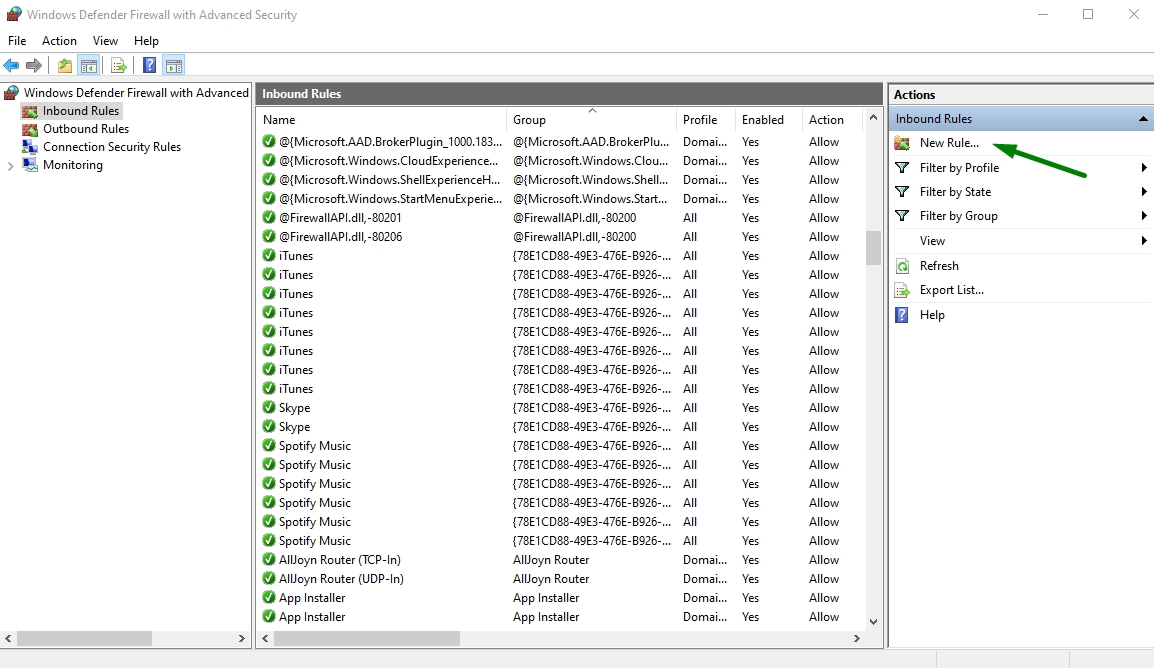
Create new inbound rule
1. Open Windows firewall with advanced security.
2. Click inbound rules on the left.
3. Click New rule on the right.
4. Click Custom rule.
5. Specify programs or leave as all programs.
6. Specify ports or leave as all ports.
7. Click "These IP addresses" under remote IP.
8. Click "This IP address range".
9. Type from
10.8.0.1 To
10.8.0.254.
10. Close and click Next, then leave as "Allow the connection".
11. Apply to all profiles.
12. Name your profile and click Finish.
You should then be able to connect to your home devices through VPN.
Enable rule for PPTP
1. Open Control Panel.
2. Select Windows Firewall.
3. Select Advanced Settings:
4. Search for the "Routing and Remote Access" option under Inbound Rules and Outbound Rules. For Inbound Rules: right-click "Routing and Remote Access (PPTP-In)", select Enable Rule. For Outbound Rules: right-click "Routing and Remote Access (PPTP-Out)", select Enable Rule.
Open ports
In order to allow your VPN traffic to pass through the firewall, open the following ports:
1. IP Protocol=TCP, TCP Port number=1723 – used by PPTP control path.
2. IP Protocol=GRE (value 47) – used by PPTP data path.
3. Make sure that these ports are allowed on Windows Firewall with corresponding network profiles.
4. DO NOT configure RRAS static filters if you are running on the same server RRAS based NAT router functionality. This is because RRAS static filters are stateless and NAT translation requires a stateful edge firewall like ISA firewall.
5. In general, VPN error 807 indicates that the network connection between your computer and the VPN server was interrupted. This also can be caused by an issue in the VPN transmission and is commonly the result of Internet latency or simply means that your VPN server has reached capacity. Try to reconnect to the VPN server.
Turn off SSL monitoring
Depending on your firewall or security software, there are steps to take to fix VPN blocked by Windows firewall. Here’s what to do if you’re using NOD32 or Kaspersky.
NOD32:
- Select Setup.
- Select Advanced Setup.
- Select Antivirus and antispyware.
- Select Web access protection.
- Select HTTP, HTTPS > HTTP scanner setup, and set HTTPS filtering mode to "Do not use HTTPS protocol checking".
Kaspersky:
- Select Settings.
- Select Traffic Monitoring panel.
- Select Port Settings or settings.
- Select Network.
- Select Port Settings and uncheck the box for port 443/SSL.