This guide walks you through purchasing FastVPN, installing the Android app, connecting to a VPN location, and using the app's main features.
Step 1. Purchase FastVPN
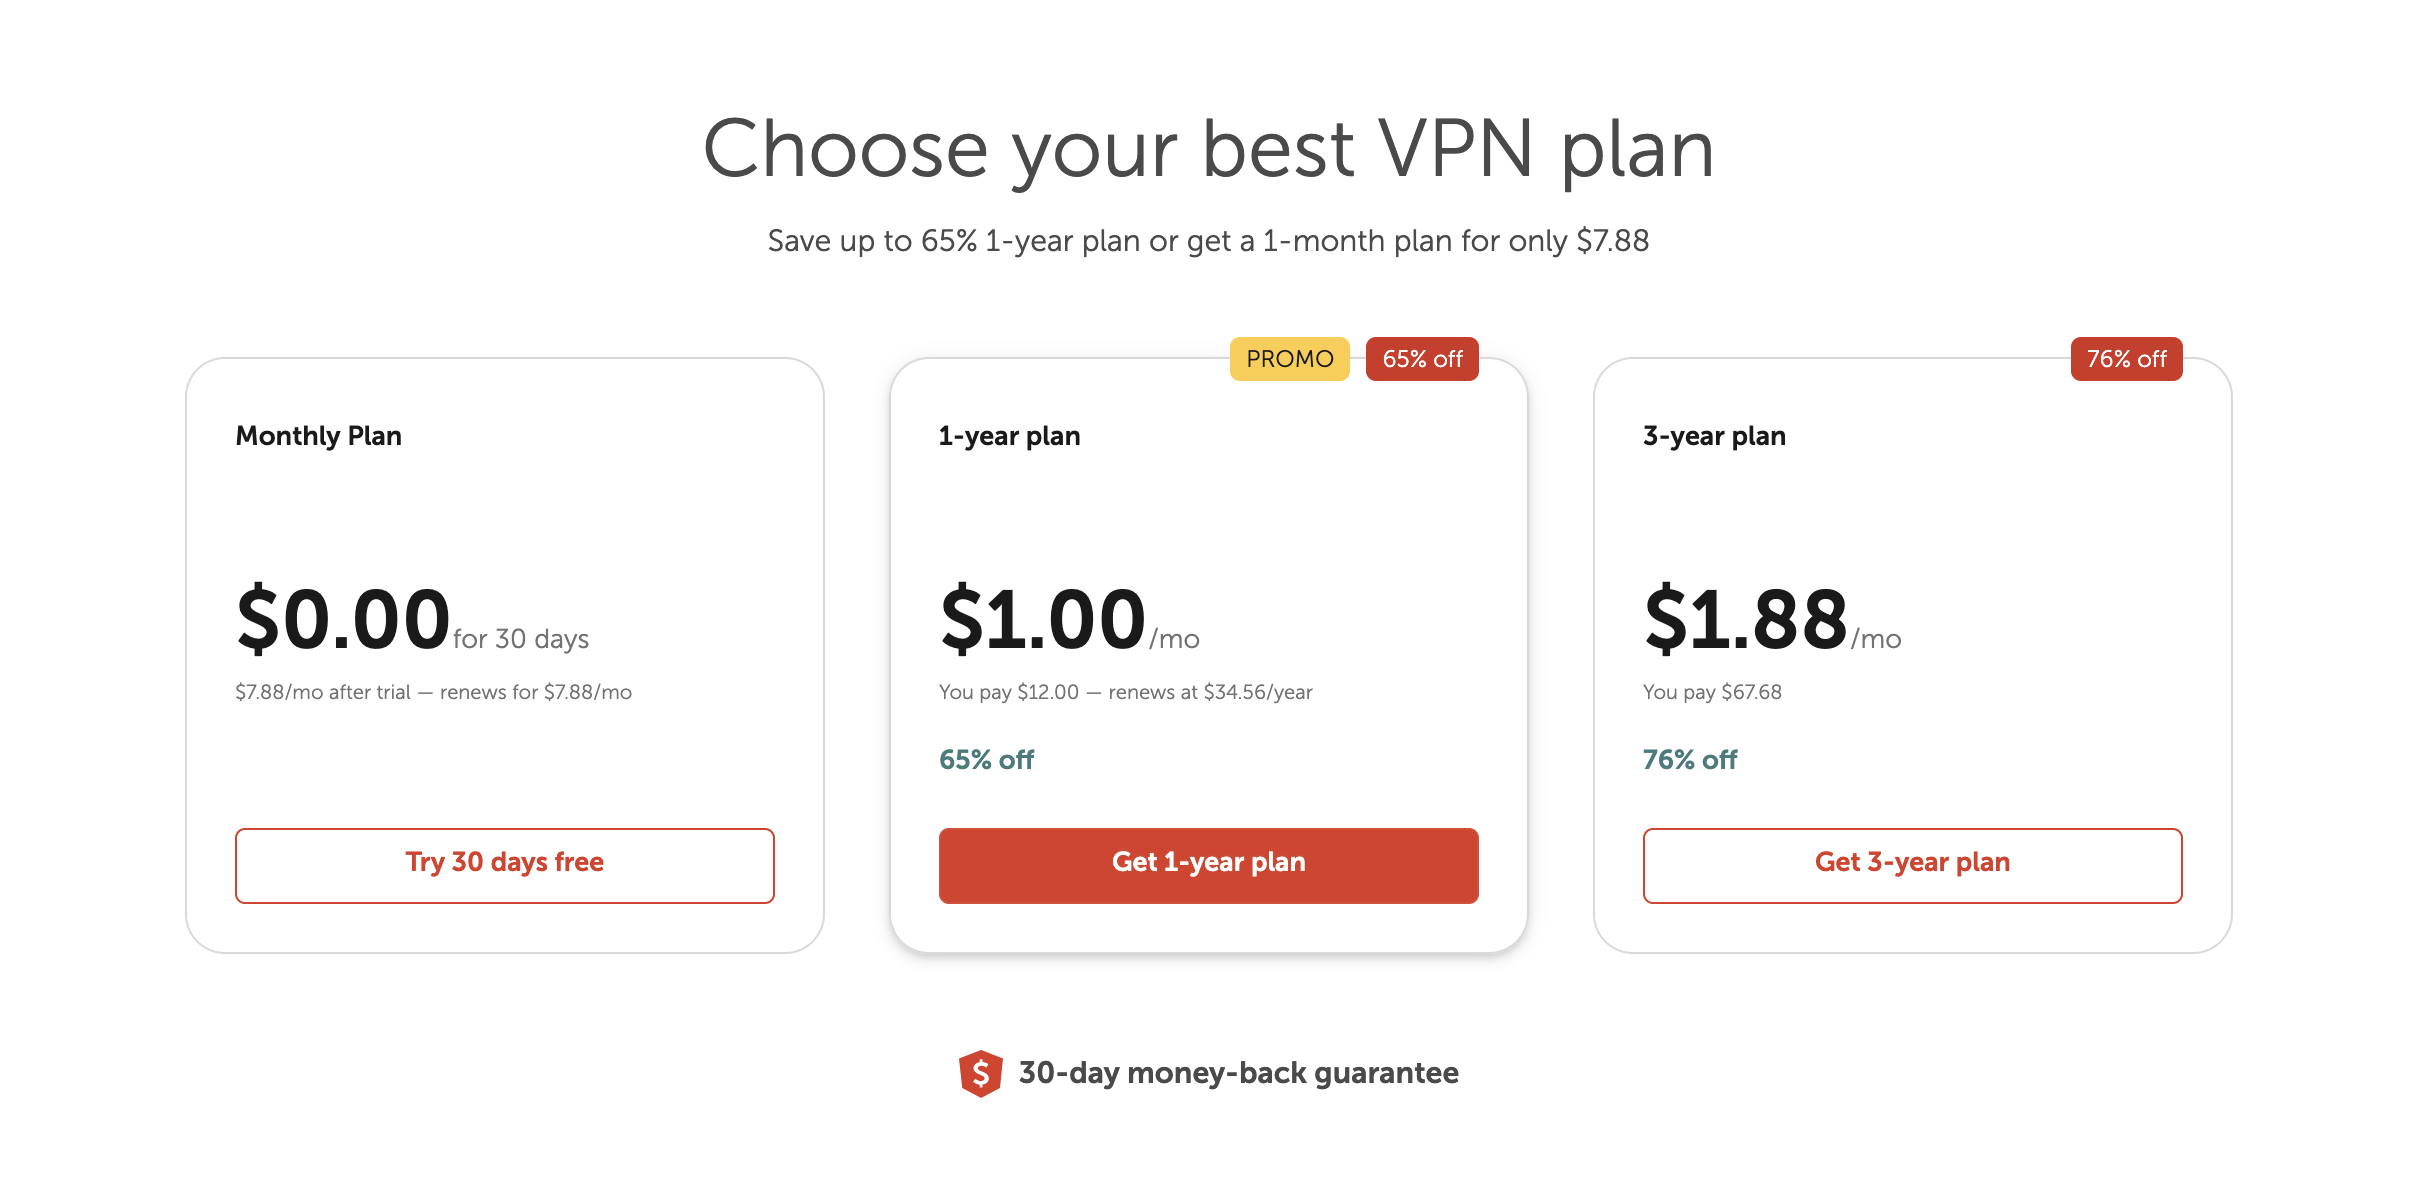
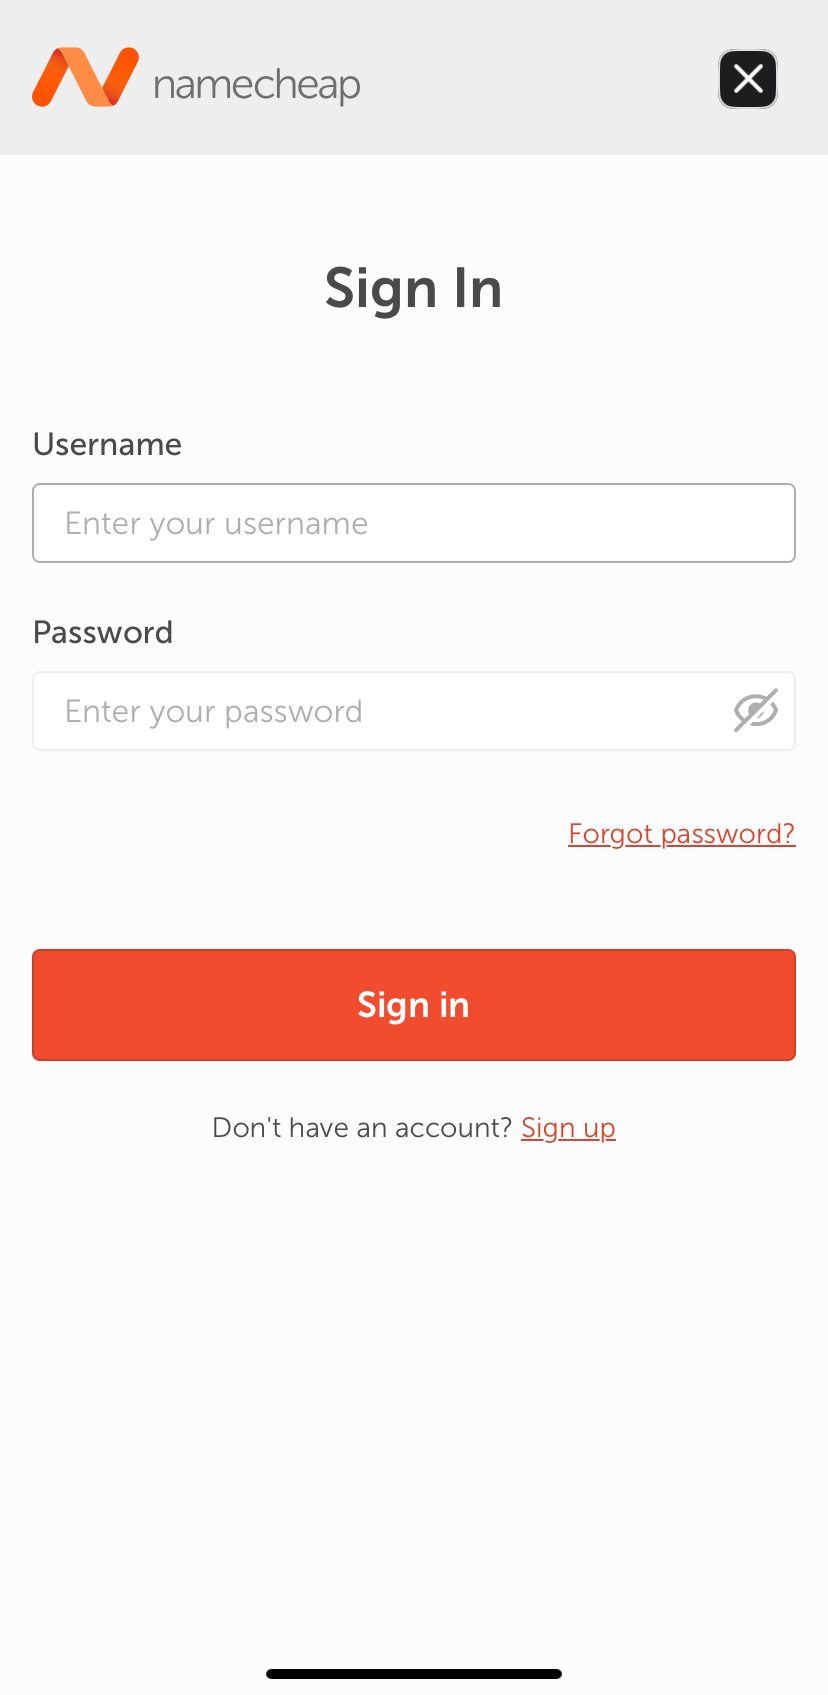
Once you click the button under your plan, you will be prompted to sign into your Namecheap account:
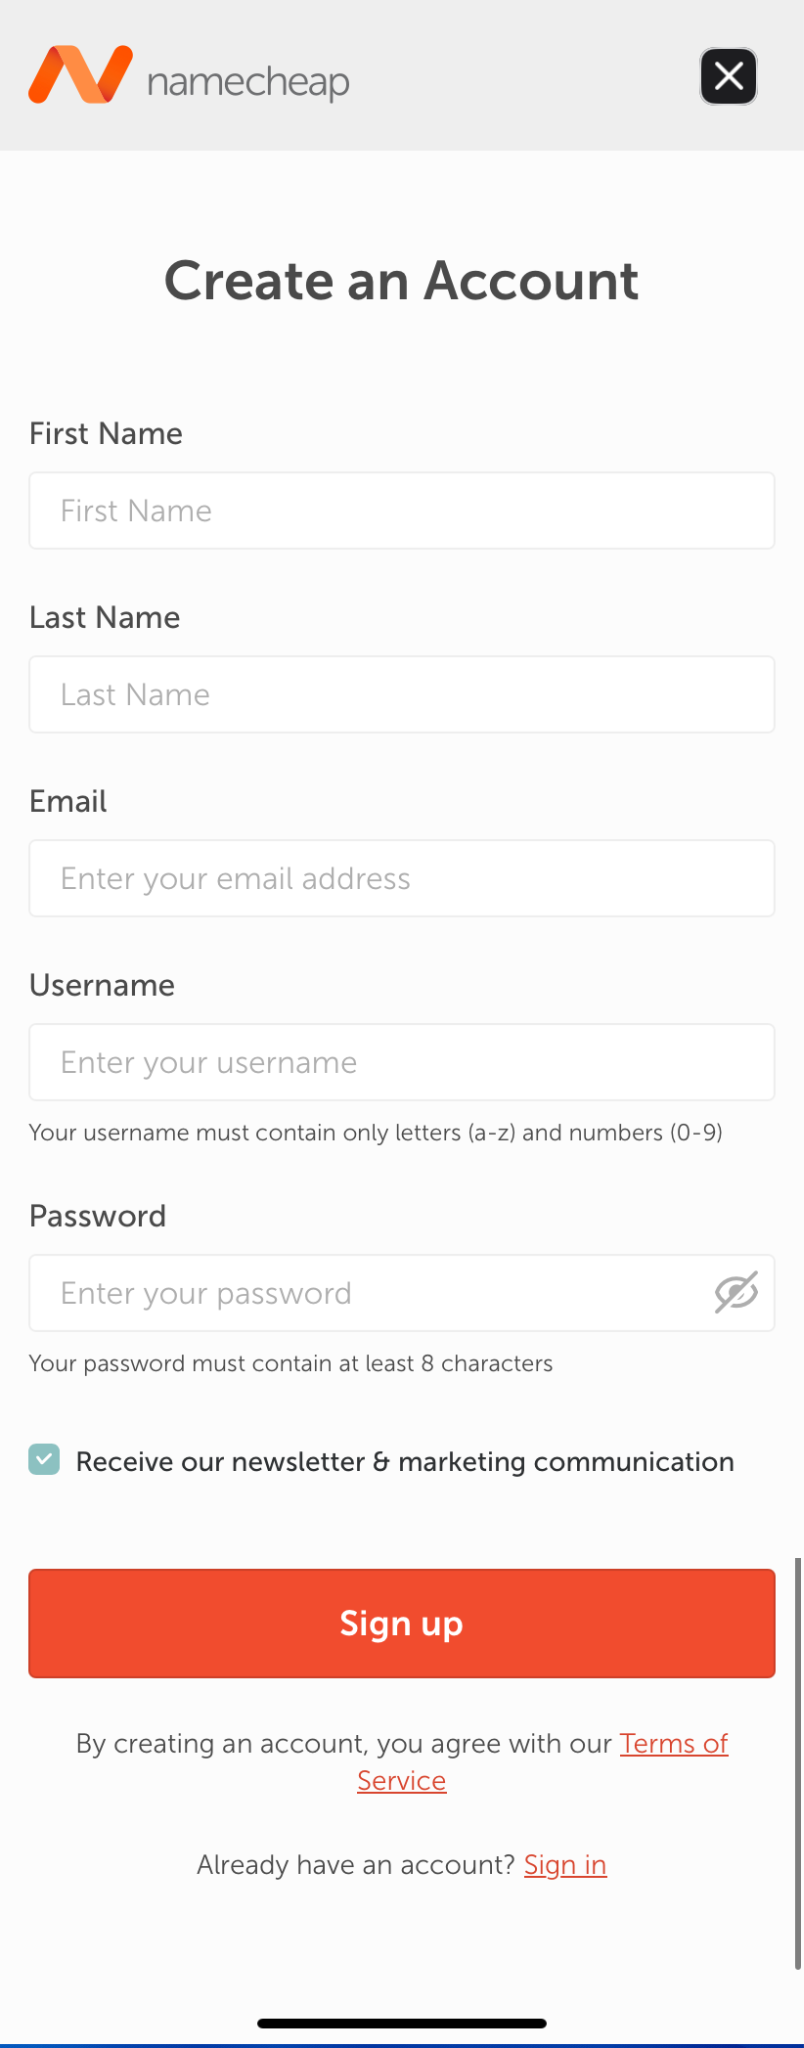
or to create a new account:
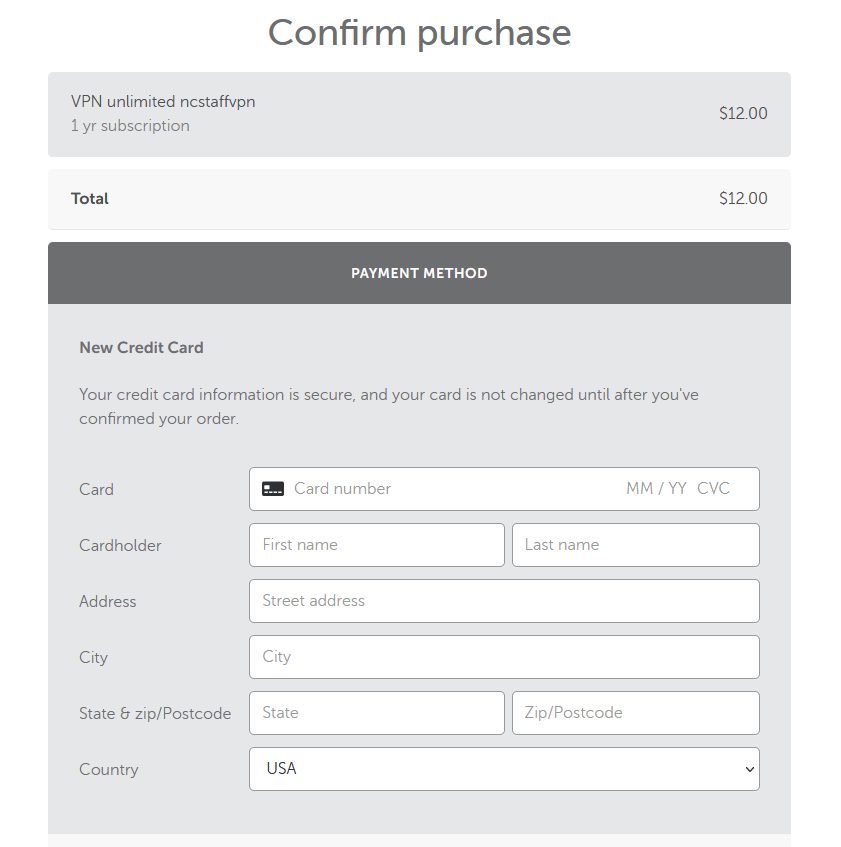
Once you're logged in, enter payment details and confirm your purchase of
FastVPN for Android:
Step 2. Install the app
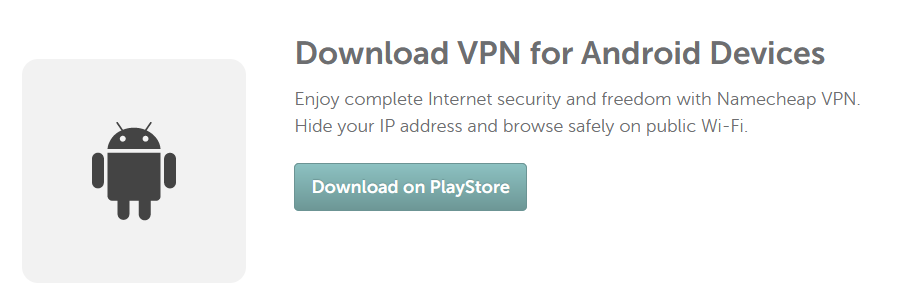
You can get the link to install the app directly from the
FastVPN for Android page by clicking the
Download button in the
Download VPN for Android Devices section:
Step 3. Log in
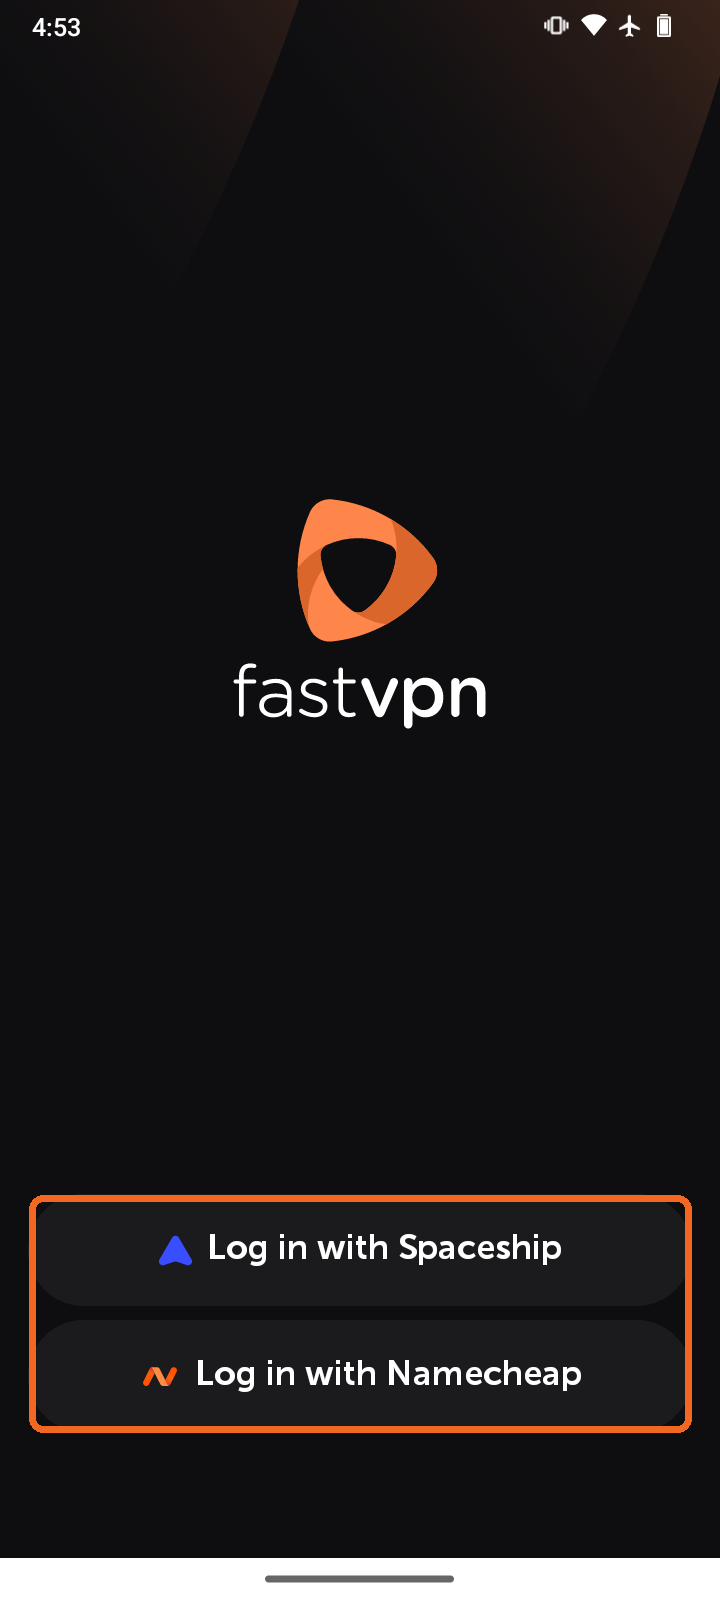
Once the app is installed, open FastVPN from your app list. On the welcome screen, choose how to log in:
-
Log in with Namecheap if you purchased FastVPN with your Namecheap account.
-
Log in with Spaceship if you purchased FastVPN with your Spaceship account.
Step 4. Allow notifications
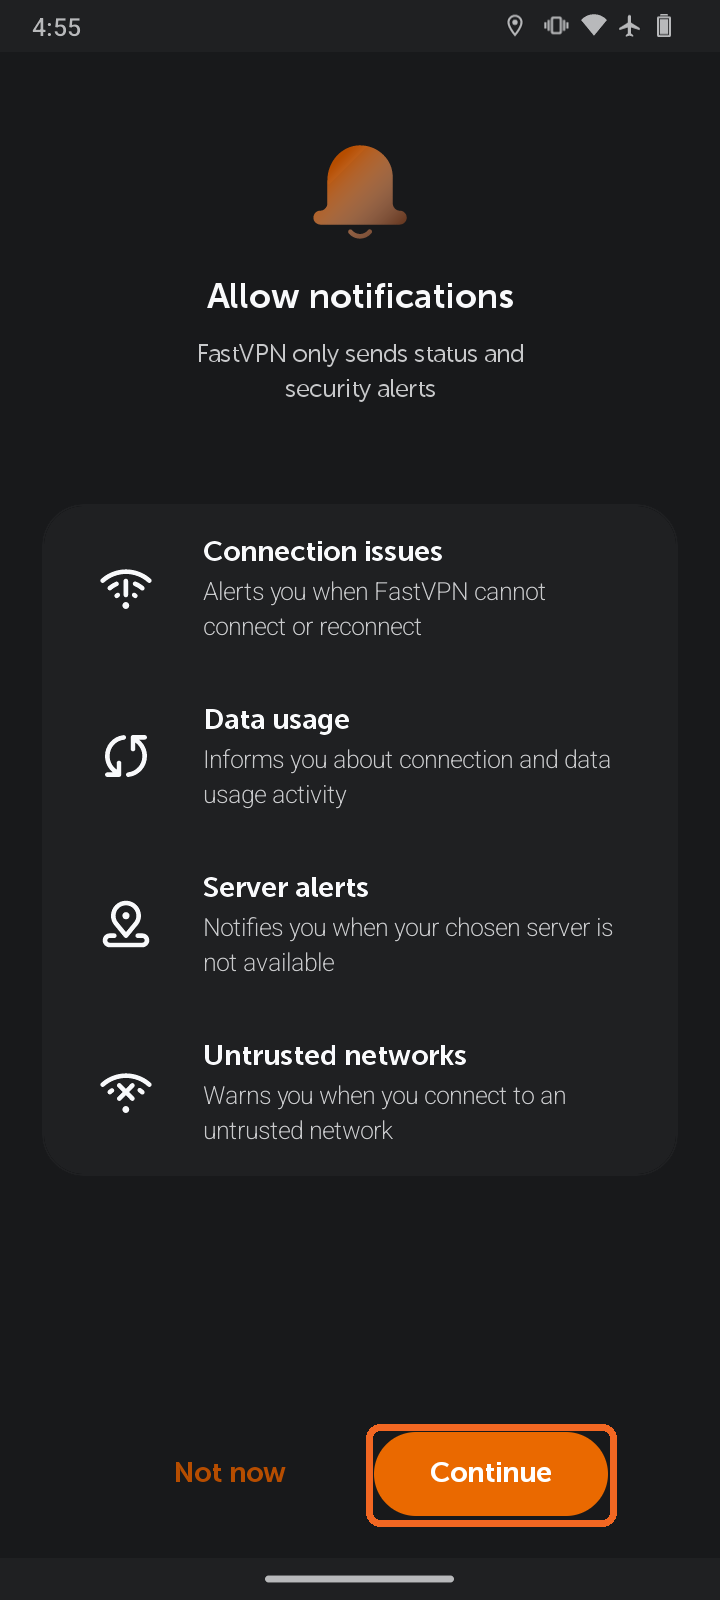
After you log in, FastVPN asks for permission to send notifications. FastVPN only sends status and security alerts:
-
Connection issues - alerts you when FastVPN cannot connect or reconnect.
-
Data usage - informs you about connection and data usage activity.
-
Server alerts - notifies you when your chosen server is not available.
-
Untrusted networks - warns you when you connect to an untrusted network.
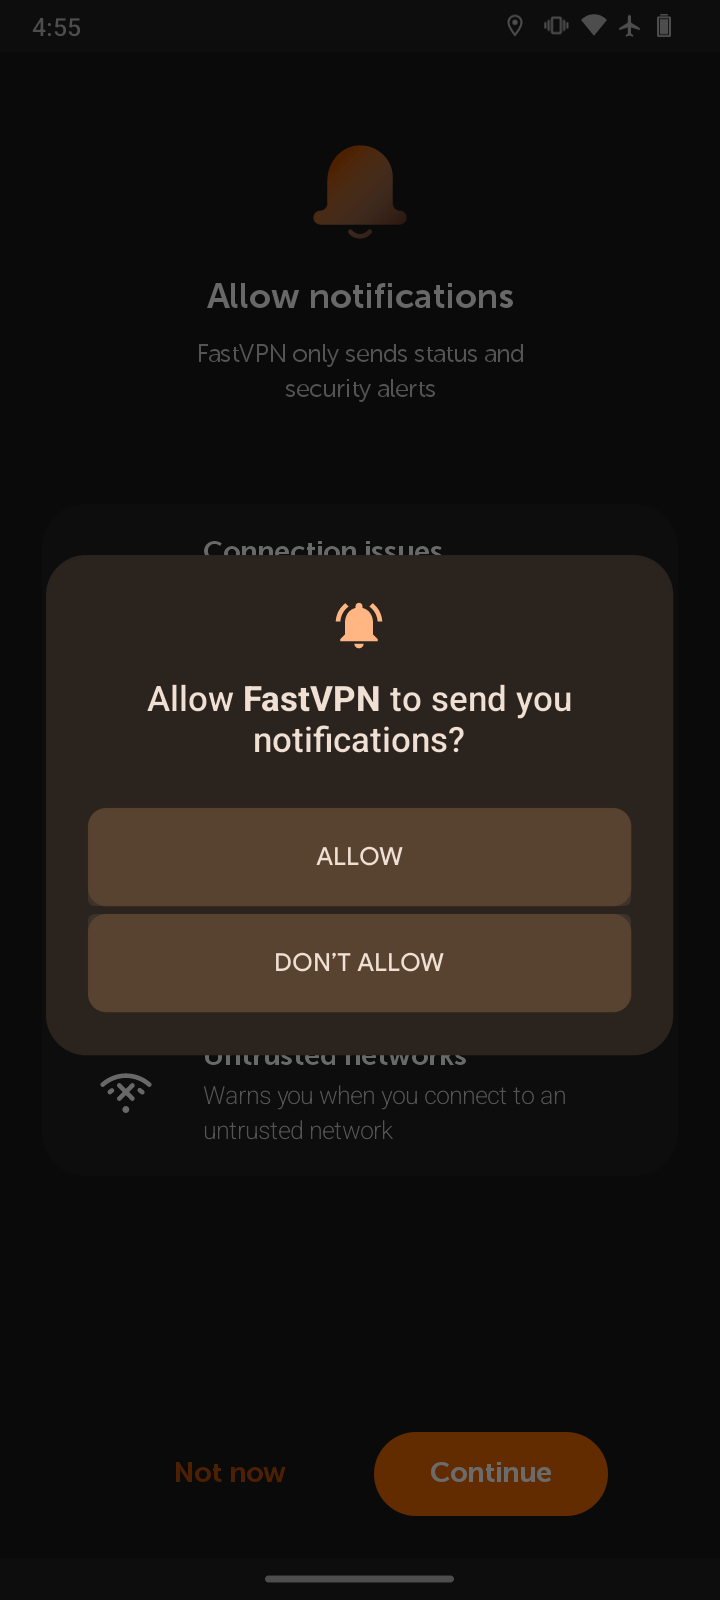
Tap Continue, then tap Allow in the Android prompt. If you prefer not to receive alerts, tap Not now - you can still use the VPN.
Step 5. Connect to the VPN
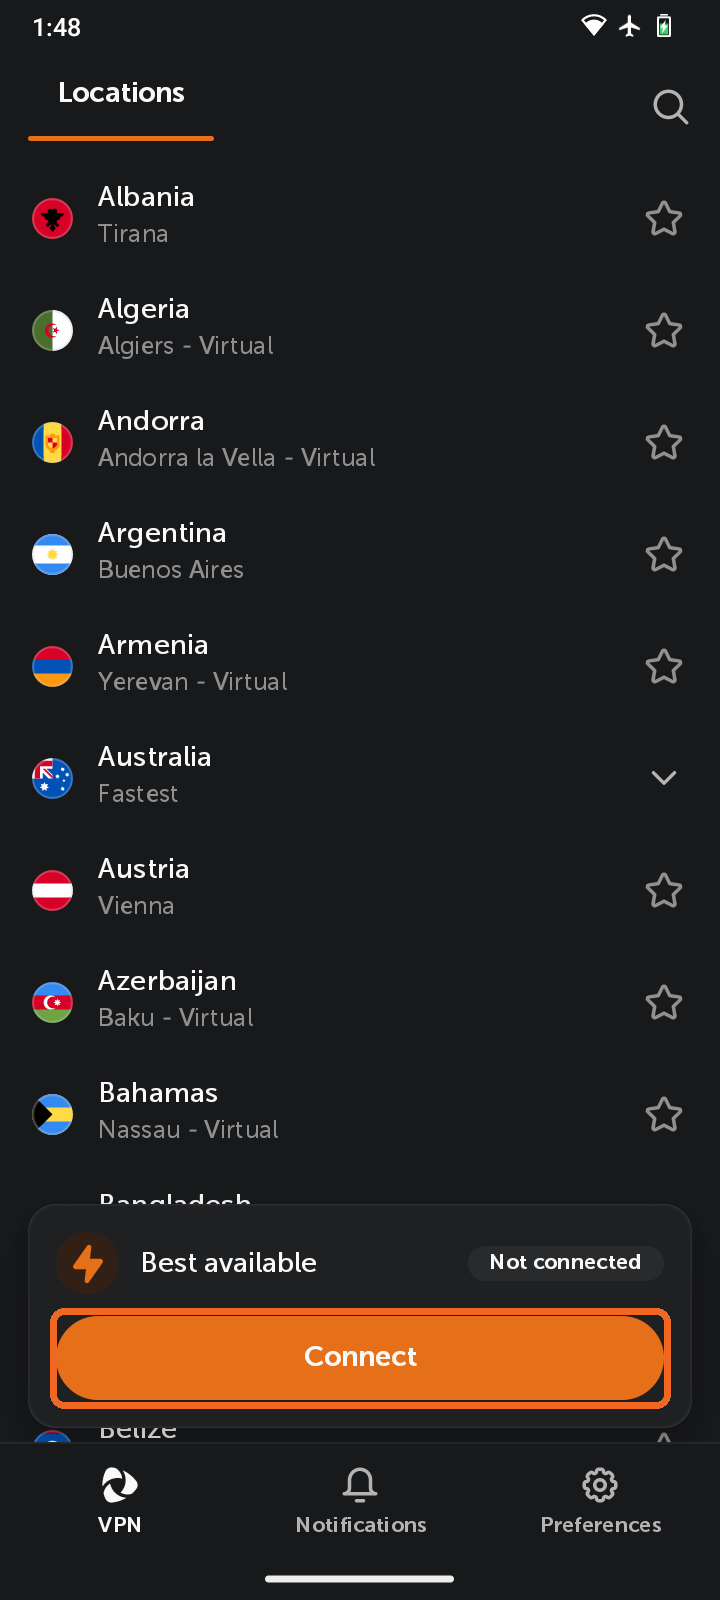
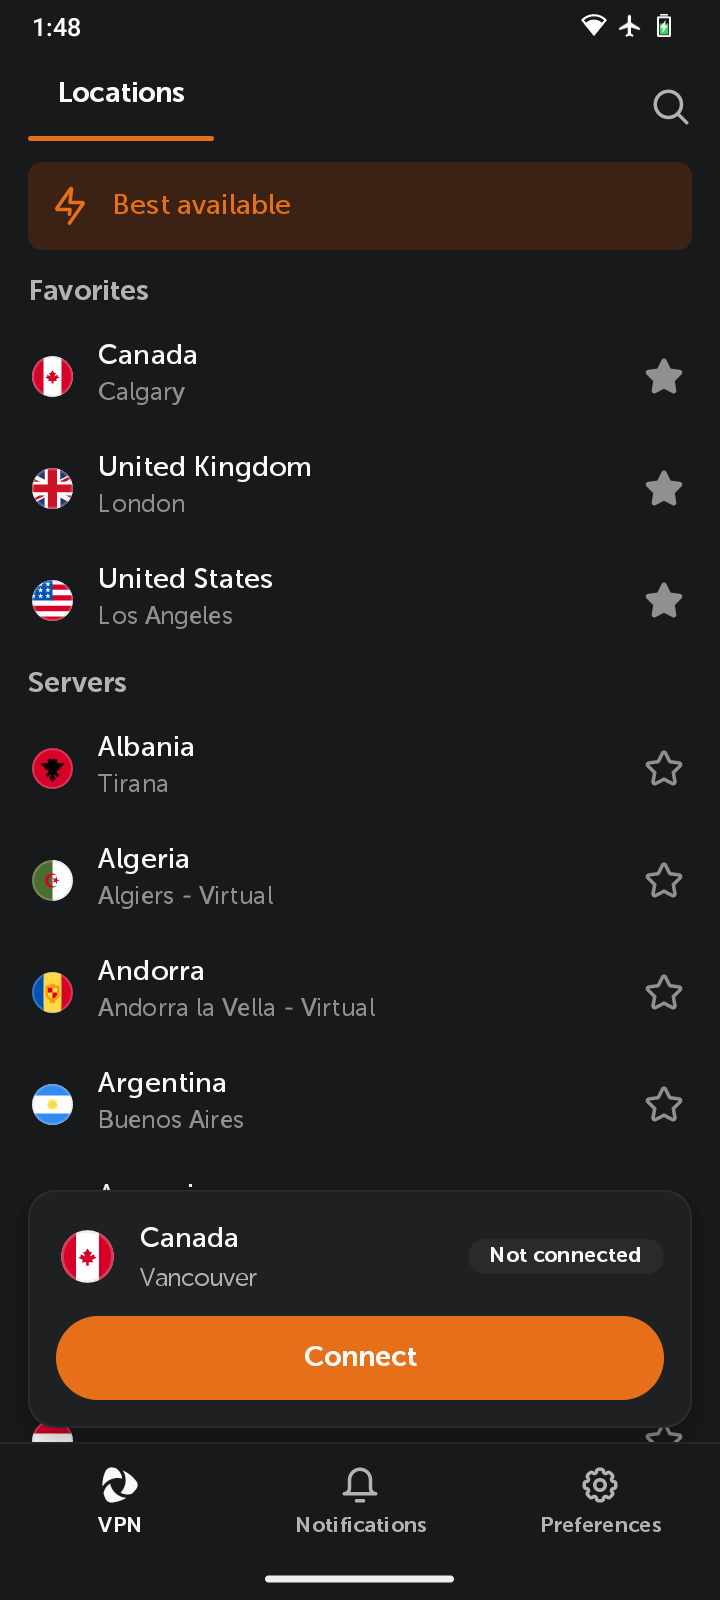
You will land on the VPN tab. It shows the list of locations, and the connection card at the bottom of the screen shows the selected location and your connection status.
By default, Best available is selected - the app picks the location with the most preferable download speed, latency, and distance for you. Tap Connect to connect to it.
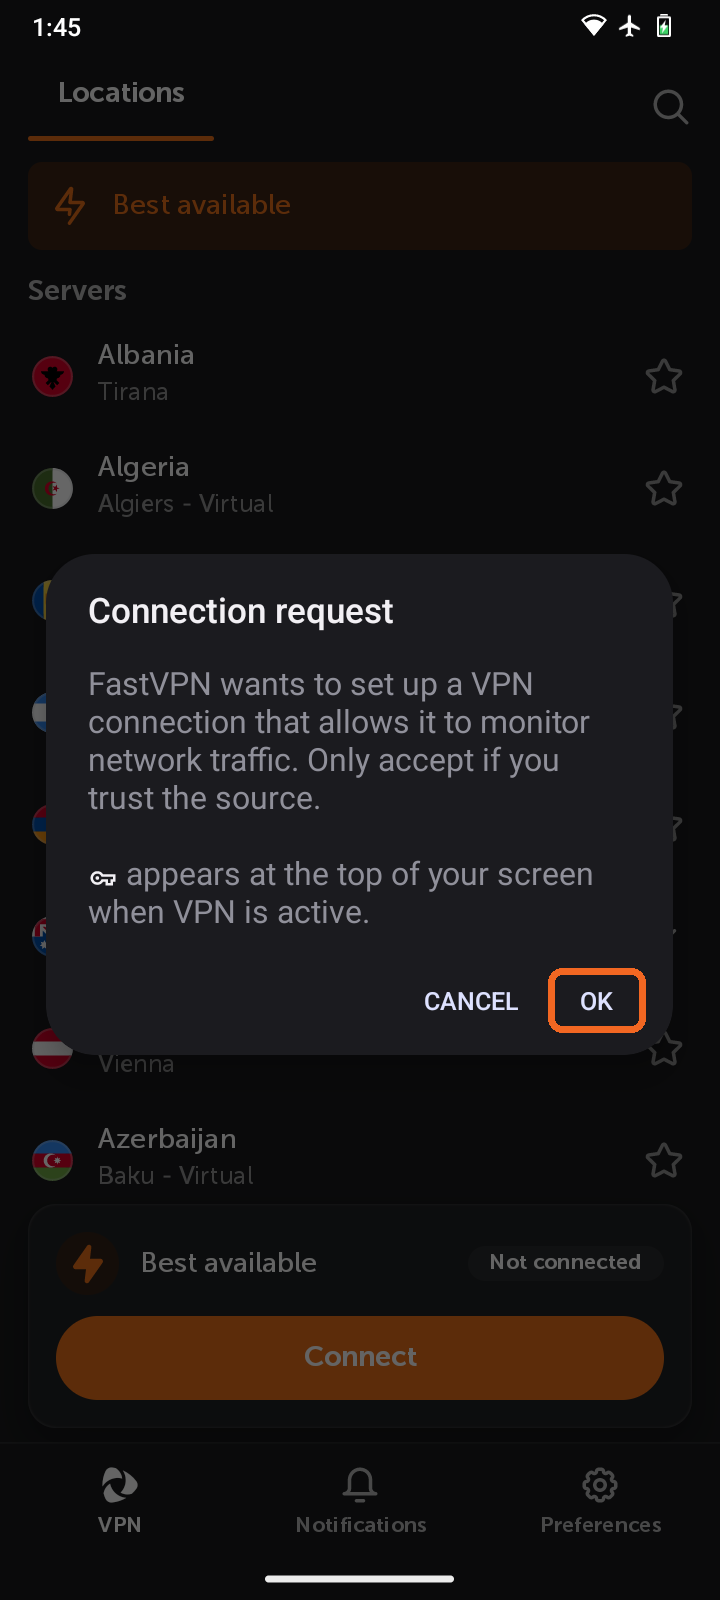
The first time you connect, Android asks you to allow FastVPN to set up a VPN connection. Tap OK on the Connection request pop-up. A key icon appears at the top of your screen whenever the VPN is active.
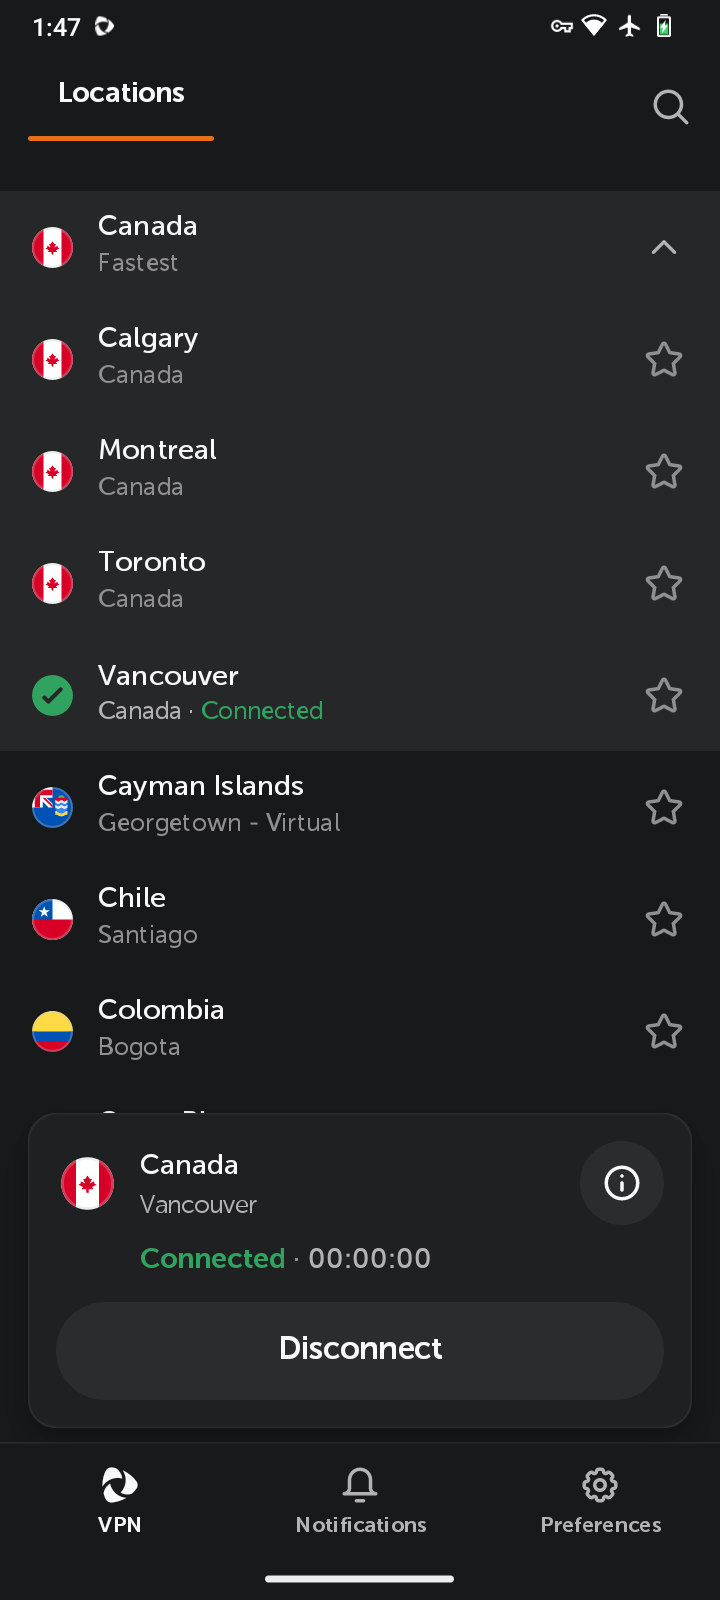
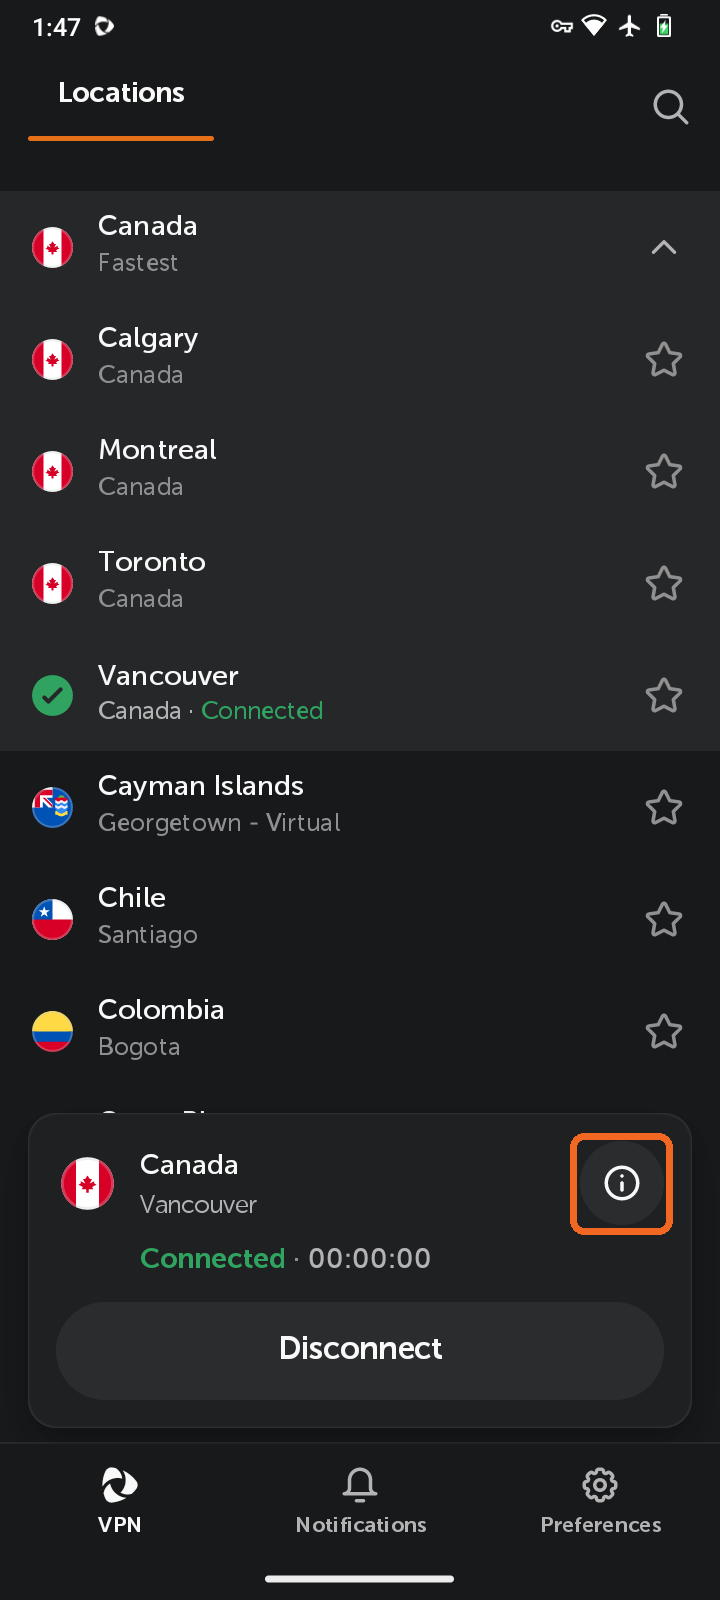
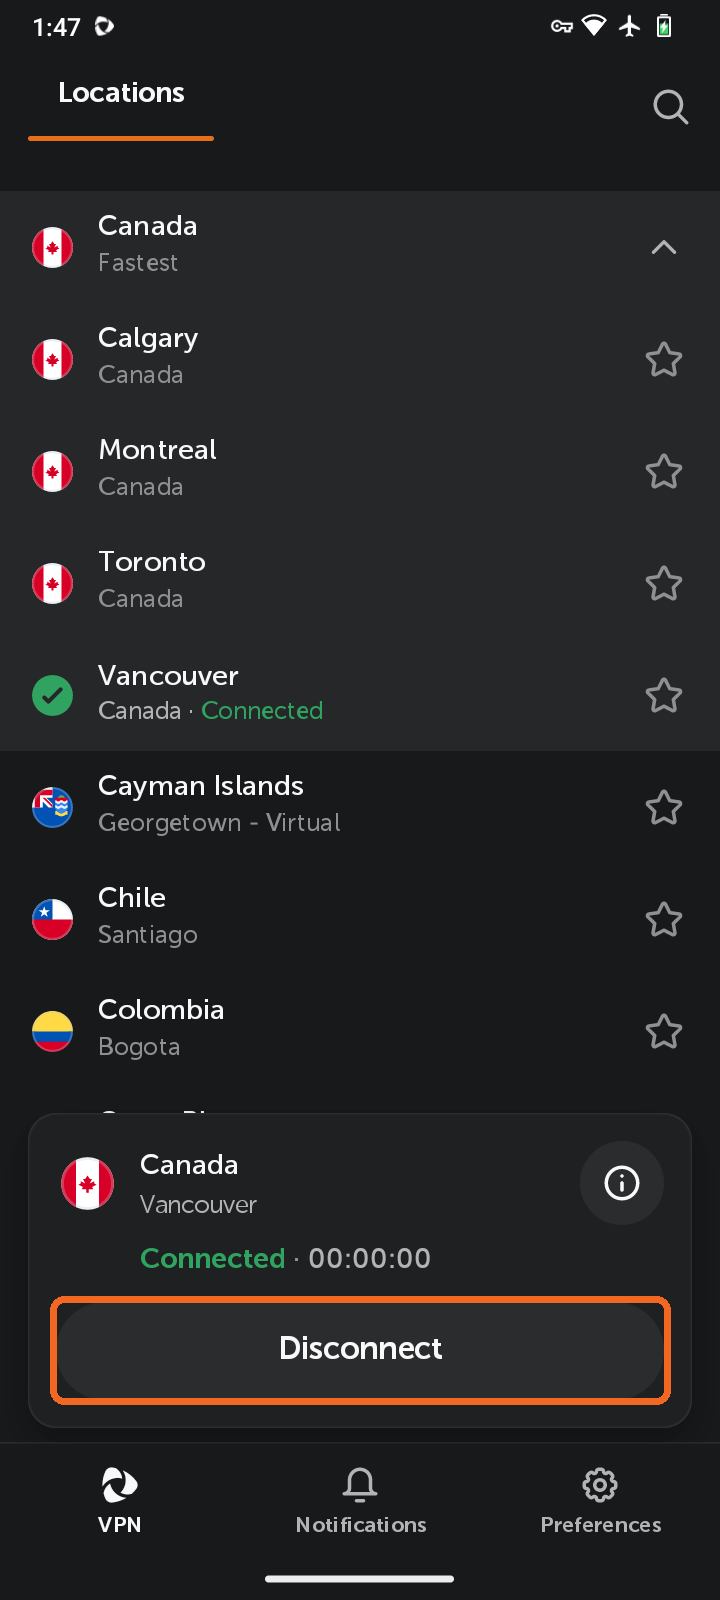
Once connected, the connection card shows your location, the Connected status and the connection time:
Note: The greater the distance between you and the chosen location, the greater the latency. The delay also depends on the networking efficiency and the quality of the routing devices.
Step 6. Choose a location
To connect to a specific location instead of Best available, scroll through the Servers list on the VPN tab and tap the location you want. The app will automatically connect to the selected location. The location you are connected to is marked with a green check mark and the Connected label.
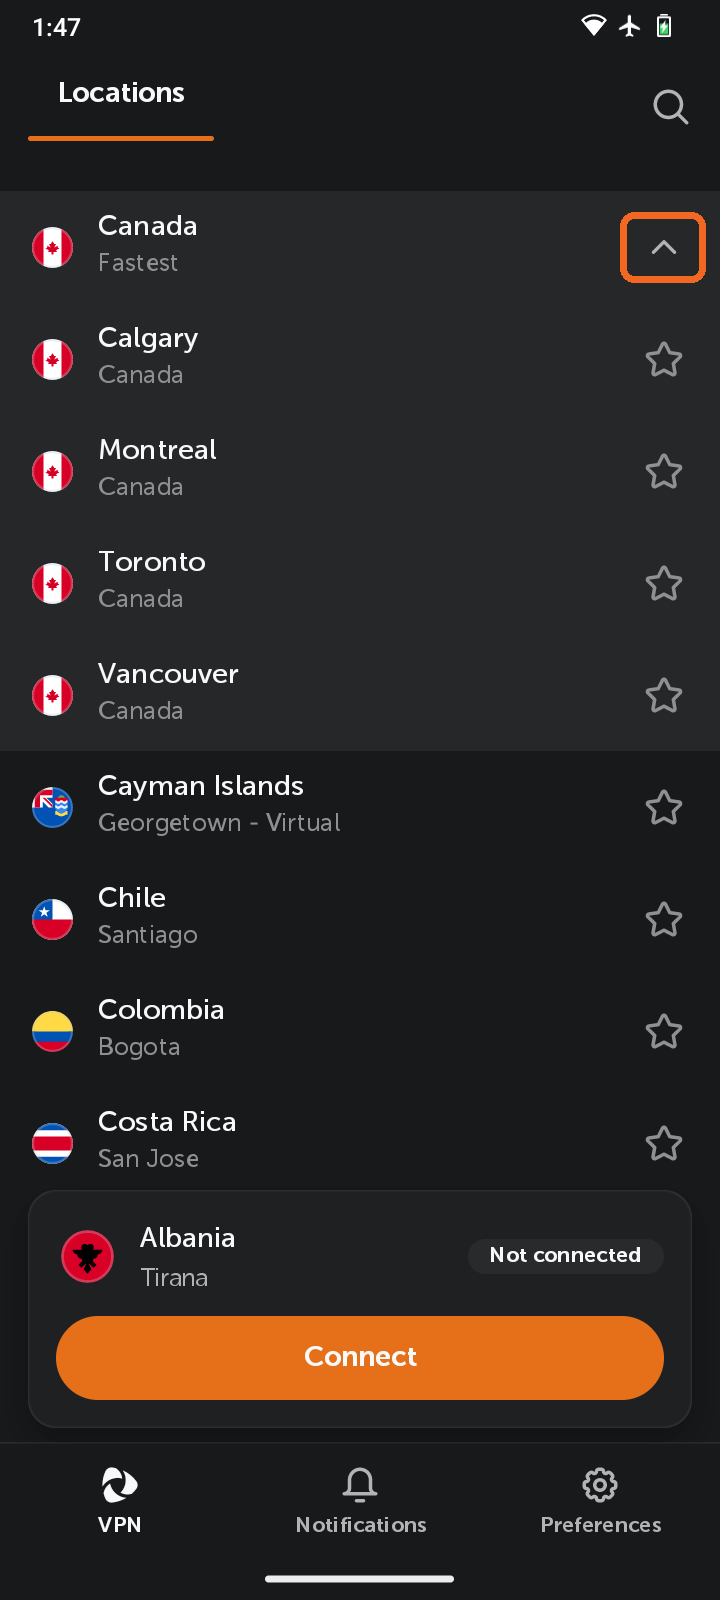
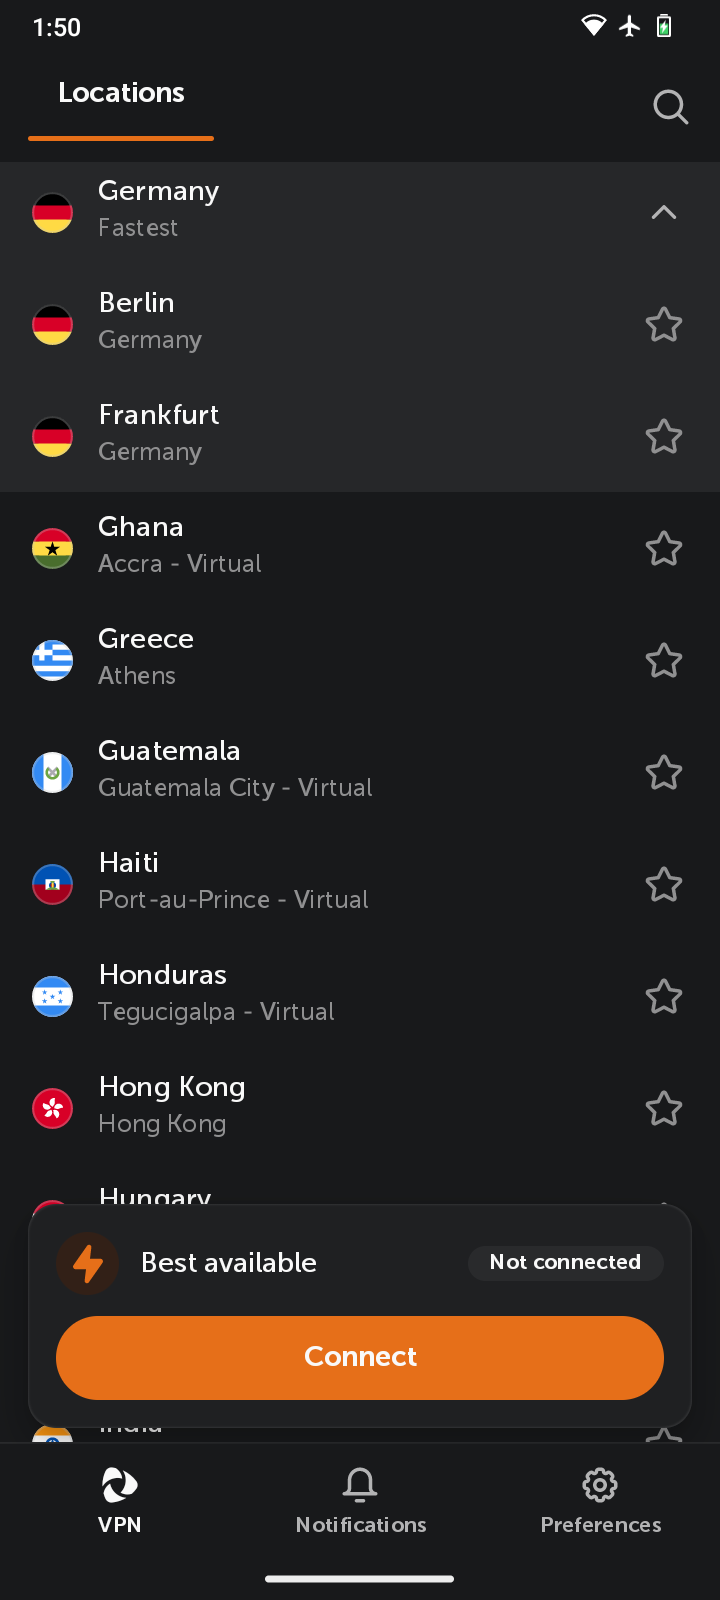
Countries with several cities show an arrow next to them. Tap the arrow to expand the list, then choose Fastest (the best server in that country) or a specific city:
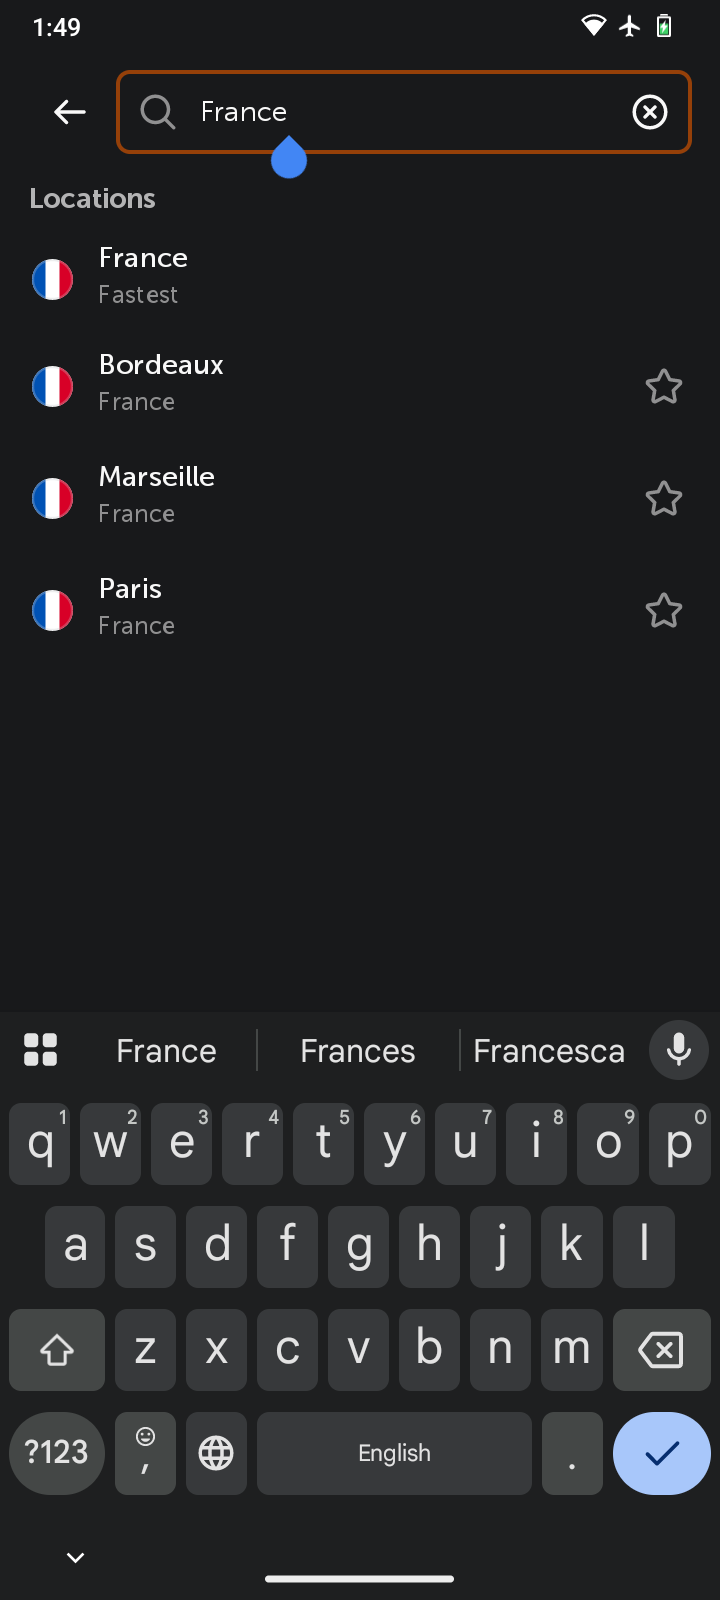
To find a location quickly, tap the search icon in the top-right corner and type a country or city name:
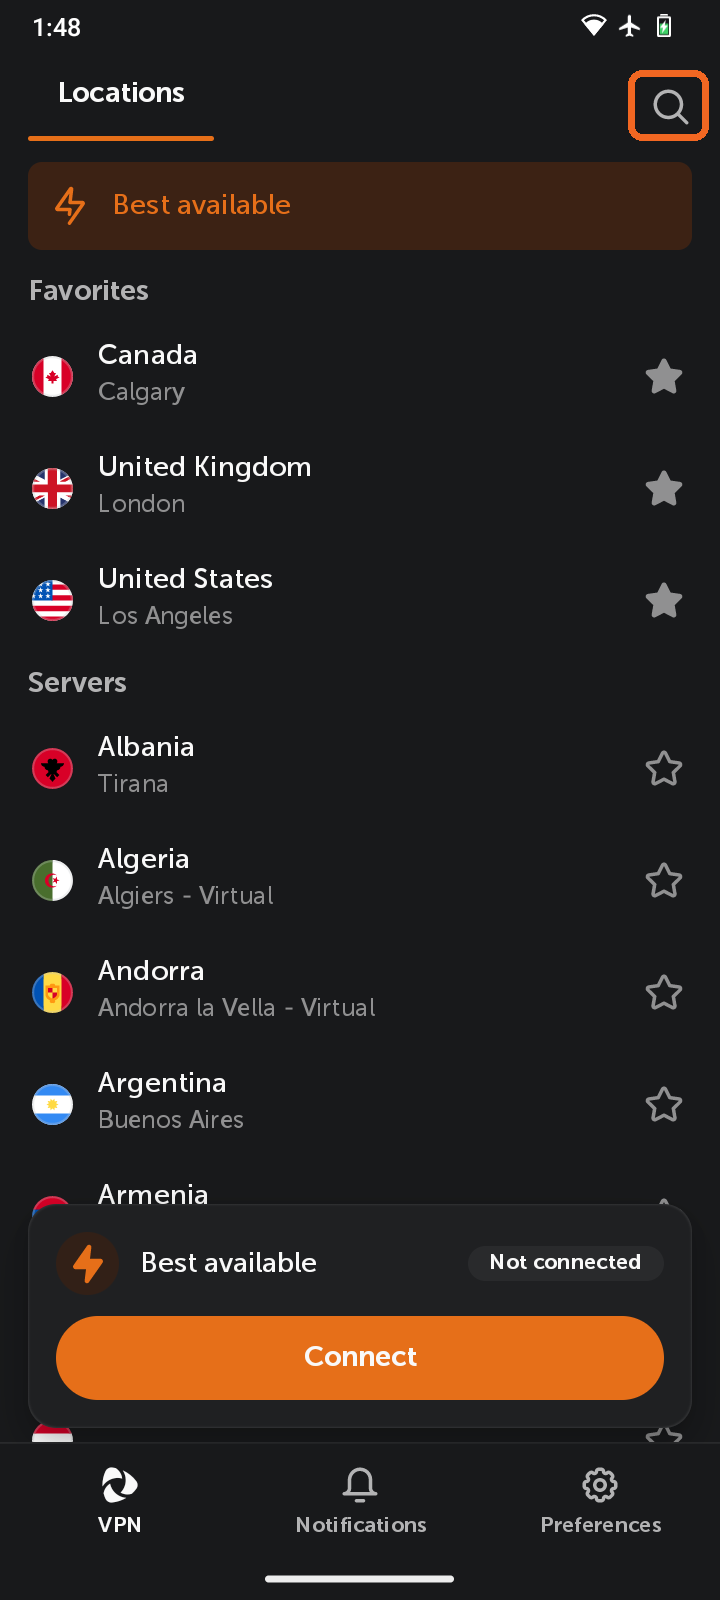
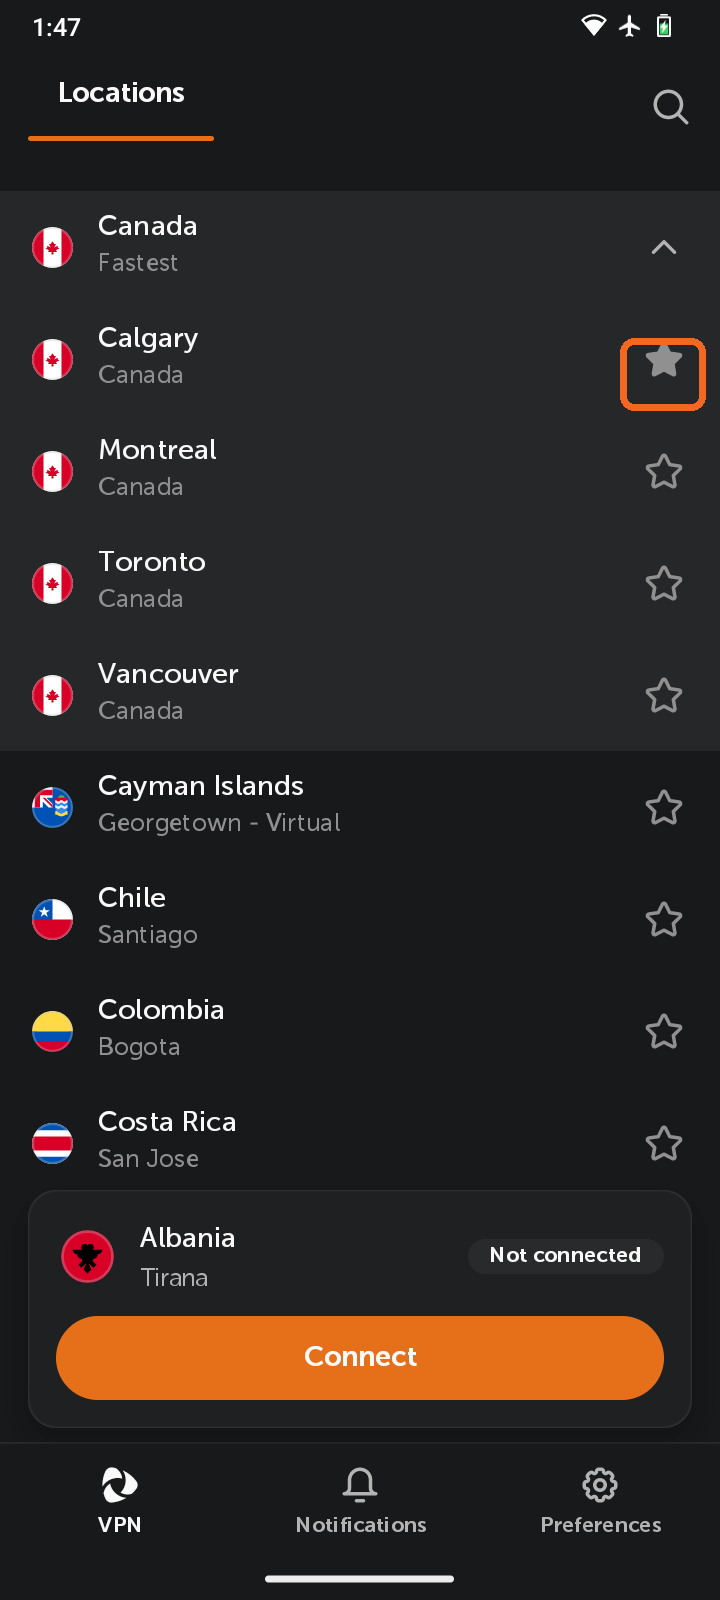
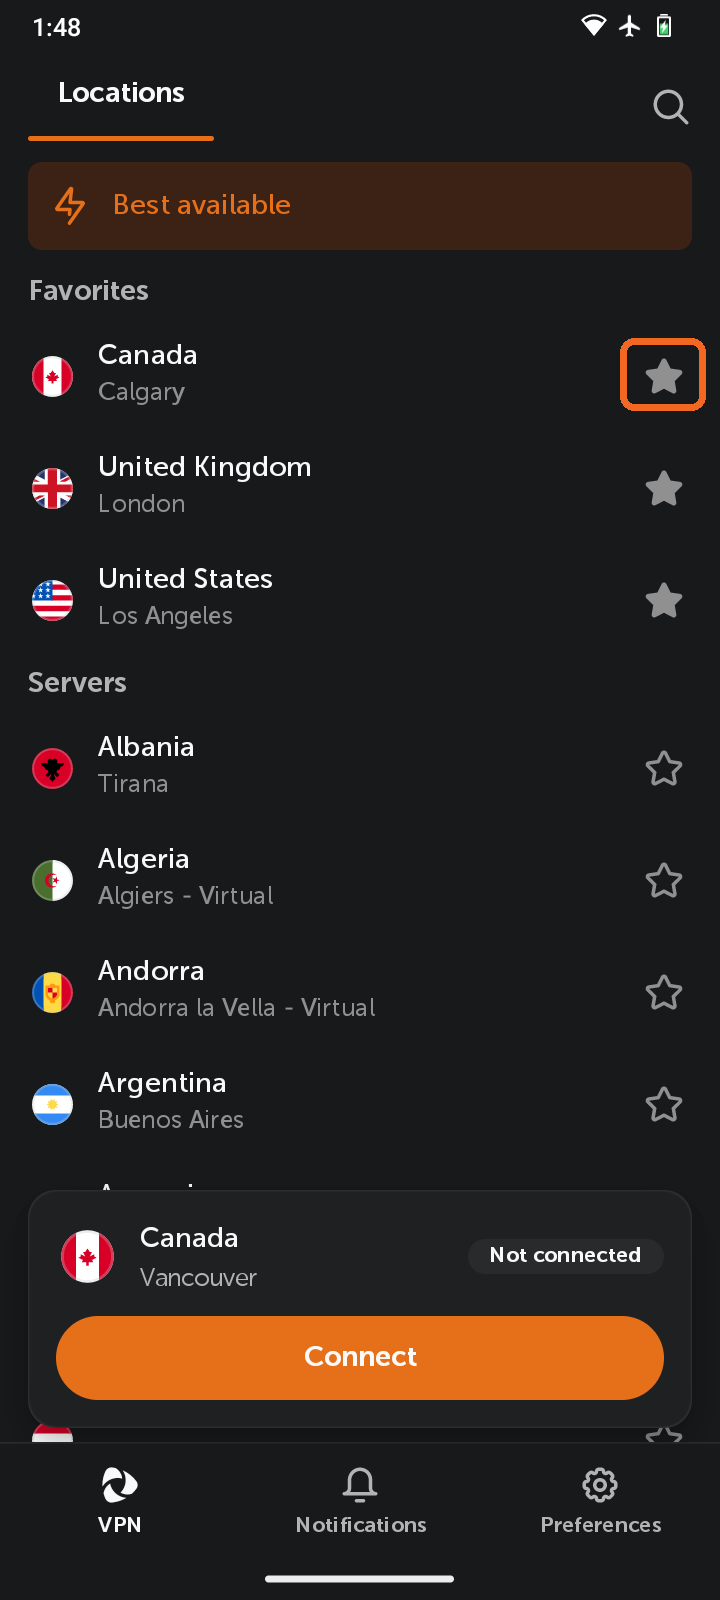
You can also add locations to Favorites by tapping the star icon next to them. Your favorite locations appear in a separate Favorites section above the Servers list:
Step 7. View connection details and switch IP
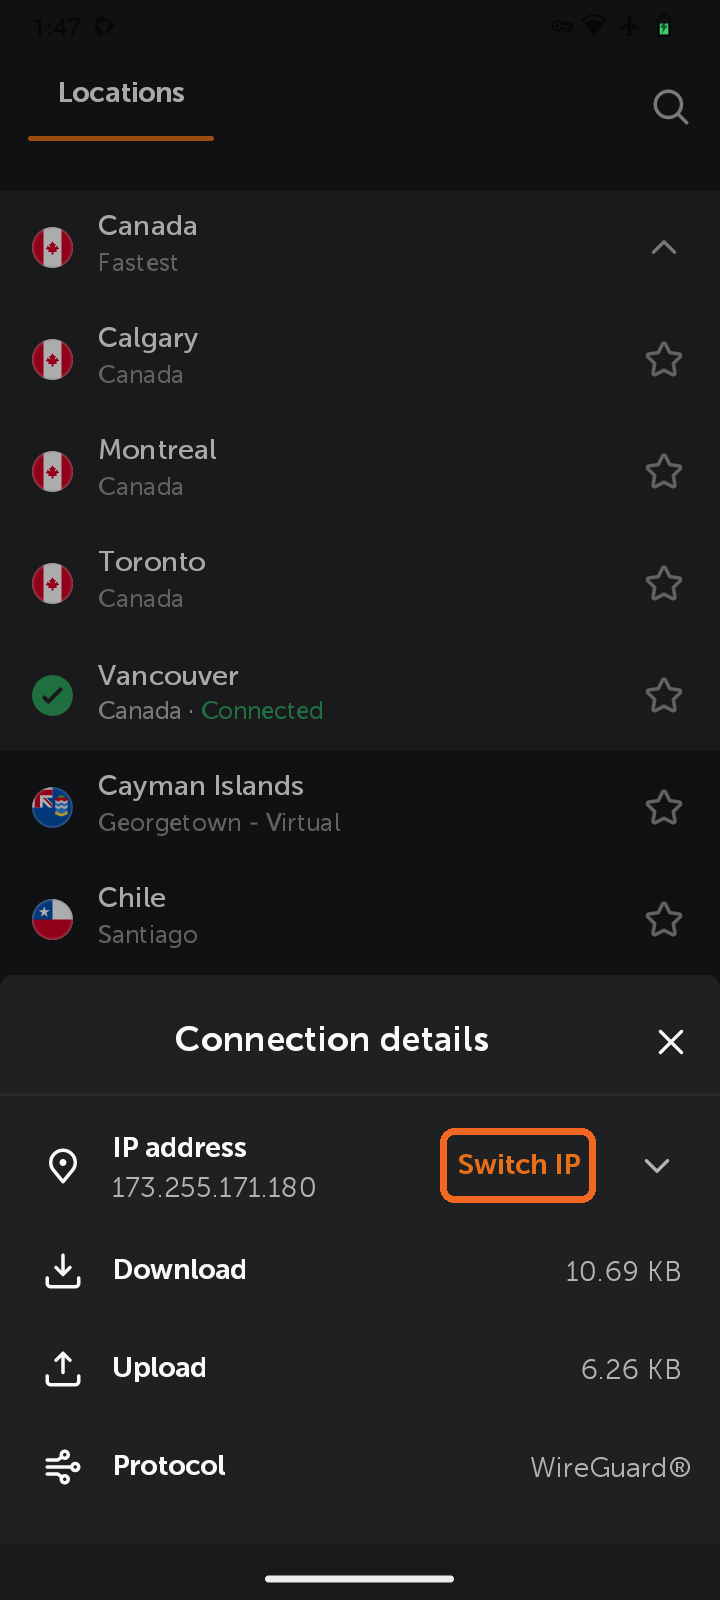
While connected, tap the info (i) icon on the connection card to open Connection details. Here you can see your current IP address, download and upload statistics, and the protocol in use.
To change your IP address, tap Switch IP. Switch IP gives you a new IP address without changing your selected location. It's useful if a site blocks your IP or you want a fresh connection.
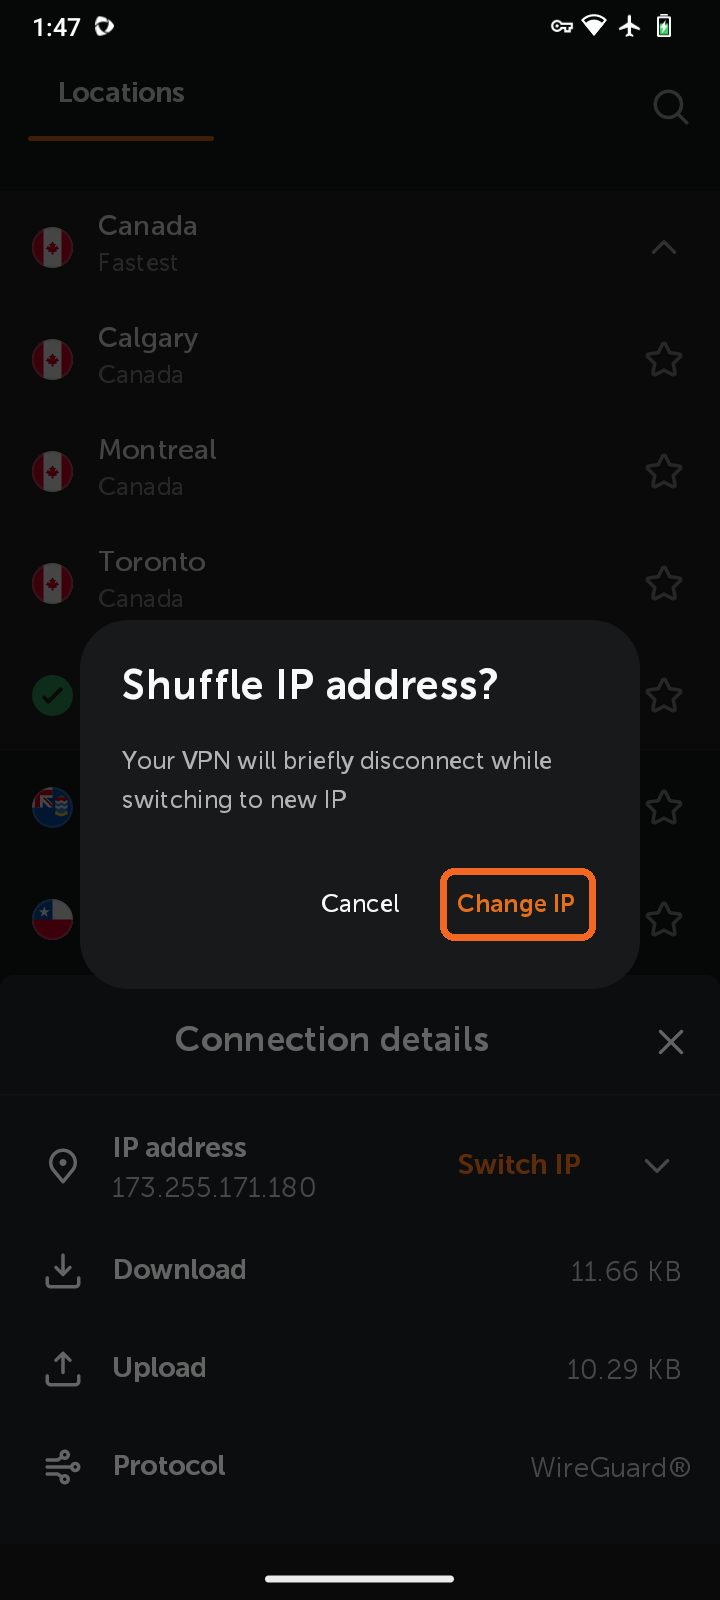
When you tap Switch IP, the app asks you to confirm. Tap Change IP - the VPN briefly disconnects, reconnects to another server in the same area, and gives you a new IP, usually in just a few seconds. This feature can help bypass IP blocks, fix slow speeds, or improve privacy without manually picking a new location.
Note: Your IP address may rotate, but it always stays within your selected location.
Step 8. Disconnect
To disconnect, tap Disconnect on the connection card. The card then shows Not connected and keeps your last location selected, so you can reconnect with a single tap on Connect.
Notifications
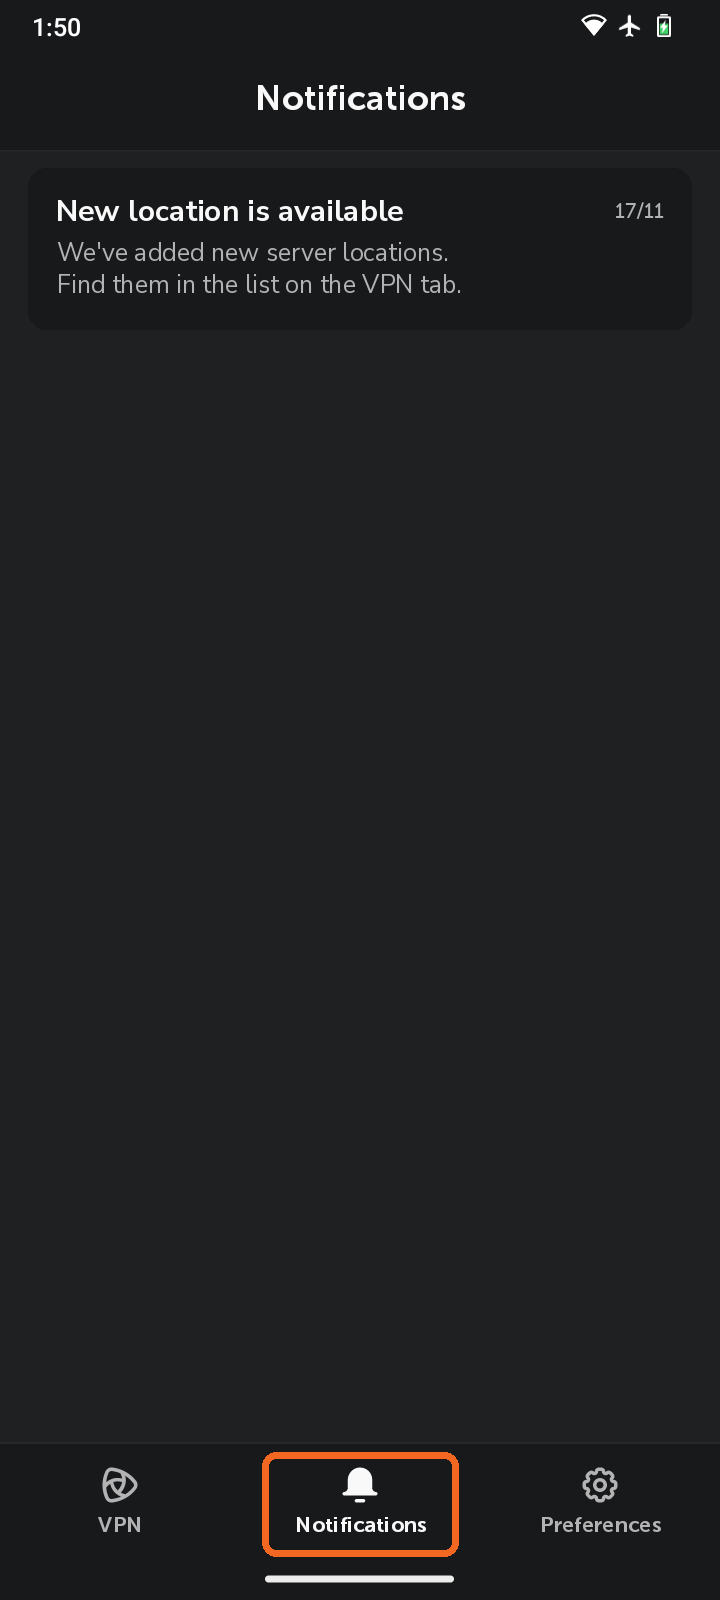
Tap Notifications in the bottom navigation bar to see important announcements and alerts from FastVPN:
Preferences
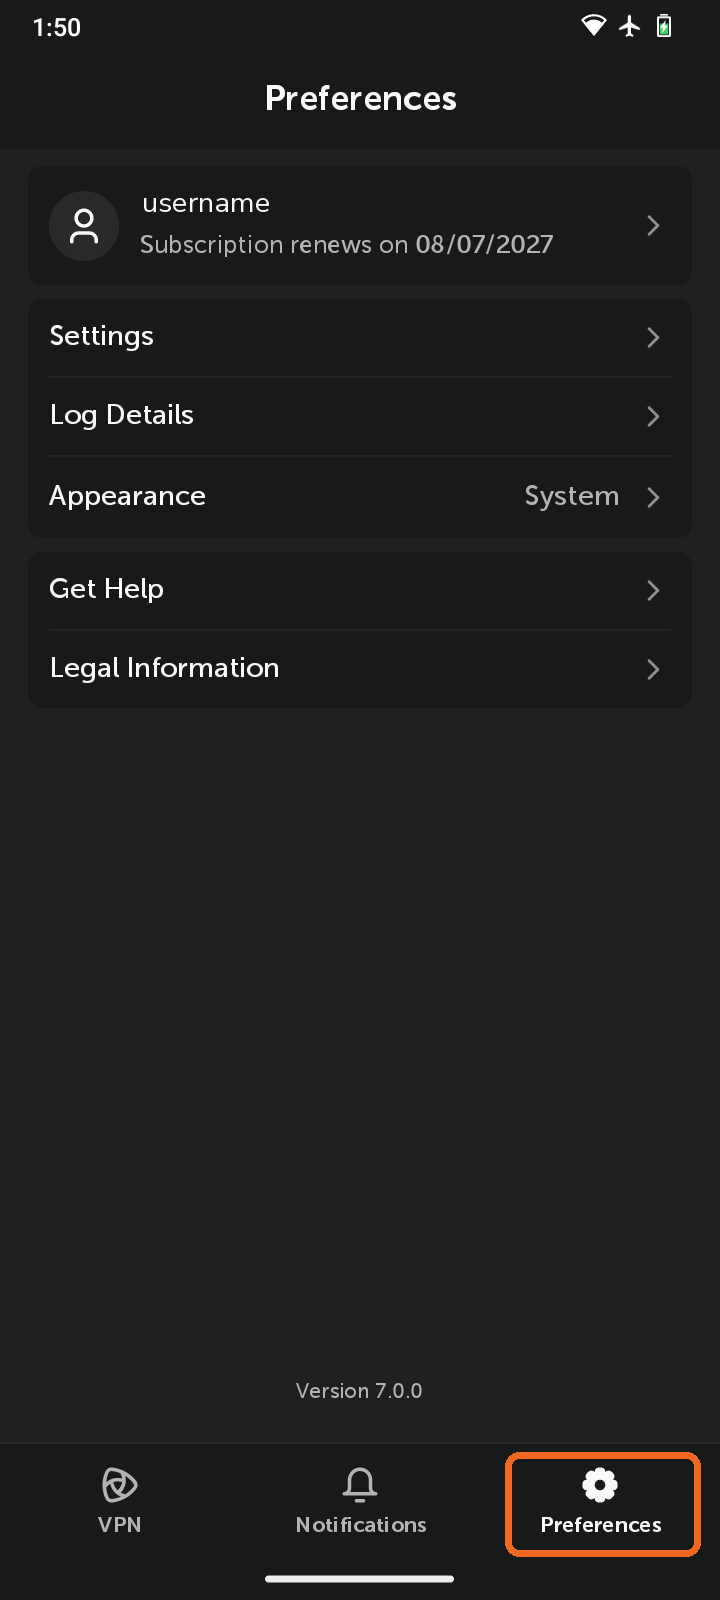
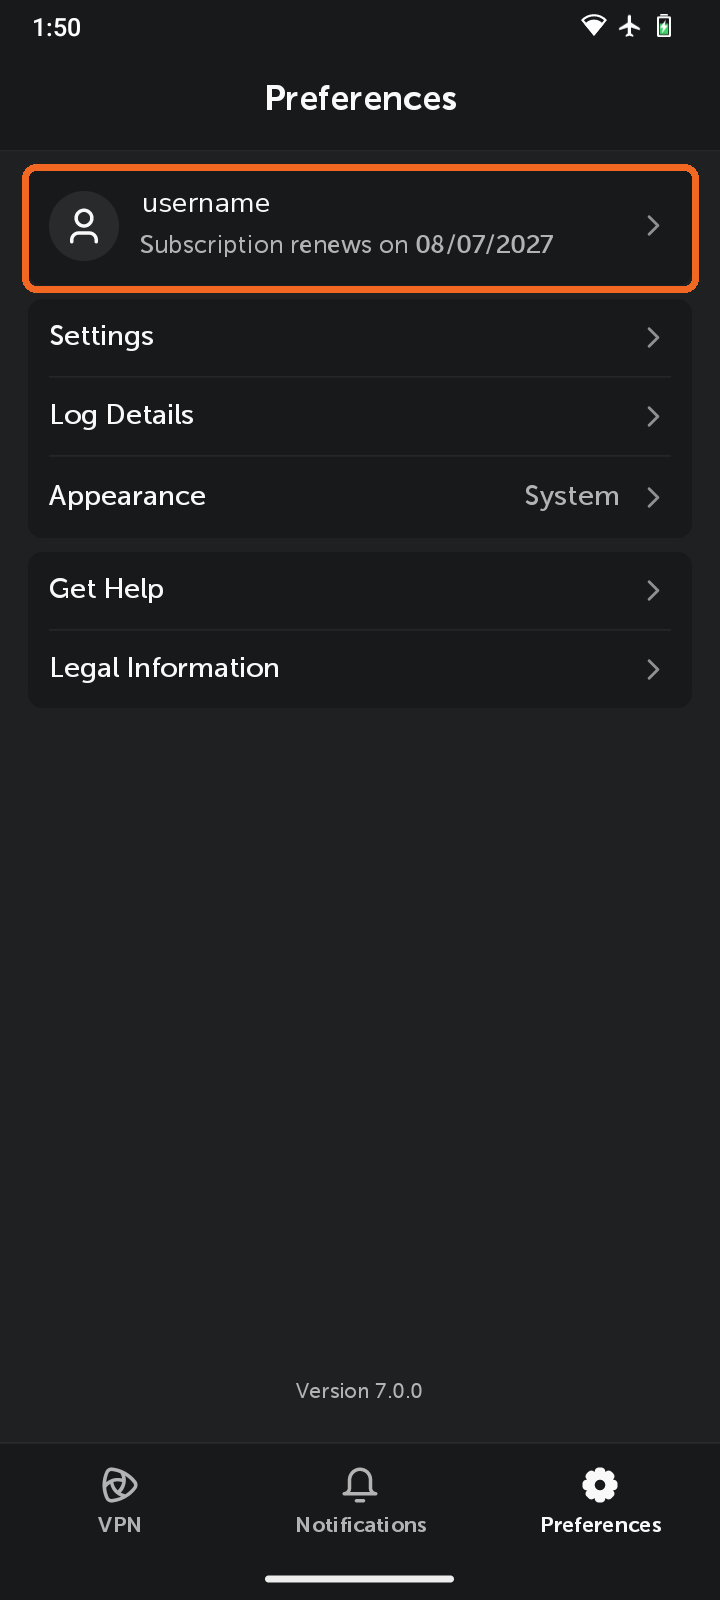
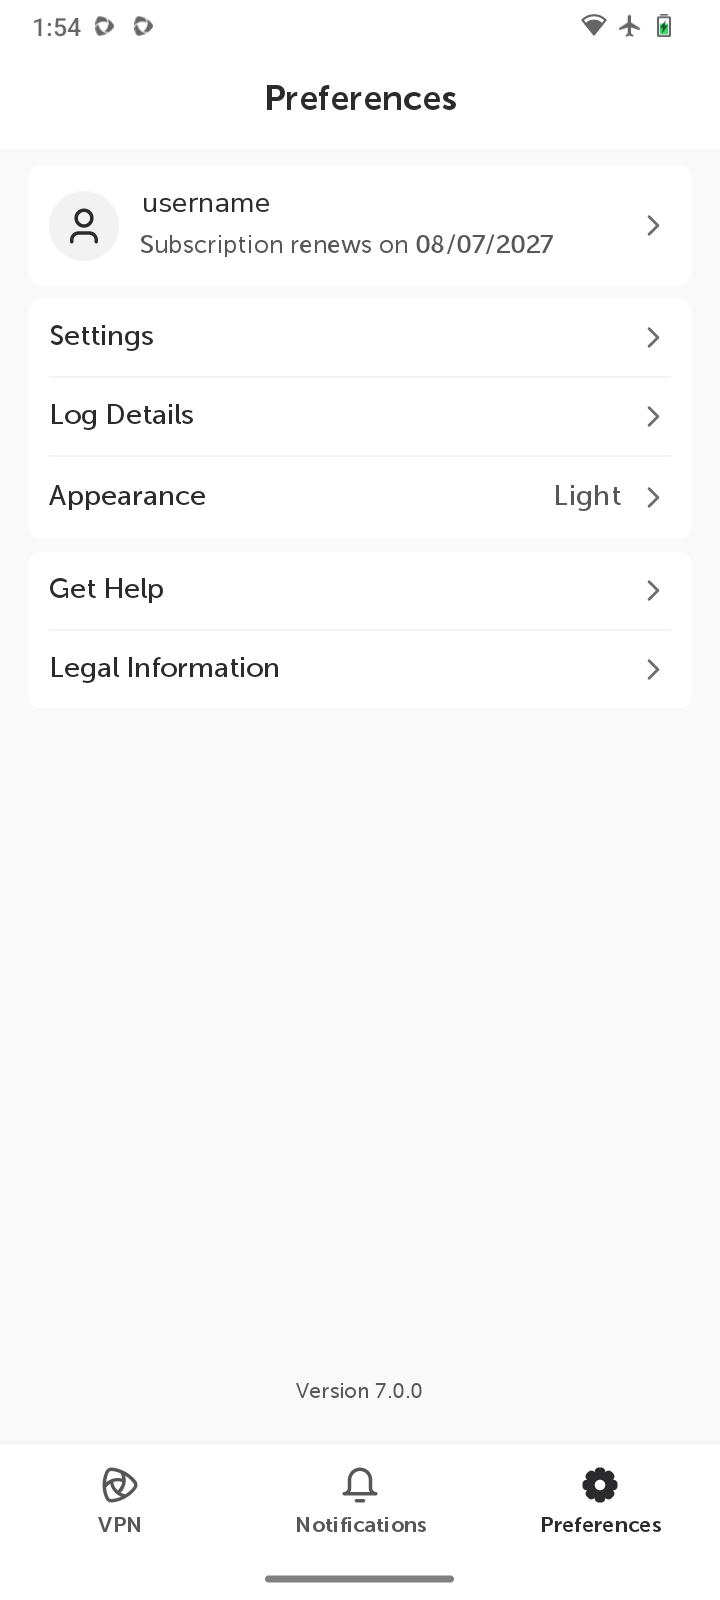
To open the app settings, tap Preferences in the bottom navigation bar. At the top you will see your account username and the date your subscription renews. Below are the following sections:
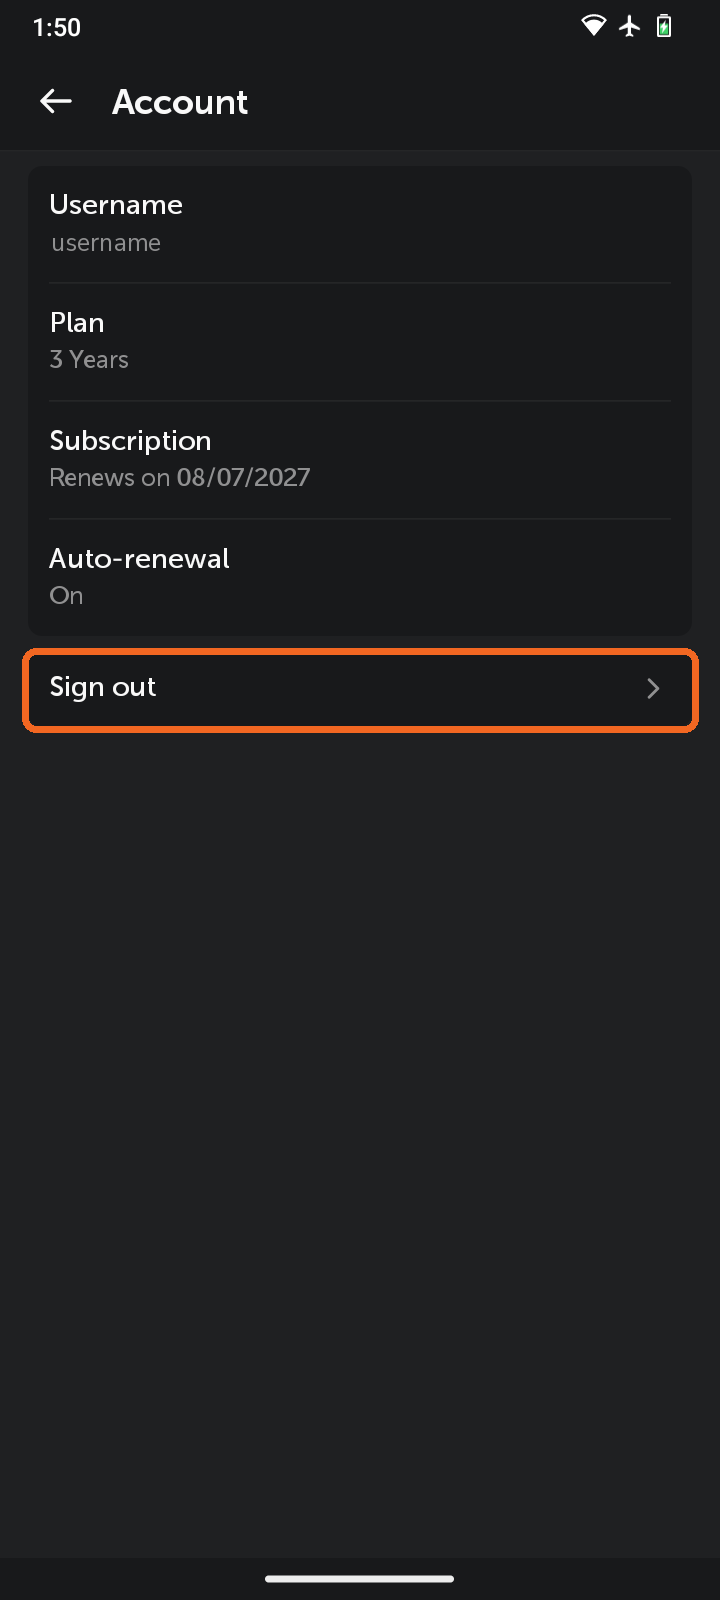
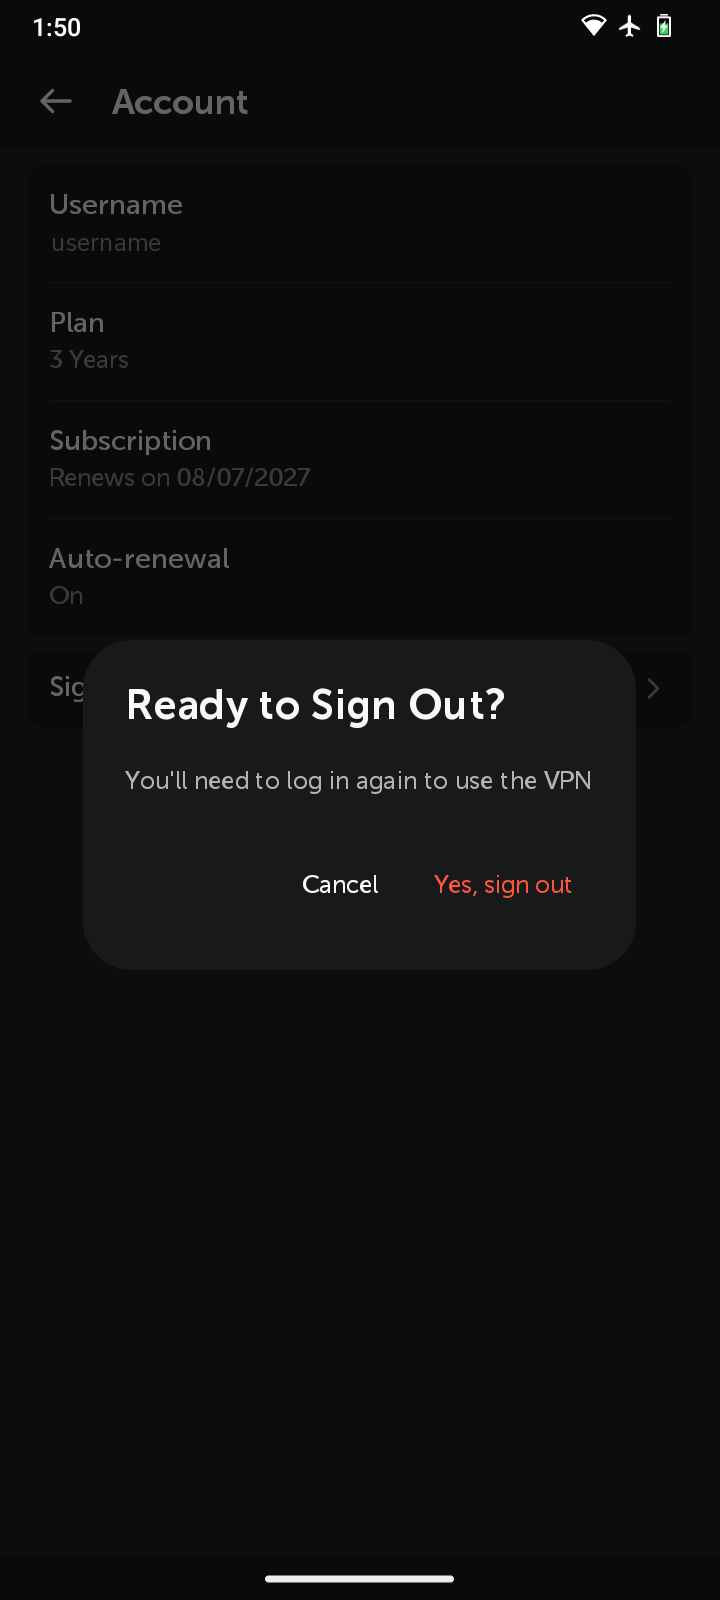
Account - tap your username to see your account details: Username, Plan, Subscription renewal date and Auto-renewal status. To sign out, tap Sign out and confirm with Yes, sign out. You will need to log in again to use the VPN.
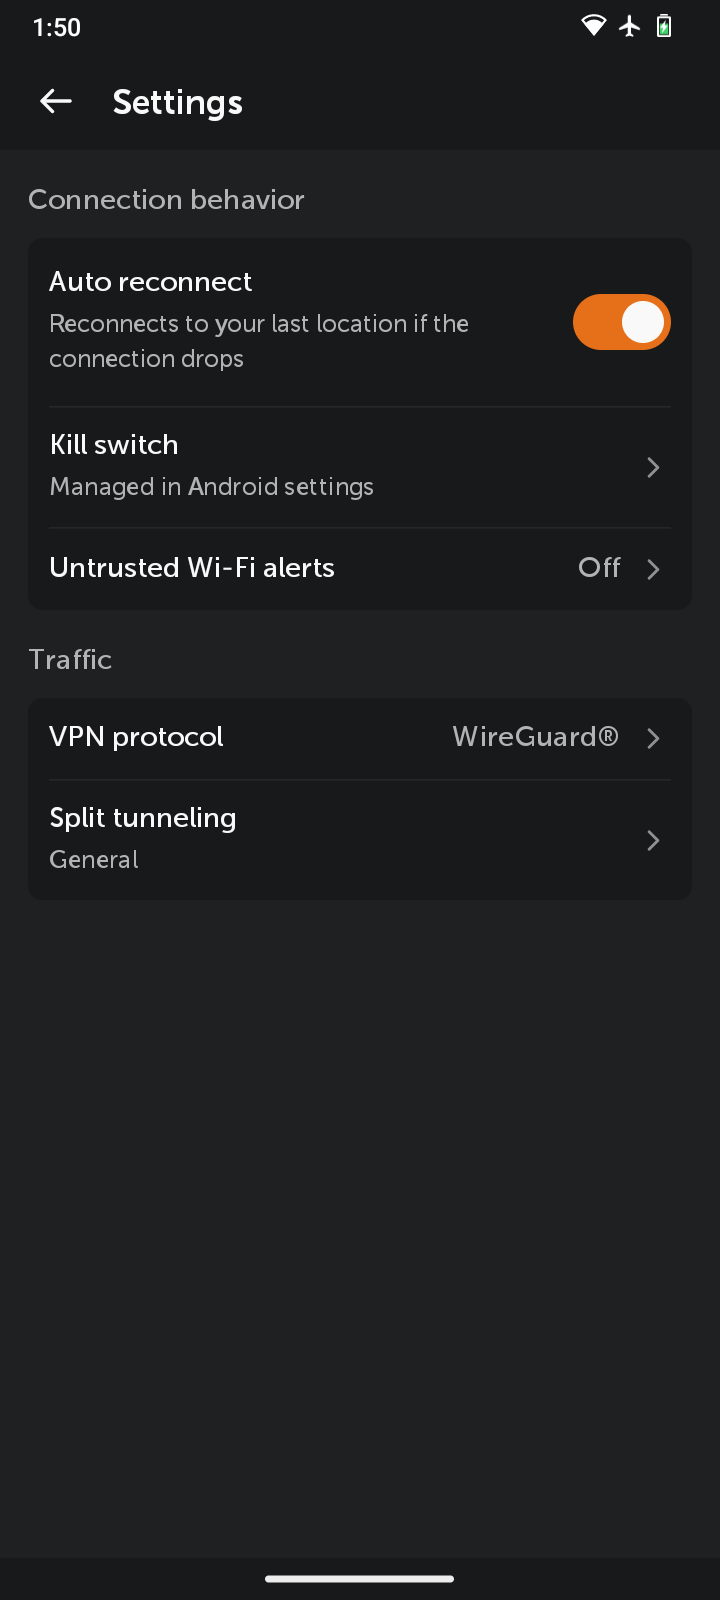
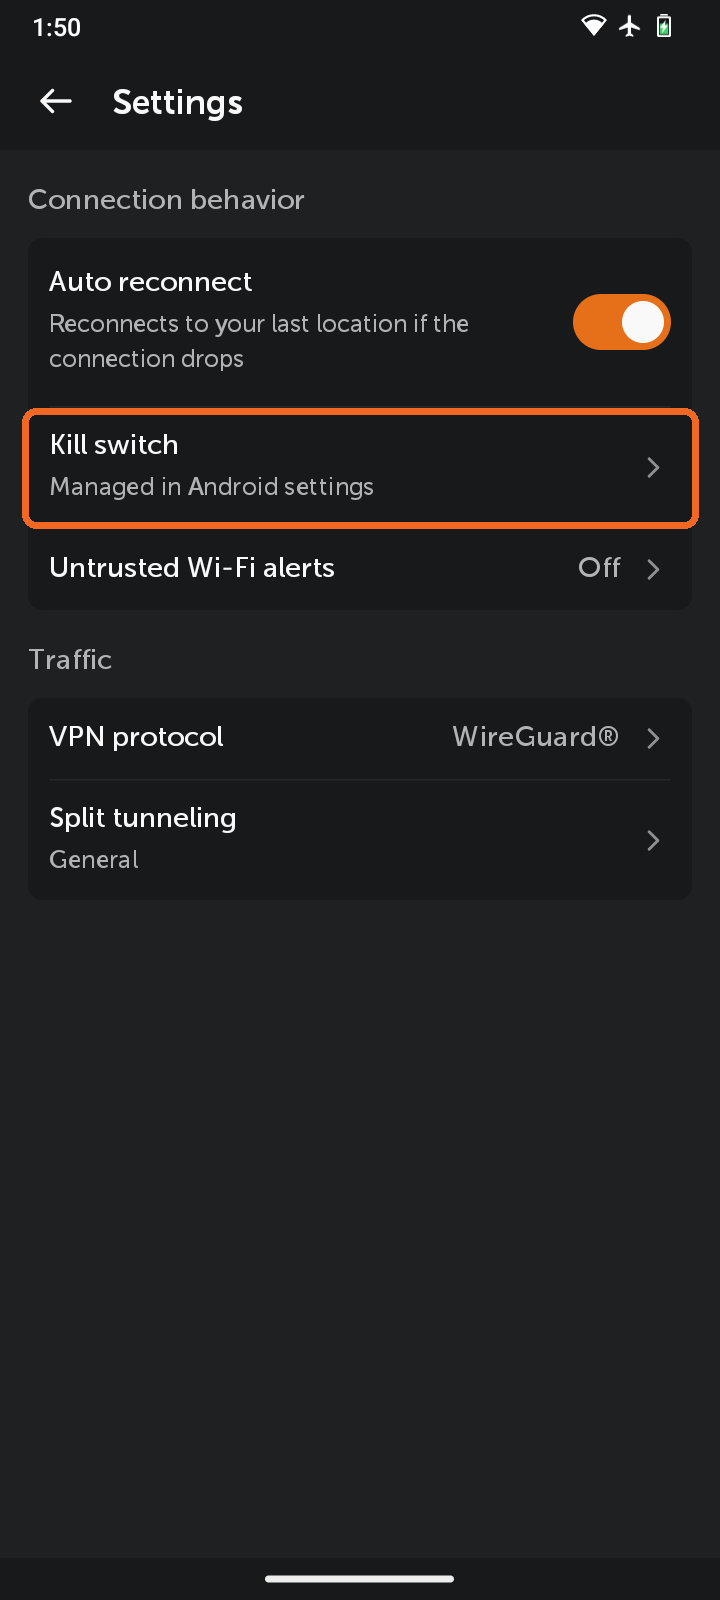
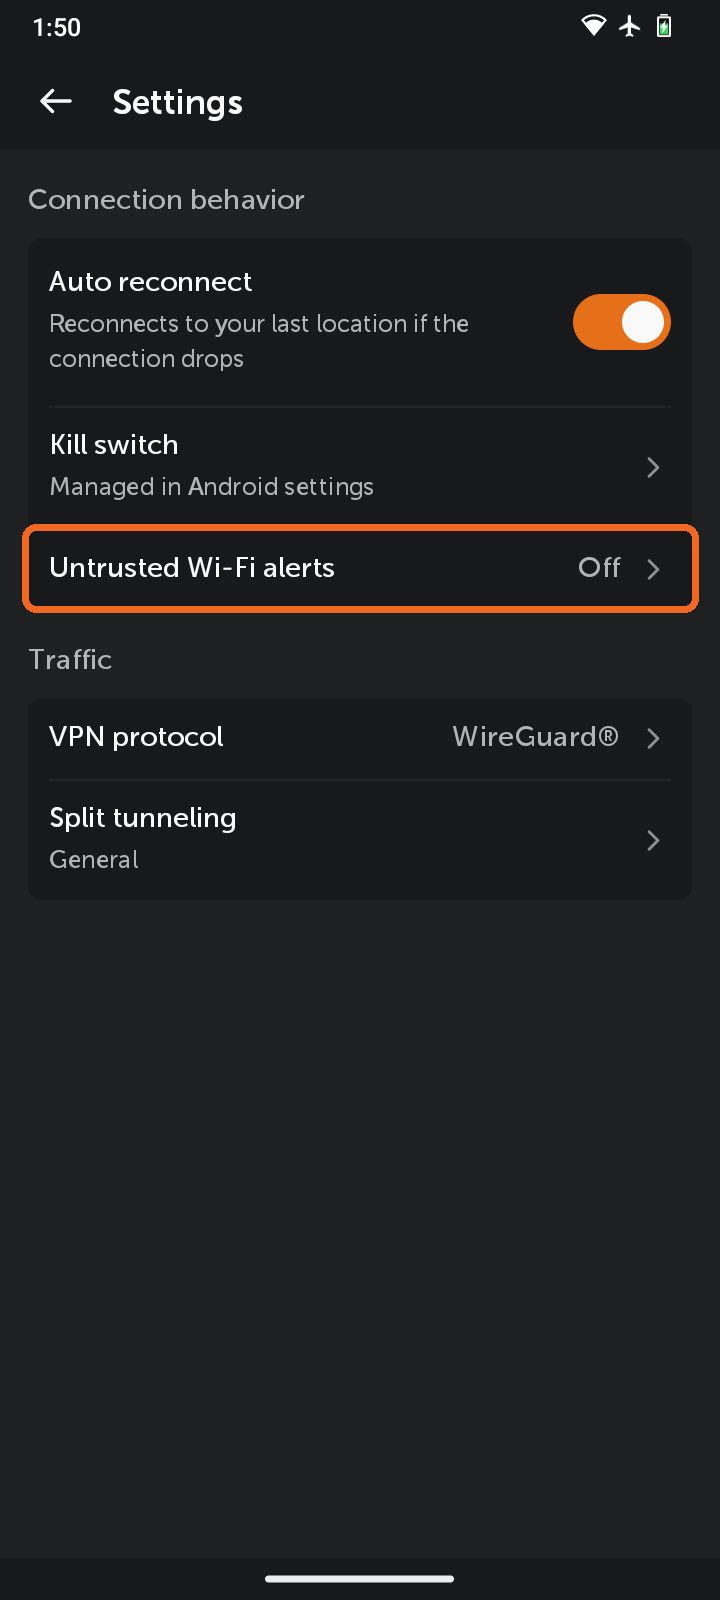
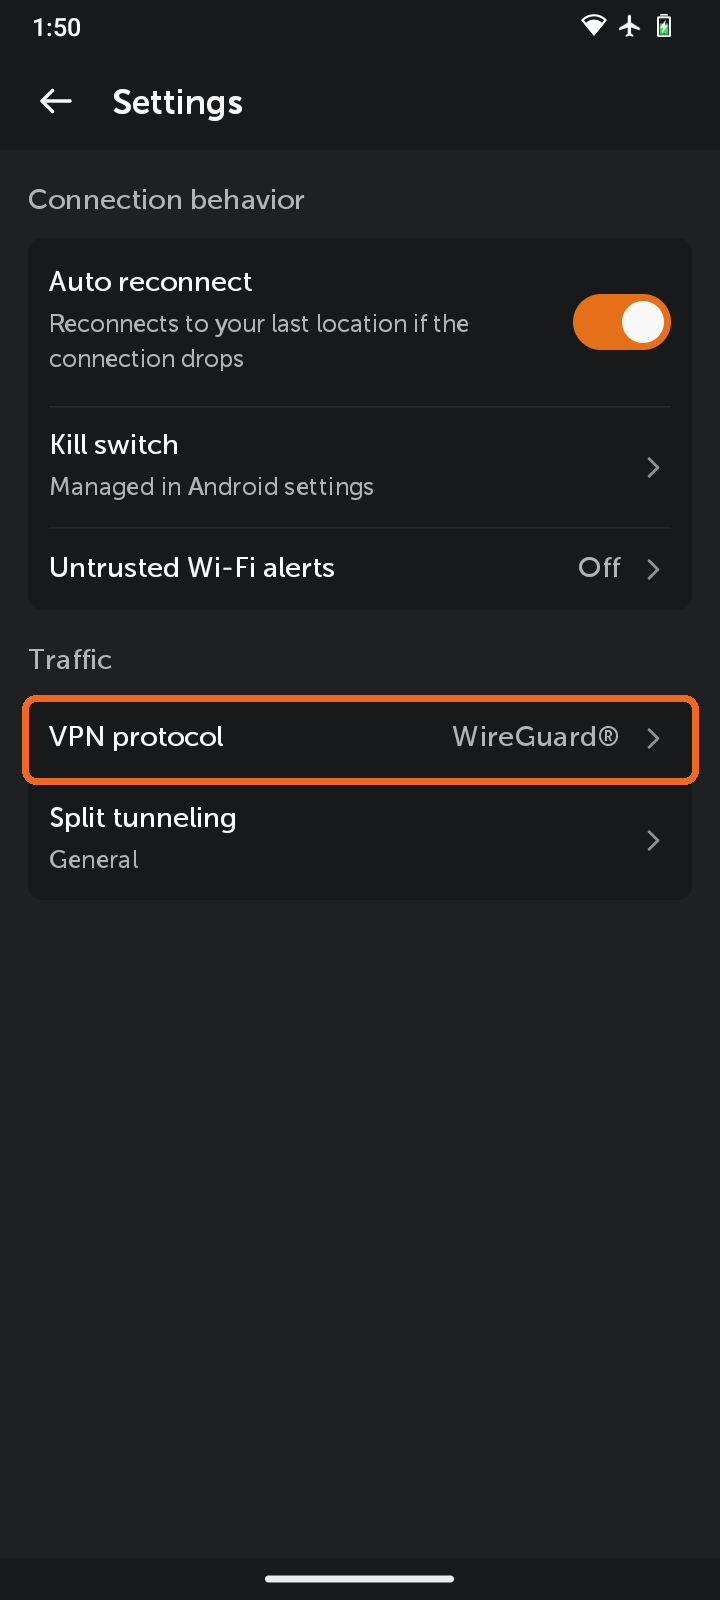
Settings contains the connection and traffic options:
Under Connection behavior you will have:
-
Auto reconnect reconnects you to your last location if the connection drops, so your traffic always stays protected.
-
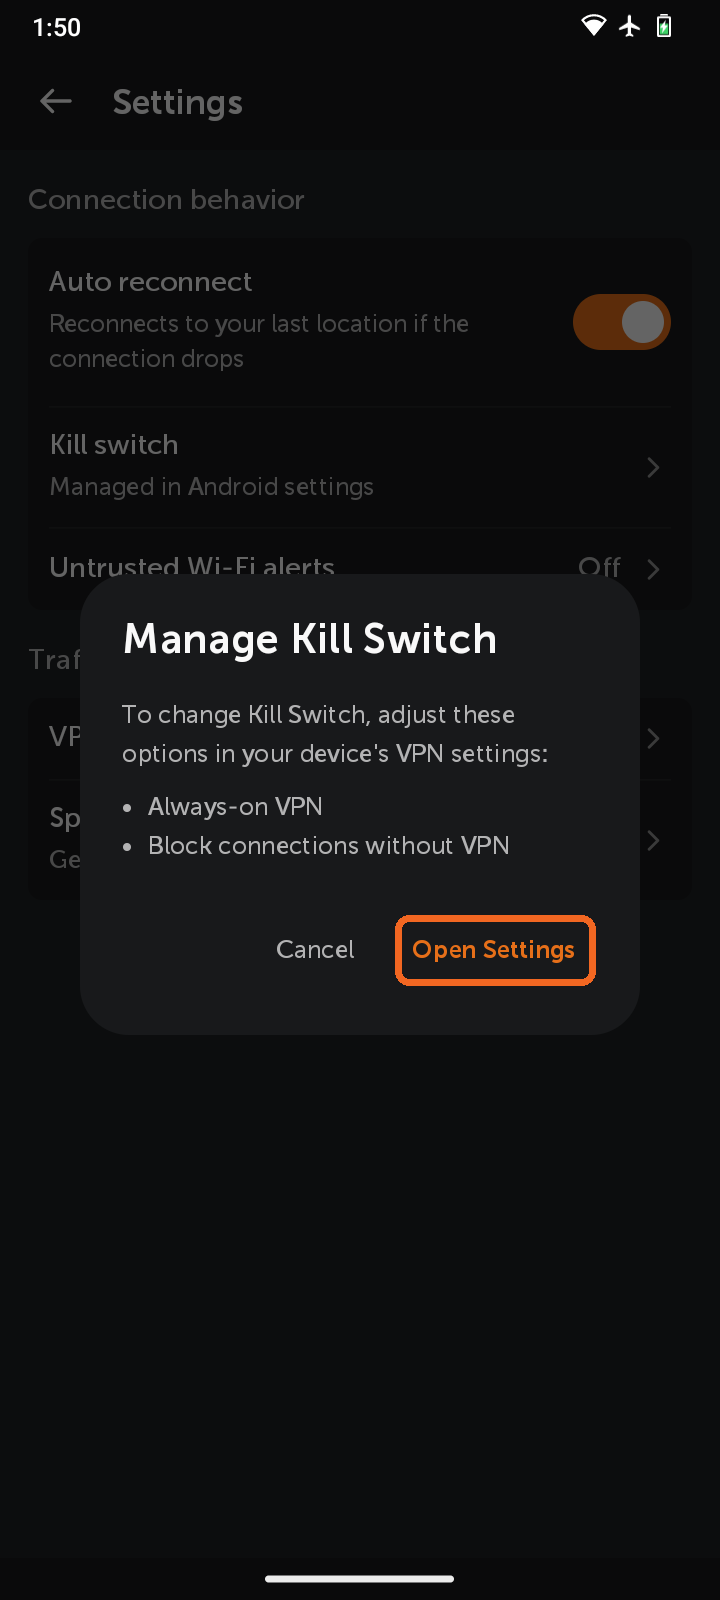
Kill switch is managed in Android settings. Tap Kill switch, then Open Settings in the Manage Kill Switch pop-up.
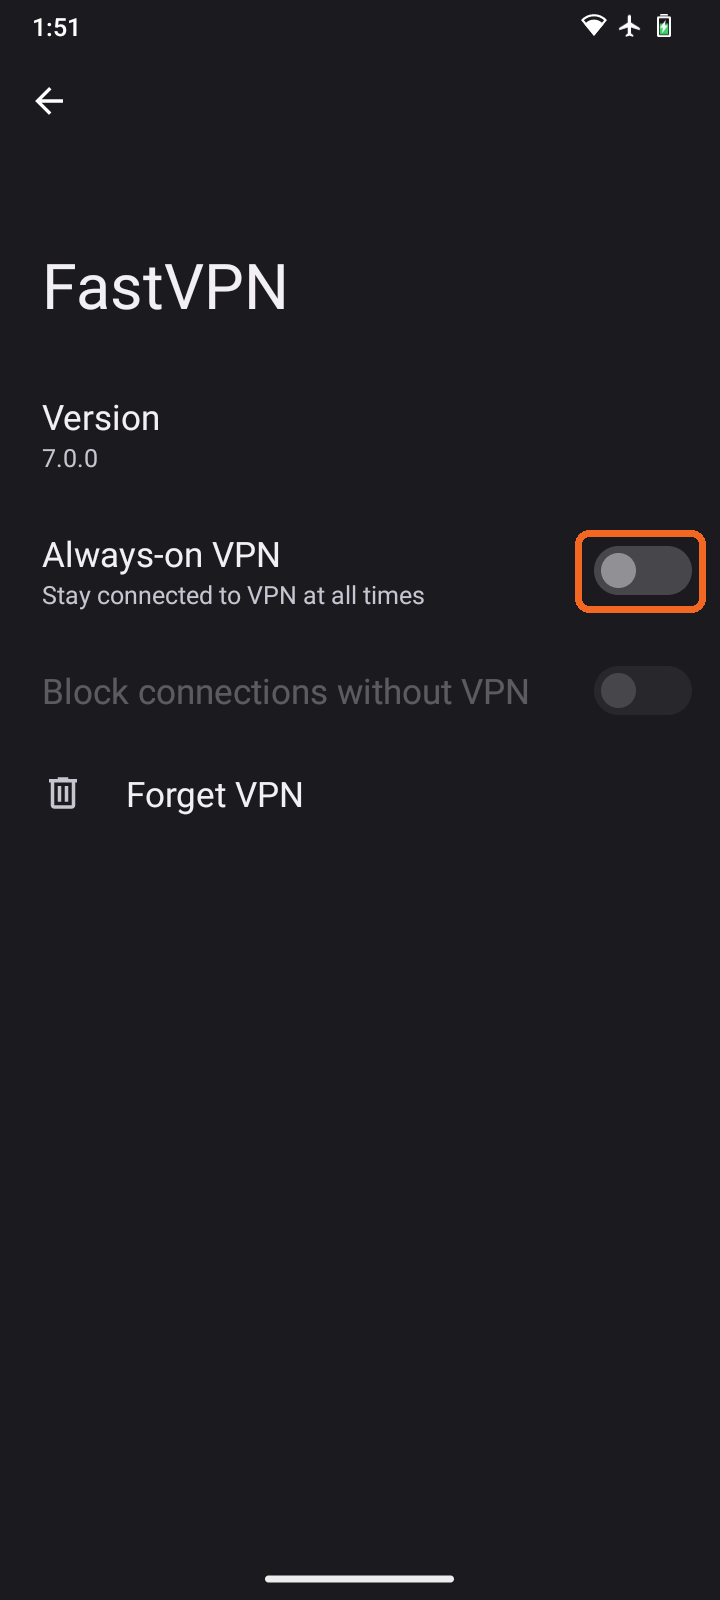
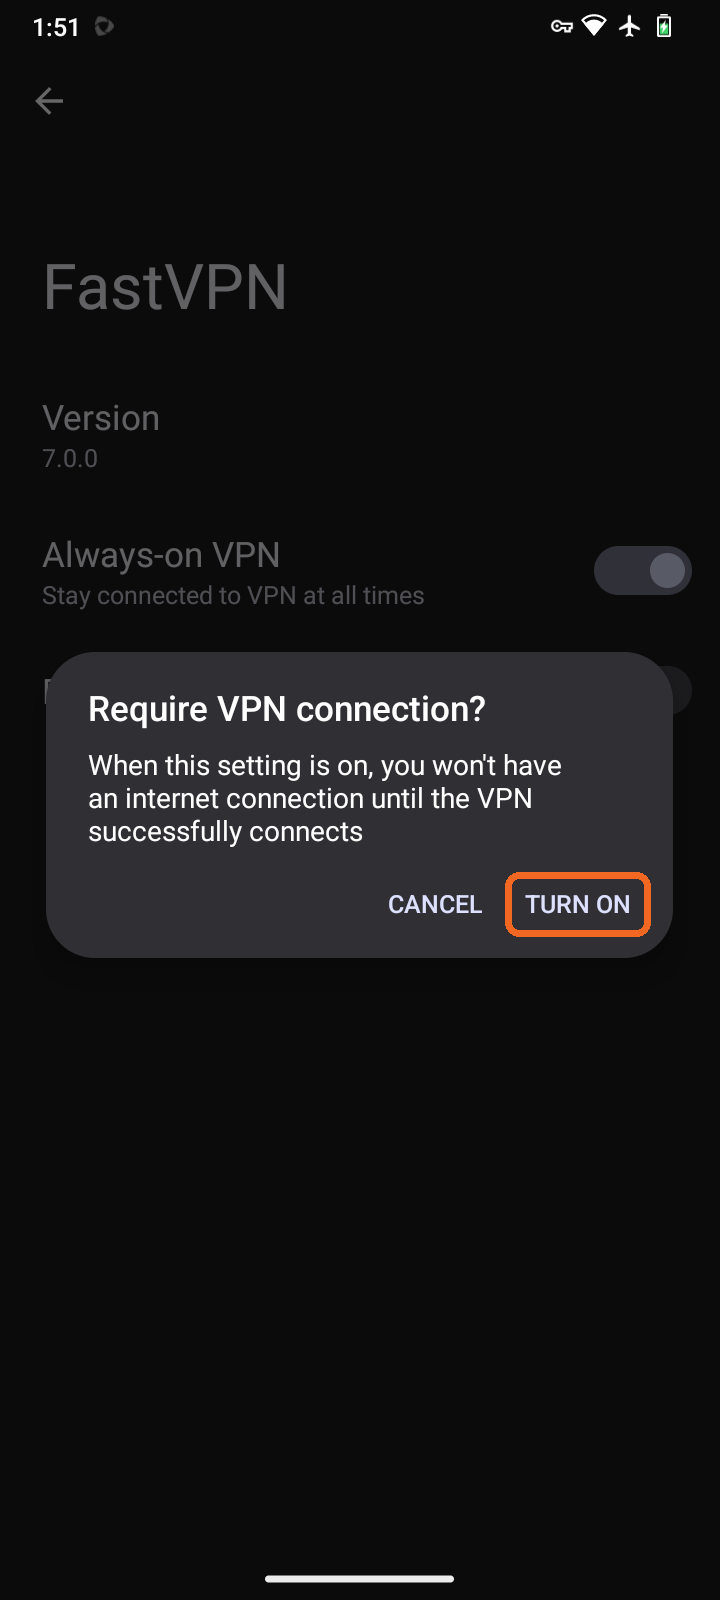
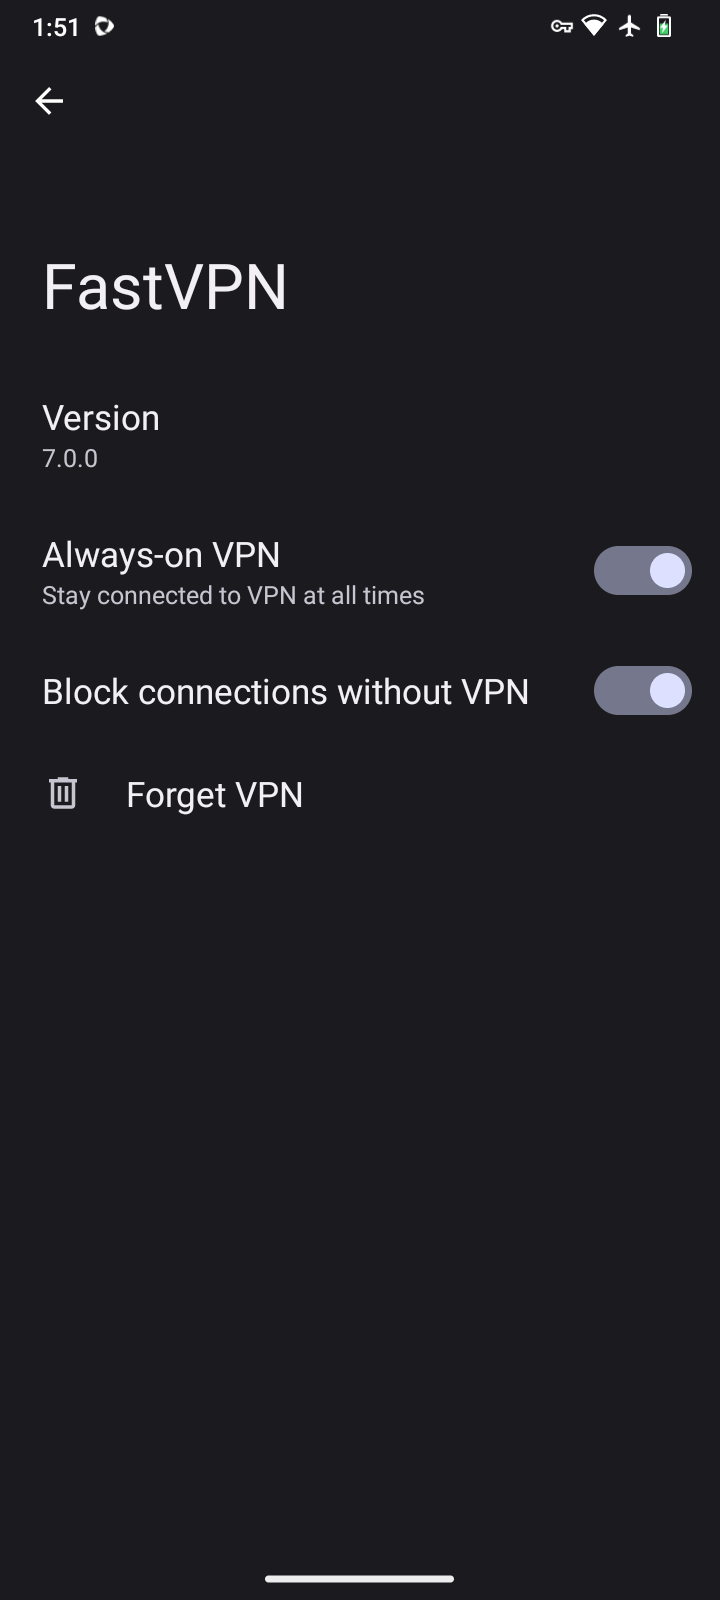
Android opens the FastVPN VPN settings. Turn on Always-on VPN and Block connections without VPN, then tap TURN ON in the Require VPN connection? pop-up. With this setting on, you won't have an internet connection until the VPN successfully connects.
-
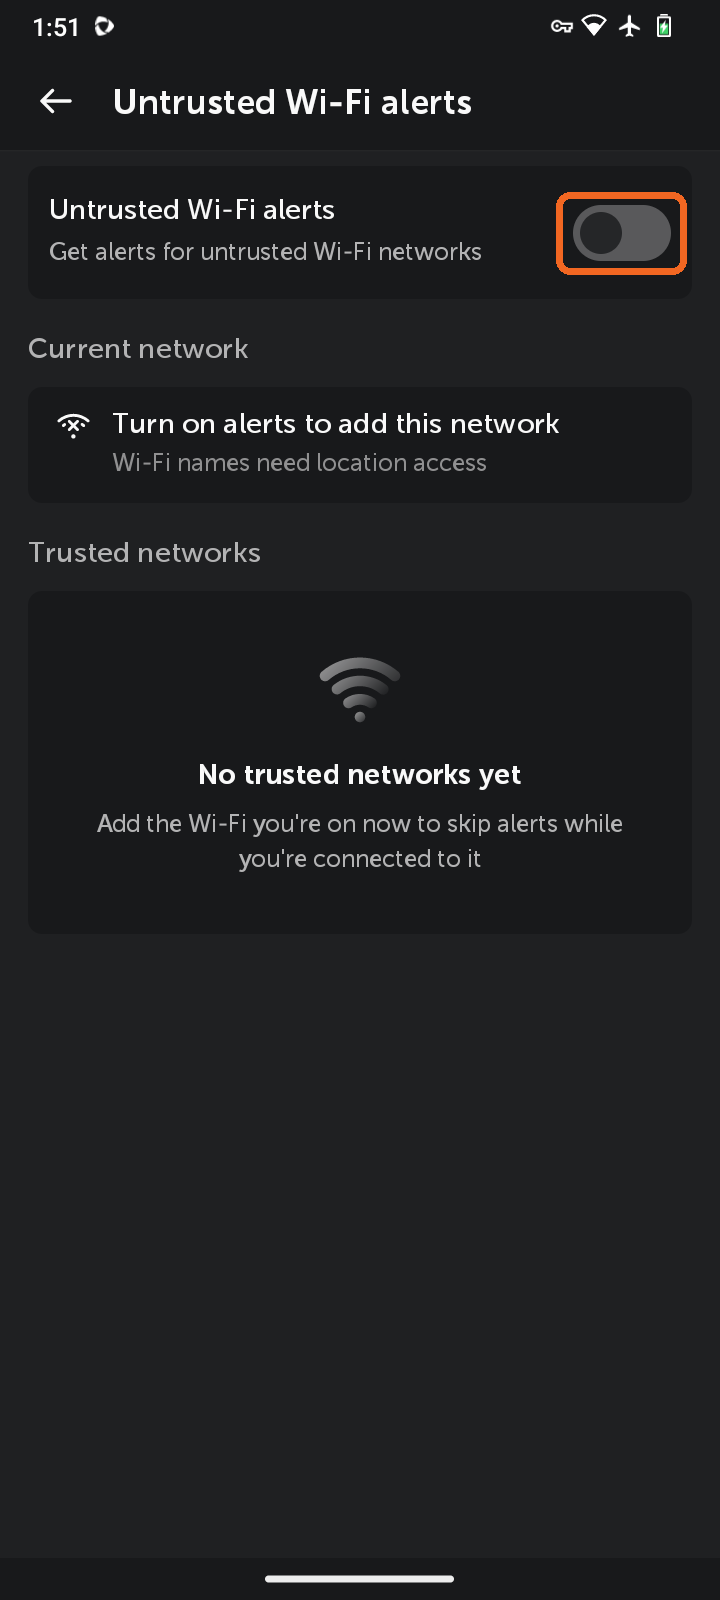
Untrusted Wi-Fi alerts warns you when you connect to an untrusted Wi-Fi network. Tap it and turn on the Untrusted Wi-Fi alerts toggle.
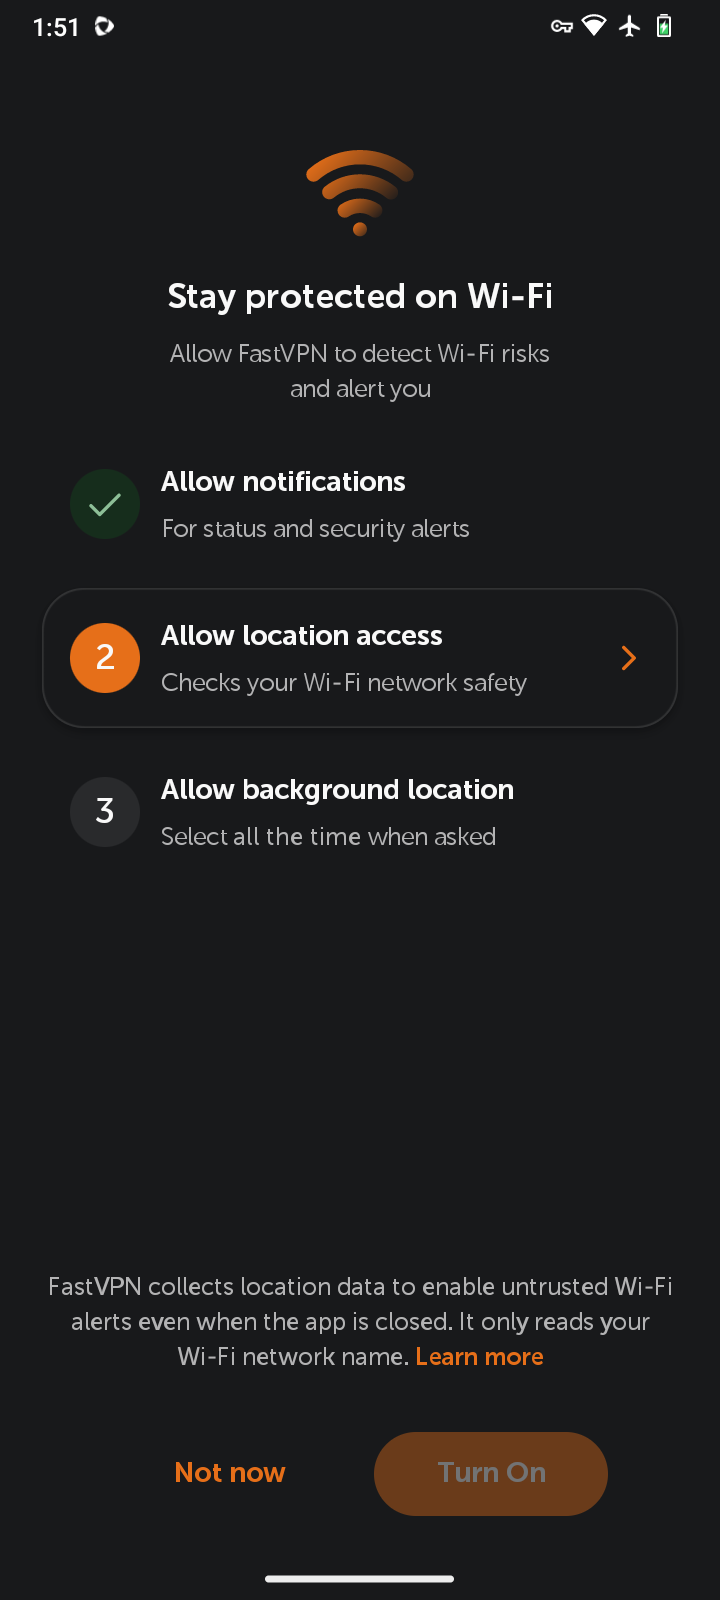
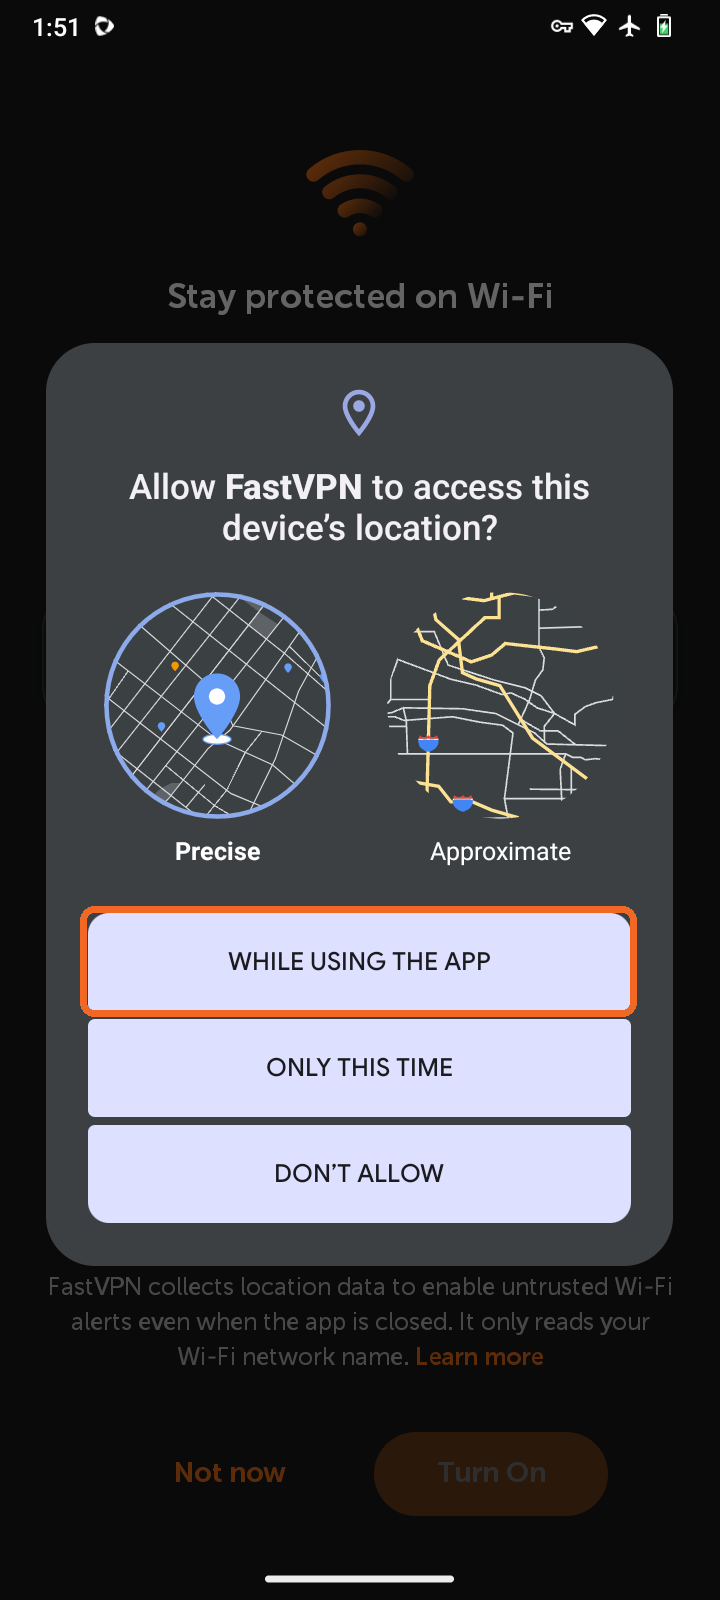
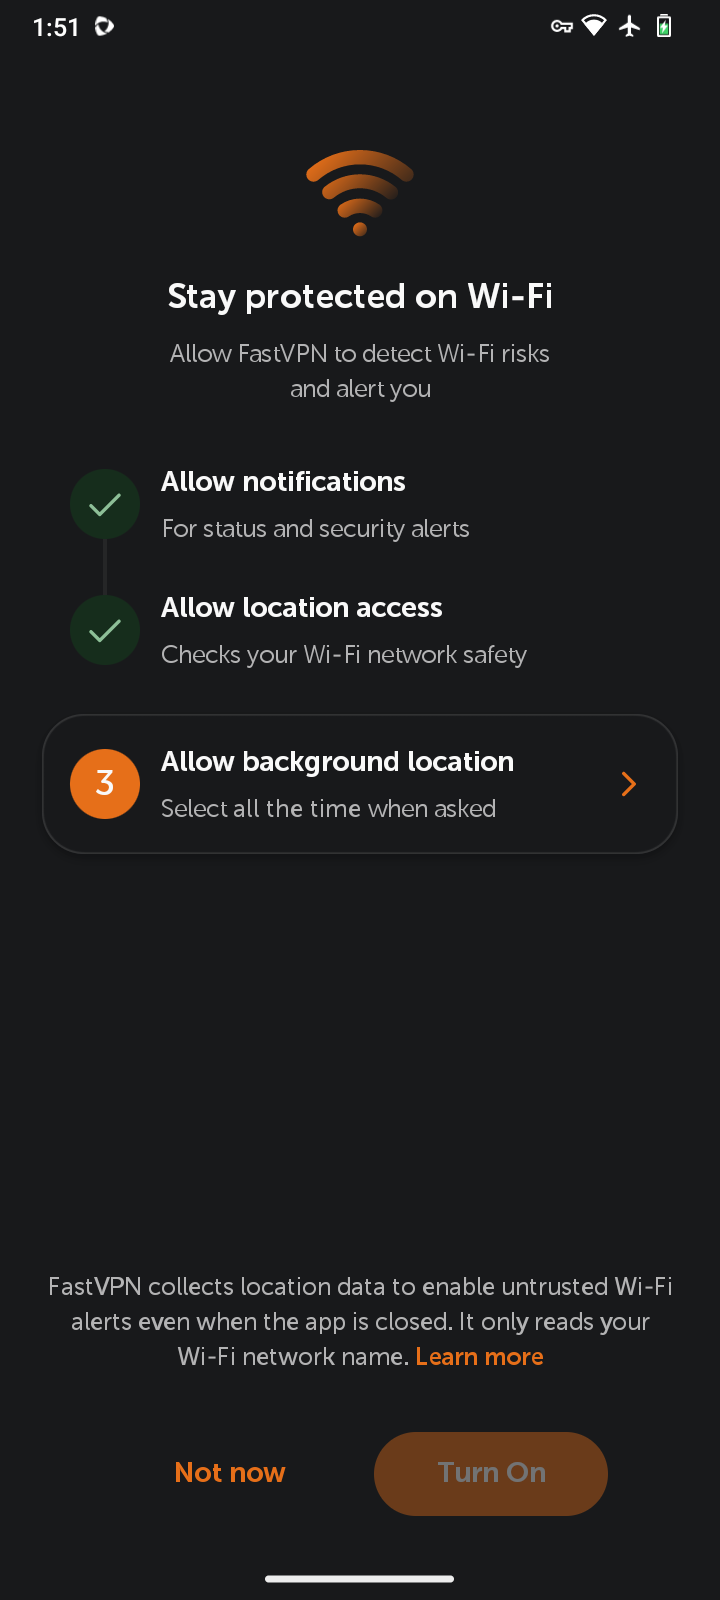
The app then asks you to allow notifications, location access, and background location. FastVPN only uses location access to read your Wi-Fi network name, including when the app is closed. Tap Allow location access and choose While using the app in the Android prompt:
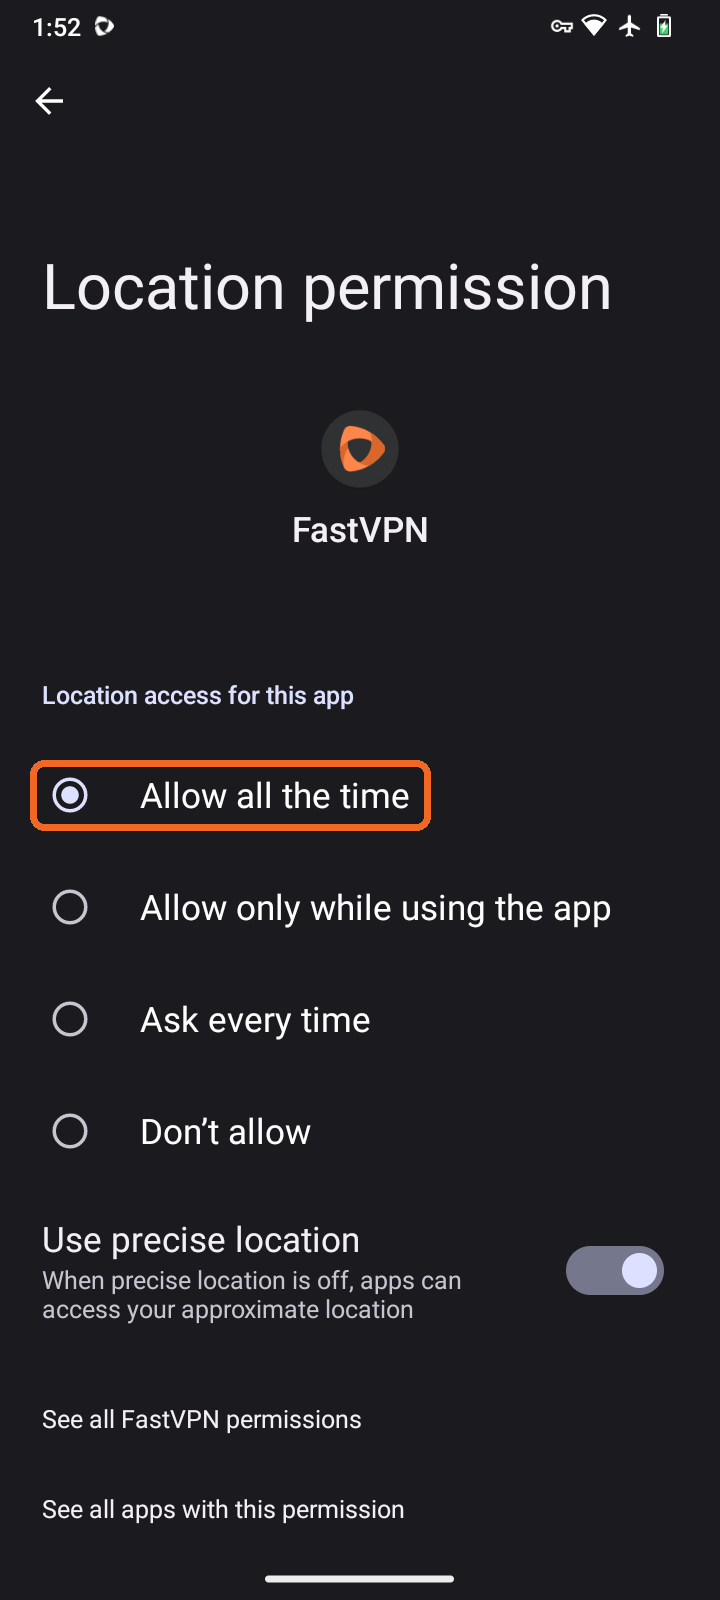
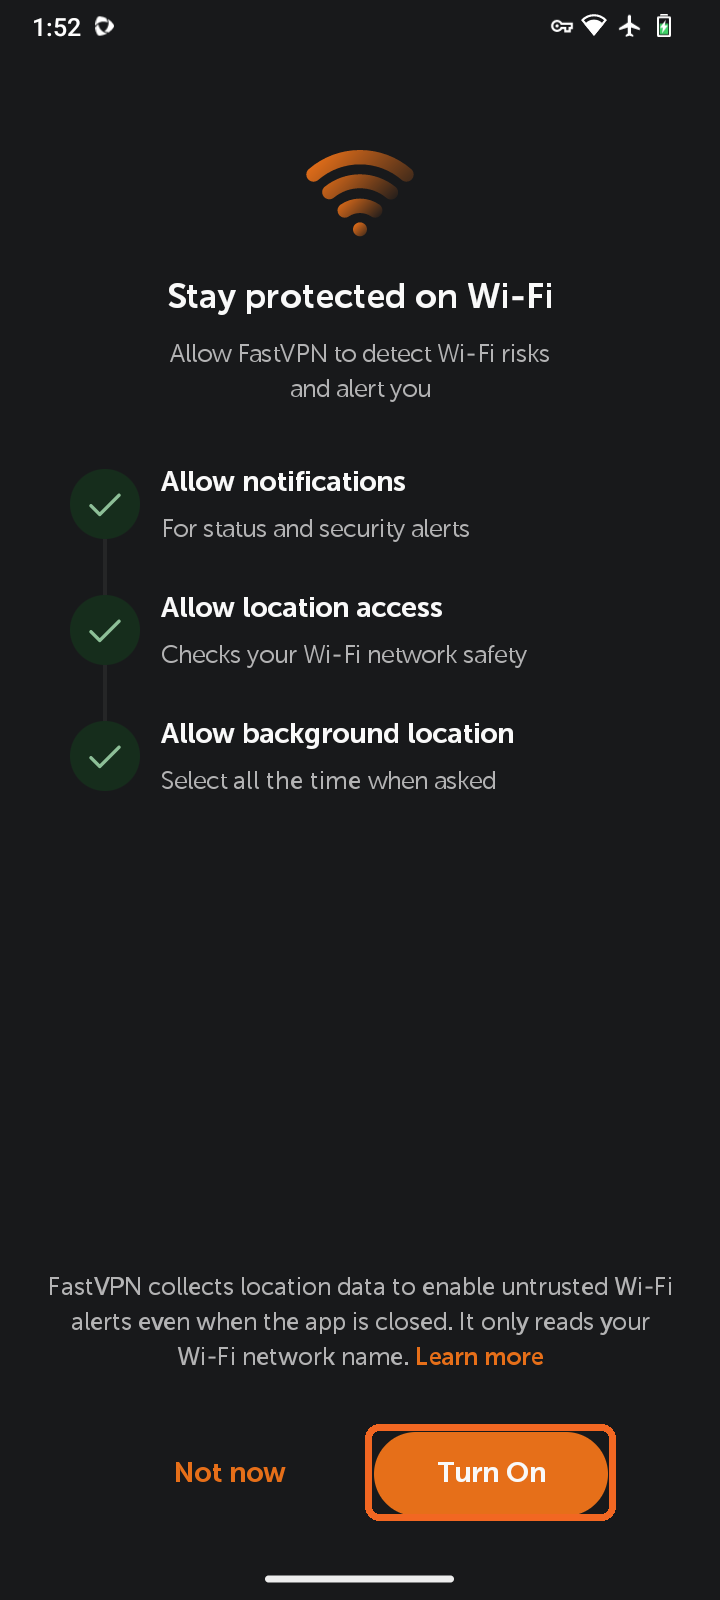
Next, tap Allow background location. Android opens the Location permission screen for FastVPN - select Allow all the time and go back to the app. When all three steps are checked, tap Turn On.
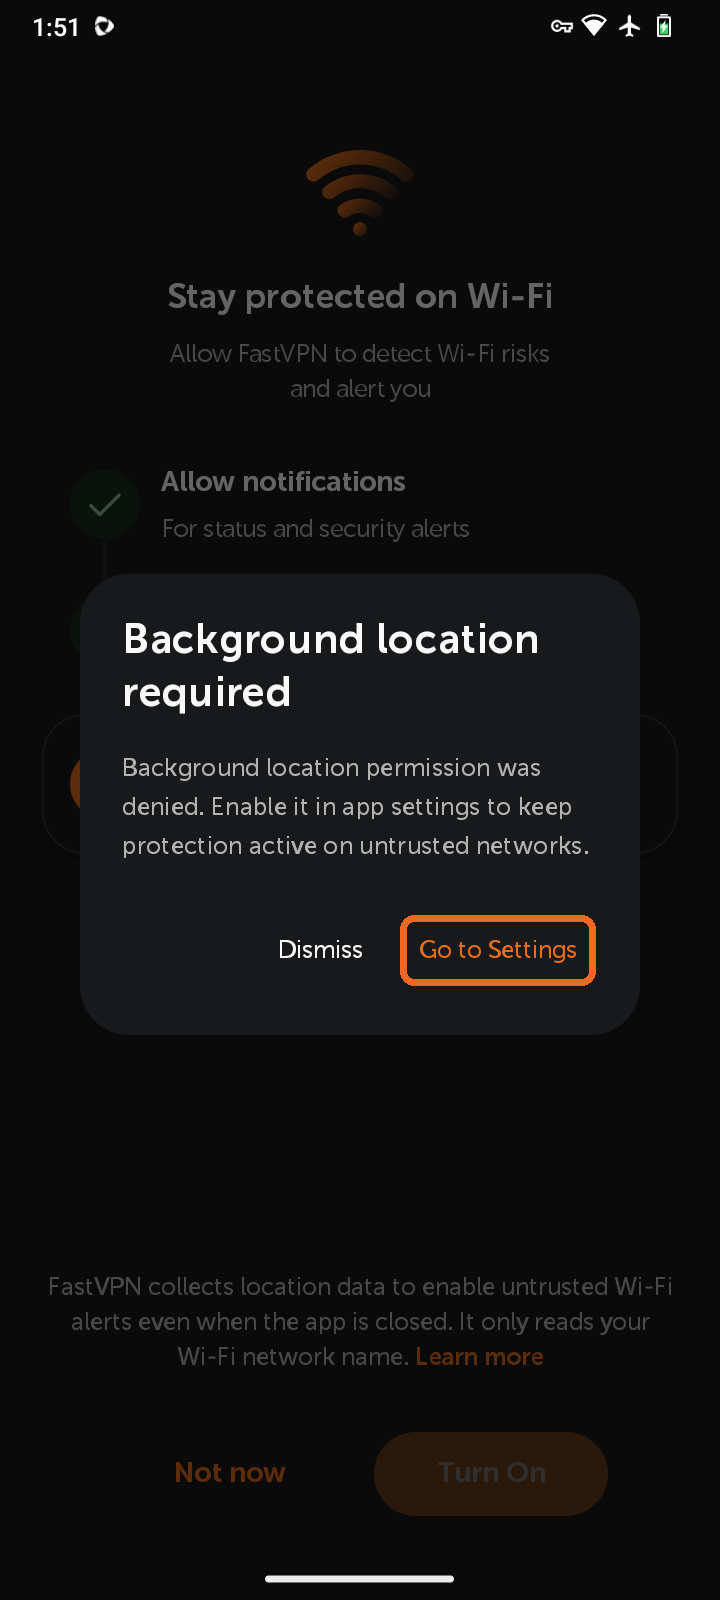
Note: If background location is not allowed, the app shows Background location required. Tap Go to Settings and select Allow all the time to keep protection active on untrusted networks.
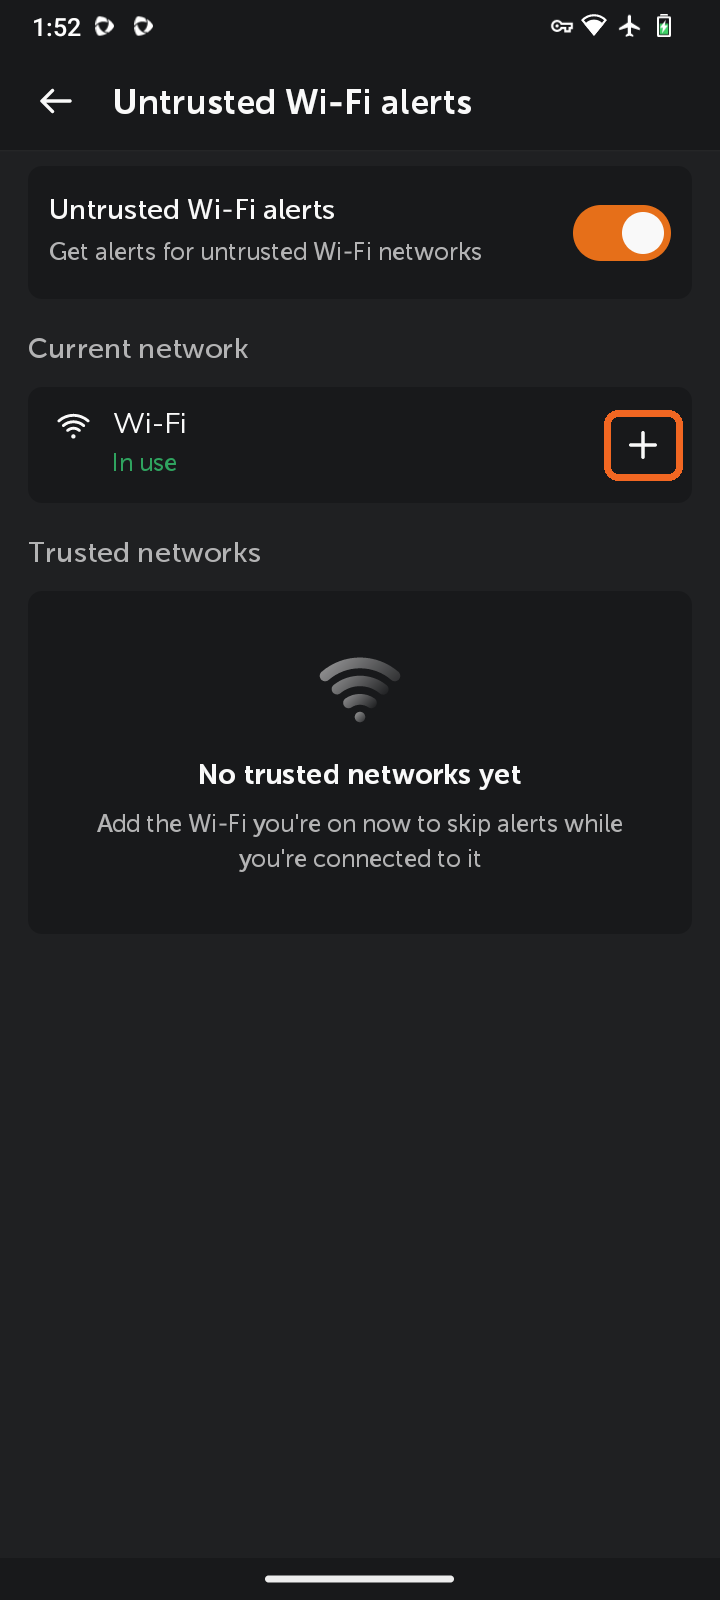
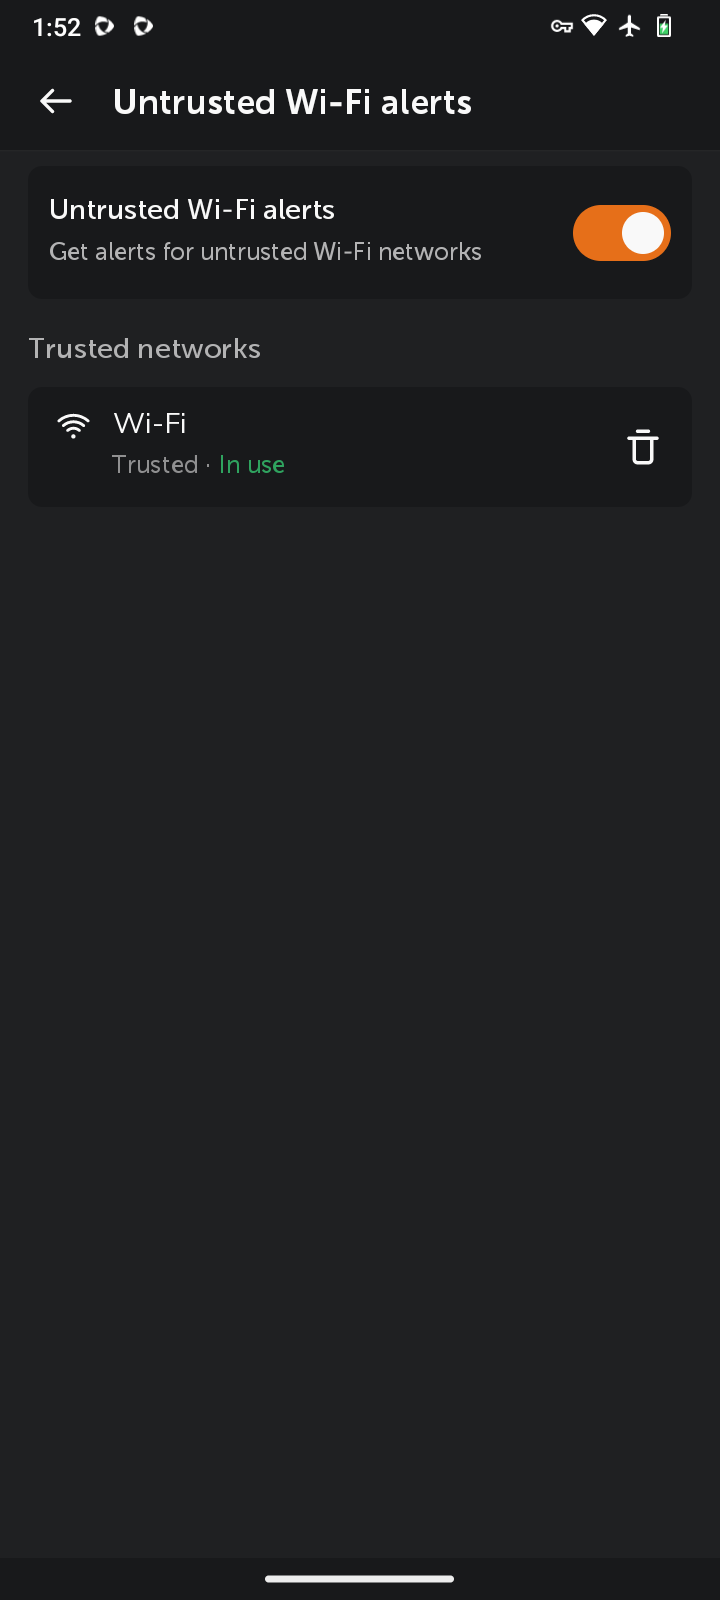
Once alerts are on, the Wi-Fi you are connected to appears under Current network. To skip alerts for a network you trust, tap the + icon next to it. The network moves to Trusted networks. To remove a network from the list, tap the trash icon next to it.
Under Traffic you will have:
-
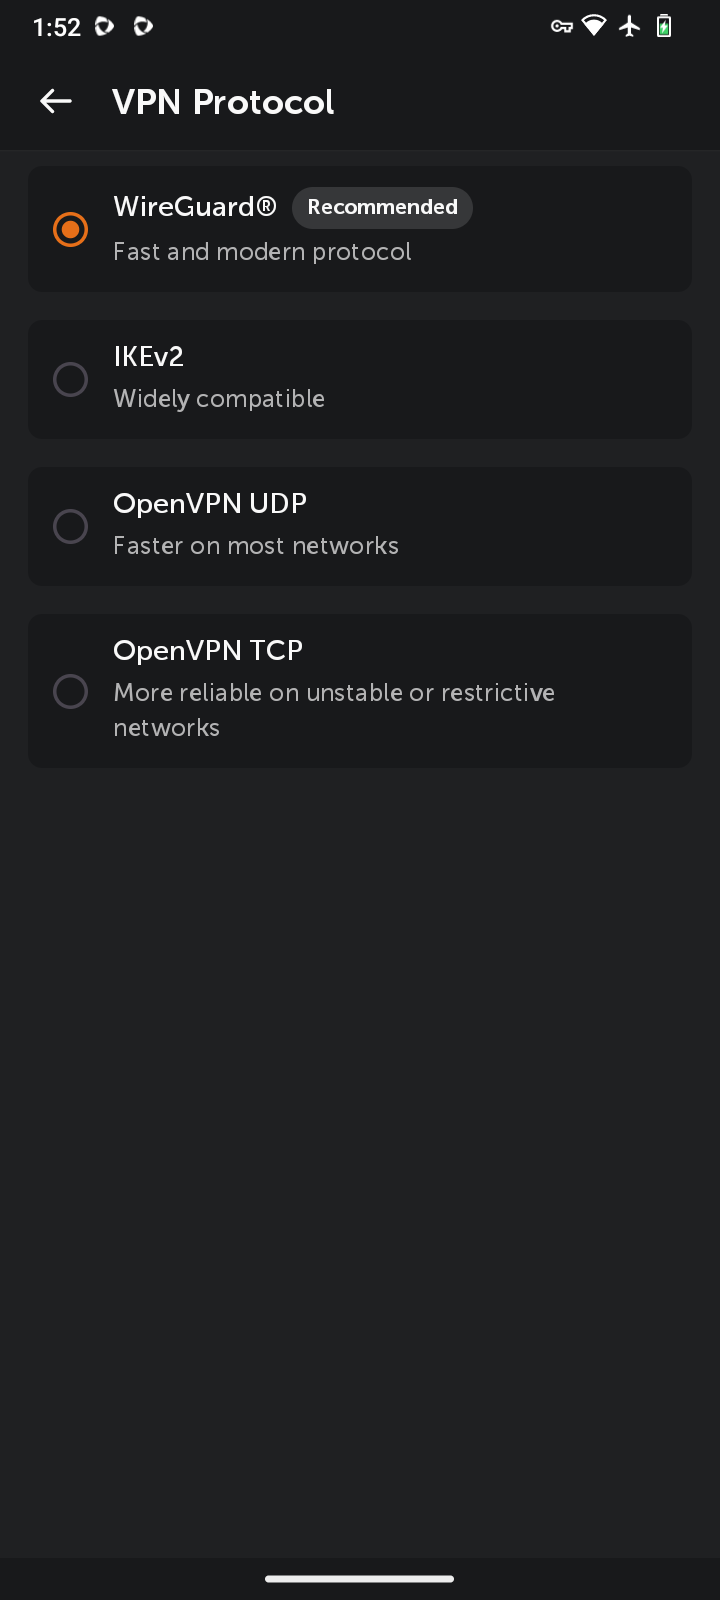
VPN protocol lets you choose the protocol used for your connection:
- WireGuard®* (Recommended) - a fast and modern protocol with strong encryption, perfect forward secrecy, and minimal attack surface.
- IKEv2 - a secure, stable and widely compatible protocol.
- OpenVPN UDP - faster on most networks; best for transmitting time-sensitive data.
- OpenVPN TCP - more reliable on unstable or restrictive networks.
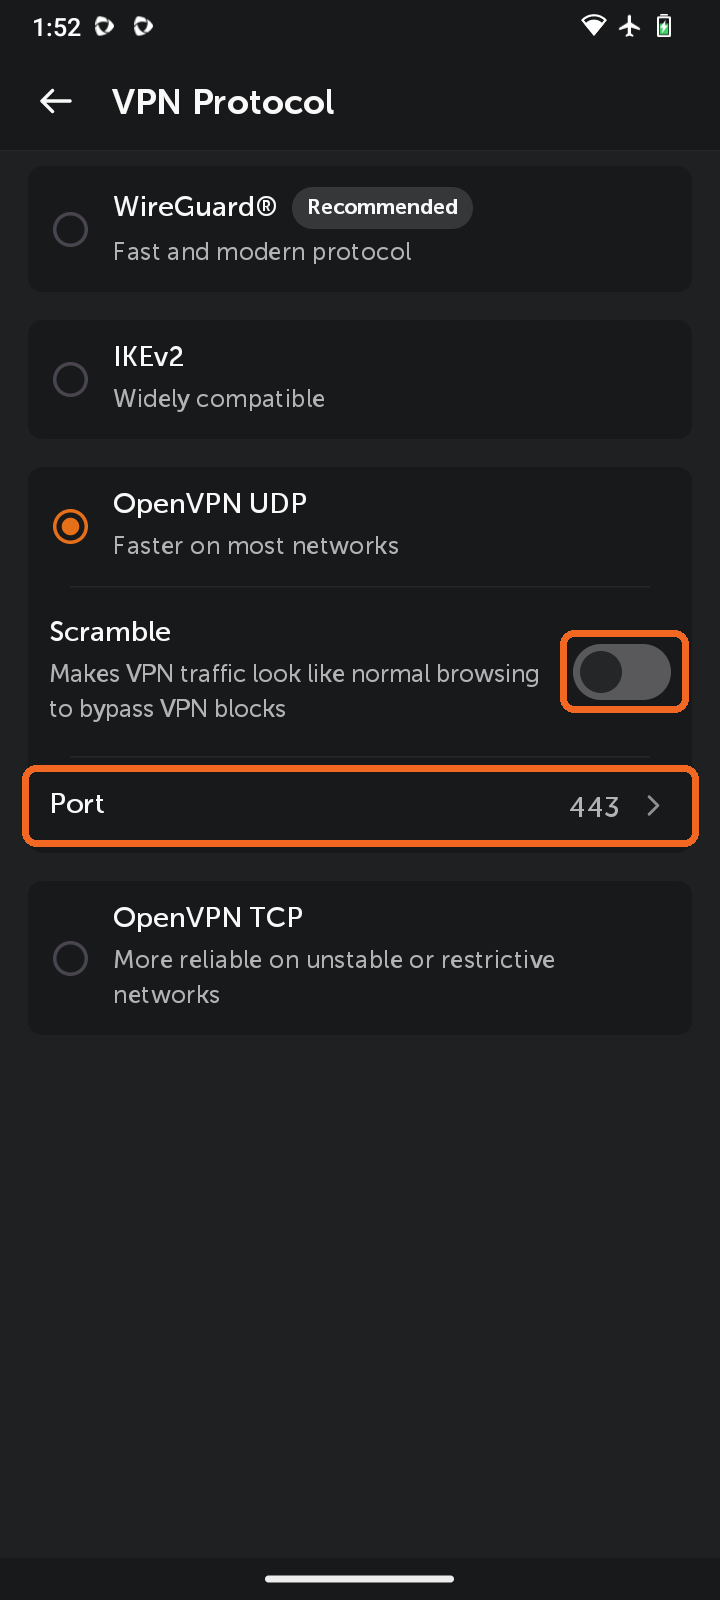
When you select OpenVPN UDP or OpenVPN TCP, two extra options appear:
-
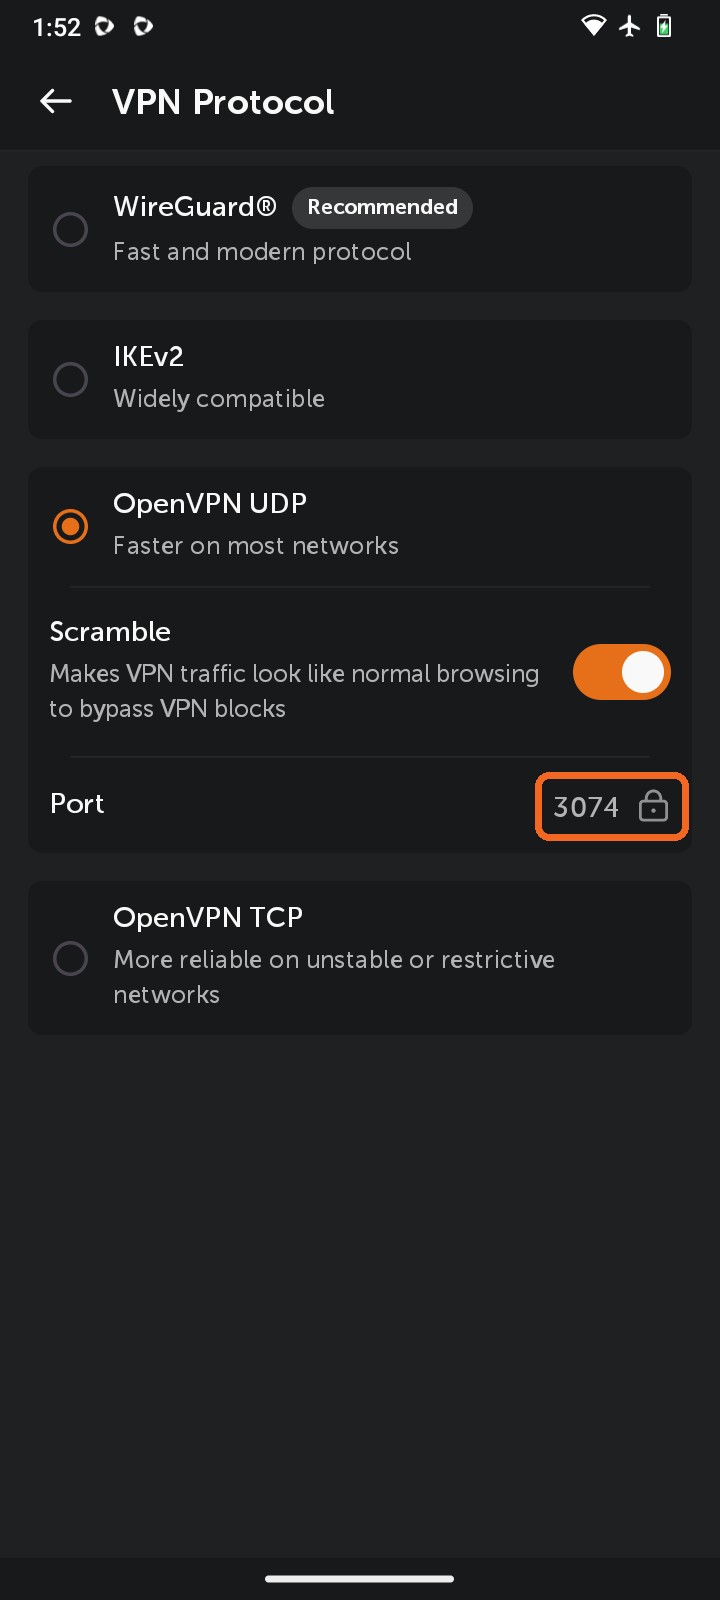
Scramble makes VPN traffic look like normal browsing to bypass VPN blocks. Turn it on if your network detects and blocks VPN connections.
-
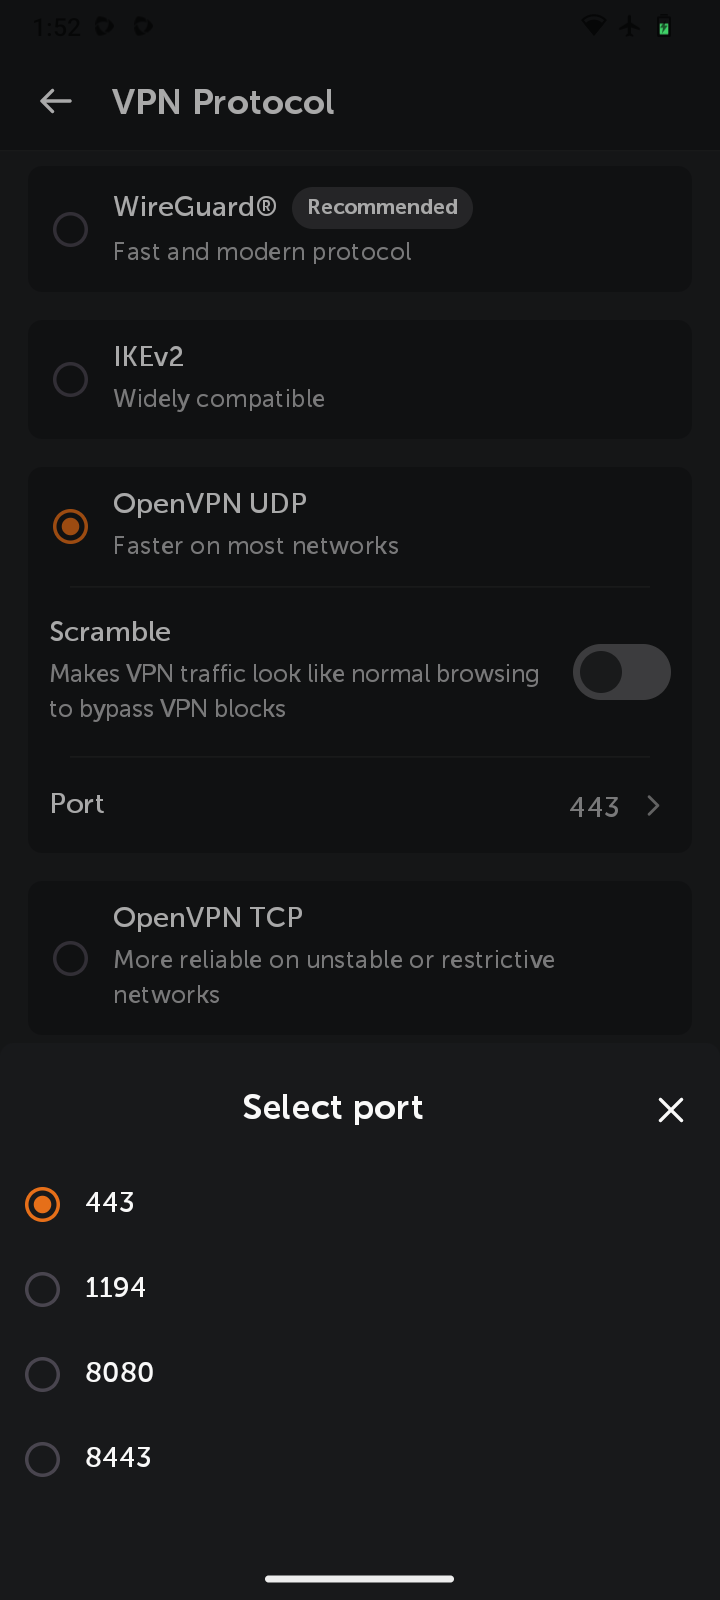
Port lets you choose the port used for the connection: 443 (default), 1194, 8080 or 8443. When Scramble is on, the port is set automatically and can't be changed.
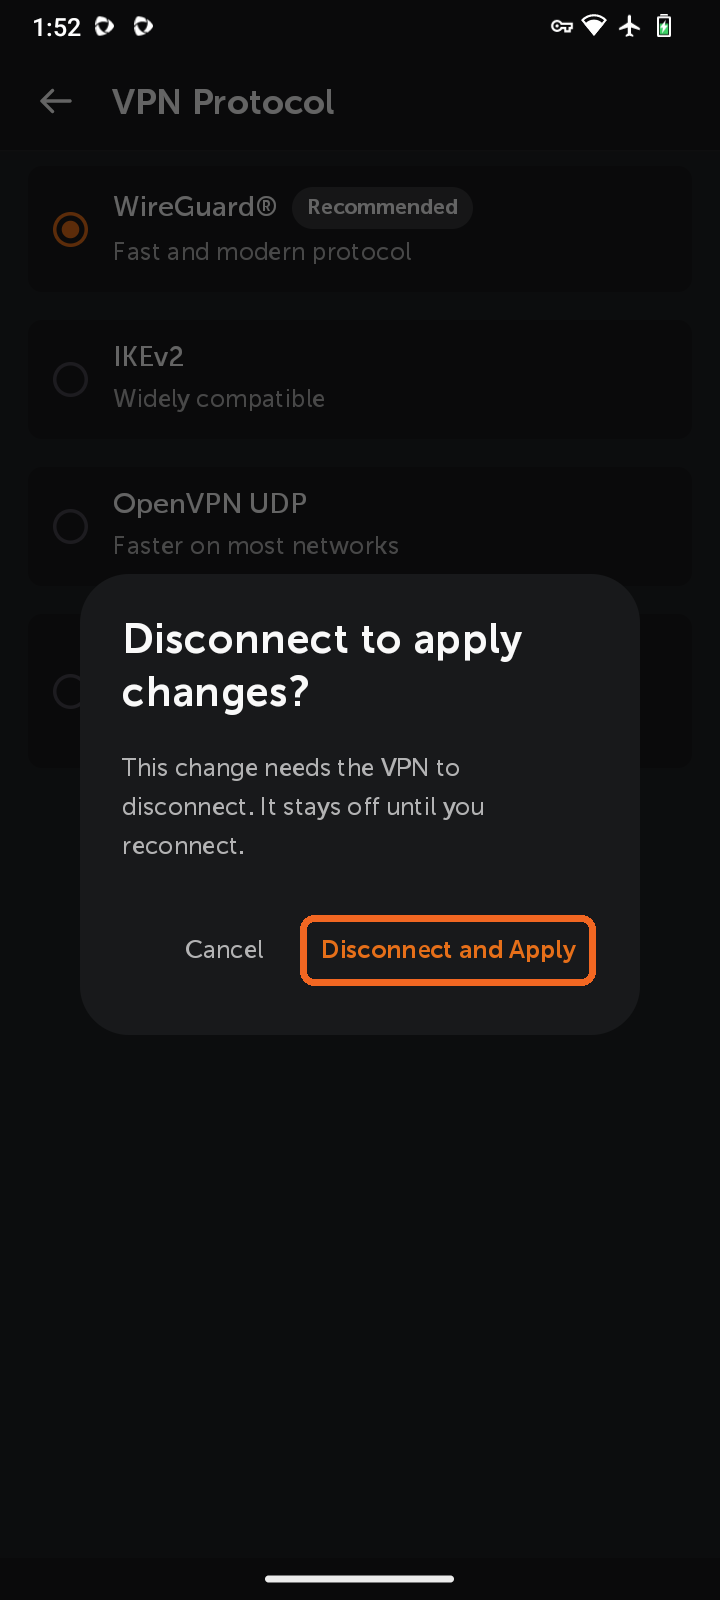
Note: If you change the protocol or its options while connected, the app asks you to Disconnect and Apply. The VPN stays off until you reconnect.
*All Rights Reserved. "WireGuard" and the "WireGuard" logo are registered trademarks of Jason A. Donenfeld.
-
Split tunneling lets you select apps, hostnames and IP addresses that bypass the VPN and use your regular Internet Service Provider connection instead. Learn more
-
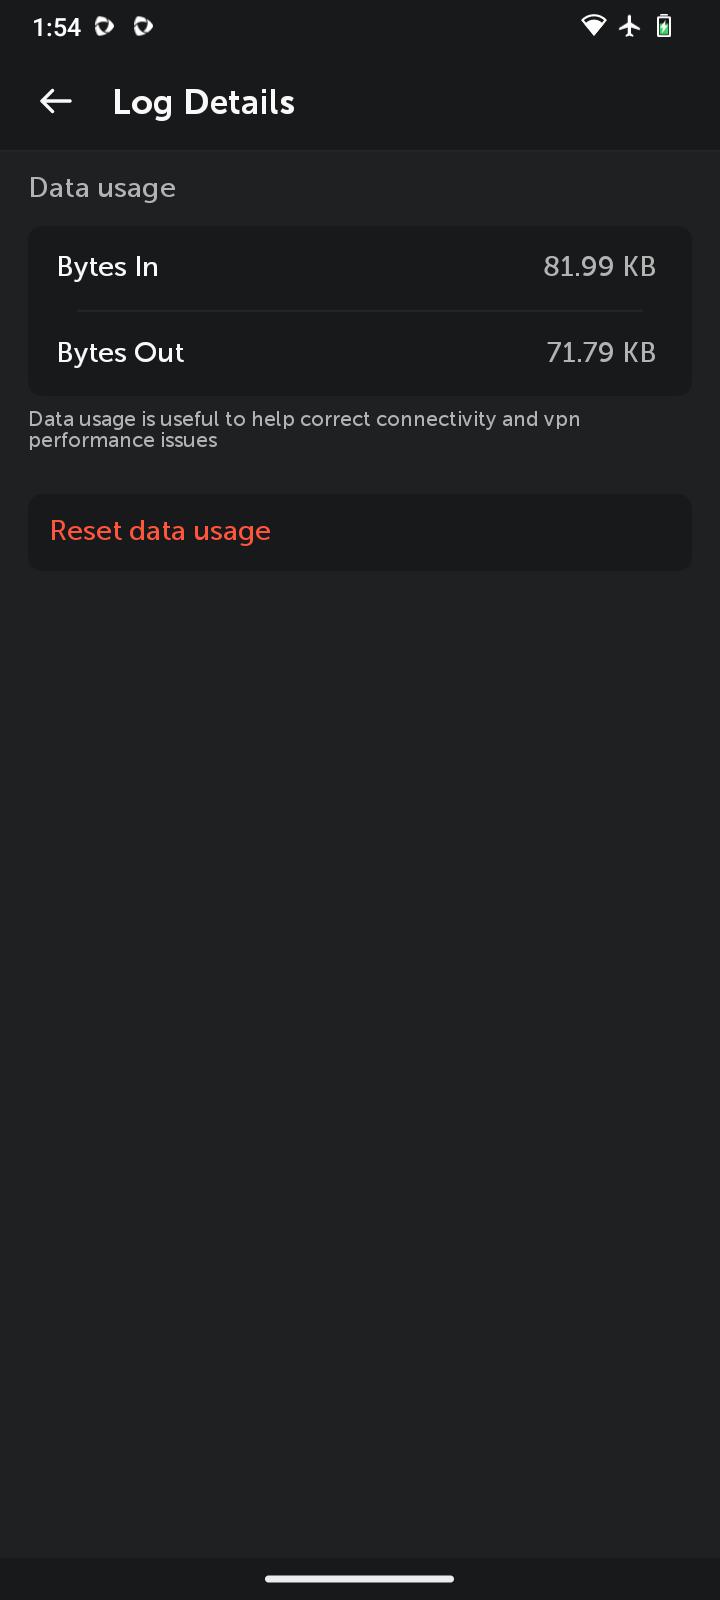
Log Details shows your data usage: Bytes In and Bytes Out. This information helps us correct connectivity and VPN performance issues, and it is visible only to you. Tap Reset data usage to clear the counters.
-
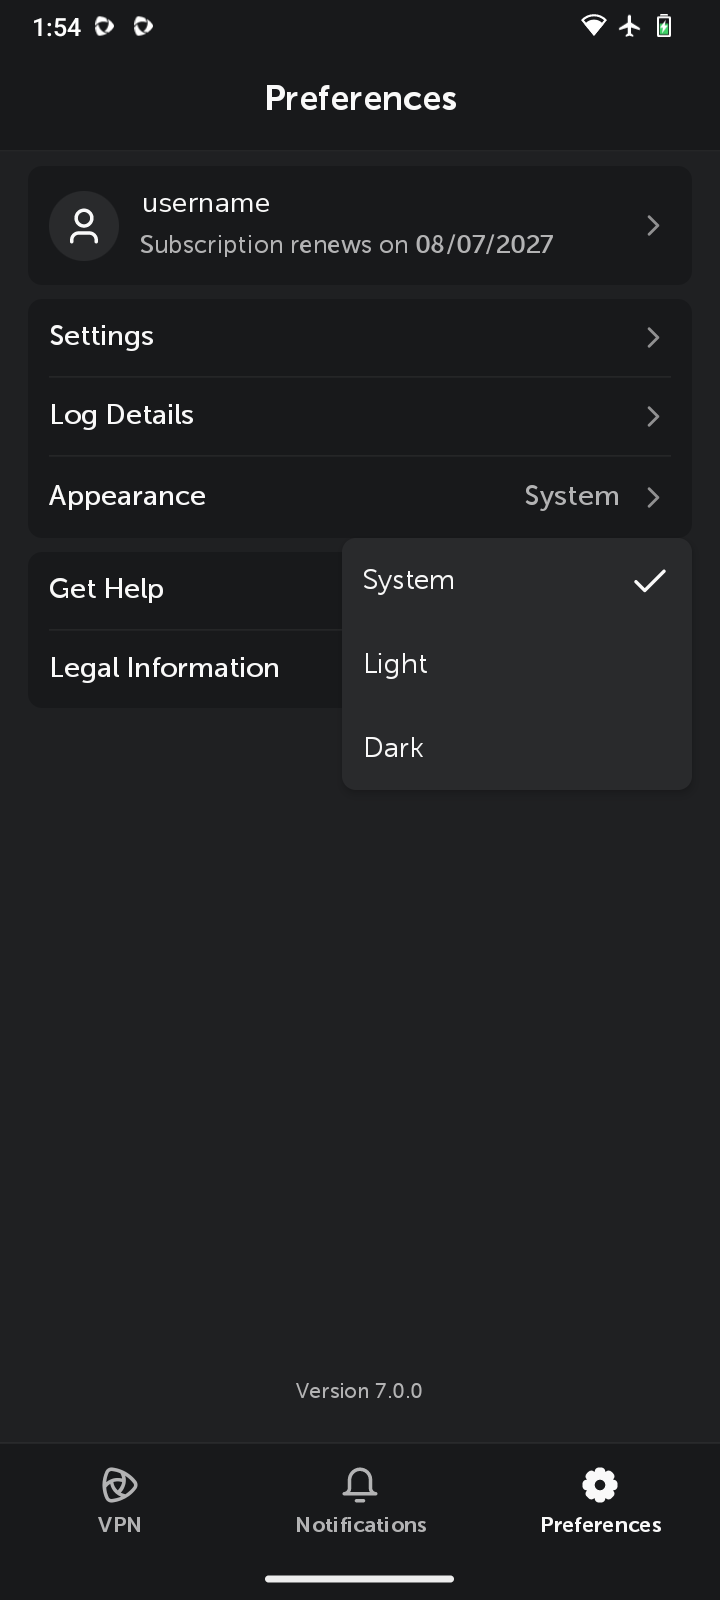
Appearance lets you choose a Light or Dark theme for the app, or select System to follow your device's theme.
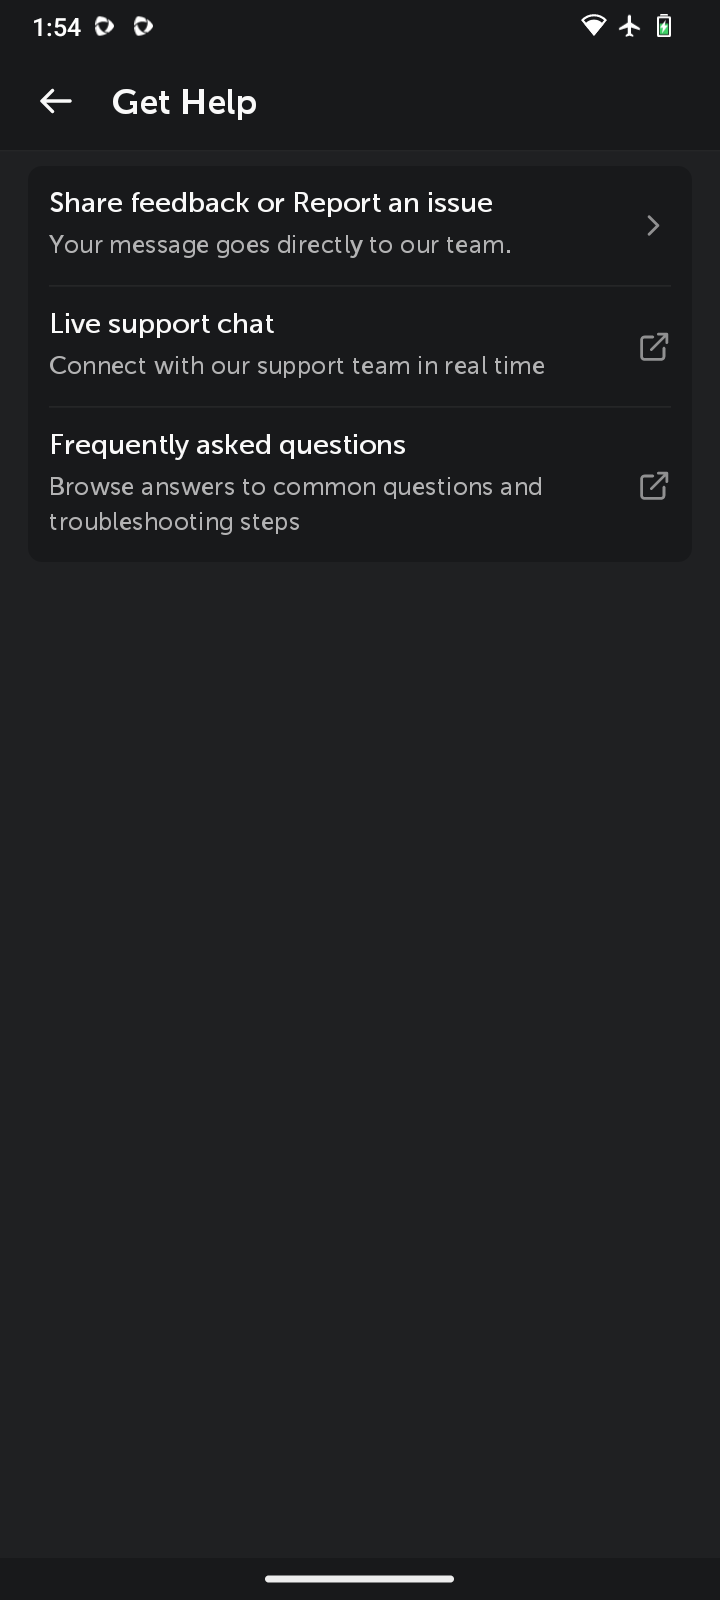
Get Help gives you the following options:
-
Share feedback or Report an issue - send feedback or report a problem directly to our team from the app.
-
Live support chat - connect with our support team in real time.
-
Frequently asked questions - browse answers to common questions and troubleshooting steps in our Knowledge Base.
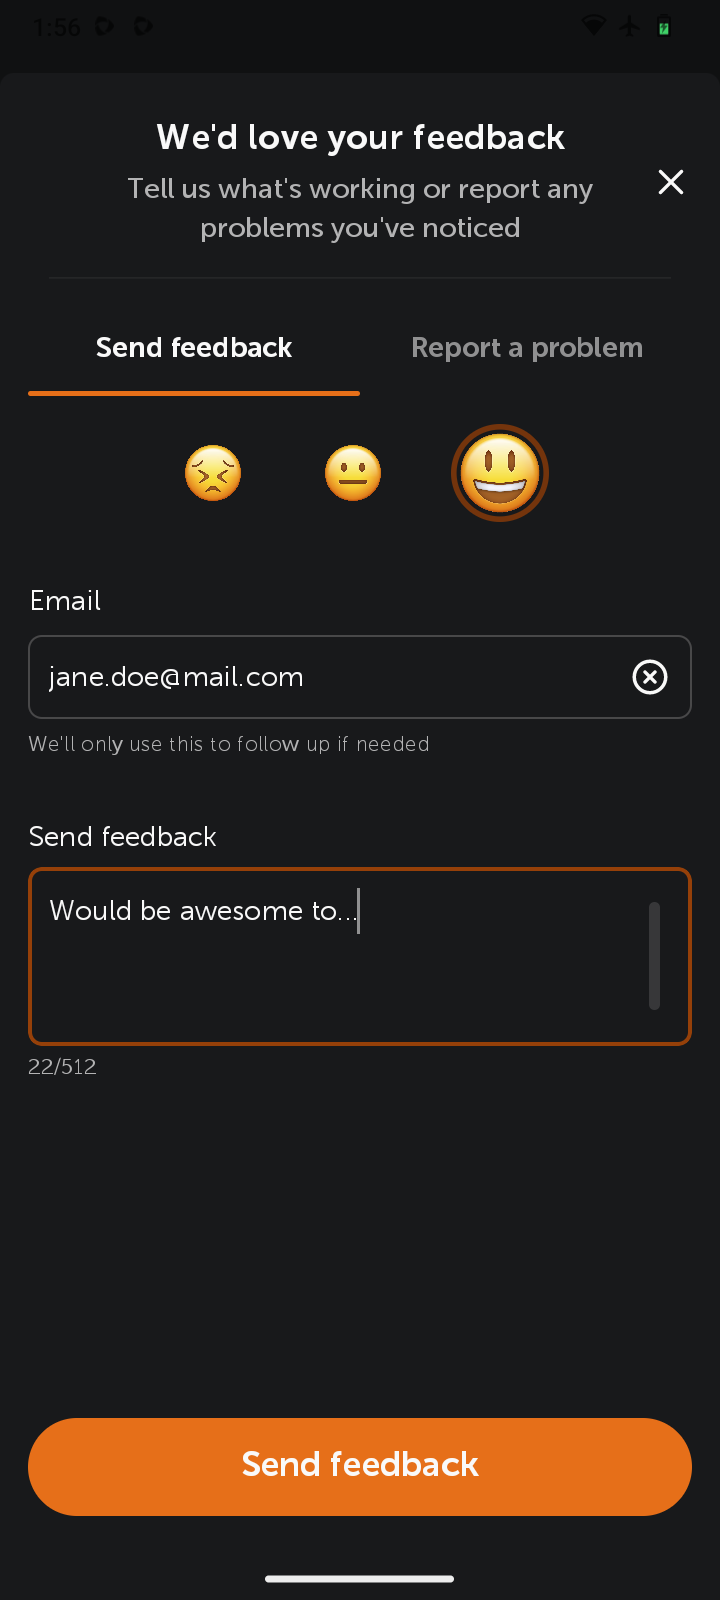
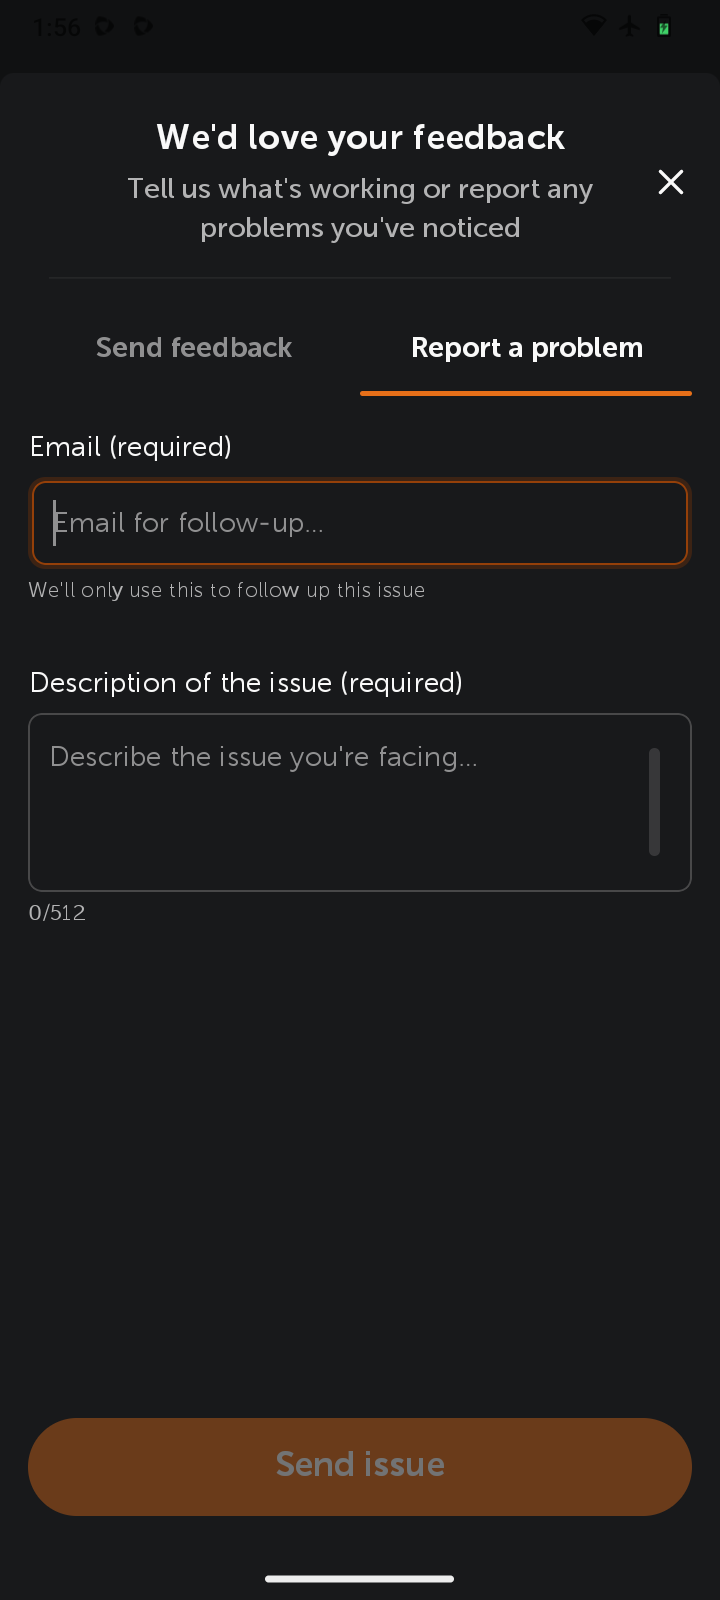
When you tap Share feedback or Report an issue, a form opens with two tabs:
-
Send feedback - rate your experience, optionally add your email, write your message and tap Send feedback.
-
Report a problem - enter your email (required, used only to follow up on the issue) and a description of the issue (required), then tap Send issue.
-
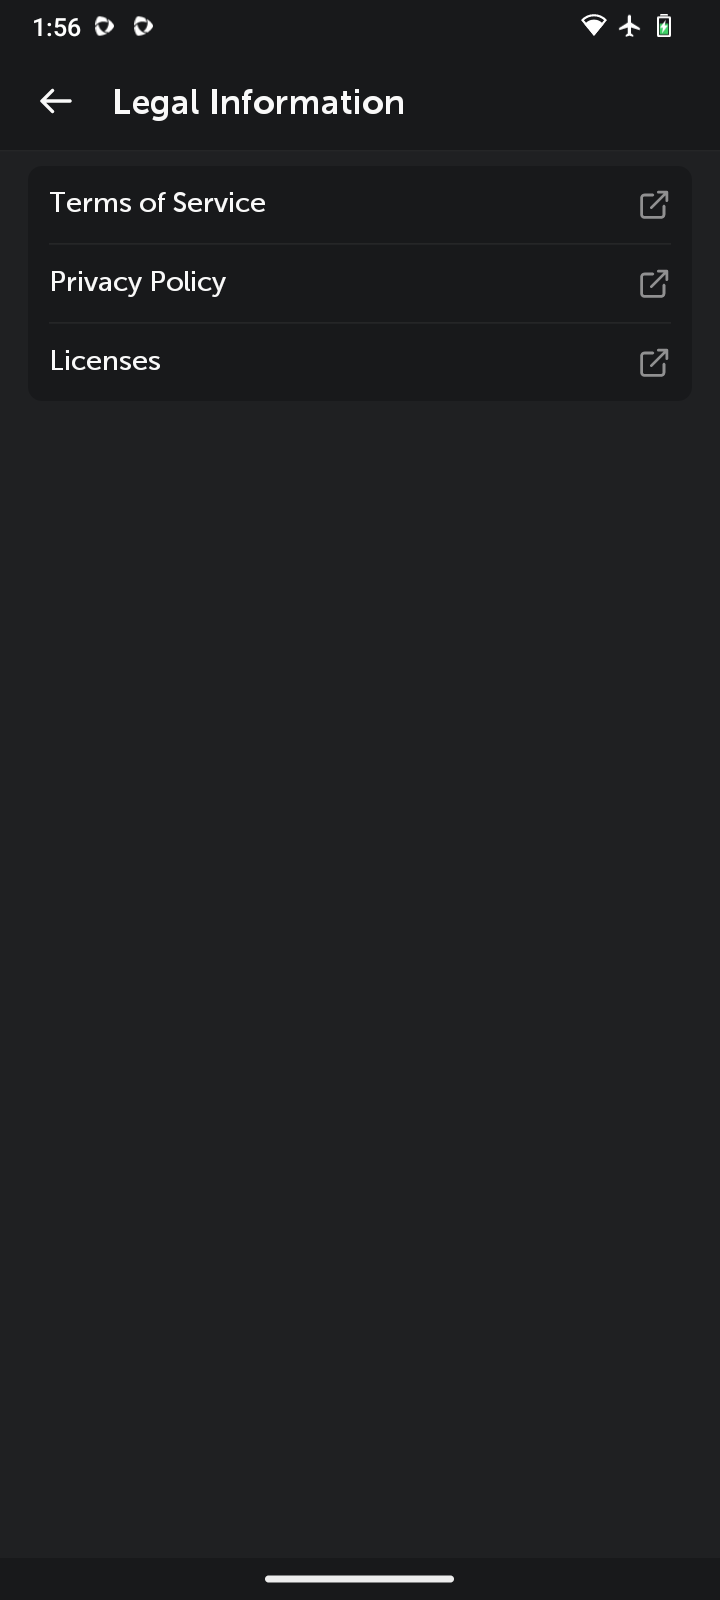
Legal Information gives you access to the Terms of Service, Privacy Policy and Licenses.
If you need any further assistance, please contact our
Support Team.