Ubuntu
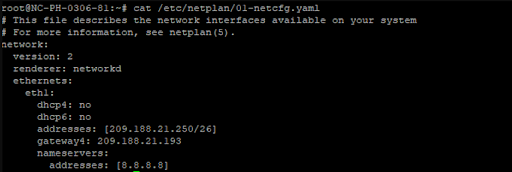
1. Check the contents of the eth1 interface:
cat /etc/netplan/01-netcfg.yaml
The following content of the YAML file should be present there:
network:
version: 2
renderer: networkd
ethernets:
eth1:
dhcp4: no
dhcp6: no
addresses: [209.188.21.250/26]
gateway4: 209.188.21.193
nameservers:
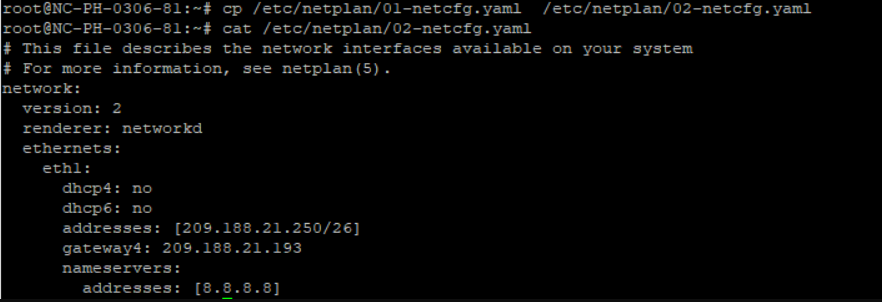
addresses: [8.8.8.8]2. For our private interface eth0, we will copy
/etc/netplan/01-netcfg.yaml to
/etc/netplan/02-netcfg.yaml file with the following command:
cp /etc/netplan/01-netcfg.yaml /etc/netplan/02-netcfg.yaml
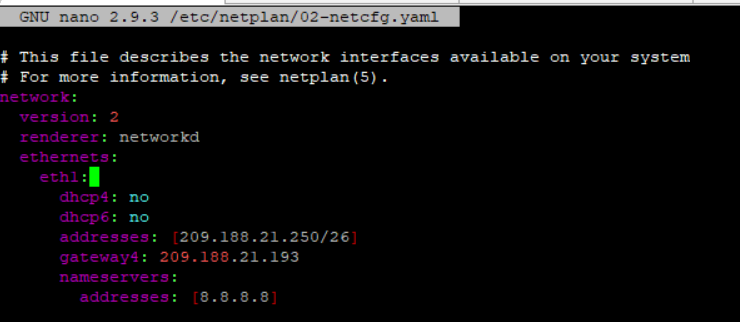
3. After that, open the YAML file for eth0 (/etc/netplan/02-netcfg.yaml) with the editor of your choice (make sure to follow the rules of how to
edit YAML documents).
NOTE: YAML is very strict with indentation and is case-sensitive, so please be attentive to the YAML syntax.
nano /etc/netplan/02-netcfg.yaml:
Replace the following text data:
eth1 >> eth0
addresses: [209.188.21.250/26] >> addresses: [192.168.1.1/24]
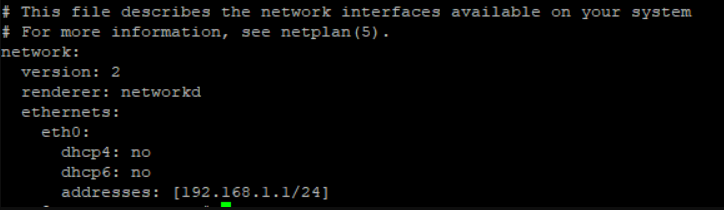
4. Remove the lines:
gateway4:
nameservers block (including addresses that follows).
The configuration file should look as follows:
5. After the configuration file for eth0 has been created, disable the port eth0 with the command:
ip link set eth0 down
You can check the status of the interface with the following command:
ip link show eth0:
6. After forcing shutdown, apply the new configuration using the command:
netplan apply
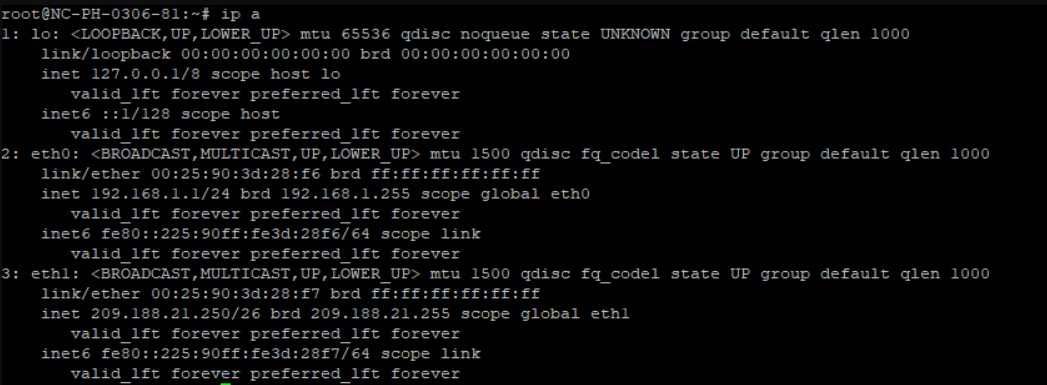
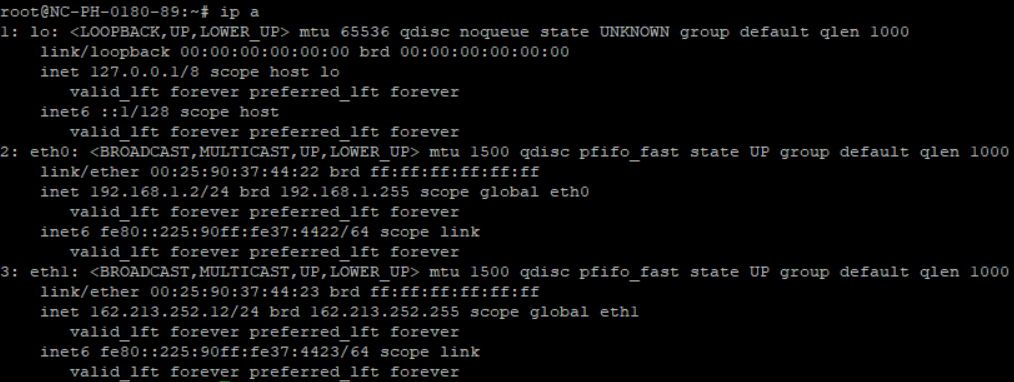
7. Check if the IP address has been added to the interface:
ip a:
You will then need to check for eth0 at the output:
As long as the state is "UP" and set internal IP address is present, you are good to go.
8. On the host 2, perform the same operations, only set the internal IP address to another value, different from the existing hosts within the same subnetwork /24.
9. After the configuration has been performed on the both servers, ensure that the hosts are available for each other (link to the last section).
Debian
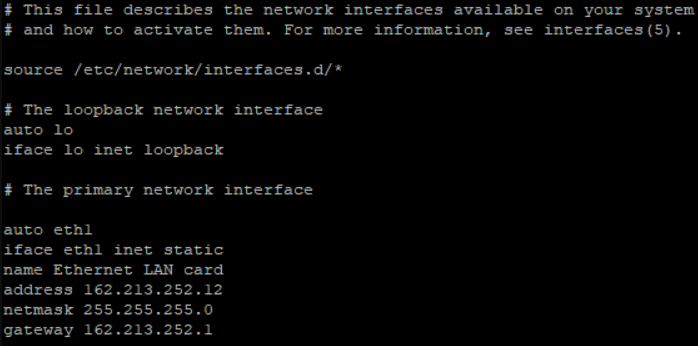
1. Check the contents of the interface’s configuration file:
cat /etc/network/interfacesThe initial file should contain the following information:
2. Open the file with your favorite text editor and amend the following lines to the end of the file:
nano /etc/network/interfaces
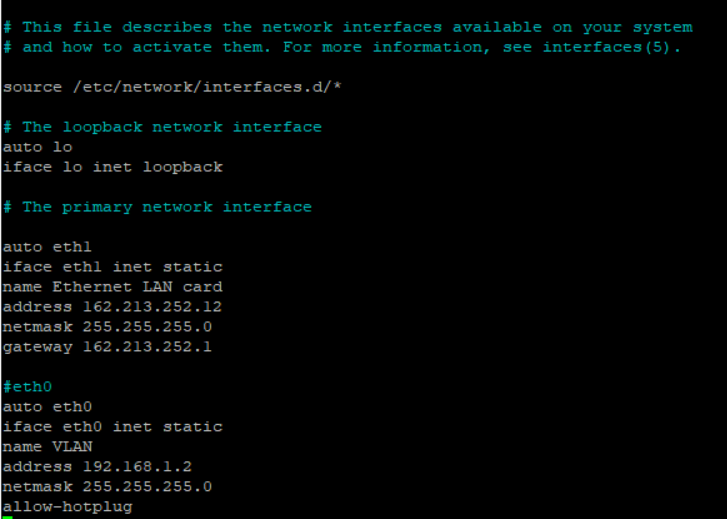
3. Add the necessary data and save the changes:
#eth0
auto eth0
iface eth0 inet static
name VLAN
address 192.168.1.2
netmask 255.255.255.0
allow-hotplug
The file should look as follows:
4. After that, restart the networking with the following command:
systemctl restart networking:
5. Once restarted, check the interface parameters:
ip a:
6. You will need to check for eth0 at the output:
As long as the state is "UP" and the set internal IP address is present, you are good to go.
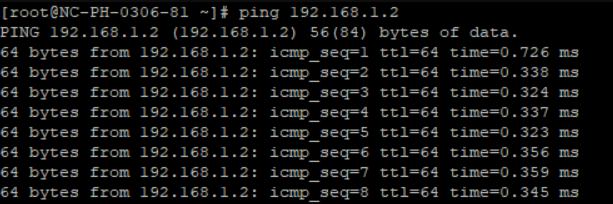
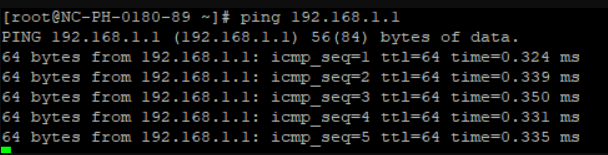
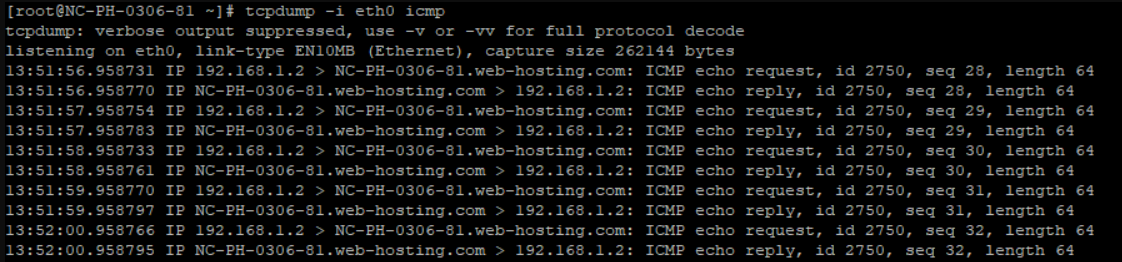
How to check for available hosts
After the configuration has been performed on both servers, ensure that the hosts are available to each other by utilizing
ping command and
tcpdump:
Server1:
ping IP address
Server2: tcpdump -i eth0 icmp

And vice versa:
Server2:
ping IP address
Server1: tcpdump -i eth0 icmp
This wraps up the VLAN interface setup for your OS, which is based on two network hosts. For more than two network hosts, we recommend using the available IP address from a private subnet that is not assigned to the existing hosts.
Well done!