Take the hassle out of SSL installation with our service.
A CSR (Certificate Signing Request) code is what you’ll need to activate an SSL certificate in your Namecheap account.
Here are the illustrated steps for you to do that:
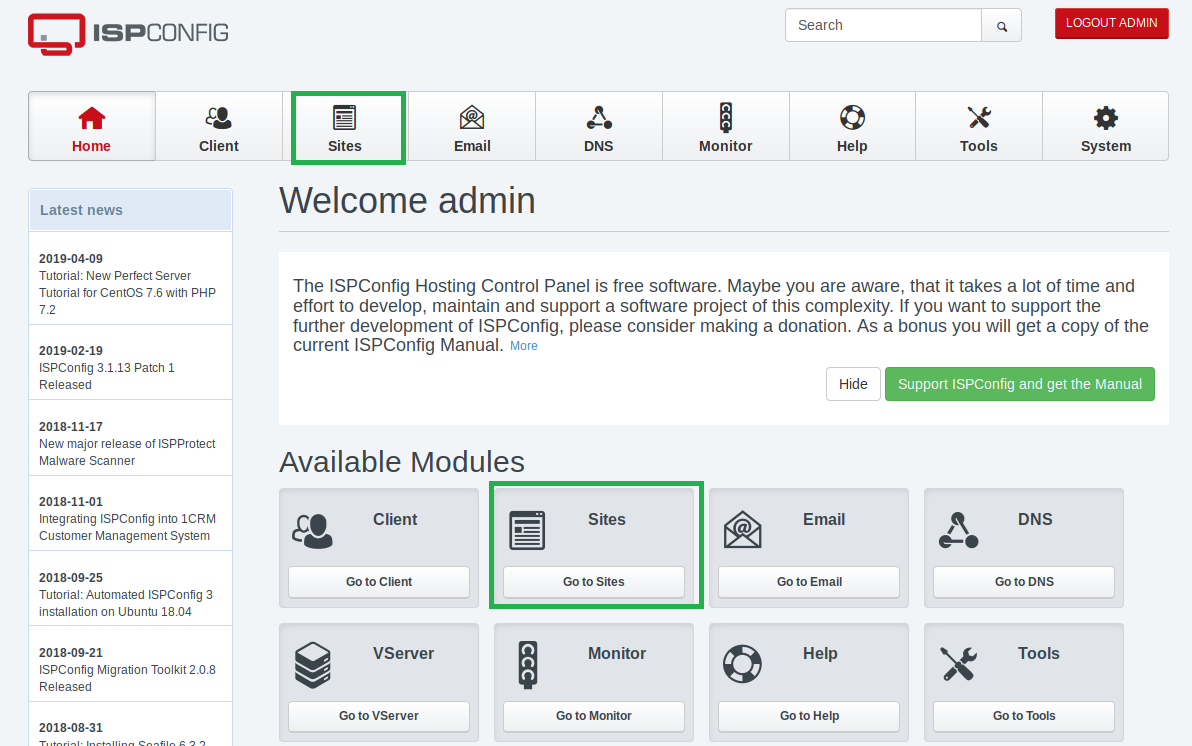
- Login to ISPConfig dashboard via port 8080. (e.g. http://yoursite.com:8080)
- Click Sites in the main menu.
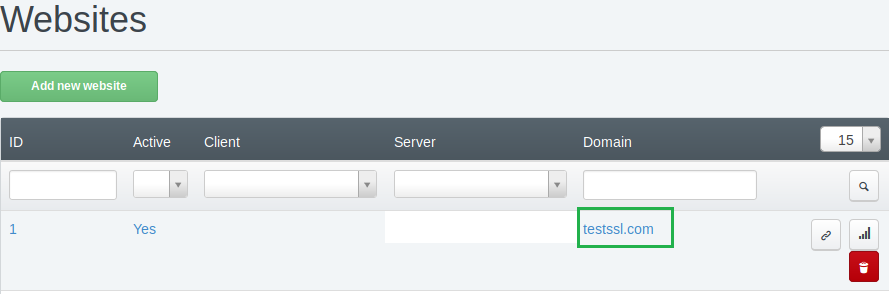
- Click on the domain name you want to generate a CSR for.
- Select the SSL tab.
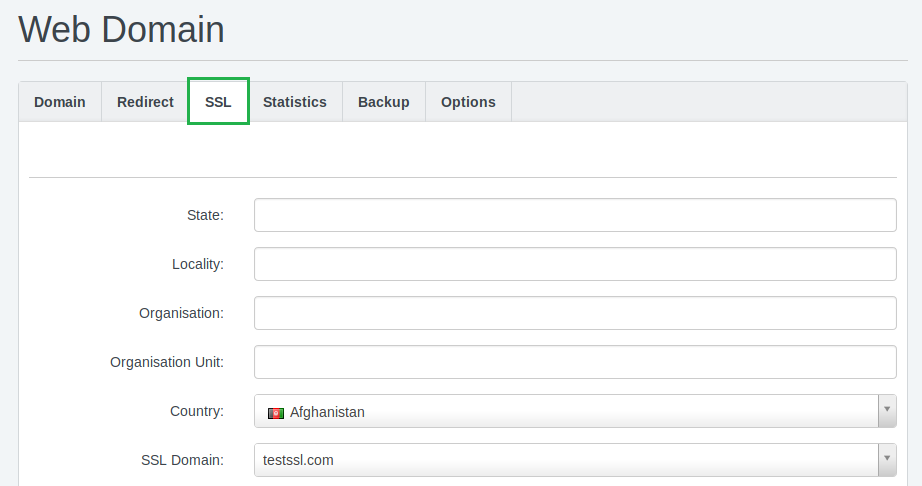
- Fill in the fields using this guidance:
- State field: complete name of your state or region.
- Locality field: complete name of your city or locality.
- Organization field: the officially registered name for your business. If it’s not registered, type N/A. For Organization and Extended Validation Certificates, you’ll submit additional official paperwork for the Certificate Authority to check.
- Organization Unit field: the name of a division or department within your officially registered organization. If it’s not registered, type N/A.
- Country field: select from the drop-down list.
- SSL Domain field: choose whether you do or don’t want to include the www subdomain for your certificate.
Note: If you’re using a single-domain certificate, the www subdomain and domain name are included in your certificate by default. Or if you have a Wildcard certificate, select the domain with an * (asterisk) next to it. - SSL Action: scroll down and choose the Create certificate option from the drop-down menu in this section.
Click Save.
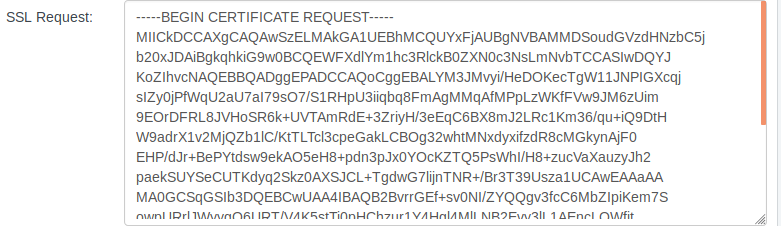
- Go to the Websites page.
- Click the SSL tab. Now you will see that the SSL Key, SSL Request, SSL Certificate boxes have information in them:
- SSL Request - your CSR code. Keep it safe, you’ll need it during the SSL activation.
i.e. the information starting and ending with these tags: -----BEGIN CERTIFICATE REQUEST----- and -----END CERTIFICATE REQUEST-----.
- SSL Key - your RSA private key code. It will be automatically saved in the ISPConfig panel i.e. the information starting and ending with these tags: -----BEGIN RSA PRIVATE KEY----- and -----END RSA PRIVATE KEY-----.
- SSL Certificate – self-signed certificate details. These are not needed to continue the SSL installation process.
- Copy all the content in the SSL Request field:
- Go to your Namecheap account and proceed with the SSL Certificate Activation Steps.
