If you have a Dedicated Server with CloudLinux installed, you can control, monitor and set limits for existing cPanel accounts with the LVE Manager WHM plugin. This plugin can be found in the WHM >> LVE Manager menu.
Here, the interface is designed to manage limits for resold accounts, to monitor statistics, as well as to keep track of resource usage. It also helps to modify packages limits of resold accounts.
You will see that the LVE Manager features the following tabs:
- Current Usage - Allows for the monitoring of resource usage from current resold accounts
- Historical Usage - Allows for the controlling of resold accounts’ resource usage history
- Users - Allows for the viewing and managing of all resold accounts’ limits
- Statistics - Allows for the statistical displaying of resource usage for a particular timeframe or particular resold account
- Options - Allows for the setting of email notifications for LVE Faults
- Packages - Allows for the managing of a package’s limits
Current Usage
Historical Usage
Users
Statistics
Options
Packages
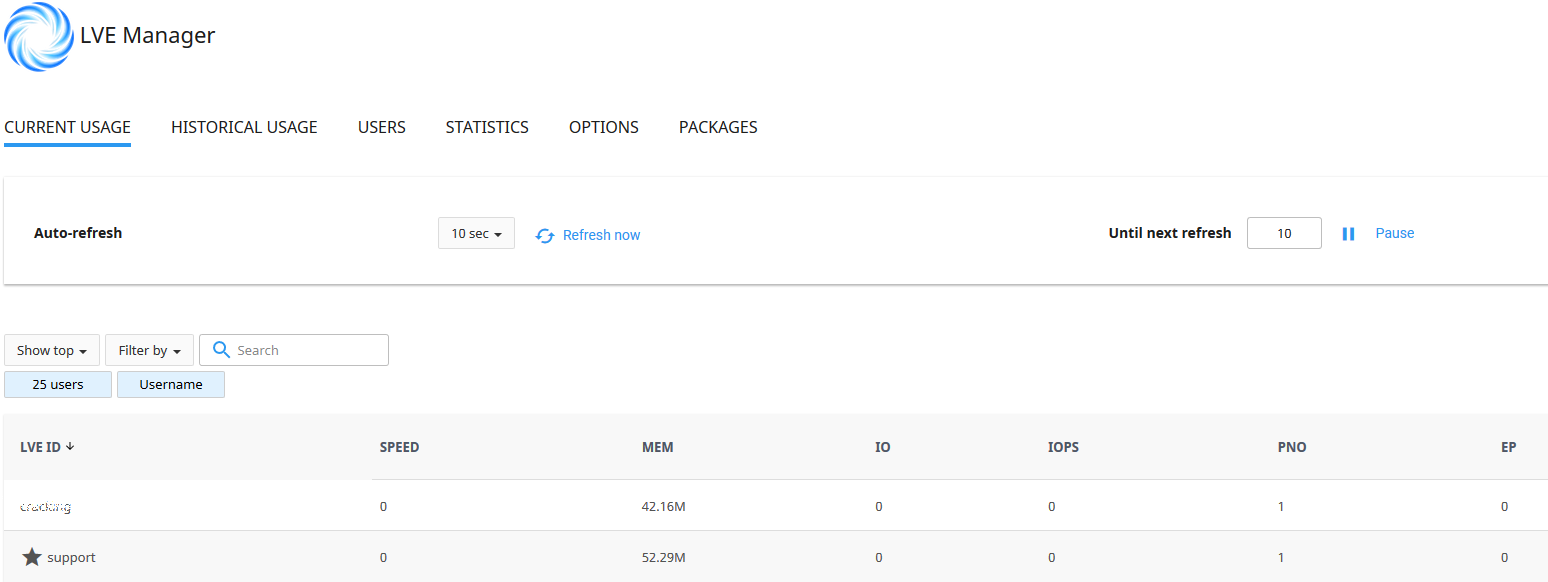
Current Usage
The Current Usage tab provides information on the following:
- SPEED
- Memory (MEM)
- Data Throughput (IO)
- Read/Write Operations Per Second (IOPS)
- The Number of Processes (PNO)
- Entry Processes (EP)
The Resource Usage data is refreshed every 10 seconds, which is set by default in the Auto-Refresh field. You can set this time by selecting the desired value from the drop-down.
It is also possible to manually refresh the table by selecting Refresh Now. Or, you can also freeze the values by selecting Pause. Keep in mind that usage values will not change until the next manual refresh, so Unpause will unfreeze the values and the countdown will continue.
You’ll notice along the bottom of the table lies the starred line, which displays the total resource usage from both the resold accounts and that of the reseller’s. For each parameter, the data is shown as a summary.
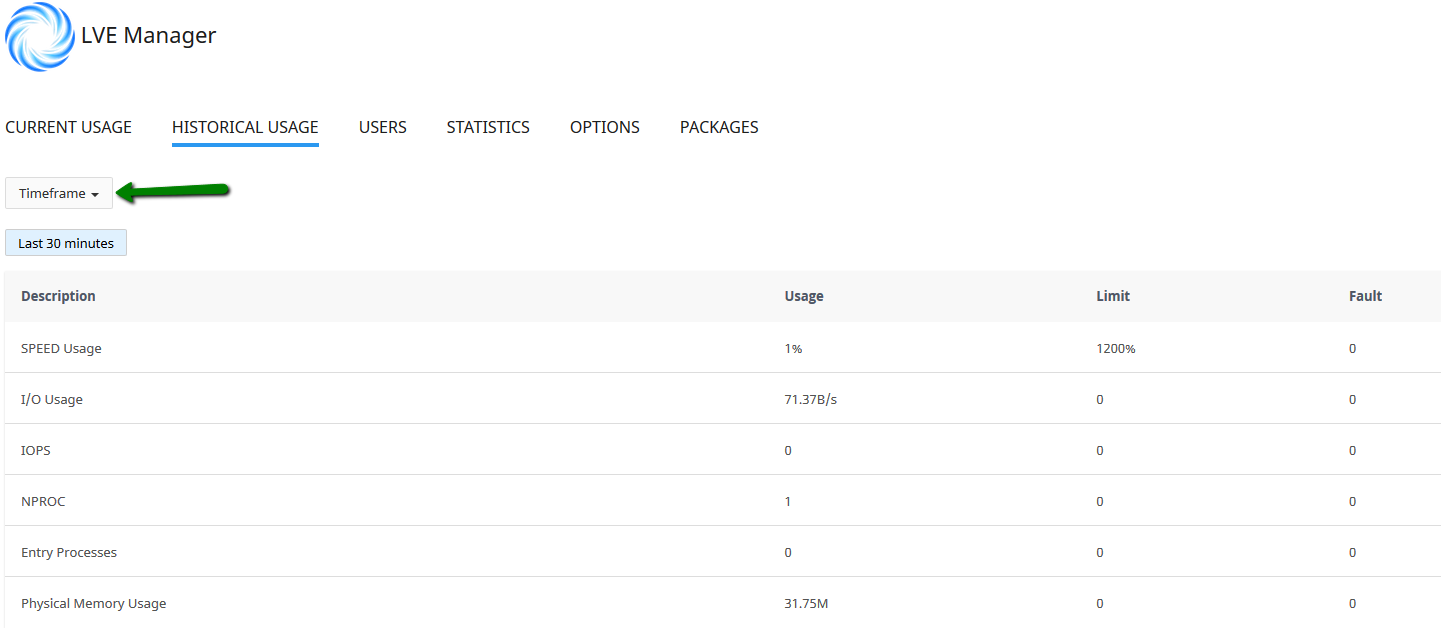
Choose the Historical Usage tab to view the reseller and resold accounts’ resource usage history and faults. To filter the list of users, select Timeframe:
When a resold account reaches the limits set for the reseller, this information will appear on the chart. In case the resold account reaches its limits set by the reseller, such faults will not be displayed on the chart:
On the Historical Usage page, you will see the list of Top 5 Users (based on resource usage, for the same period as charts/overall usage). To view resource usage statistics for a particular user, simply select the History icon in the Actions column.
To view and/or manage other users from the Statistics page, select the LVE Statistics tab at the top of the Top 5 List.
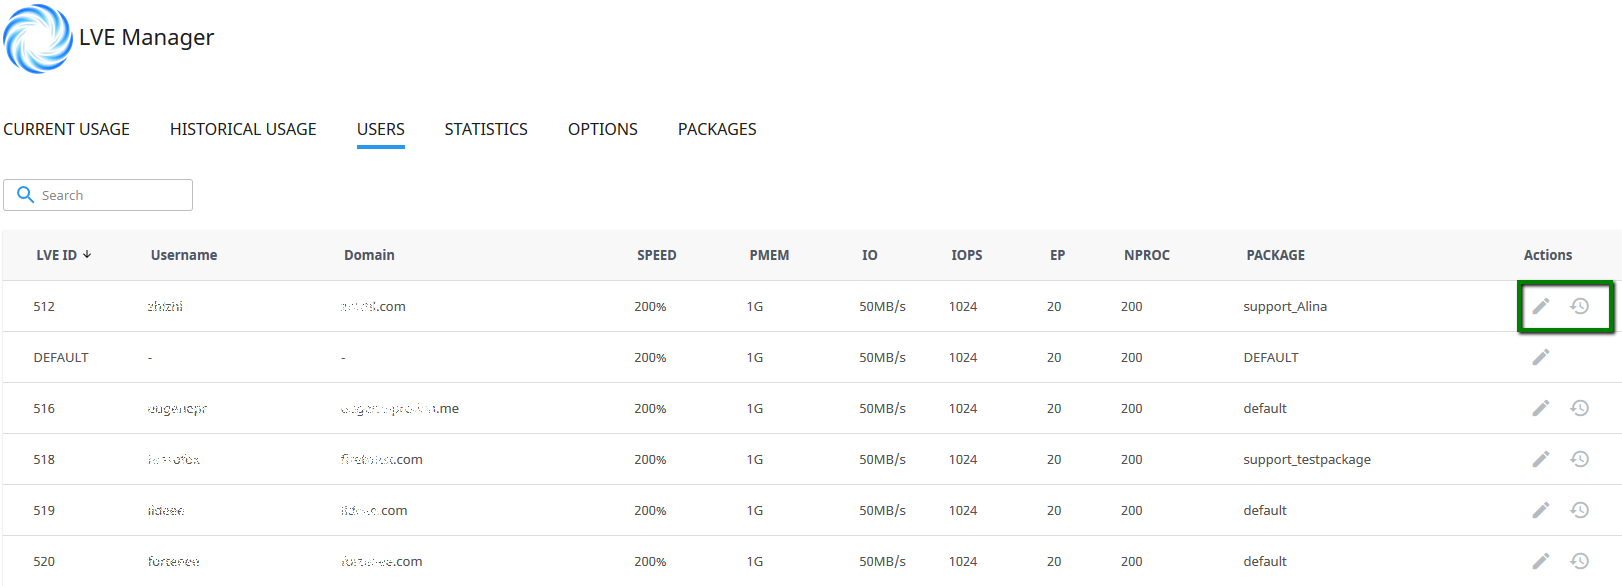
Users
To view and manage the list of all resold accounts and their respective resource usage limits, simply select the Users tab. The limits are available as follows:
You can also filter the list by Username, Domain, and LVE ID.
To edit limits for a particular user, select the
Pencil icon in the
Actions column. Here, the following actions are available:
- Selecting Reset to reset limits to default values
- Selecting Apply to not limit a set unlimited resources to a user
- Setting values for SPEED, PMEM, IO, IOPS, EP, and NPROC
Remember to select
Save to save your changes or
Cancel to close the window.
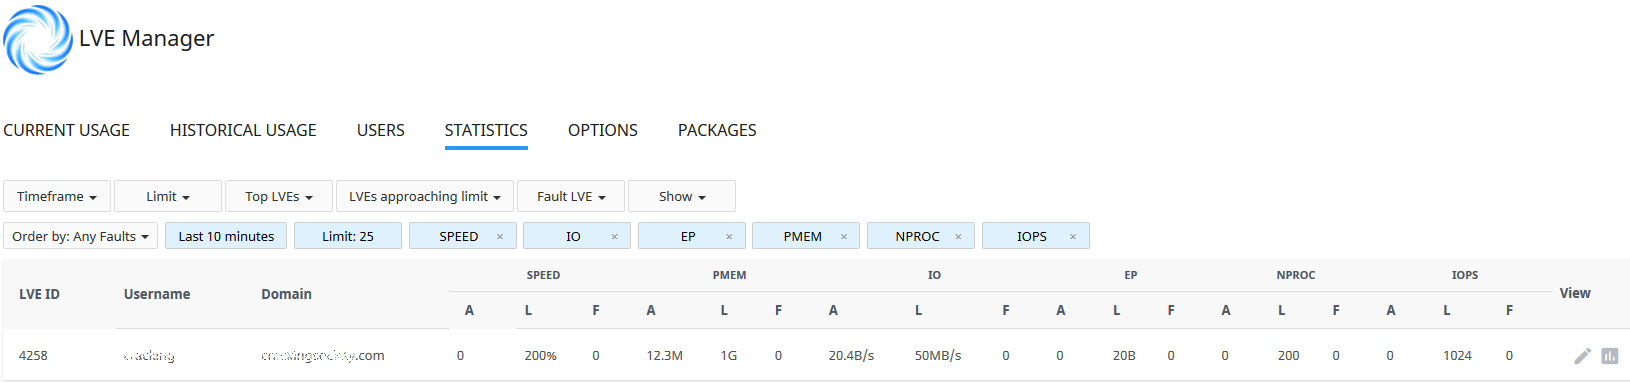
Statistics
Select the
Statistics tab to view the statistics for resource usage limits. The
Statistics table can be filtered by:
- Timeframe
- Limit
- Top LVEs
- LVE approaching limit
- Fault LVE
The following parameters are then displayed:
- SPEED per user
- PMEM usage per user
- IO usage per user
- EP usage per user
- NPROC usage per user
- IOPS usage per user
Options
To reconfigure your email notifications, select the
Options tab.
Under the
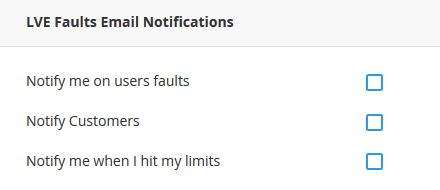
LVE Faults Email Notifications section, check the appropriate boxes to set your desired type of notification:
- Notify Me on Users’ Faults - The reseller gets notified when users have exceeded their limits
- Notify Customers - Resold accounts get notified when they have exceeded their limits
- Notify Me When I Hit My Limits - The reseller gets notified when his/her overall resource usage limits are reached
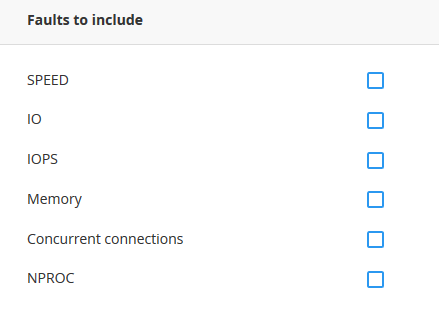
In the Faults to Include section, simply check the appropriate boxes to include particular limits to certain email notifications:
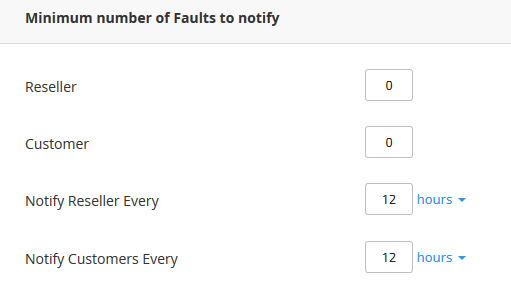
In the Minimum Number of Faults to Notify section, simply enter the number of faults required for a notification to be sent for the reseller and to the customer. You can also set this frequency notification from the reseller.
To apply the change(s) you selected, click Save Changes.
Packages
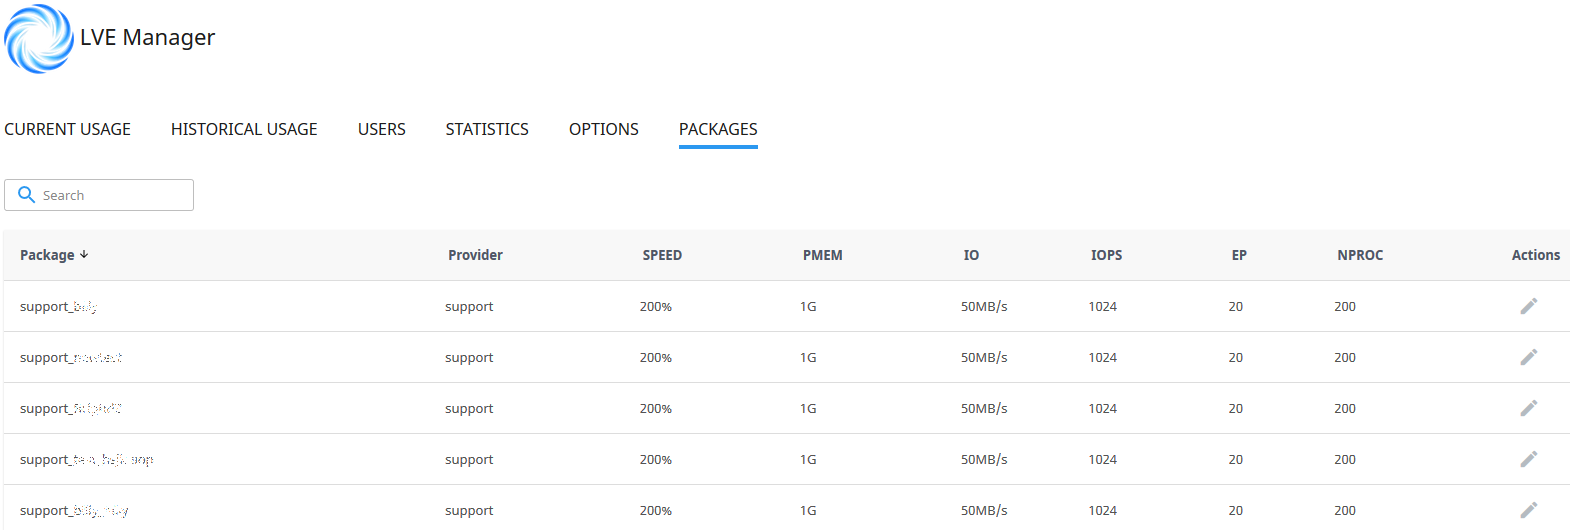
To view and modify limits for packages, select the Packages tab:
Select the
Pencil icon in the package row to set the following limits:
- SPEED limit
- Physical memory (PMEM) - select 0 to set to unlimited
- I/O limits
- IOPS limits
- Concurrent connections (EP) limits
When all desired limits are selected, remember to
Save so your changes are applied.
Now, you’re officially ready to go!