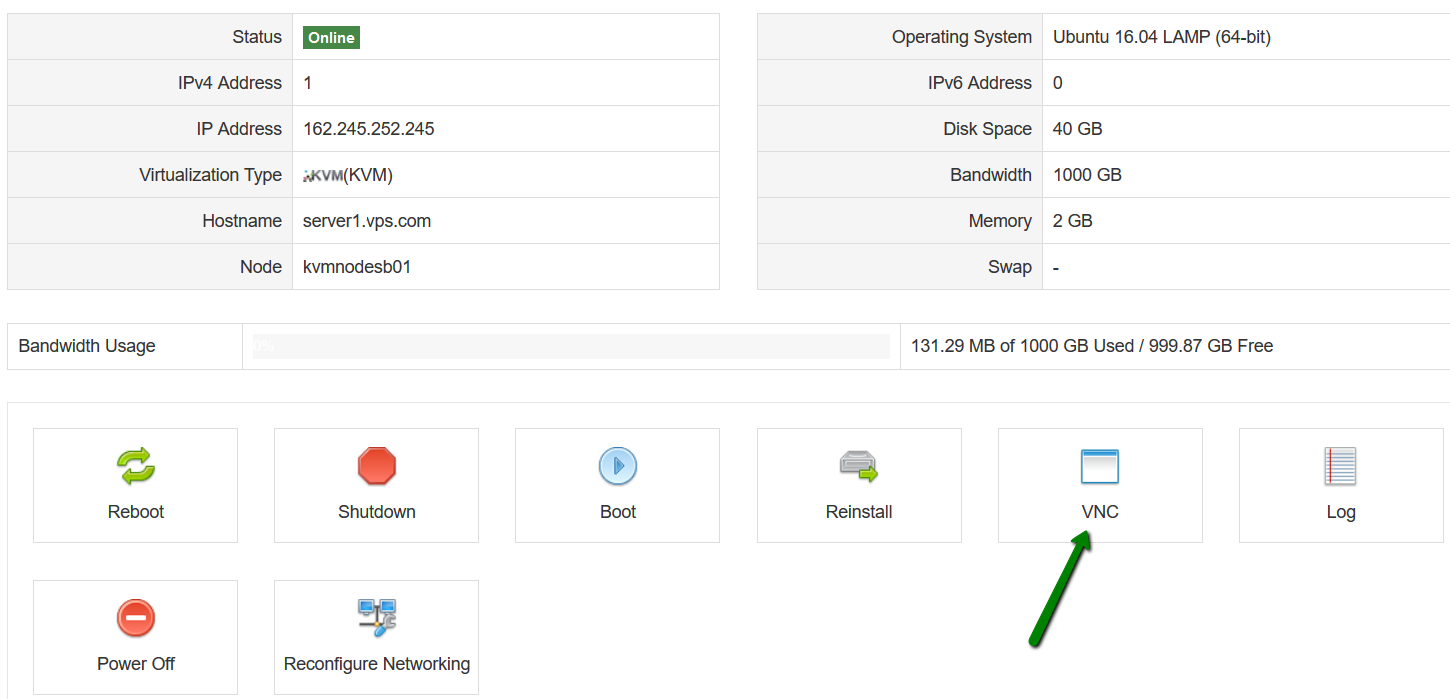
VNC connection details can be found in
SolusVM >
VNC menu. Use
this guide to find your VNC login details:
1. You can use any VNC client. In this guide we will use TightVNC.
After VNC client installation, run TightVNC server from Start > All Programs > TightVNC > TightVNC Server > Run TightVNC Server.
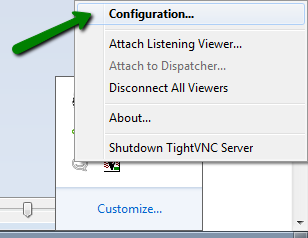
2. Next, right-click the TightVNC Server icon in the tray > select Configuration:
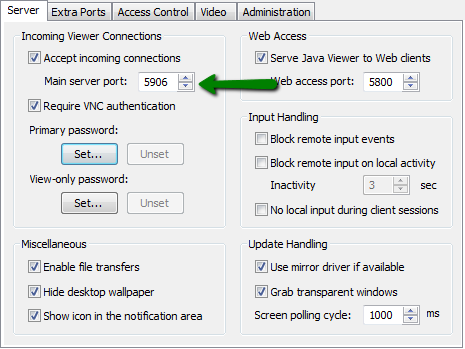
3. Specify main server port in Incoming Viewer Connections section (use the one from the VNC settings in Solus):
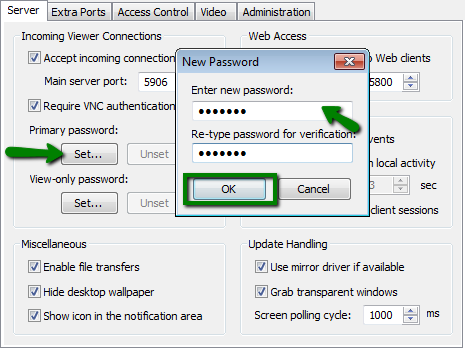
4. Click Set Password button for Primary password to set the password (use the one from the VNC settings in Solus):
5. Click OK to apply changes and close the configuration window.
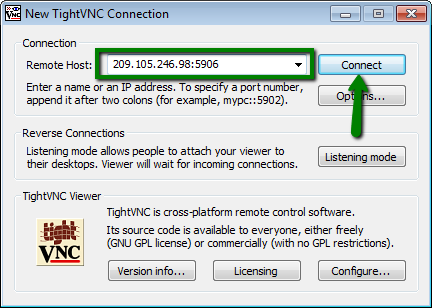
6. Next, open TightVNC Viewer from Start > All Programs > TightVNC.
Enter IP address:port number you found in Solus VNC settings into Remote Host field in the following format:
111.222.333.444:5900 and click Connect:
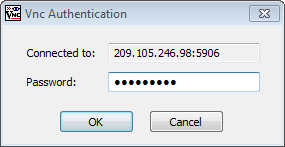
7. You will be prompted to enter your VNC password:
8. If all the details are set correctly, VNC command window will open:
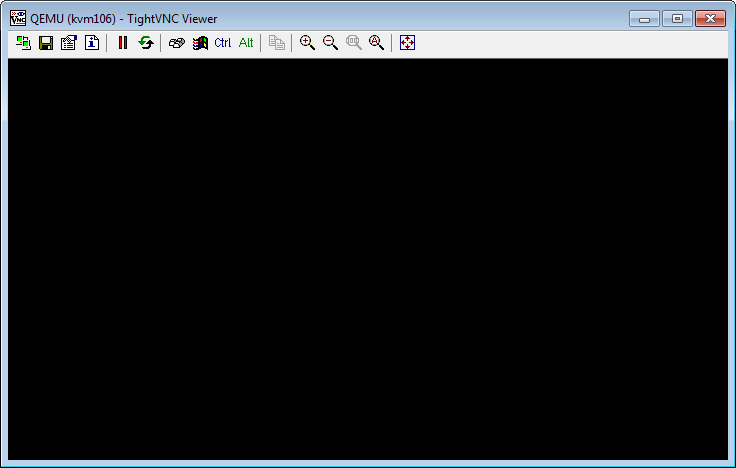
That's it!
Need any help? Contact our HelpDesk
