
Loading speed is one of the most important aspects of your website success. By default Joomla CMS is quite 'fast-running', however, it can be overloaded by additional extensions, heavy content, etc. There are many things you can do to optimize your Joomla installation and get great speed to your website.
In this tutorial you will find main and most essential steps you can take to optimize and speed up your Joomla website.
1. Update Joomla version
2. Update Joomla extensions
3. Enable caching
4. Enable compression
5. Reduce Images Size
6. Remove unused and unoptimized Joomla extensions
7. Use extensions for optimization
8. Add .htaccess optimization rules
1. Update Joomla version
Each new version of Joomla has multiple code improvements. So if you keep your installation updated to the latest version, this will improve your website speed and security. Even if there are few updates, new Joomla versions website will perform better than the previous ones.
When it comes to the upgrade within the same major version you are using, the process is quite simple. However, if you need to migrate from one version to another, it will take some efforts.
At the moment Joomla officially supports two versions: Joomla 2.5 and Joomla 3.x. This means that developers create updates for both versions, keep them secure and fix bugs. The upgrade of Joomla installation within the same major version is simple and can be processed through Joomla administrator dashboard.
However, if you are using an outdated Joomla versions like Joomla 1.0 or Joomla 1.5, which are no longer supported, it’s better to move such an installation to Joomla 2.5 at least. Unfortunately, such kind of upgrade is quite complicated and will take some of your time and efforts.
Upgrading within the same major version
In order to upgrade Joomla manually, follow these steps:
1. Log in to your Joomla admin dashboard.
2. Once you are logged in, you will see the following warning if your current installation is not up to date:

3. Click on Update now button to proceed with the upgrade.
Migrating from one major Joomla version to another
Migrating to a new major version can be quite difficult because not all templates and extensions, which you might be using at the moment, are compatible with the new Joomla version.
You can transfer all your content successfully, however, it’s possible that you will need to change or update all the templates and extensions for your website.
As an example we will show how to update Joomla 2.5 to Joomla 3.x. You will need to follow these steps:
1. Log in to your Joomla admin dashboard.
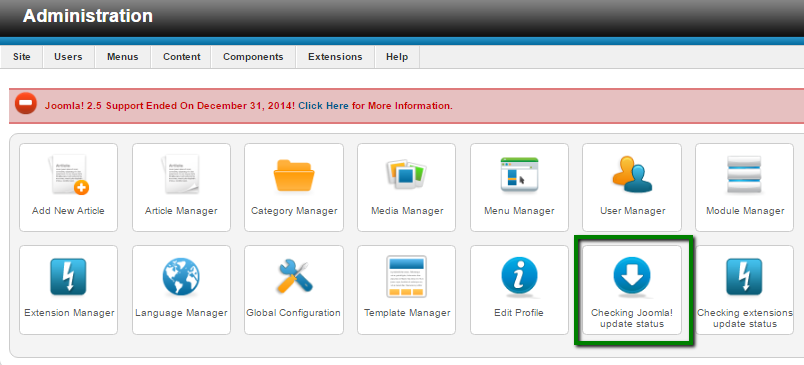
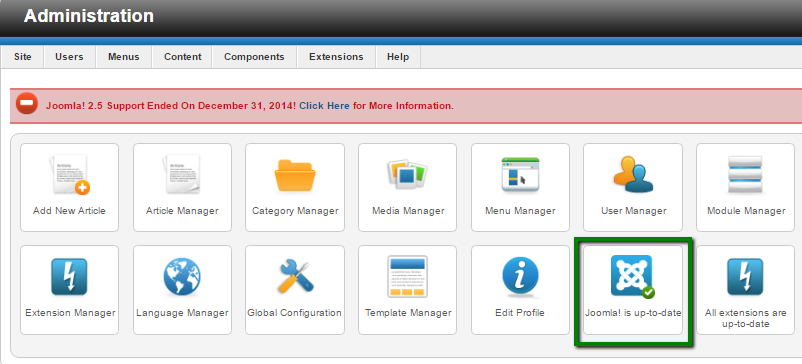
2. Go to Checking Joomla! update status menu (or it can be called Joomla! us up to date) if the current version of your installation has the latest update).
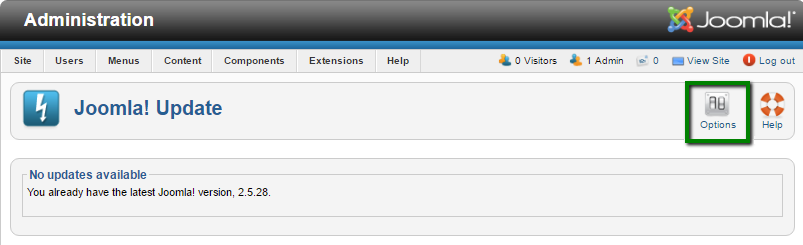
3. After this you will be redirected to the Joomla update page, click on the Options menu:
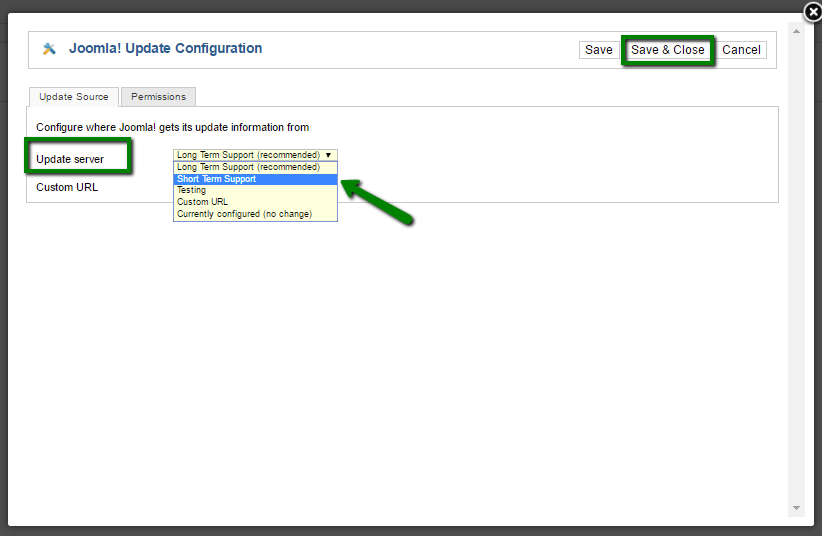
4. In the pop-up window, select Short Term Support in the drop-down menu next to Update server line. Then click Save & Close:
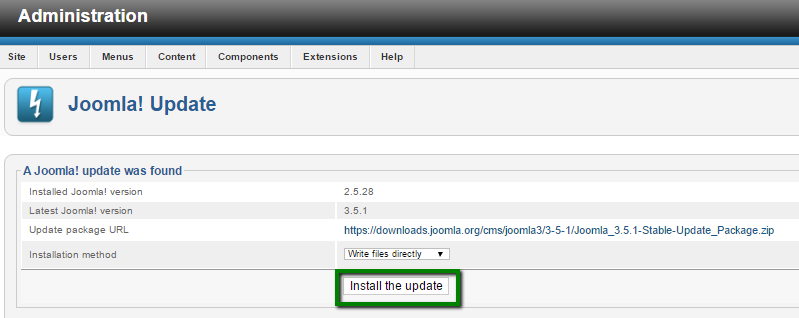
5. After you switch the settings, Joomla will detect an available update. Click on Install the update to proceed with the migration:
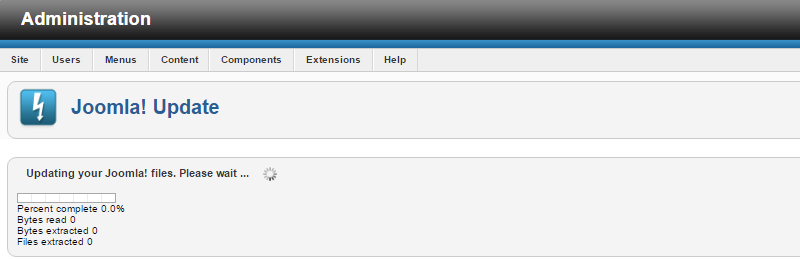
6. It will take a few seconds to migrate your content, so keep the browser window opened:
7. Once the migration is over, you will be logged out from the admin area and redirected to the login page of Joomla 3.
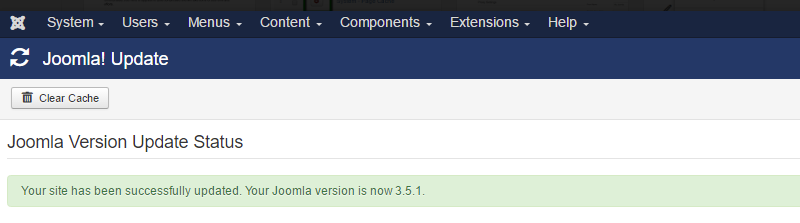
8. Log in to the dashboard again and you will see a notification about the successful migration:
9. Now you will need to change or update all the templates and extensions for your website.
2. Update Joomla extensions
Update of the Joomla extensions can also speed up your website. In order to update your website modules and plugin, you will need to follow these steps:
1. Log in to your Joomla admin dashboard.
2. If there are extensions that need the update, Joomla will show it on the main page:

3. Click on View updates button and you will be redirected to the Joomla extensions update menu, where you will see the list of available updates for your extensions:
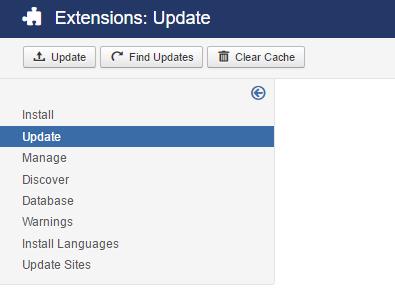
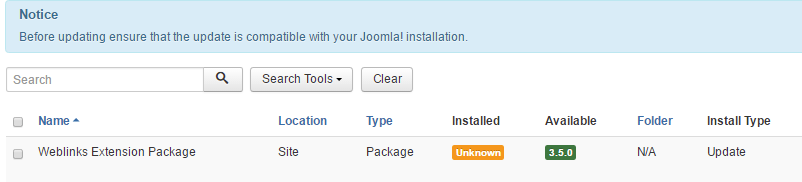
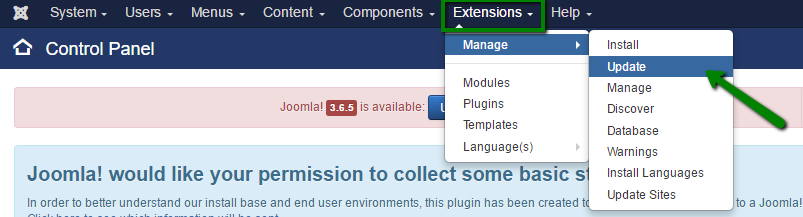
4. You can also get to this menu via Extensions > Manage > Update menu:
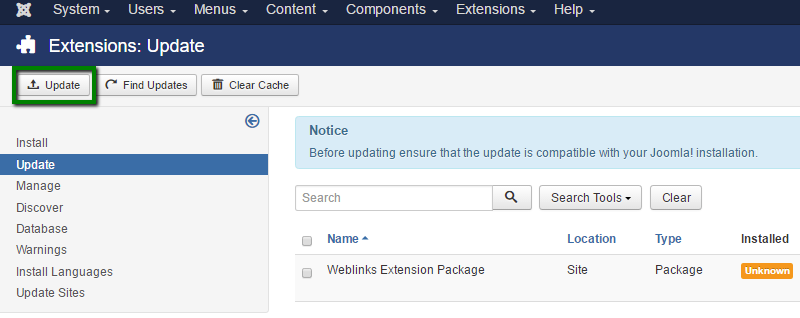
5. Once you see all the extensions that have a new version, select the plugin in the list and click on Update at the top left corner of the page:
NOTE: Not all Joomla extensions can be updated via Extensions > Manage > Update menu. We recommend checking fresh updates on the official websites of the extensions you are using.
That’s it! You have successfully updated your Joomla extensions.
3. Enable caching
In order to enable Joomla caching options, you need to:
1. Log in to your Joomla admin dashboard.
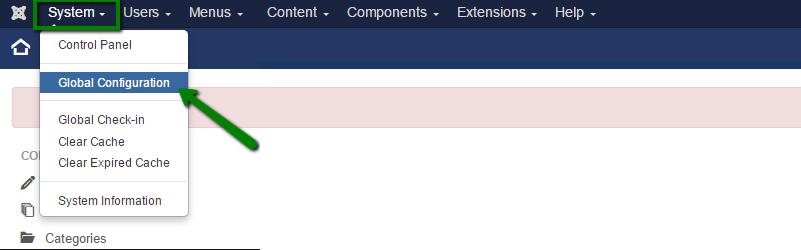
2. Go to System > Global Configuration menu:
3. In this page go to the System tab:
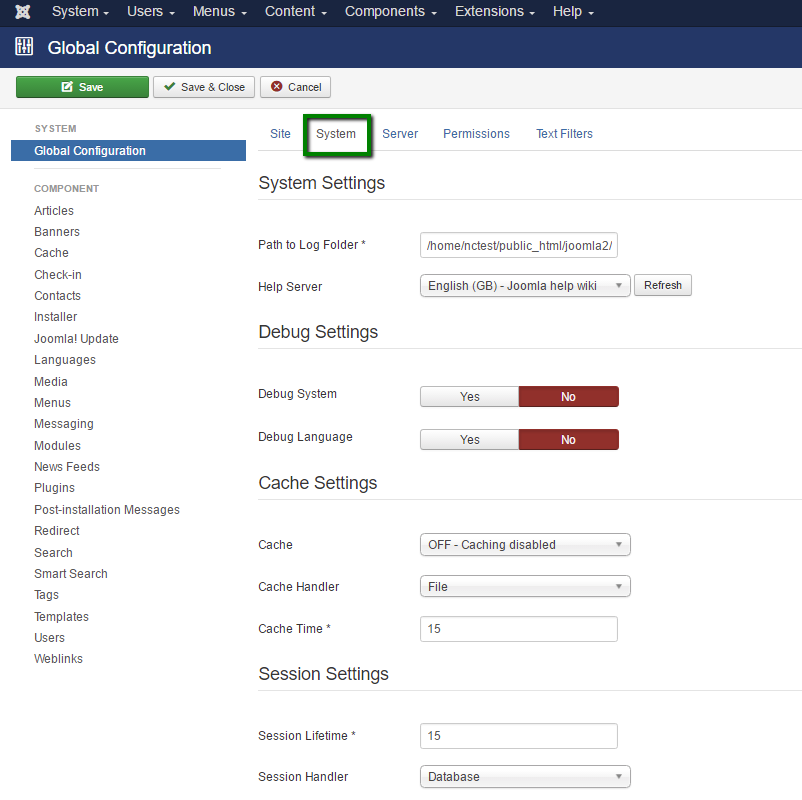
4. Find Cache Settings section and open a drop-down menu next to the Cache line. Select ON - Conservative caching option:
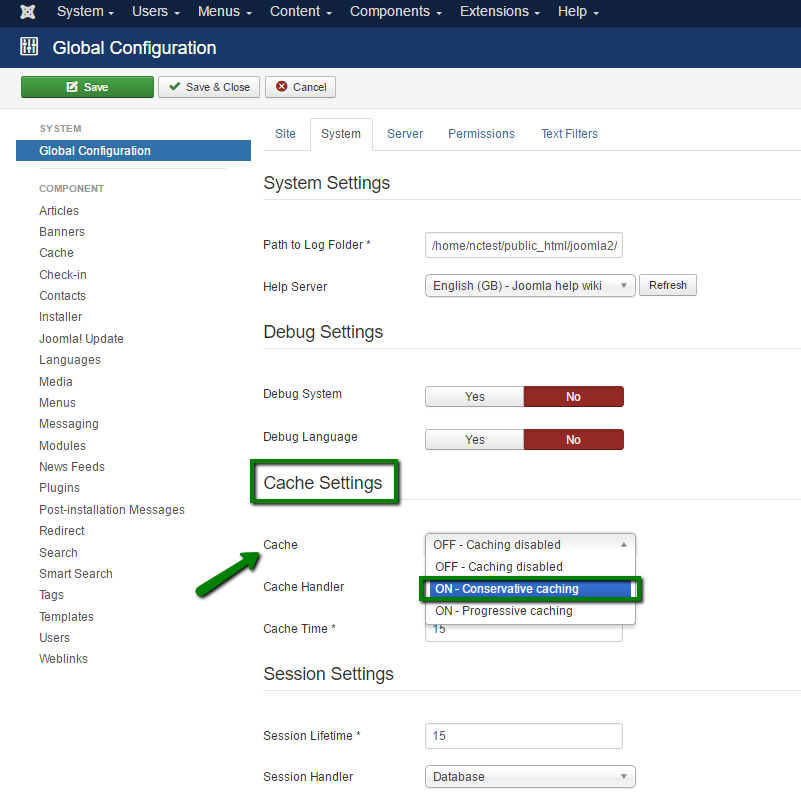
5. Click Save button, once done.
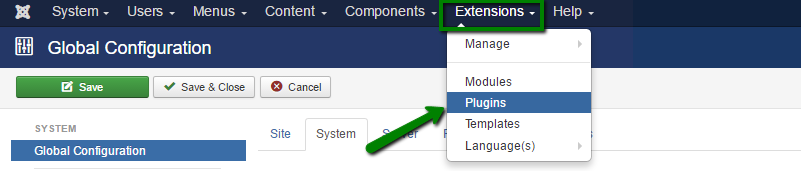
6. The next step is to enable the System - Page Cache core Joomla 3 plugin. Go to Extensions > Plugins menu:
7. On this page you will see a list of all plugins installed in your Joomla. Use search bar to find the caching plugin System - Page Cache:

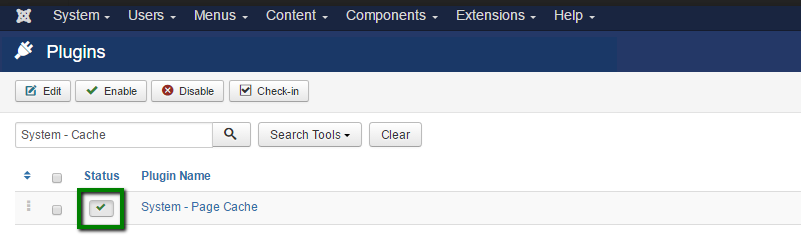
8. The red cross next to the plugin shows that this plugin is disabled. To change the status to enabled press on this red cross button:
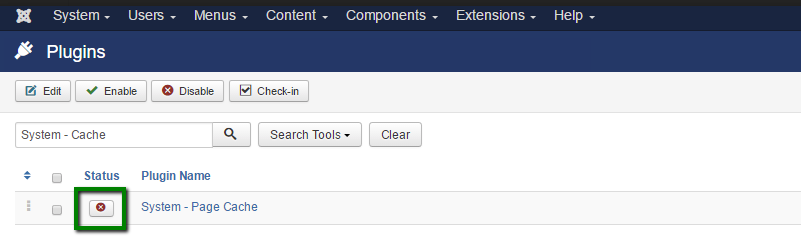
9. Once done, you will see the green tick next to the plugin identifying it’s enabled:
All done now and Joomla caching system has been successfully enabled.
4. Enable compression
The internal Joomla compression system allows your visitors to transfer compressed pages, which in general reduces the webpage size. In order to enable this feature, follow next steps:
1. Log in to your Joomla admin dashboard.
2. Go to System > Global Configuration menu

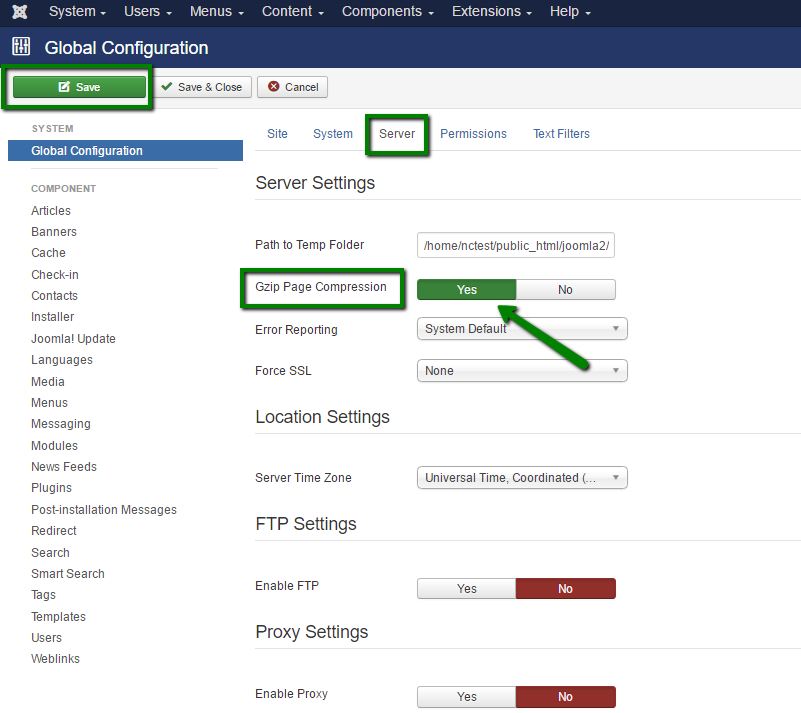
3. Go to Server tab and find Gzip Page Compression section. Hit Yes button next to it to enable this option.
4. Do not forget to click on the green Save button in the top left part of the page for the changes to be applied:
That’s it! You can check if Gzip compression is working properly using an online tool, like http://checkgzipcompression.com.
5. Reduce Images Size
In most cases images are one of the biggest part of your website. Usually they are not optimized at all. We recommend following these general rules:
1. Try not to use large original images and then scale them in HTML editor. This takes time for the browser to scale such images, when someone is viewing the page. Additionally, it may result a quality loss comparing to the original images.
2. Avoid adding too many images to a single page. If the article must have lots of photos, try splitting it into several pages.
3. Use optimized images. Desktop applications, like Adobe Photoshop, and online tools, like Smush It, allows you to reduce the size if your images easily without losing their original quality.
6. Remove unused and unoptimized Joomla extensions
Every extension you install for your website takes some system resources, database and disk space. If you have too many extensions, it increases the general size of your website and slows it down.
Sometimes you can test different extensions and forget to delete them once afterwards. This adds some unnecessary content to your website, so it's better to clean-up such extensions. We recommend keeping only those that are actually used by your website.
Also, do not forget to use top-rated plugins and extensions, which can be found by checking different user reviews on the Internet. Poorly coded addons can effect the general performance of your website.
7. Use extensions for optimization
There is a large number of Joomla extensions used for various purposes. Here are some recommended among Joomla users: JCH Optimize, Jbetolo, JotCache, Cache Cleaner.
Check the reviews, extensions' features and specification, and use the ones that meet your website needs.
8. Add .htaccess optimization rules
There are several rules for .htaccess file you can use in order to improve your Joomla website performance:
ETag – tells browsers when one image has already been downloaded and can be fetched from the local browser cache instead from the server.
Expires headers – similar to ETag, however, it allows you to set different expiration times for different file types.
AddOutputFilterByType DEFLATE – minifies the source code of your compiled HTML files by removing empty lines, breaks and spaces.
# Begin - ETag Optimization
# This rule will create an ETag for files based only on the modification
# timestamp and their size.
# Note: It may cause problems on your server and you may need to remove it
FileETag MTime Size
# AddOutputFilterByType is now deprecated by Apache. Use mod_filter in the future. AddOutputFilterByTypeDEFLATE text/plain text/html text/xml text/css application/xml  application/xhtml+xml application/rss+xml application/javascript
application/x-javascript

# Enable expiration control
ExpiresActive On

# Default expiration: 1 hour after request
ExpiresDefault "now plus 1 hour"

# CSS and JS expiration: 1 week after request
ExpiresByType text/css "now plus 1 week"
ExpiresByType application/javascript "now plus 1 week"
ExpiresByType application/x-javascript "now plus 1 week"

# Image files expiration: 1 month after request
ExpiresByType image/bmp "now plus 1 month"
ExpiresByType image/gif "now plus 1 month"
ExpiresByType image/jpeg "now plus 1 month"
ExpiresByType image/jp2 "now plus 1 month"
ExpiresByType image/pipeg "now plus 1 month"
ExpiresByType image/png "now plus 1 month"
ExpiresByType image/svg+xml "now plus 1 month"
ExpiresByType image/tiff "now plus 1 month"
ExpiresByType image/vnd.microsoft.icon "now plus 1 month"
ExpiresByType image/x-icon "now plus 1 month"
ExpiresByType image/ico "now plus 1 month"
ExpiresByType image/icon "now plus 1 month"
ExpiresByType text/ico "now plus 1 month"
ExpiresByType application/ico "now plus 1 month"
ExpiresByType image/vnd.wap.wbmp "now plus 1 month"
ExpiresByType application/vnd.wap.wbxml "now plus 1 month"
ExpiresByType application/smil "now plus 1 month"

# Audio files expiration: 1 month after request
ExpiresByType audio/basic "now plus 1 month"
ExpiresByType audio/mid "now plus 1 month"
ExpiresByType audio/midi "now plus 1 month"
ExpiresByType audio/mpeg "now plus 1 month"
ExpiresByType audio/x-aiff "now plus 1 month"
ExpiresByType audio/x-mpegurl "now plus 1 month"
ExpiresByType audio/x-pn-realaudio "now plus 1 month"
ExpiresByType audio/x-wav "now plus 1 month"

# Movie files expiration: 1 month after request
ExpiresByType application/x-shockwave-flash "now plus 1 month"
ExpiresByType x-world/x-vrml "now plus 1 month"
ExpiresByType video/x-msvideo "now plus 1 month"
ExpiresByType video/mpeg "now plus 1 month"
ExpiresByType video/mp4 "now plus 1 month"
ExpiresByType video/quicktime "now plus 1 month"
ExpiresByType video/x-la-asf "now plus 1 month"
ExpiresByType video/x-ms-asf "now plus 1 month"
Need help? We're always here for you.