
What if we need to install an SSL certificate for the service other than IIS and there is no IIS Manager installed on the Windows server? How one can generate a CSR code in this situation?
Luckily, there are a few workarounds available.
Besides the fact that these workarounds will not provide a wizardous user-friendly interface and require a bit of familiarity with the system management tools, yet they remain very powerful for accomplishing our goal – creating a CSR code, which we can submit to the Certificate Authority during the certificate activation.
So let’s look at each of the methods closer.
Open the Certificates snap-in in MMC by following these steps: Win+R >> mmc.exe >> OK >> File >> Add/Remove Snap-in >> Certificates >> Add >> Computer account >> Next >> Local computer >> Finish >> OK.
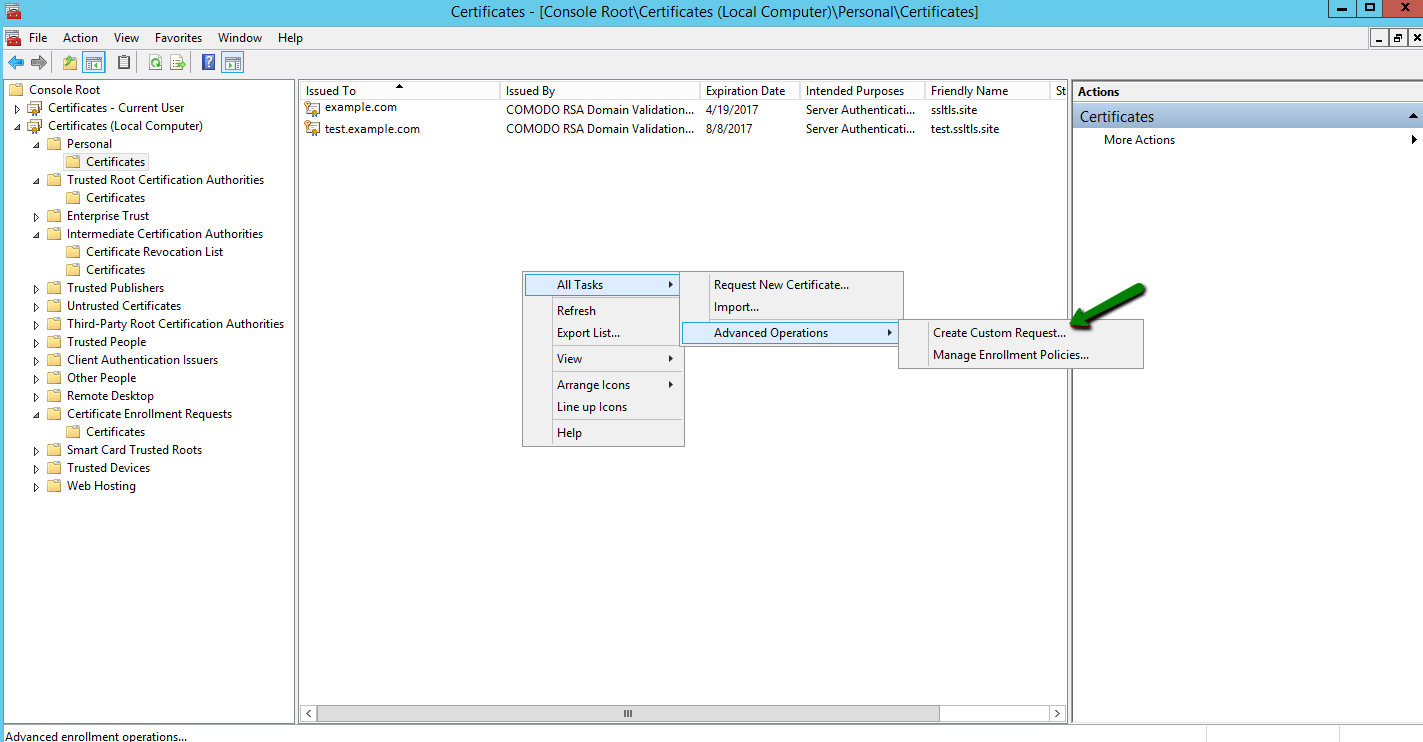
In the Personal >> Certificates panel, right-click on the blank space and follow All Tasks >> Advanced Operations >> Create Custom Request to open the Certificate Enrollment wizard:
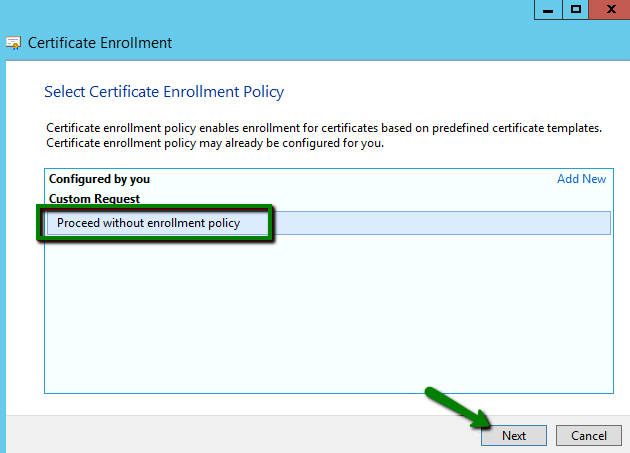
Make sure that the default Proceed without enrollment policy option is selected and click Next:
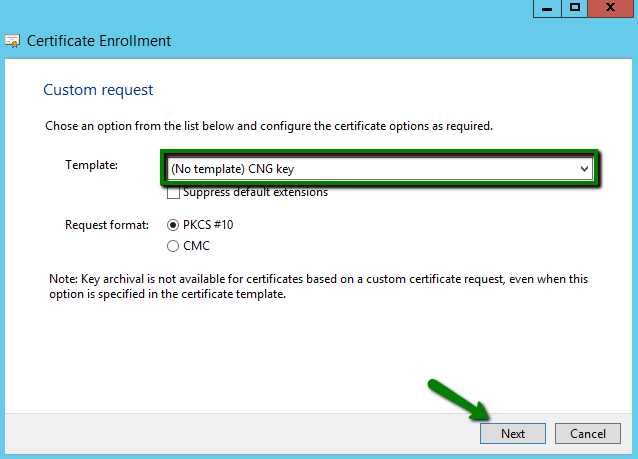
On the next screen, leave the pre-selected options (No template) CNG key and PKCS#10 and click Next:
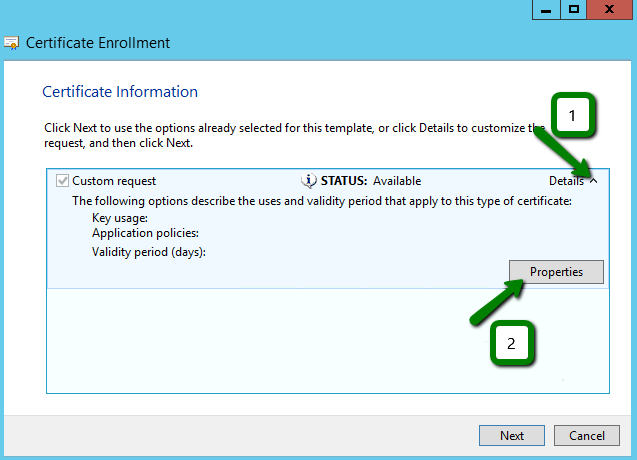
Now we need to open the window, in which we will adjust the certificate request in the way that we can receive the certificate with the correct information and using the required key type. Click the drop-down arrow on the right and then the Properties button.
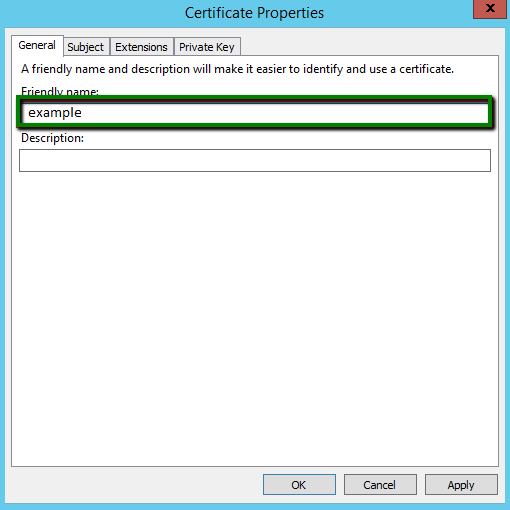
Add a friendly name value to the appropriate field so that you can identify this request entry in future. This field is used to give a name to the certificate, which can be the domain name the certificate will be issued for or virtually any other name:
On the next tab called Subject, we need to add a few fields to the request and specify their values. The most essential field types that must be present in the request are:
NOTE: If you need to add subject alternative names to the request, you can do it in the Alternative name section. Select the DNS field type and add the domain names one by one:
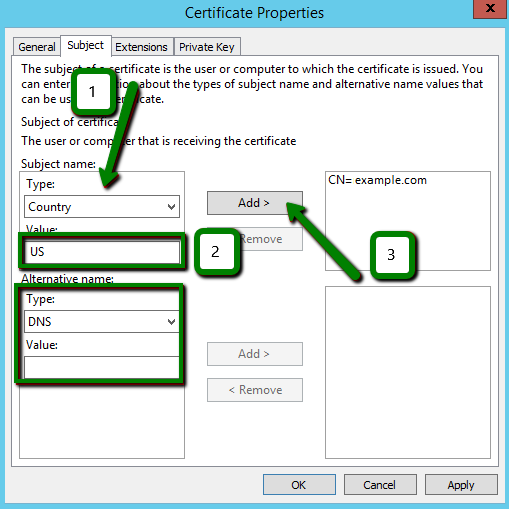
The result should look similar to this:

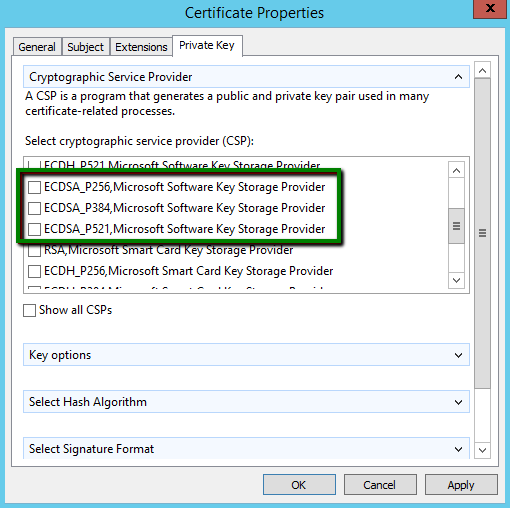
The last tab in this window we should open and review is the Private key. Let’s expand the Cryptographic Service Provider section and have a look. The default option here is the RSA algorithm, which is the industry standard today, although you can opt for "ECDSA" (if you need to issue an ECC certificate) by checking one of the entries on the picture below:
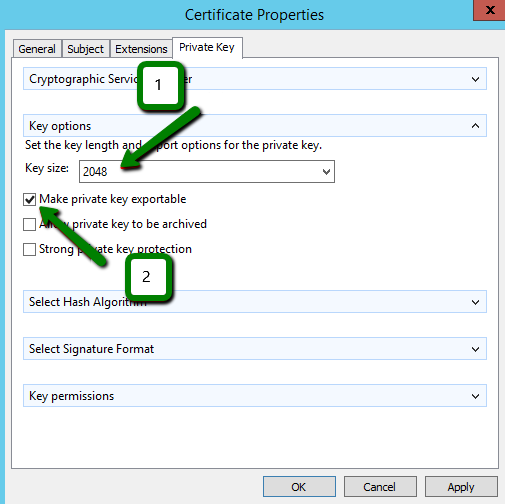
In the Key options section, if the RSA algorithm is used, make sure that Key size is set to at least 2048-bit.
NOTE: The certificates based on a key with the size less than 2048-bit are considered to be not secure, and the trusted Certificate Authorities do not issue them anymore.
If you plan to export the certificate, for example, for the installation on another instance, it is required to check the Make private key exportable option:
Now we can click Ok and move further.
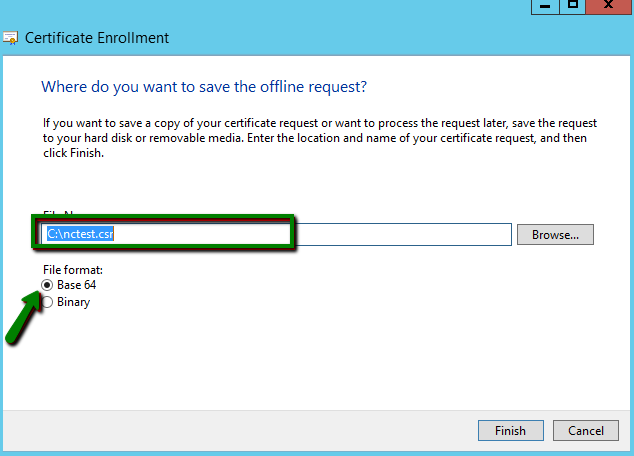
The last screen of the Certificate Enrollment wizard requires us to specify the name of the file the CSR code will be saved into and its location in the file system. Also, make sure that File Format is set to Base64. Then click the Finish button to initiate the private key and CSR generation with the attributes we have set just now:
Certreq is the command line-based utility, which is used mostly for creating and submitting certificate requests and retrieving, accepting and installing responses from Certificate Authorities.
Before we begin working with “certreq”, we need to create a policy file from which the information required for the CSR will be pulled up. Create a new regular text file and open it. Then copy and paste the text from below into the file (select the piece of code either for RSA or ECDSA):
RSA
;----------------- request.inf -----------------
[Version]
Signature="$Windows NT$"
[NewRequest]
Subject = "C=US, O=Namecheap, CN=example.com, L=Los Angeles, S=California"
KeySpec = 1
KeyLength = 2048
Exportable = TRUE
MachineKeySet = TRUE
SMIME = False
PrivateKeyArchive = FALSE
UserProtected = FALSE
UseExistingKeySet = FALSE
ProviderName = "Microsoft RSA SChannel Cryptographic Provider"
ProviderType = 12
RequestType = PKCS10
KeyUsage = 0xa0
HashAlgorithm = SHA256
[EnhancedKeyUsageExtension]
OID=1.3.6.1.5.5.7.3.1
;-----------------------------------------------
ECDSA
;----------------- request.inf -----------------
[Version]
Signature="$Windows NT$"
[NewRequest]
Subject = "C=US, O=Namecheap, CN=example.com, L=Los Angeles, S=California"
KeyAlgorithm = ECDSA_P384 ; can be changed to 256 or 521
Exportable = TRUE
MachineKeySet = TRUE
SMIME = False
PrivateKeyArchive = FALSE
UserProtected = FALSE
UseExistingKeySet = FALSE
ProviderName = "Microsoft Software Key Storage Provider"
ProviderType = 12
RequestType = PKCS10
KeyUsage = 0xa0
HashAlgorithm = SHA256
[EnhancedKeyUsageExtension]
OID=1.3.6.1.5.5.7.3.1
;-----------------------------------------------
NOTE: You can add the street address value to the CSR code by specifying the Street variable in the Subject directive as follows:
Subject = " CN=example.com, C=US, O=Namecheap, L=Los Angeles, S=California , Street= Test Avenue 1"
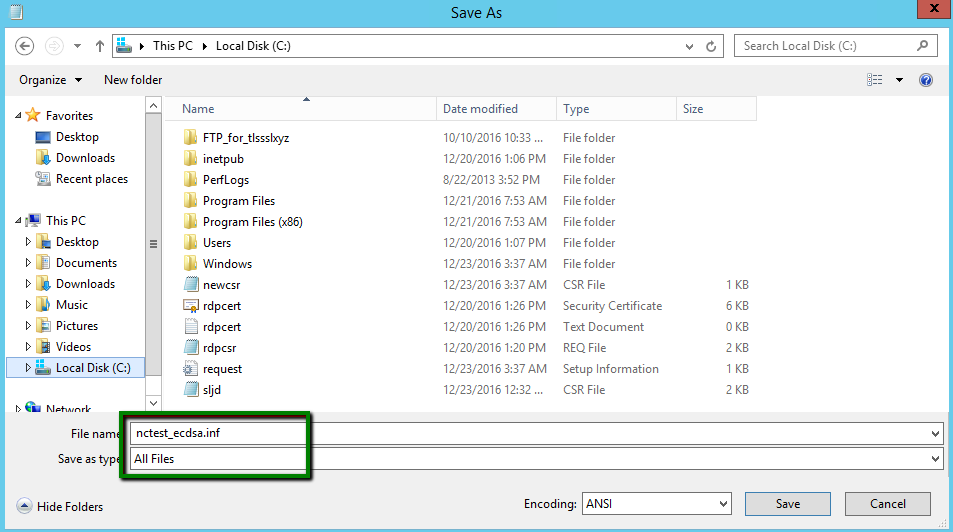
Make sure that you change the values highlighted in black with the values that would be valid for your request. Then save the file as the .inf type (request.inf, for instance):
Now we can open the command line prompt: Win+R >> cmd >> Enter.
Navigate to the folder in which the policy file is saved using the “cd” command:
cd C:\
Run the following command to initiate the CSR generation:
certreq.exe -new request.inf nctest.csr
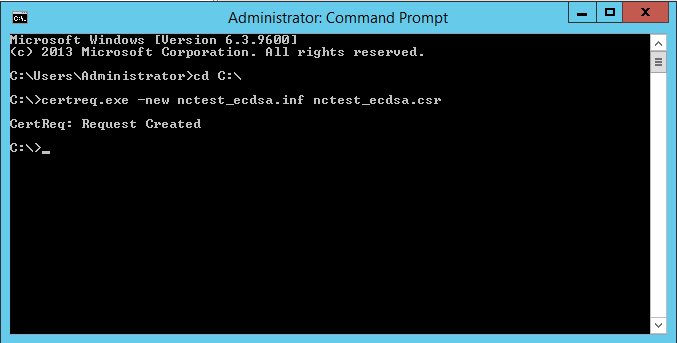
If the Request Created message appears in response to the command, the CSR code is created and saved into the .csr file (nctest_ecdsa.csr in the example above).
NOTE: When you are asked to provide the subject alternative names, you can either specify them if it is required or simply omit this step by pressing Enter.
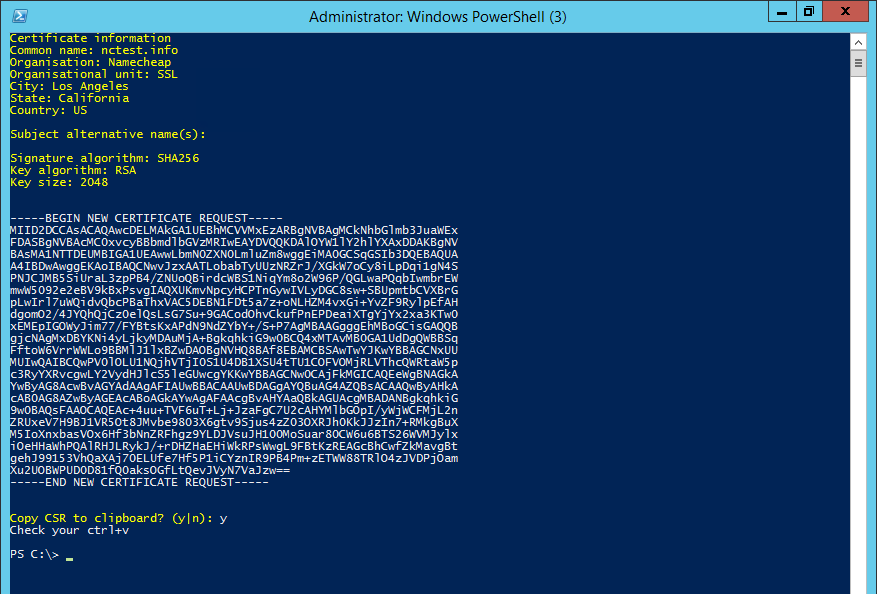
Finally, the Powershell window will produce the summary of the provided information, hashing and key algorithm details and the CSR code, offering to copy the CSR to clipboard right away:
When the CSR code is generated using any of the methods described above, you can proceed with the SSL certificate activation.
Need help? We're always here for you.