Setting up a domain name may be easier than you may think. Once your domain name is registered, you need to connect it to your hosting server.
1. You have a hosting plan with Namecheap.
2. You have a hosting plan elsewhere and you were provided with the nameservers for your domain.
3. You have your own server or you were provided with a set of host records to connect the domain to your hosting.
1. You have a hosting plan with Namecheap.
If you have a Stellar, Stellar Plus or Stellar Business plan (or old Value, Professional, Ultimate, Business plan) with us, you need to point the domain to our Web Hosting DNS nameservers (dns1.namecheaphosting.com and dns2.namecheaphosting.com). If the domain is registered with Namecheap, it can be easily done in your Namecheap account in the following way:
1) Sign into your Namecheap account (The Sign In option is available in the header of the page):

2) Select Domain List from the left sidebar and click the Manage button next to your domain in the list:

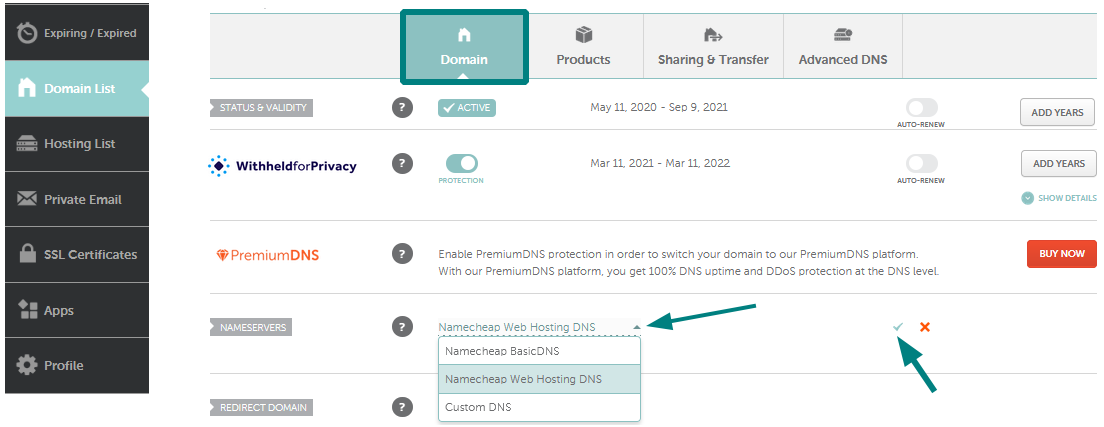
3) Find the Nameservers section and select Namecheap Web Hosting DNS from the drop-down menu. After that, use the checkmark icon to save changes:
In case you purchased a
Reseller hosting plan,
VPS, or
Dedicated server with us, it is required to point the domain to
your own private or reseller nameservers specified in the Hosting Welcome email. You can do it by selecting
Custom DNS from the drop-down menu and entering your hosting nameservers one by one in each line.
If your domain is registered with another registrar, you will need to obtain the correct nameservers from us and then configure the DNS on their side.
If your domain is registered with GoDaddy,
follow the steps here.
Once the nameservers are changed, your website most likely will not be available. In most cases, the
propagation period can take up to 24 hours (in rare cases more, since the caching time varies between ISPs). Unfortunately, this process cannot be influenced or sped up because of its automatic nature.
PLEASE NOTE: After setting the nameservers for your domain, if the domain is not the main one for your hosting account, you will also need to add it as Addon to your cPanel. You can find a tutorial for that
here.
2. You have a hosting plan elsewhere and you were provided with the nameservers for your domain.
To connect a domain to a third-party server or hosting plan via nameservers that you received from your hosting provider, you need to set these nameservers as Custom for your domain. You can do that in the following way:
1) After signing into your account, select Domain List from the left sidebar and click the Manage button next to your domain in the list. Then find the Nameservers section and select Custom DNS from the drop-down menu:
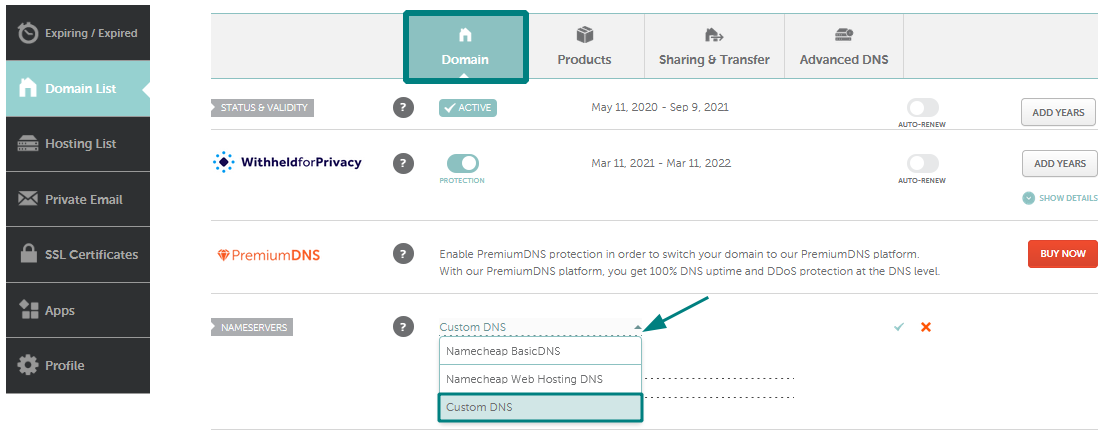
2) After that, enter your hosting nameservers one by one in each line (if you need to set more than 2 nameservers, press the Add nameserver red button). When the nameservers are entered, press the green checkmark to save changes:

It may take about 24-48 hours for your domain to propagate after the nameservers update to be resolving properly all over the world.
PLEASE NOTE: Some hosting providers may provide you with nameservers with IP addresses for them. Entering nameservers would be enough.
3. You have your own server or you were provided with a set of host records to connect the domain to your hosting.
When you have your own hosting server and you know its IP address, you can set up A records for your domain to connect it to the server. Additionally, some hosting providers can provide you with the IP address that should be used for your domain for connecting to your hosting plan. A records should be created in that case as well.
Note that it can be done only if the domain is using our BasicDNS/PremiumDNS/FreeDNS nameservers. You can set up A records in the following way:
1) After signing into your account, select Domain List from the left sidebar and click the Manage button next to your domain in the list. Then switch to the Advanced DNS tab at the top of the page:

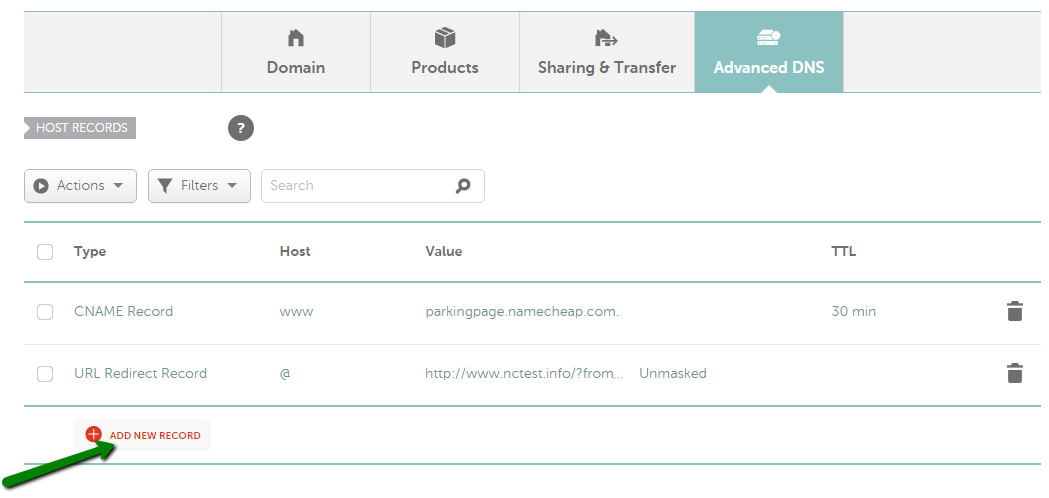
2) Find the Host records section and click on the Add New Record button (if the option is not available, it means that your domain is not using our BasicDNS/PremiumDNS/FreeDNS):
3) Select A Record for the Type and enter the Host you would like to point to your server IP address:
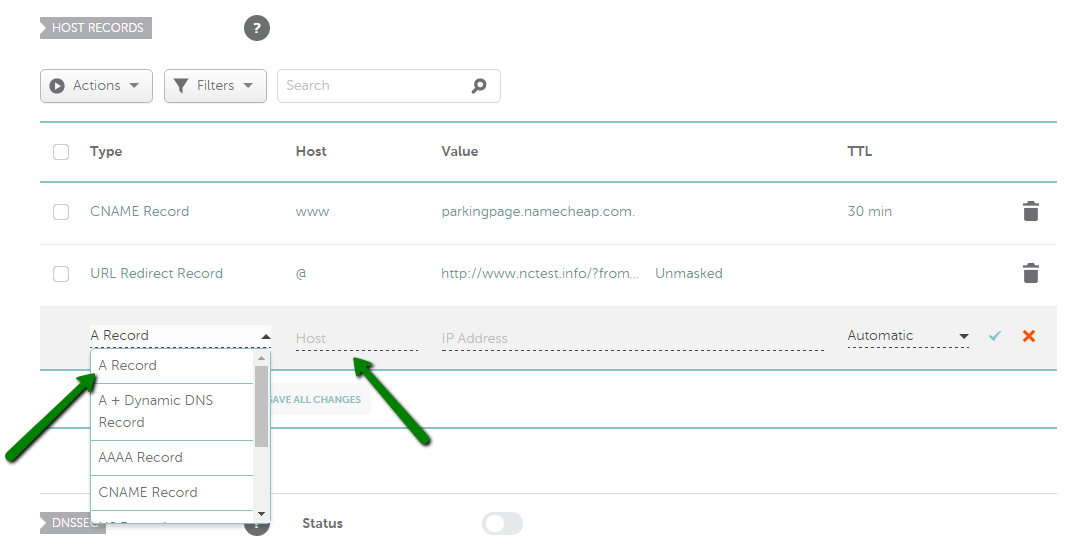
- @ should be used as a Host to point your root domain (domainname.tld)
- www should be used to set the record for the www.domainname.tld subdomain
- [customhostname] can be used to set up a subdomain and to point it to your hosting server (for example, Host blog will point blog.domainname.tld to your hosting)
- * should be entered as a Host to set up a wildcard subdomain (meaning it will point all non-existent subdomains to your hosting).
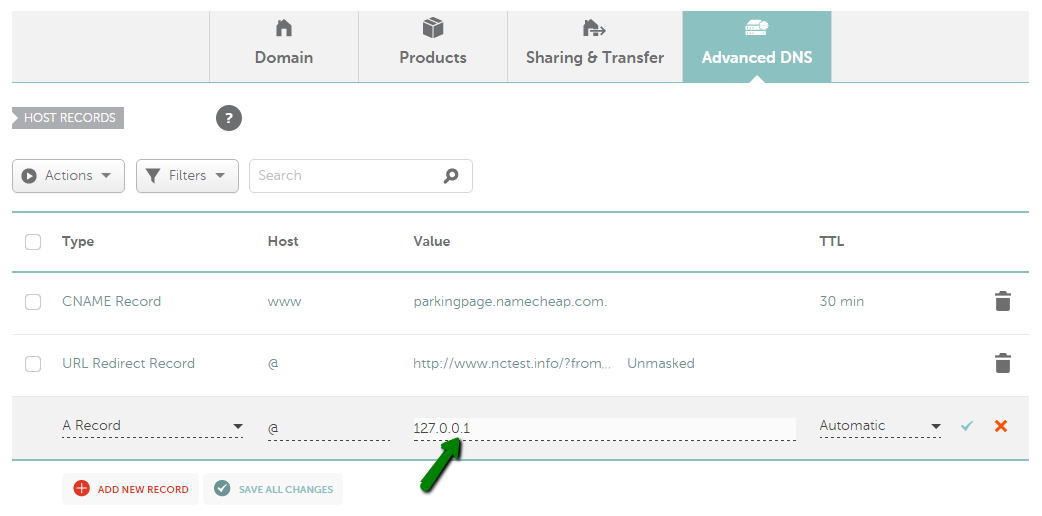
4) After that, enter the IP address of your hosting server into the Value field:
5) You can leave the TTL as Automatic (30 min) or choose any custom value from the drop-down menu:
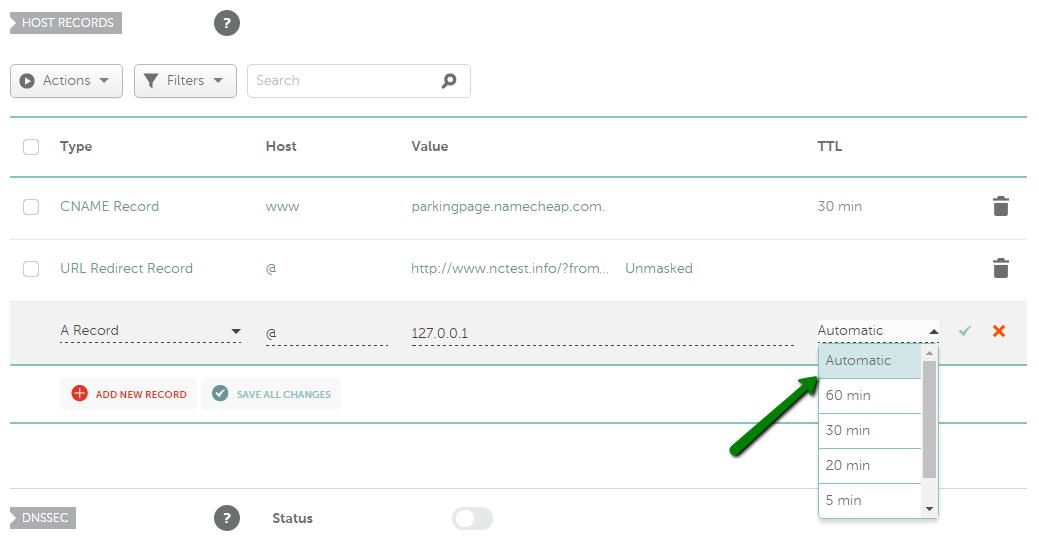
PLEASE NOTE: TTL is the time during which the data of your host record lingers after the record is updated or removed. If you are not sure what TTL to use, simply leave it as Automatic.
6) Once all details are inserted, save them using the Save changes green icon:
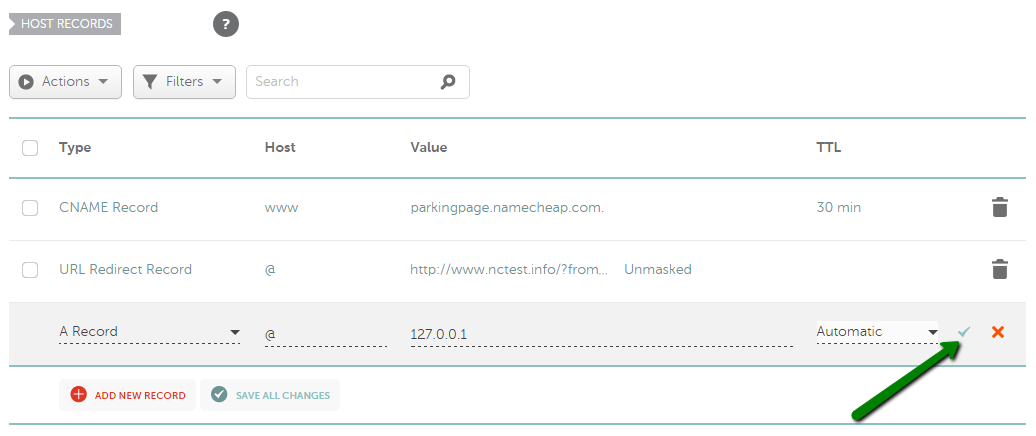
Usually, it takes about 30 minutes for the newly created records to take effect.
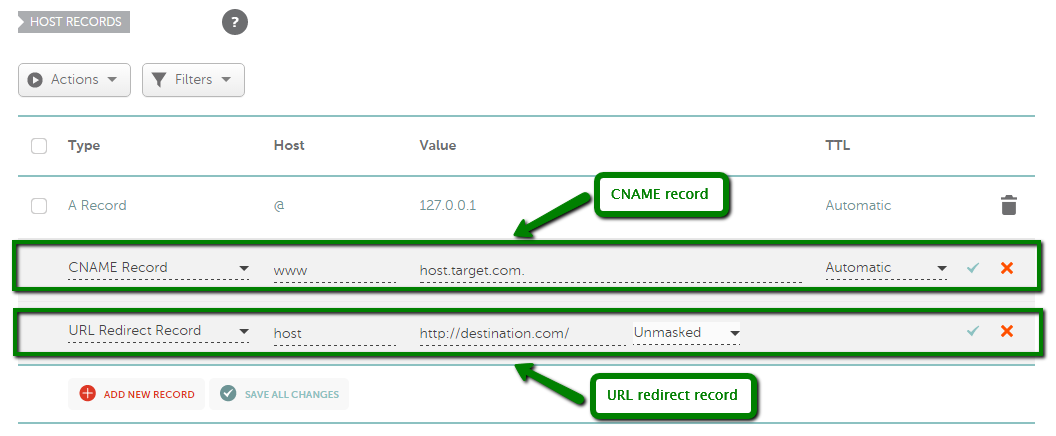
Some hosting providers may also ask you to create additional records (like URL redirect or CNAME). These records may be set in the same way as A records. You just need to choose the corresponding Type record from the drop-down menu and enter the Value that you received from your hosting provider:
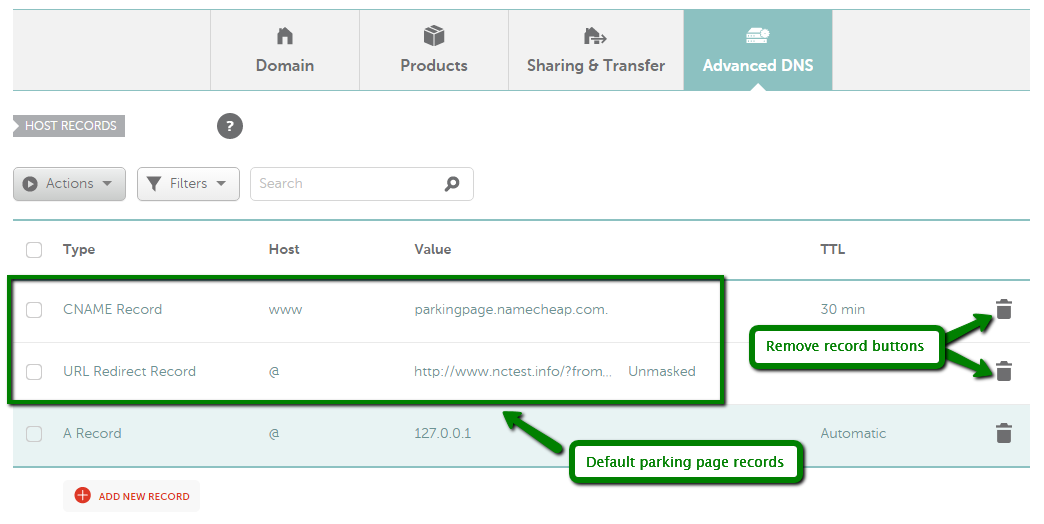
After the records are added, you need to check if there are any records for the same host name and remove them as they will be conflicting with your records. The records you need to check may be of Unmasked/Masked/Permanent Redirect, A or CNAME record types.
A newly registered domain will have the records for our Parking page set by default. These records are URL redirect for @ host pointing to http://www.domainname.tld/ and CNAME record for www host pointing to parkingpage.namecheap.com. These records should always be removed after setting up custom host records for your domain.
To remove the conflicting records, simply press the black Trash bin icon next to the corresponding record:
That's it!
If you have any questions, feel free to contact our Support Team.


