
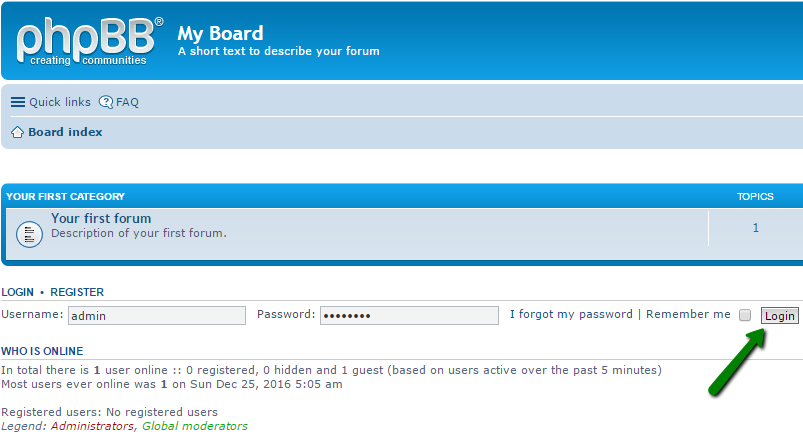
When it comes to contact form setup, you can use two basic functions – either PHP mail() or SMTP authentication.
The first one sends emails on behalf of the server your domain is hosted on. However, there is no need even to create an email address, as the server does not require it to use the address in the From field.
Unlike PHP mail(), SMTP authentication allows you to use a third-party email account with your contact form. The main thing here is to configure the connection properly, that is to set the corresponding email server, port, username and password.
Below you can find the list of different CMS and the way PHP mail()/SMTP authentication can be set up:
NOTE: We have a separate article about SMTP authentication setup for websites created on WordPress. You can find it here.
Joomla
local email account
third-party email account
By default Joomla uses PHP mail() to send emails. This option will work if you are going to use a local mailbox. The settings can be modified via System section > Setup > Global Configuration:
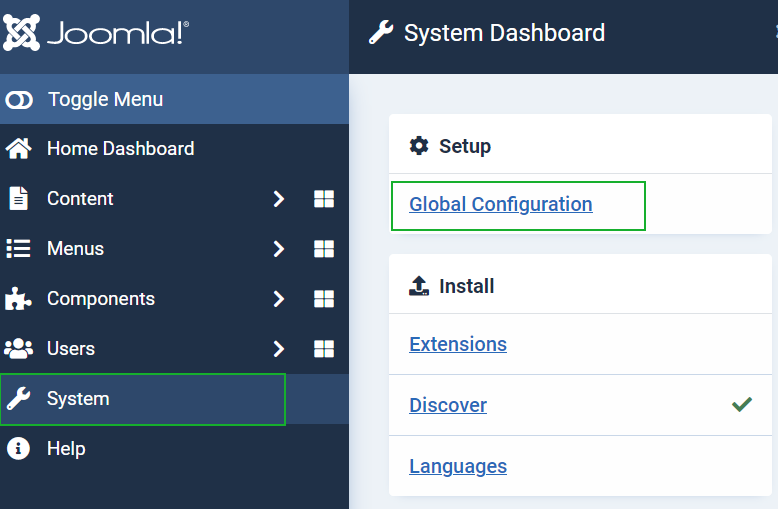
Move to Server tab > Mail section:

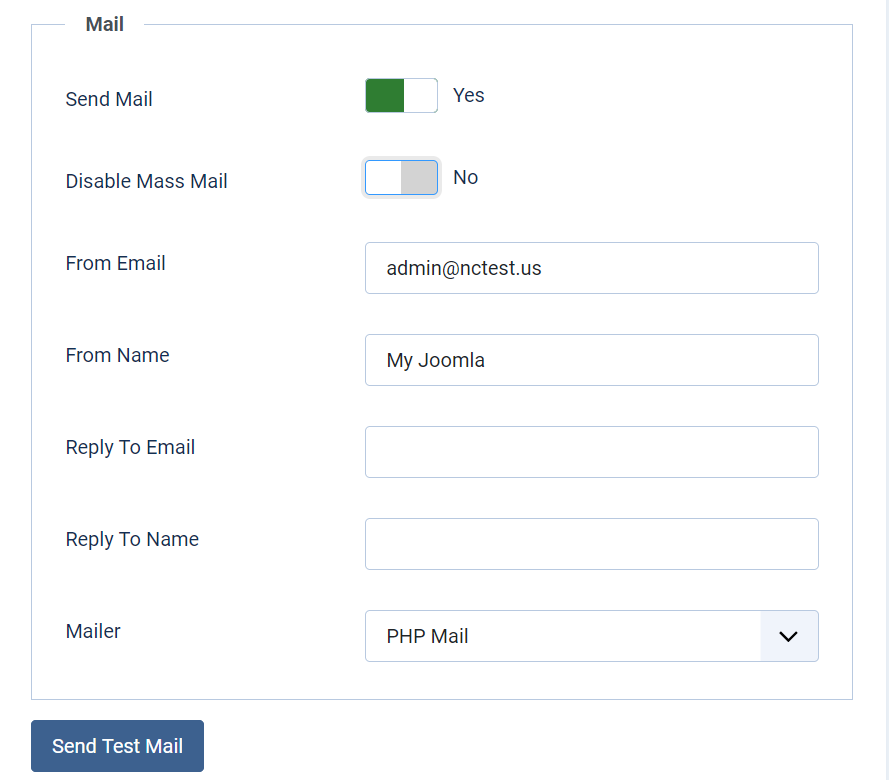
Clicking on Send Test Mail should confirm that the email was sent successfully:

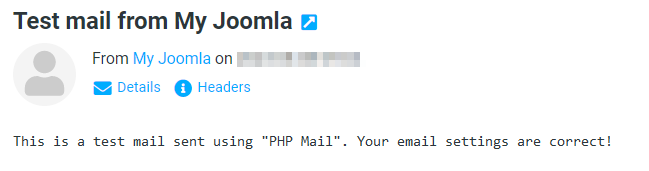
In the Inbox of the local mailbox you will get an email like this:
However, it is quite easy to configure SMTP if you wish to use a third-party email account as the one sending emails.
1. Go to System > Setup section > Global Configuration menu.
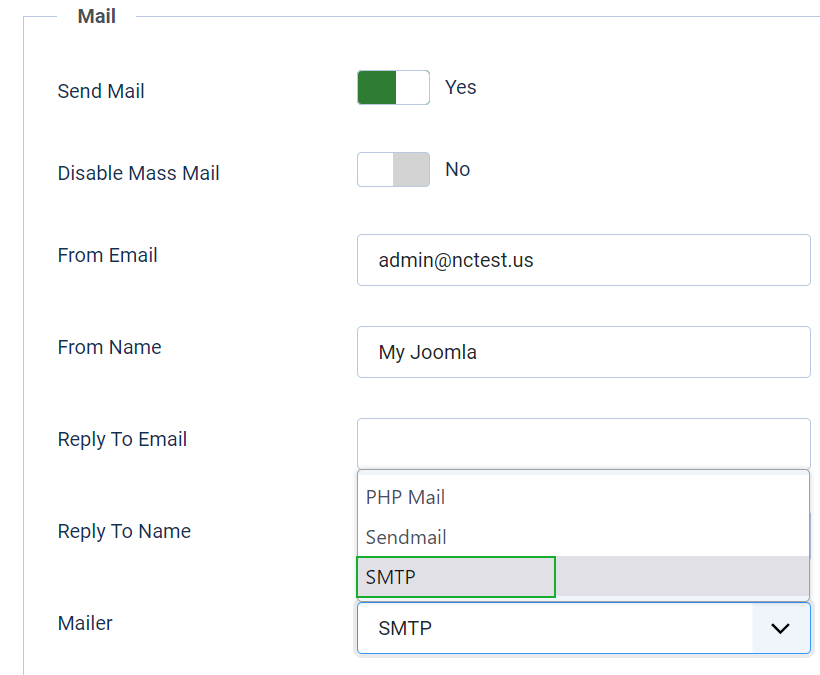
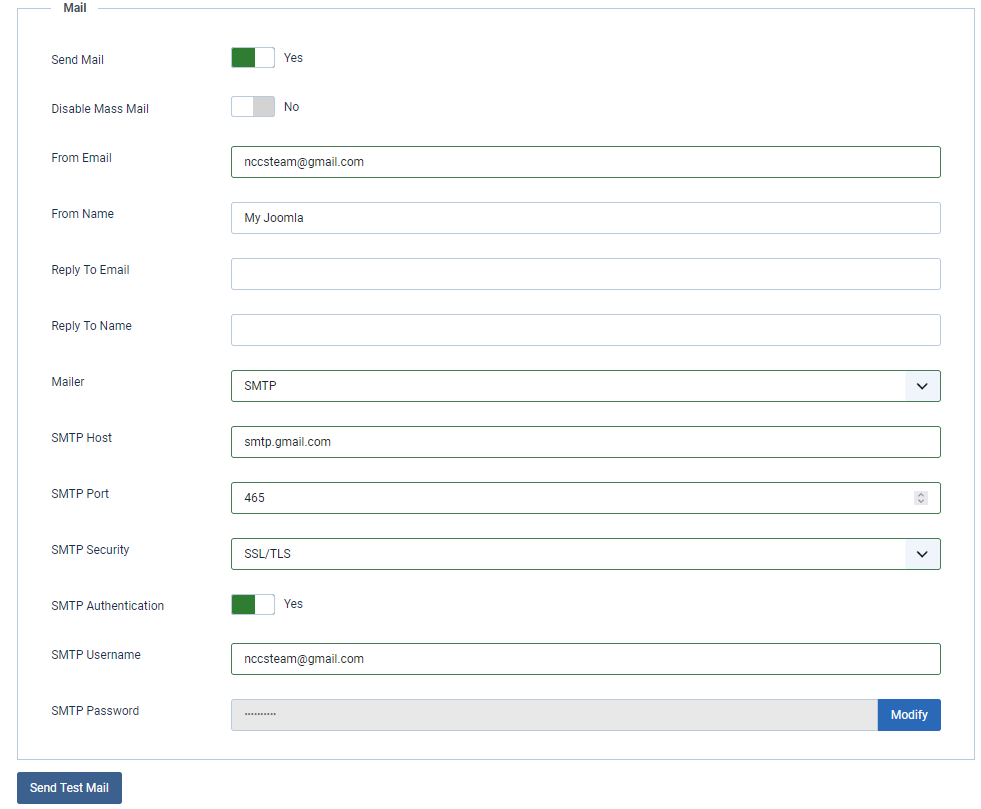
2. Move to Server tab > Mail > Select SMTP from the drop-down list:
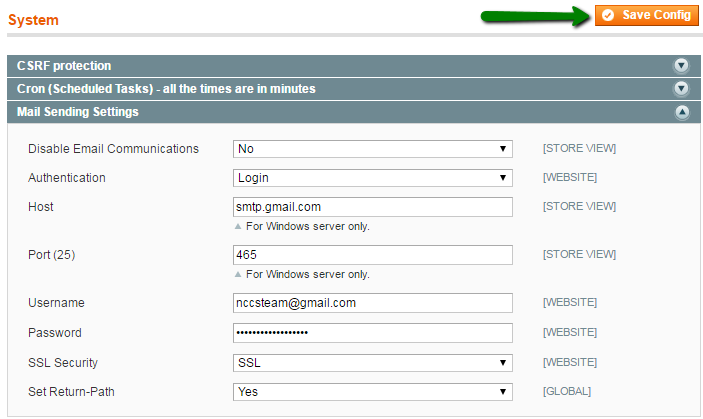
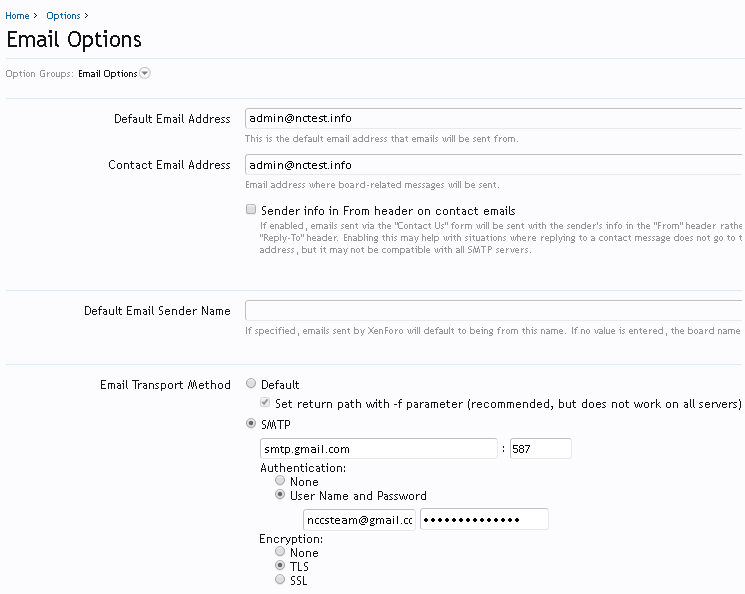
3. You will see additional fields to fill in. It’s needed to use following settings:
Send Mail: Yes
Mailer: SMTP
From email: email account you wish to send emails from
From Name: any name
Disable Mass Mail: No
SMTP Authentication: Yes
SMTP Security: SSL or TLS
SMTP Port: 465 for SSL, 587 for TLS
SMTP Username: email account you wish to send emails from
SMTP Password: password for that email account
SMTP Host: server used to send emails from
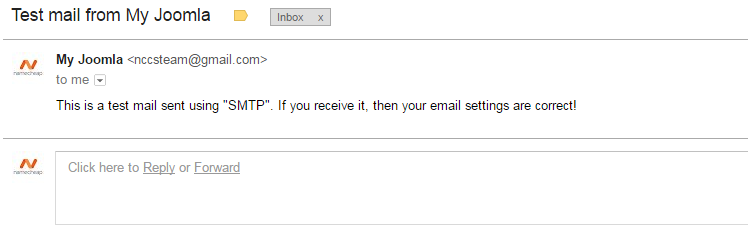
4. Clicking on Send Test Mail should confirm that the email was sent successfully:

In the mailbox of the configured account, you should find an email like this:
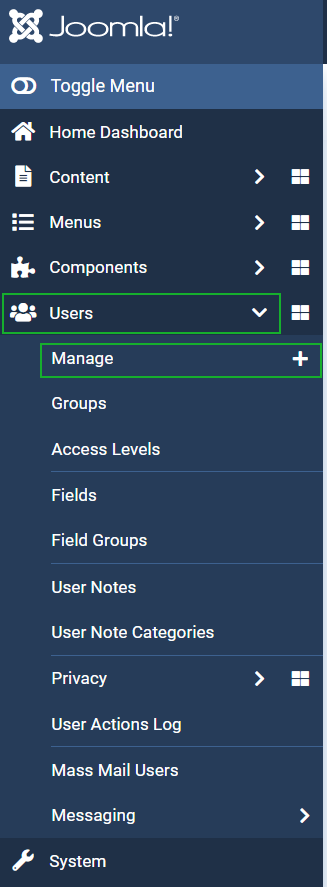
You can also test if SMTP works by creating a new user. Follow these steps to proceed:
1. Go to Users menu > Manage > Add New User:
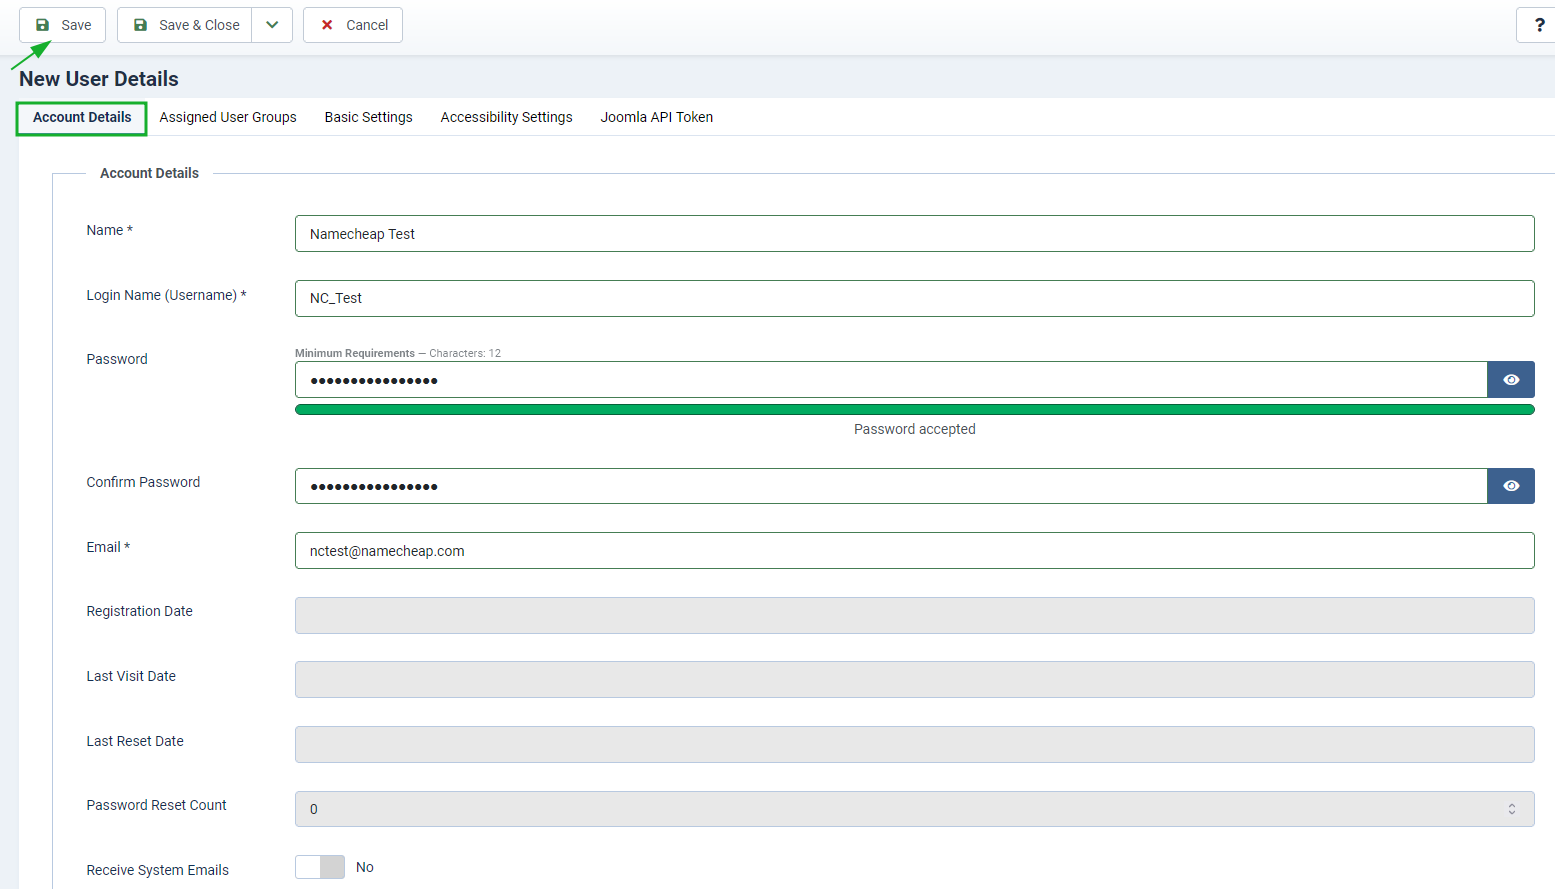
Fill in the following fields in Account Details tab:
Name: real name of the new user
Login Name: login name of the new user
Password: password for the login name
Confirm password: confirming the password of the login name
Email: contact email of the new user
Receive System Emails: yes
Once done click on Save:
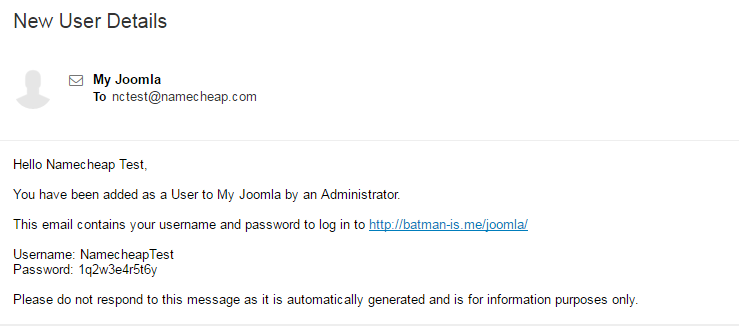
Now you can check the Inbox of the email account used in Add New User menu:
PrestaShop
local email address
third-party email address
PrestaShop has PHP mail() option enabled by default. It works with local mailbox only.
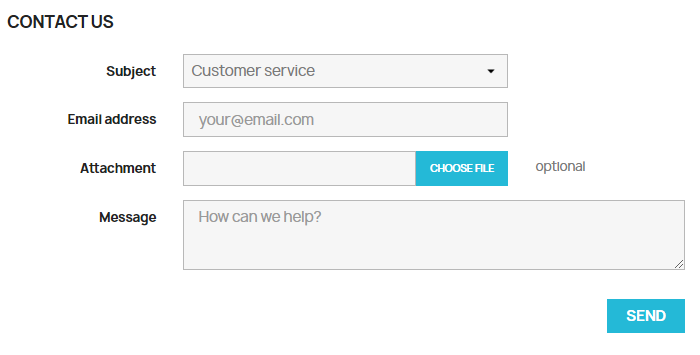
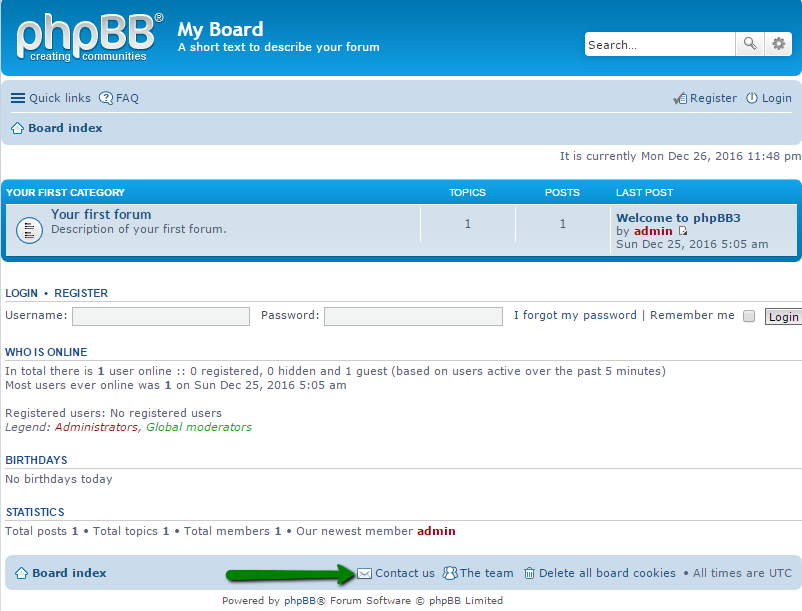
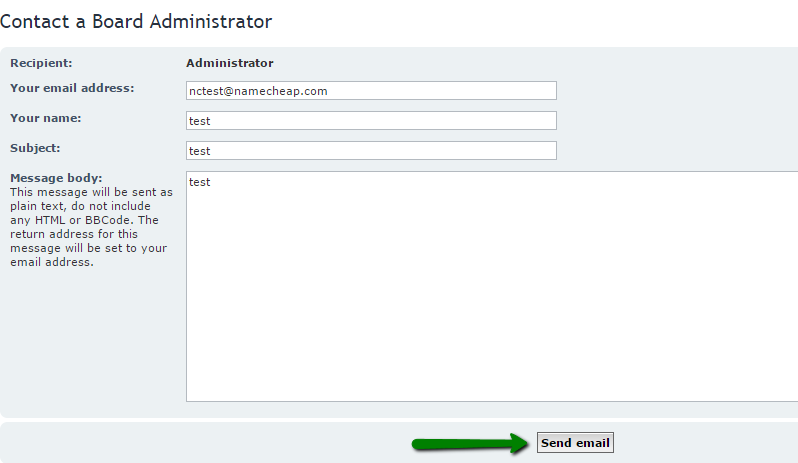
This option can be tested via Contact Us menu on your website:
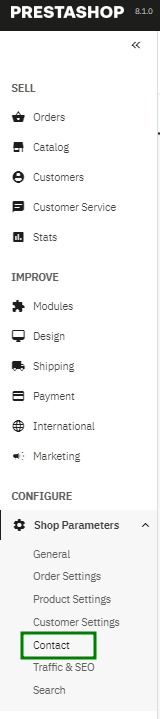
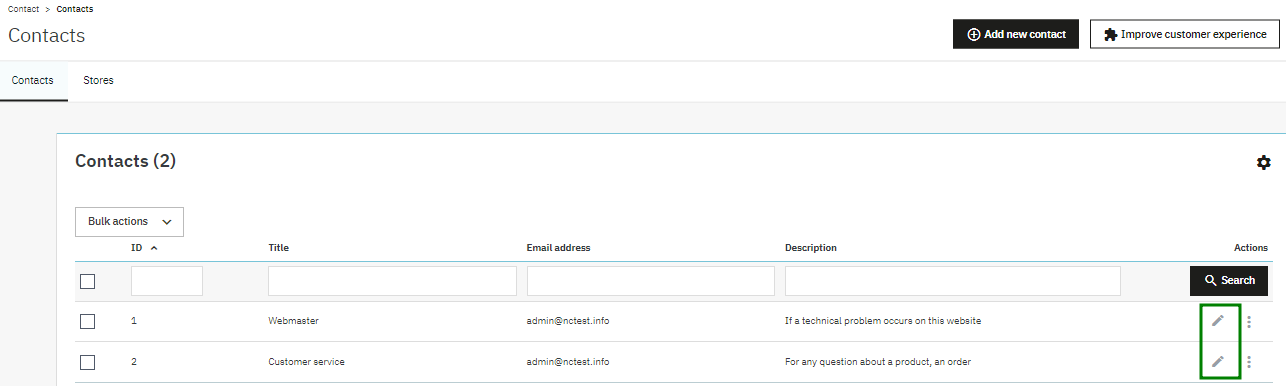
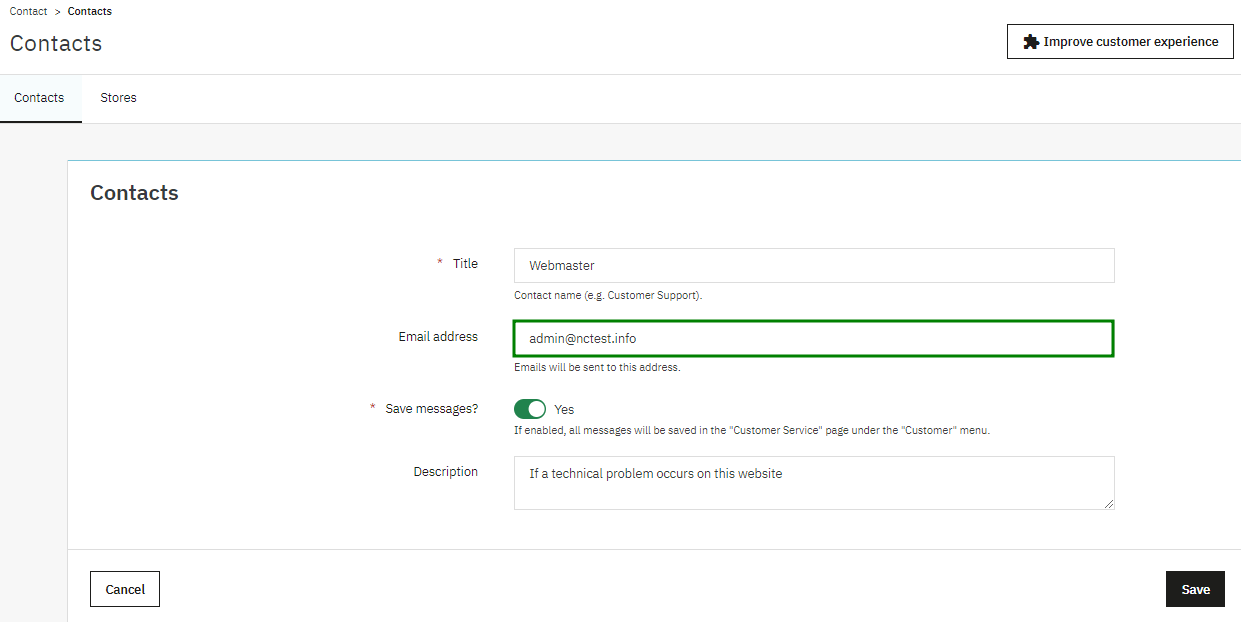
The contact email can be modified in PrestaShop admin dashboard > Shop Parameters > Contact menu:
You will need to select the corresponding contact and click on Edit:
In order to use a third-party email account, you will need to follow these steps:
1. Access the Shop Parameters menu > Contact > Stores. Enter your third-party email account into the Shop Email field: 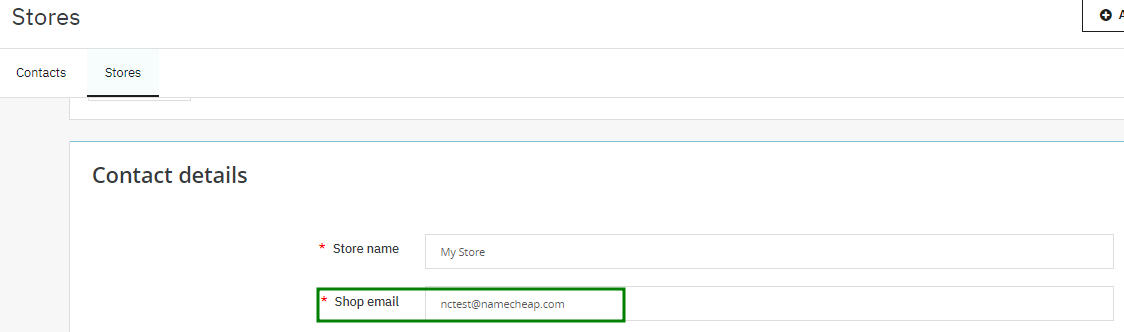
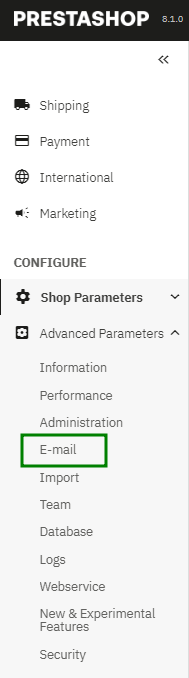
2. Go to PrestaShop admin dashboard > Advanced Parameters > E-mail menu:
3. Select Set my own SMTP parameters (for advanced users ONLY) option:
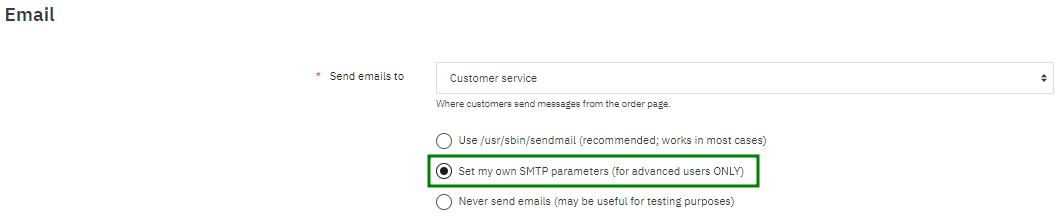
And use following settings for SMTP configuration:
Mail domain name: your domain for the website
SMTP server: server used to send emails from
SMTP username: email account you wish to send emails from
SMTP password: password for that email account
Encryption: SSL or TLS
Port: 465 for SSL, 587 for TLS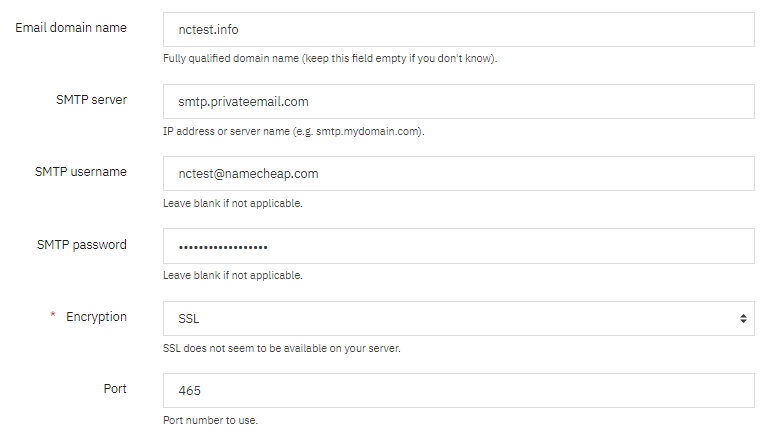
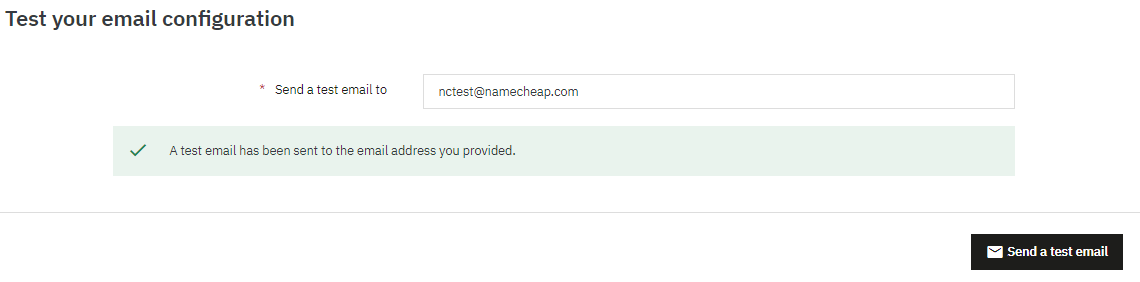
You can test SMTP with the help of Send a test email to option:

Make sure to Save changes. Once done, a test email will be sent.
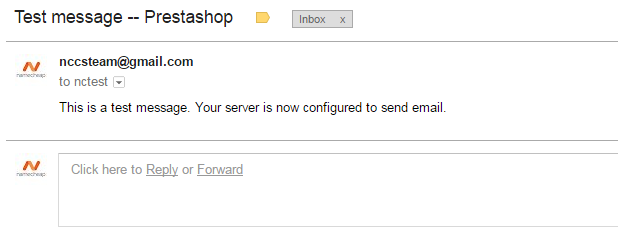
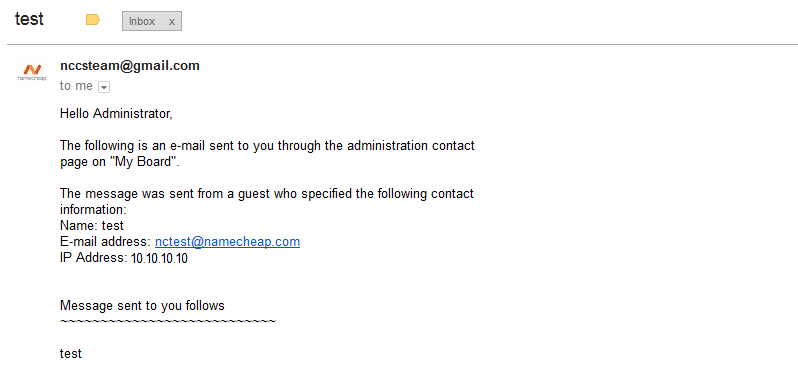
4. As a result, the test recipient will get following email to the Inbox:
You will also receive a confirmation to the configured mailbox:
OpenCart
local email account
third-party email account
OpenCart allows you to configure contact form through OpenCart Dashboard. Using this feature you will be able to email customers about new items added to your website, promotions, or anything else you wish.
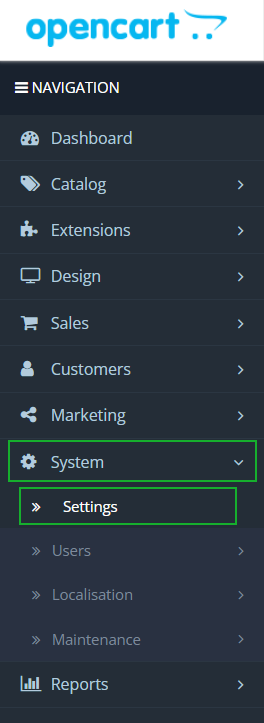
In order to set it up, log in to your OpenCart Dashboard and follow the steps below:
1. Go to System > Settings:
2. Hit Edit next to your website name in Store URL field:

3. In order to send emails from an email address, it needs to be set as the store's admin email. To edit the admin email go to the Store tab and enter your local email in the E-Mail field: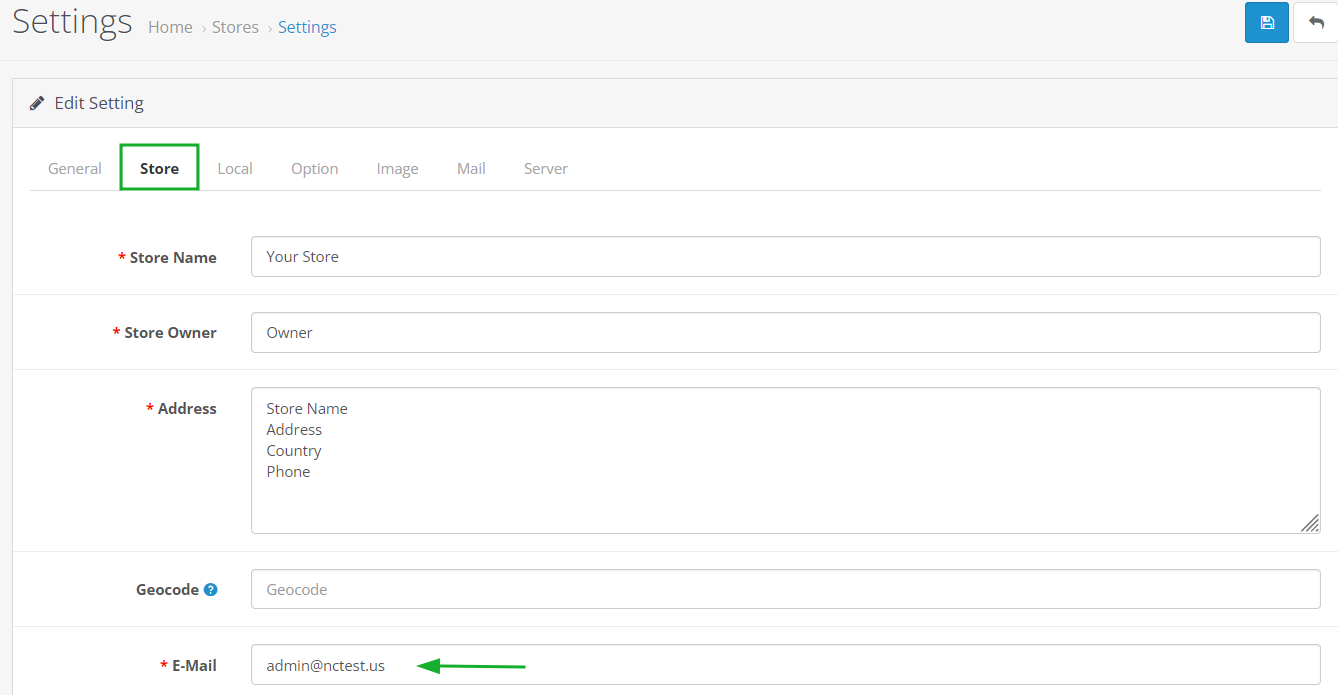
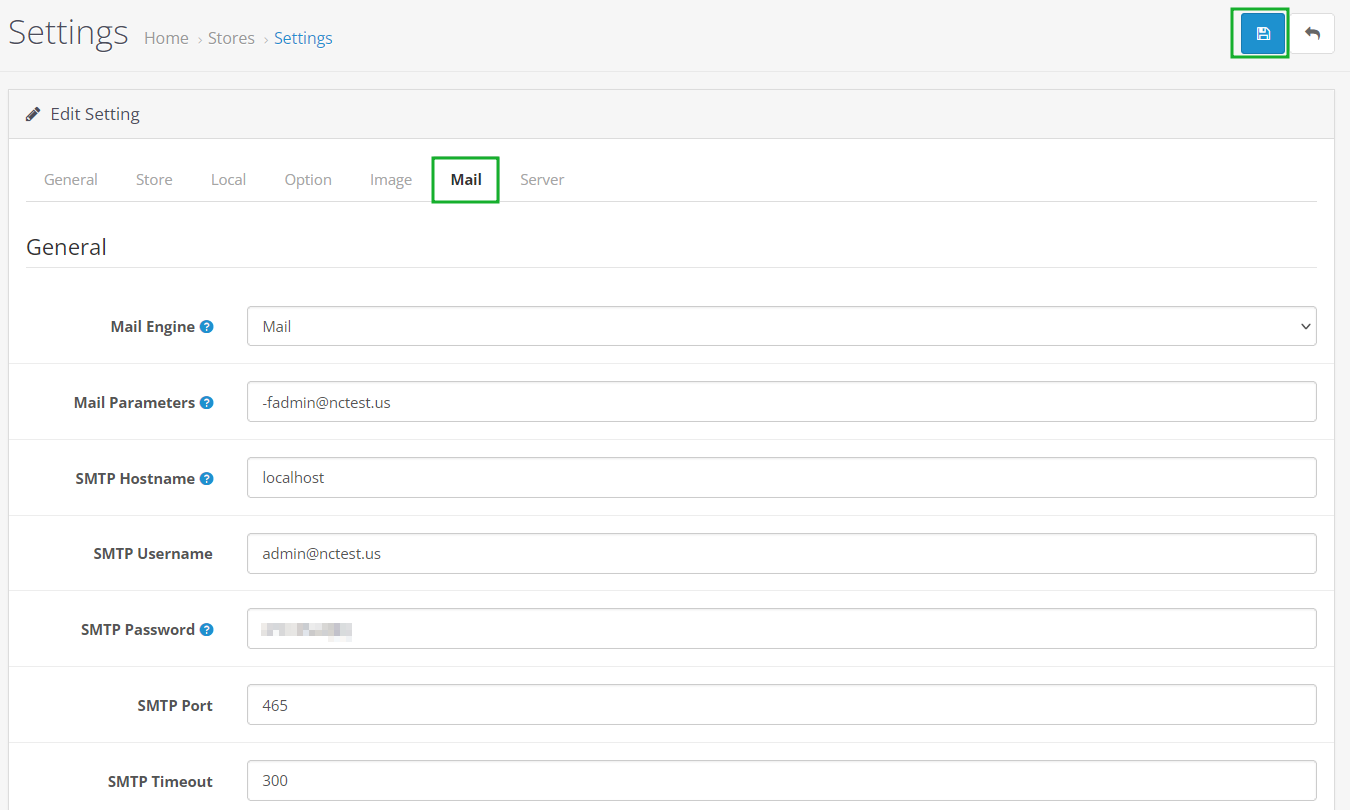
4. Then, switch to Mail tab. For the local email address, set the following configuration:
Mail Protocol: Mail
Mail Parameters: your email address with -f in front of it, e.g. -fnctest@nctest.info
SMTP Hostname: ssl://server your account is hosted on
SMTP Username: email account you wish to send emails from
SMTP Password: password for that email account
SMTP Port: 465
SMTP Timeout: the time (in seconds) allowed before the connection times out, we recommend using 300
Additional Alert E-Mails: an additional email address you would like to receive the alert email, in addition to the main store email
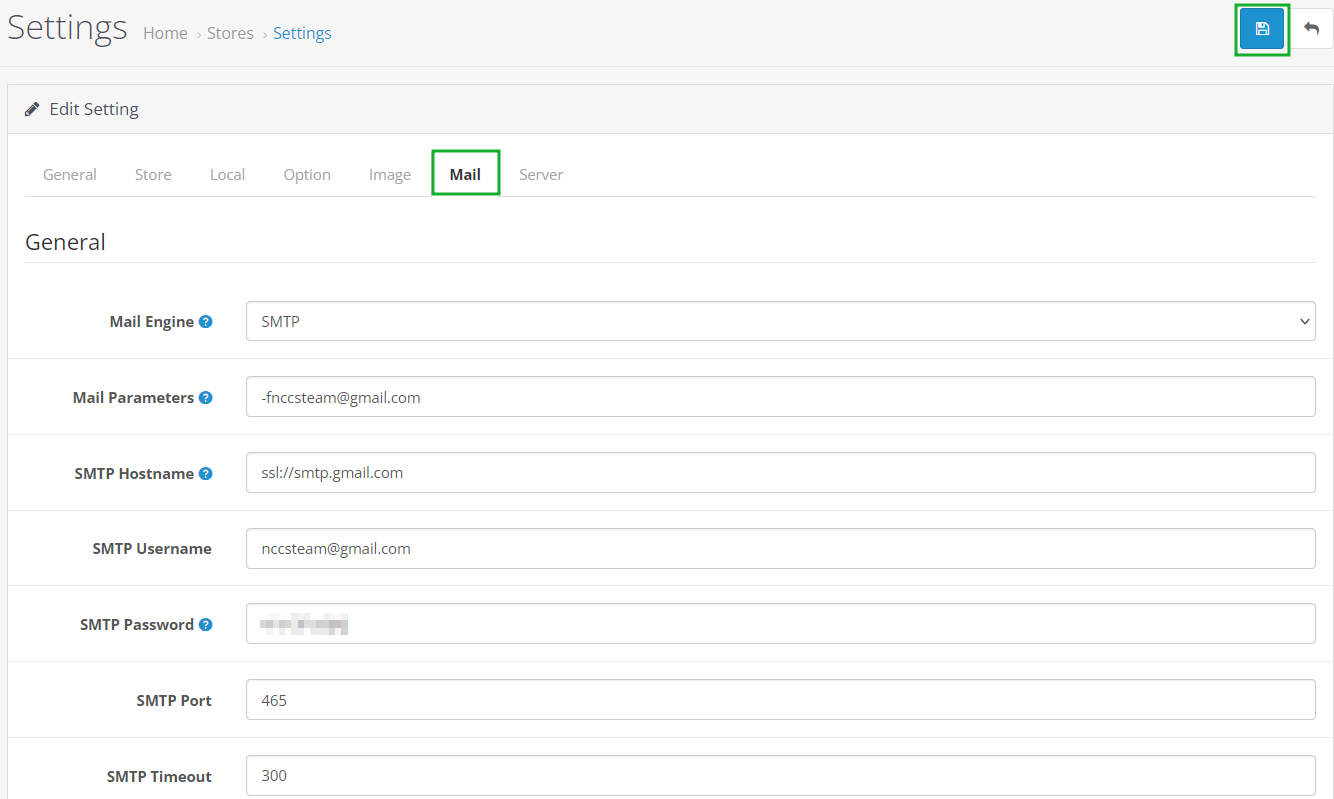
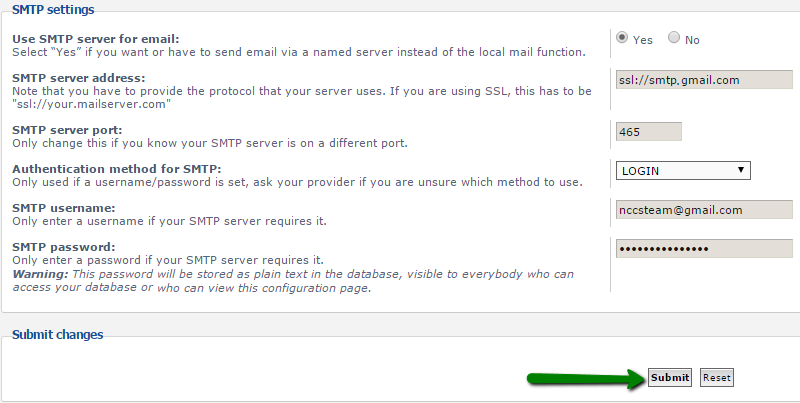
5. If you wish to use a third-party email account, you will need to configure SMTP authentication using the following settings (don't forget to check the admin email in the Store tab, as all the emails will be sent from the admin email):
Mail Protocol: SMTP
Mail Parameters: your email address with -f in front of it, e.g. -fnccsteam@gmail.com
SMTP Hostname: ssl:// or tls:// along with the server used to send emails from
(e.g., ssl://smtp.gmail.com for port 465 or tls://smtp.gmail.com for port 587)
SMTP Username: email account you wish to send emails from
SMTP Password: password for that email account
SMTP Port: 465 for SSL, 587 for TLS
SMTP Timeout: the time (in seconds) allowed before the connection times out, we recommend using 300
Additional Alert E-Mails: an additional email address you would like to receive the alert email, in addition to the main store email
6. Make sure to Save the settings once done.
Drupal
local email account
third-party email account
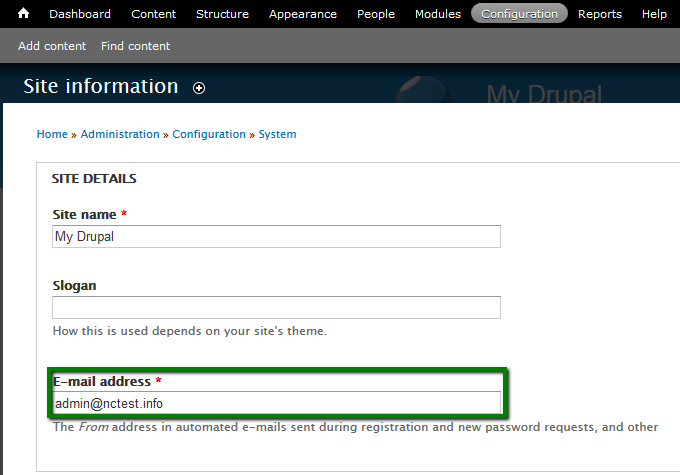
Drupal uses PHP mail() option by default sending emails from the administrative email specified in Admin Dashboard > Configuration tab > System section > Site information menu:

PHP mail() can be used with local mailboxes only. It can be tested by creating a new user in Home > Administration: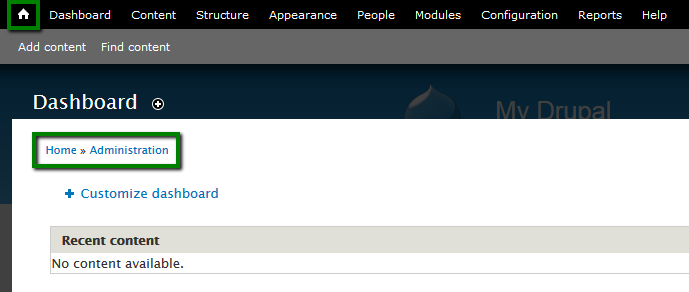
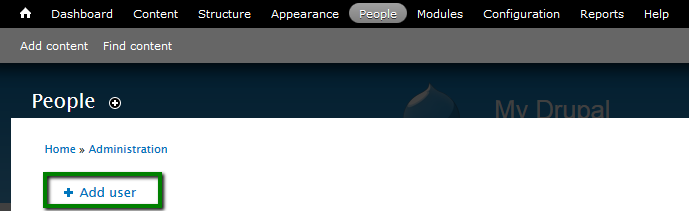
Then select People > Add user: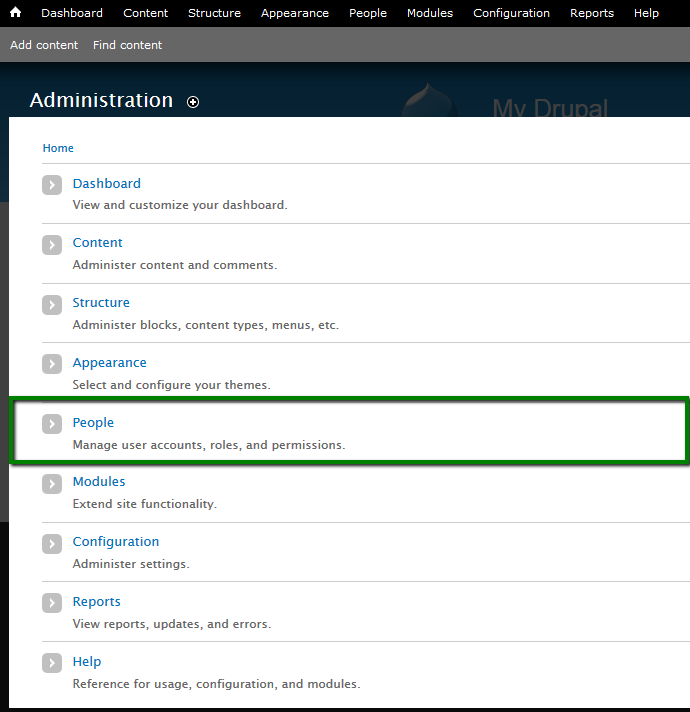
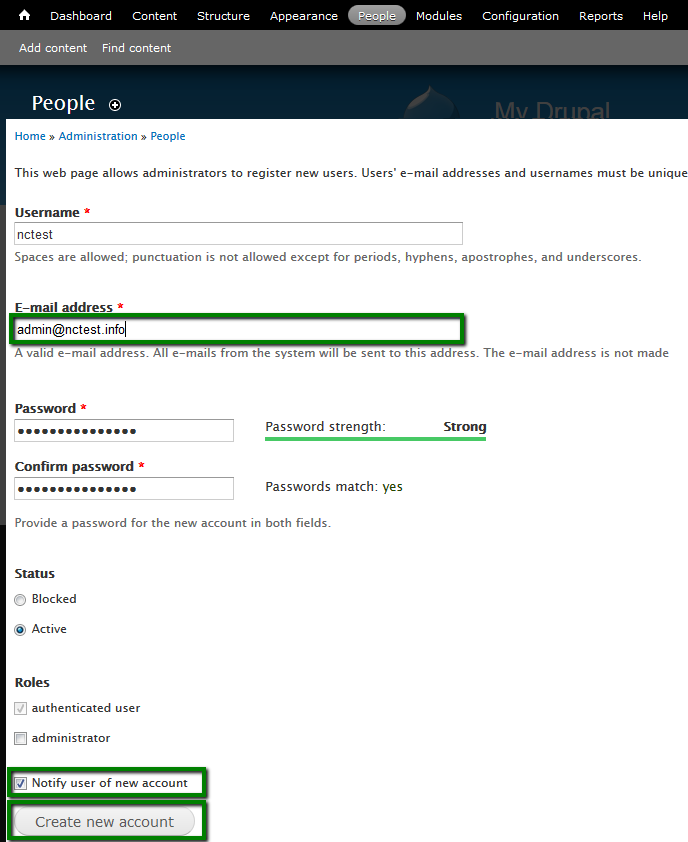
You will need to fill in following information:
Email address: contact email of the new user
Username: login name for the new user
Password: password for the login name
Confirm password: confirming the password of the login name
Notify user of new account: must be checked
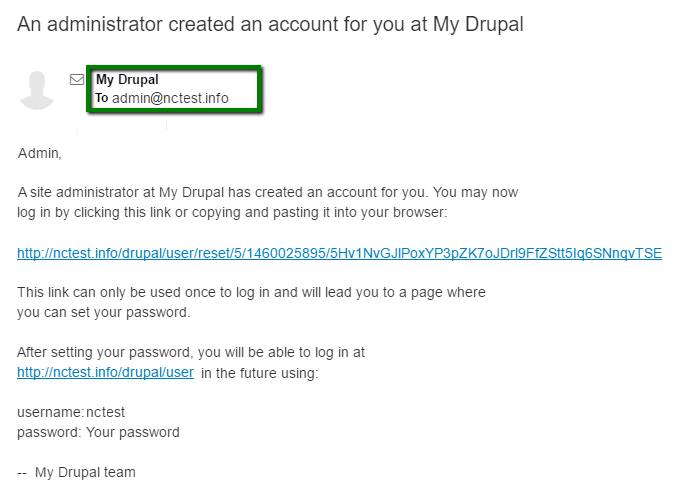
The new user will receive the following email to the Inbox:
If you wish to use a third-party email account, you will need to have SMTP configured with Drupal installation. This goal can be achieved in the following way:
1. You will need to change administrative email first.
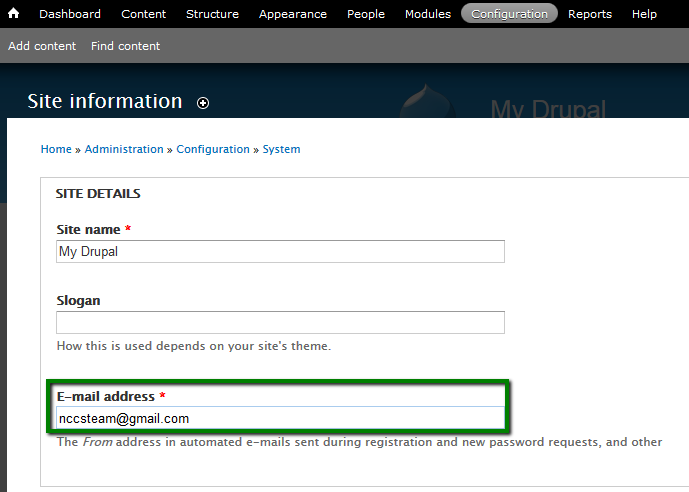
Go to Admin Dashboard > Configuration tab > System section > Site information menu:
Change E-mail address to the desired one:
Once done, Save configuration button.
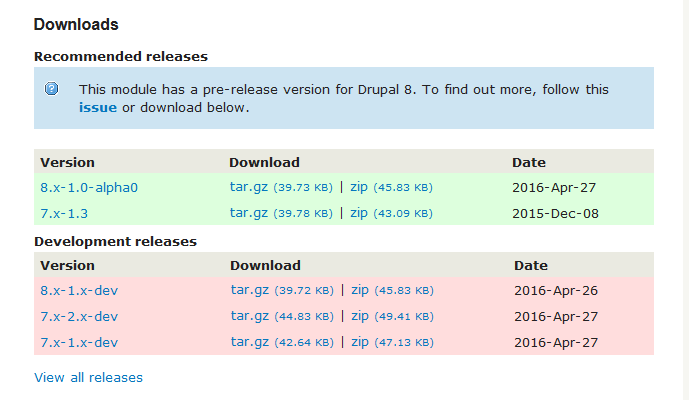
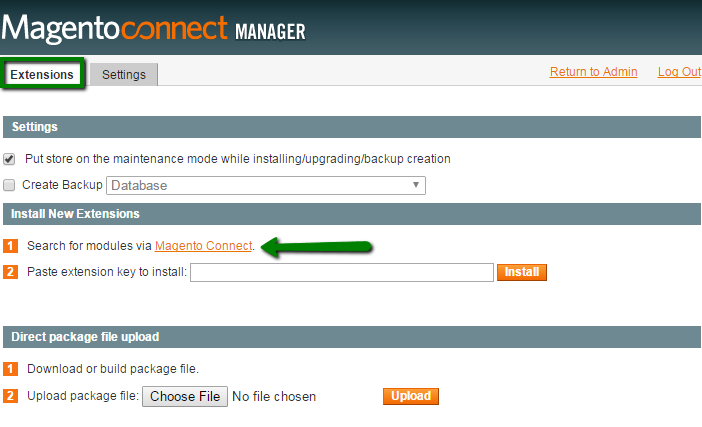
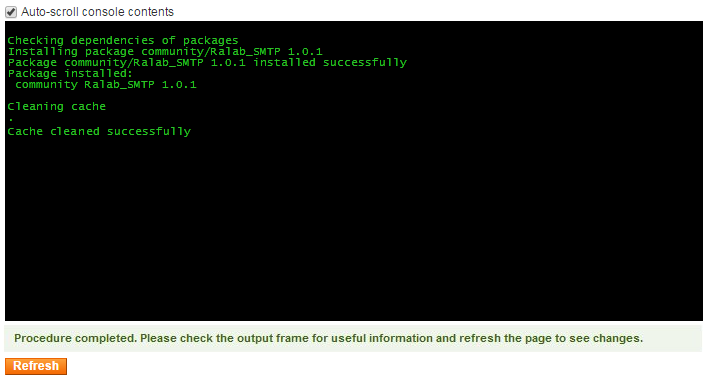
2. After this you need to install SMTP module that will allow you to connect to SMTP server and send your emails successfully. You can find one here.
Download the one that corresponds to your Drupal version from this menu:
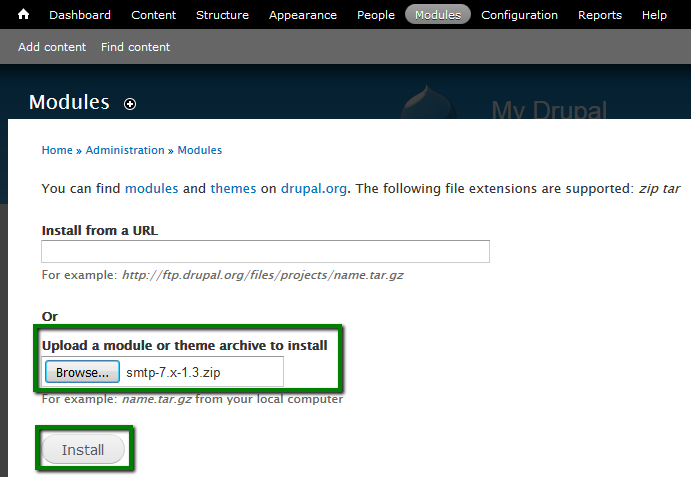
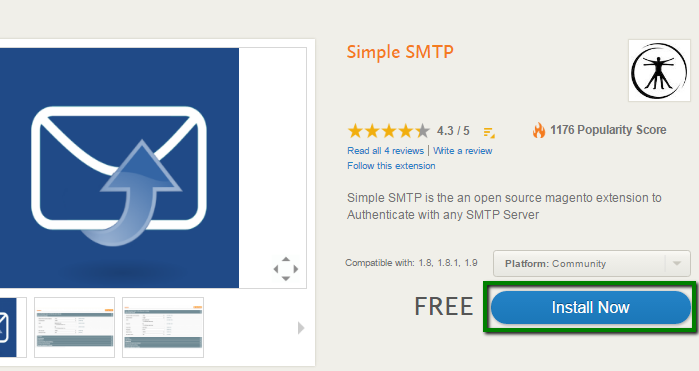
3. After that, you will need to add the module via Modules menu > Install new module:
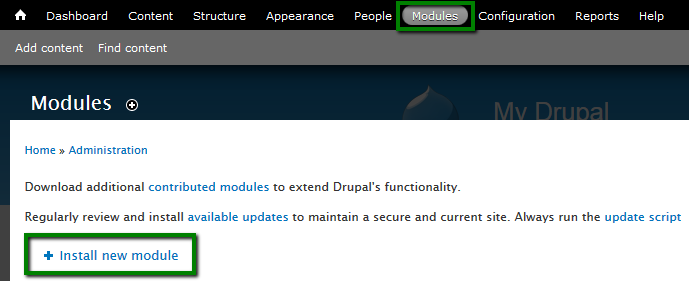
Click on Choose File to get the file from your local device and click on Install:
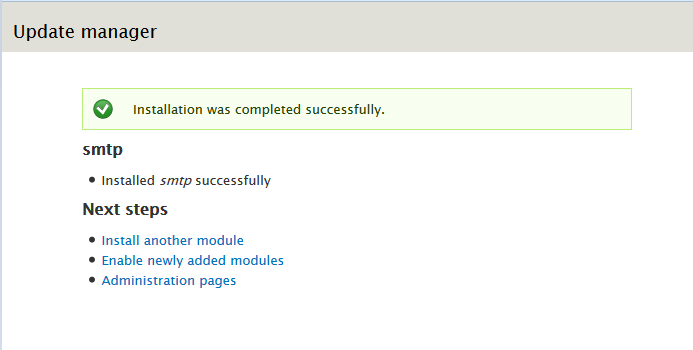
You will get the following message then:
4. Now go back to Modules tab and find the newly installed module in the list. Hit Configure next to it:

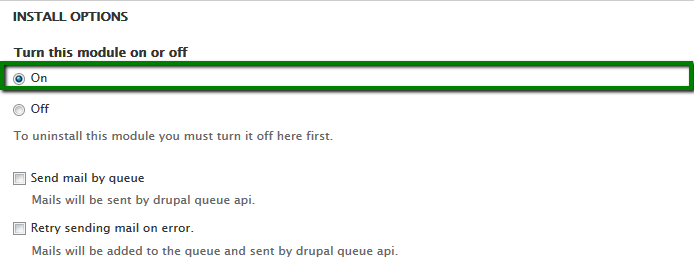
5. Set the following configuration in SMTP Authentication Support menu:
Turn this module: On
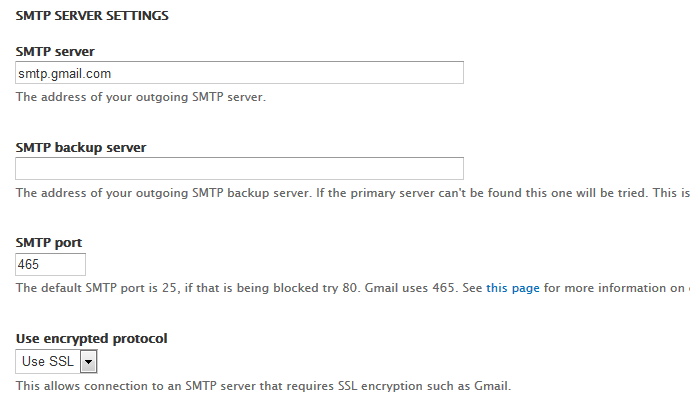
SMTP server: server used to send emails from
SMTP port: 465 for SSL, 587 for TLS
Use encrypted protocol: SSL or TLS
Username: email address you wish to send emails from
Password: password for that email account
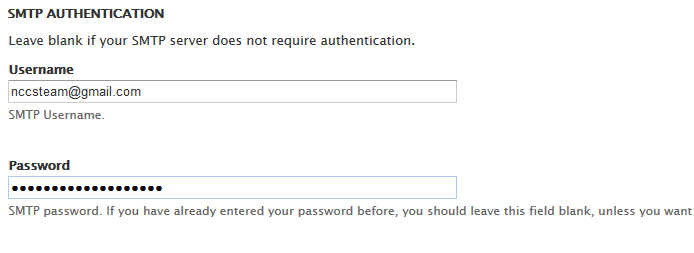
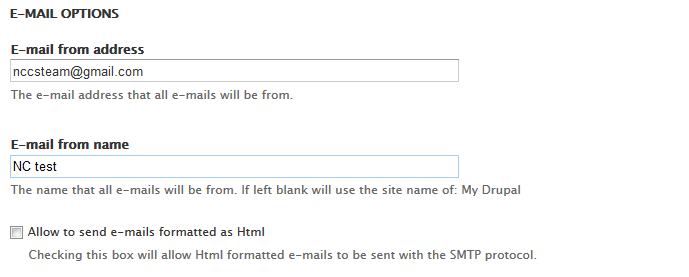
E-mail from address: email account you wish to send emails from
E-mail from name: any name you wish
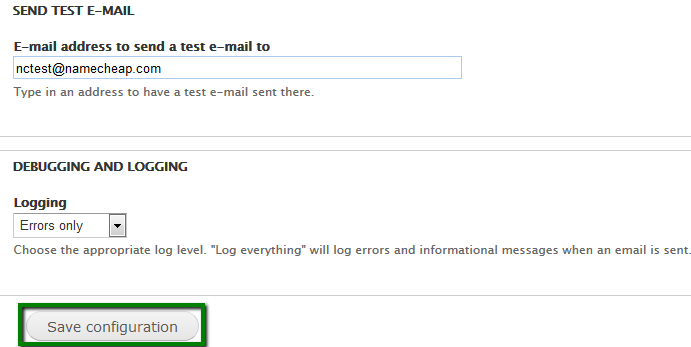
E-mail address to send a test e-mail to: some email address to test SMTP option
Click on Save Configuration once everything is set:
6. You will get the following message after that:
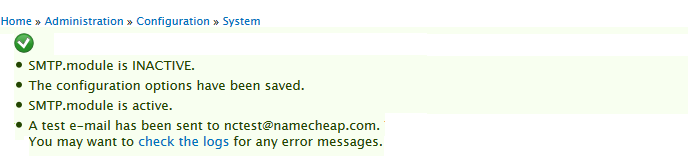
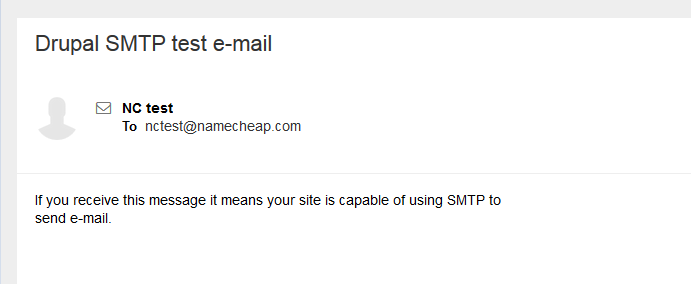
The following email will be sent to the email account specified in E-mail address to send a test e-mail to field:
Moodle
local email account
third-party email account
Emails sent from Moodle through PHP mail() function by default. This will work with local mailbox only.
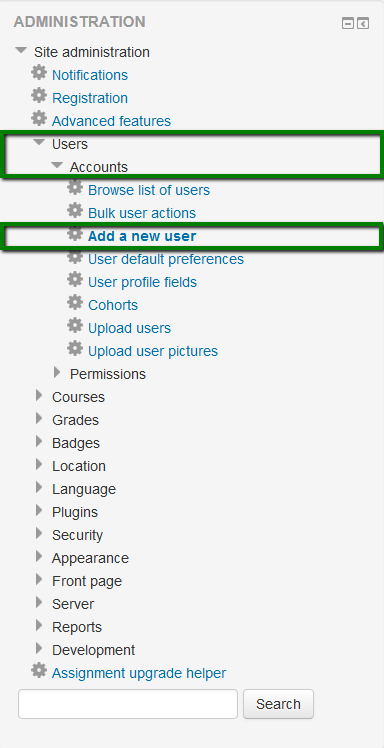
It is possible to test the function via creating a user in Admin dashboard > Site administration > Users > Accounts > Add a new user:
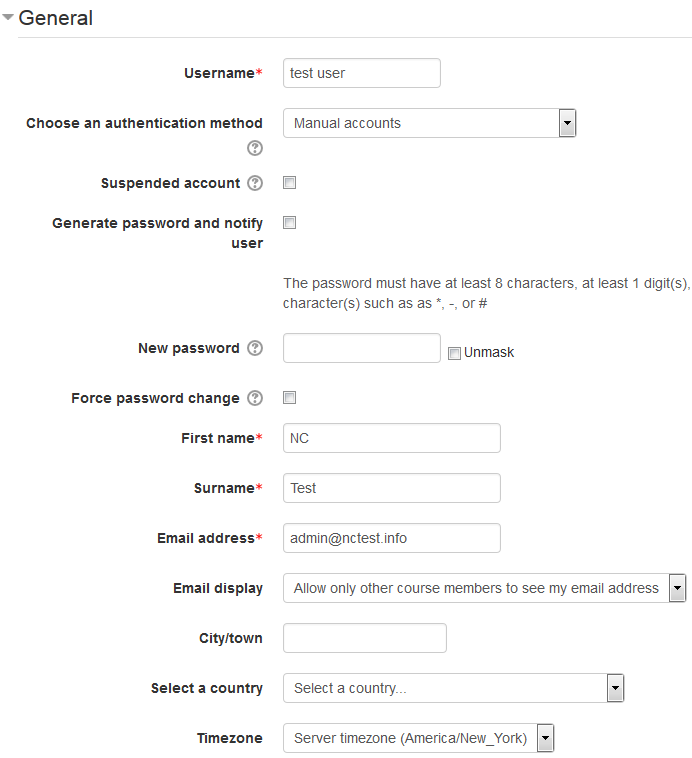
Once there, fill in the following fields and save the changes then:
Username: login name for the new user
First name: user's first name
Surname: user's surname
Email address: email address assigned to user's account
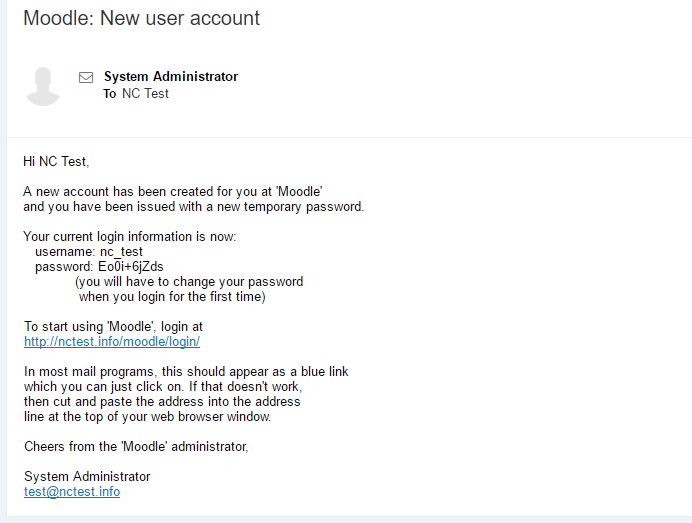
The newly created user will receive a notification to the contact mailbox:
In order to use a third-party mailbox for sending emails, you will need to follow these steps:
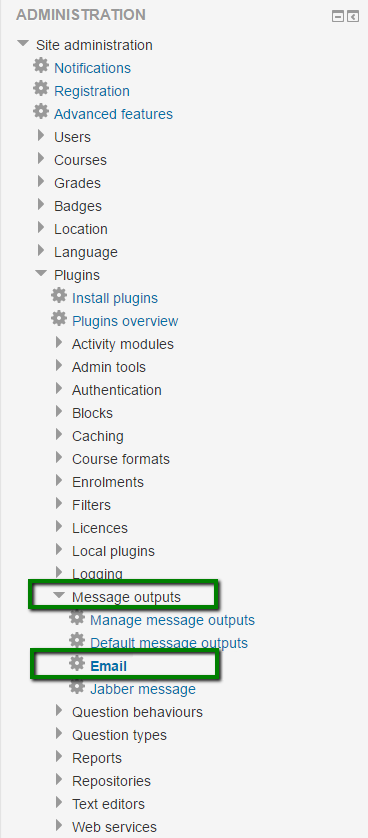
1. Log in to Moodle Admin Dashboard.
2. Go to Site administration > Plugins > Message outputs > Email in the settings section:
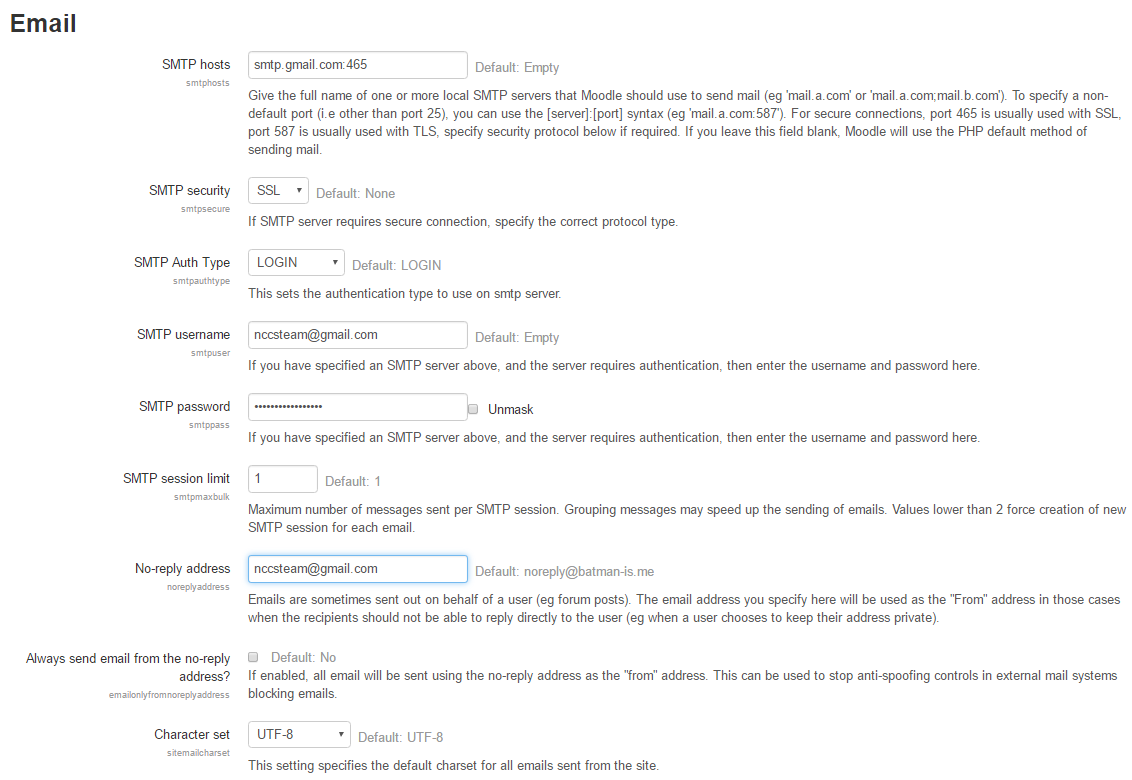
3. In Email menu you will need to configure SMTP settings for the mailbox you are going to use:
SMTP hosts: hostname:port, e.g. smtp.gmail.com:465
The port number must be attached to the SMTP server host name for the port to be used.
SMTP security: SSL for port 465, TLS for port 587
SMTP username: email account you wish to send emails from
SMTP password: password for that email address
No-reply address: the email address you specify here will be used as the 'From' address in those cases when the recipients should not be able to reply directly to the user
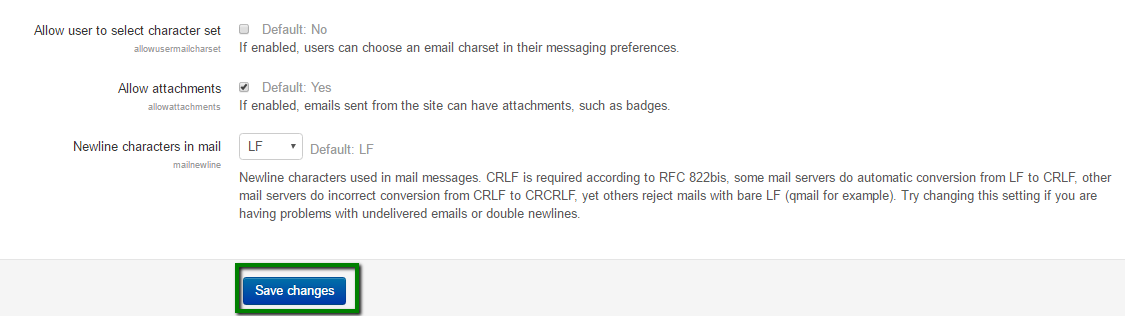
Once you input all settings, click on Save changes:
SMTP function can be tested by creating a new user as well.
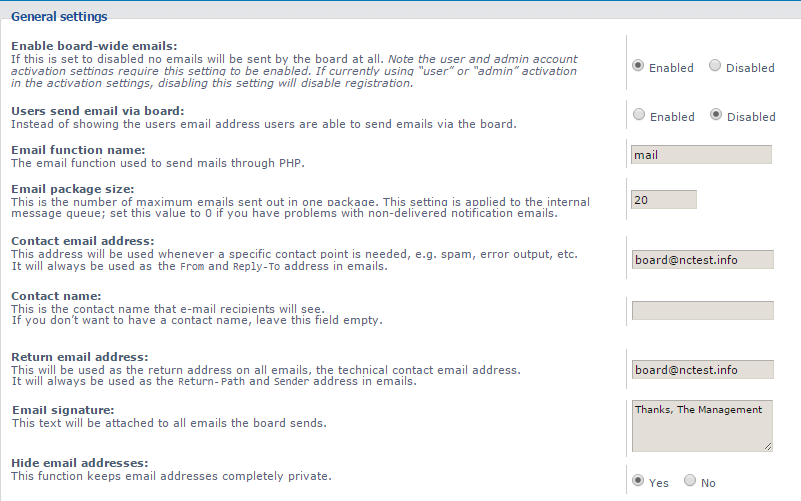
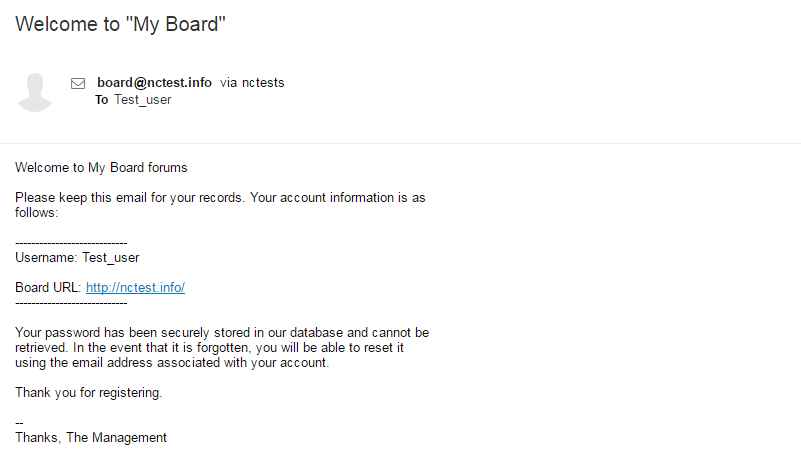
MediaWiki
local email address
third-party email address
MediaWiki uses PHP mail() option by default. It will work only if you use a local mailbox.
You can test and configure it in the following way:
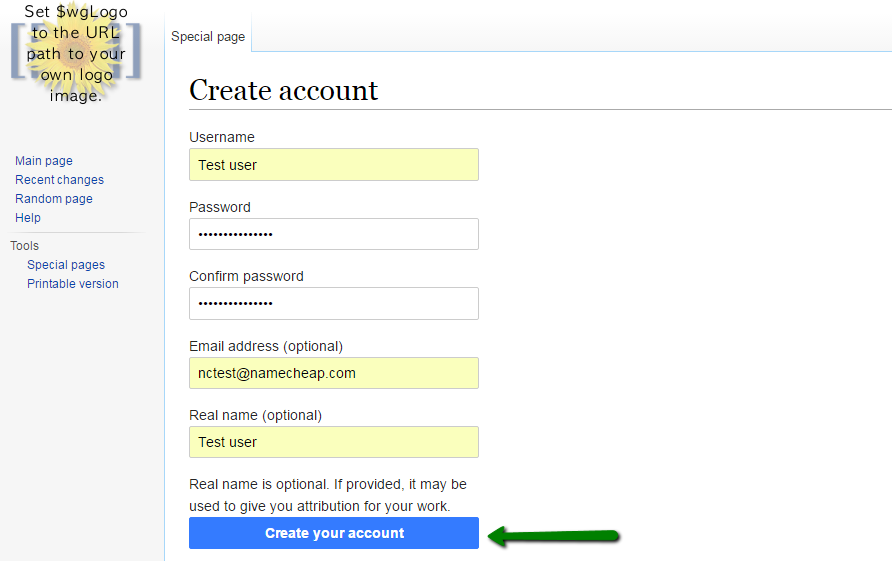
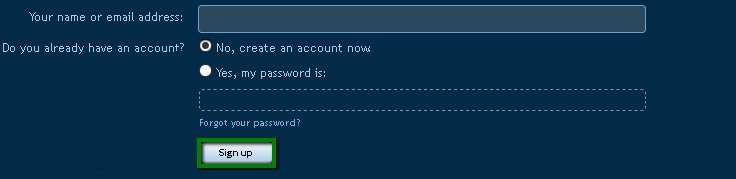
1. Go to your website and click Create account link in the top right corner:

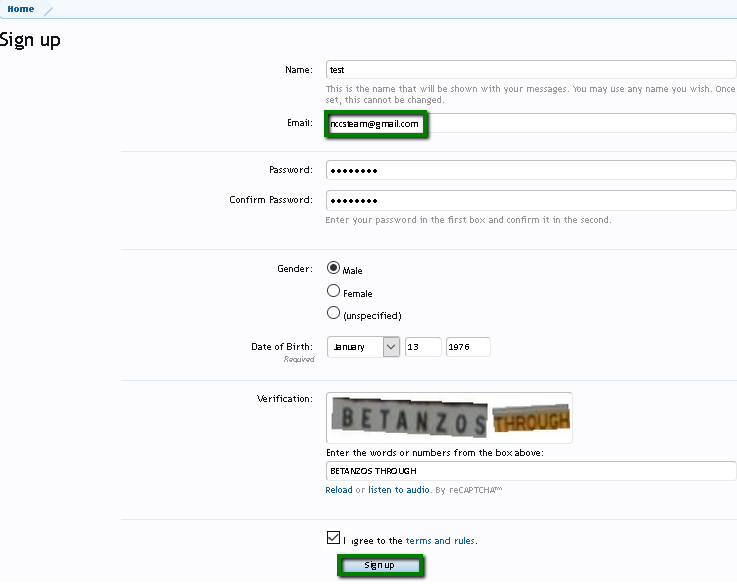
2. Fill in the fields to create a new user and hit Create your account button:
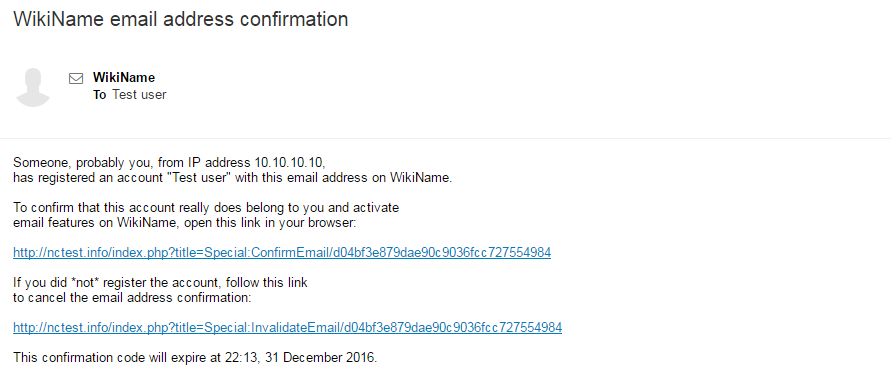
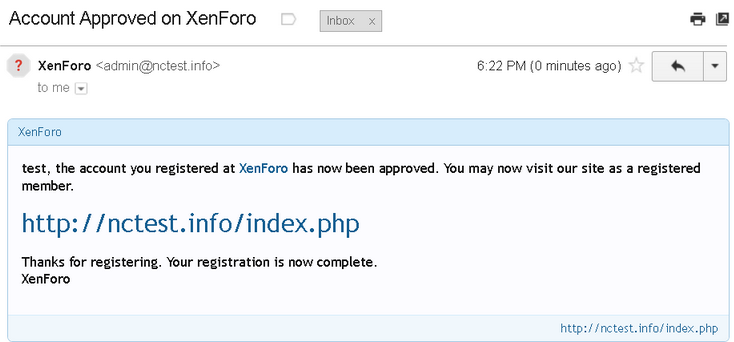
3. Check the Inbox of the email account used for the registration. There should be an email with the confirmation link:
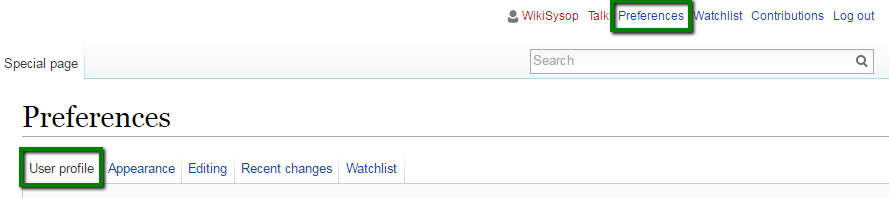
4. The email address used to send such emails can be changed in via MediaWiki admin panel.
Once logged in, move to Preferences menu > User profile tab:
5. Scroll down the page to Email options section:

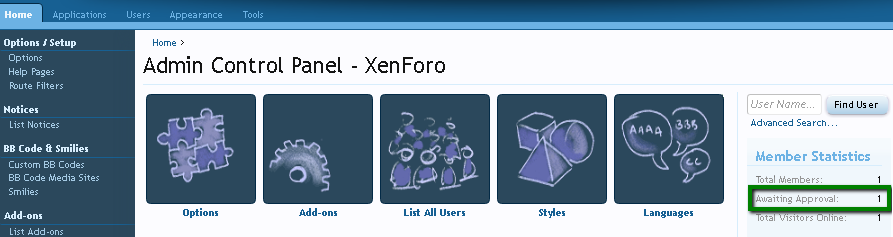
There you will see the default admin email account that was set during MediaWiki installation. If needed, feel free to change it to a different local mailbox of yours.
If you wish to use a third-party email address, you will need to configure SMTP mail authentication in the following way:
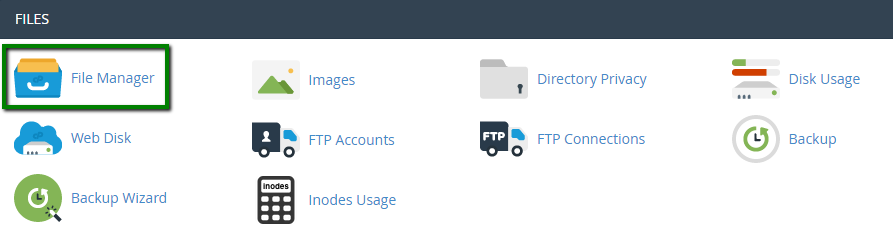
1. Log in your cPanel and go to File Manager menu:
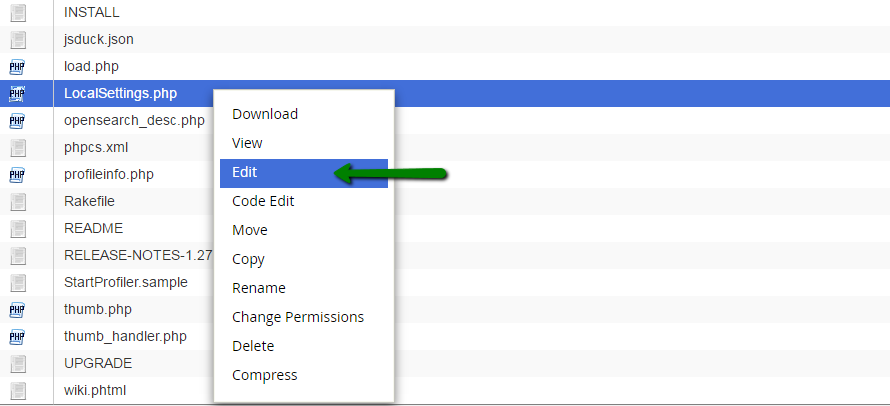
2. In the root installation folder of your website find LocalSettings.php file. Right-click on it and use Edit option:
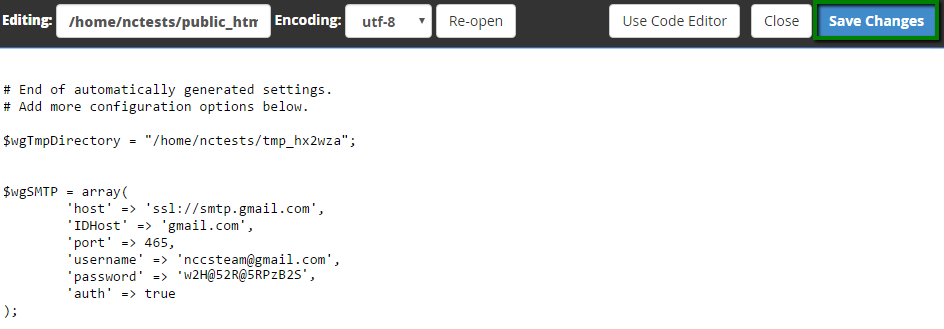
3. Add the following lines at the end of the file. Make sure that you edit them with the data of your email service provider and email account used:
$wgSMTP = array(
'host'     => "ssl://mail.example.com", // could also be an IP address. Where the SMTP server is located
'IDHost'   => "example.com",      // Generally this will be the domain name of your website (aka mywiki.org)
'port'     => 465,                 // Port to use when connecting to the SMTP server
'auth'     => true,               // Should we use SMTP authentication (true or false)
'username' => "my_user_name",     // Username to use for SMTP authentication (if being used)
'password' => "my_password"       // Password to use for SMTP authentication (if being used)
);


| Email service | SMTP server | Port |
|---|---|---|
| *@gmail.com | smtp.gmail.com | 465 (SSL) |
| *@hotmail.com | smtp.office365.com | 587 (TLS) |
| *@outlook.com | smtp.office365.com | 587 (TLS) |
| *@yahoo.com | smtp.mail.yahoo.com | 465 (SSL) |
| Yahoo Business Email | smtp.bizmail.yahoo.com | 465 (SSL) |
| Google Apps | smtp.gmail.com | 465 (SSL) |
| Private Email | mail.privateemail.com | 465 (SSL) |
| Zoho Mail | smtp.zoho.eu | 465 (SSL) |
Need help? We're always here for you.