This guide will show you how to manage PHP settings on our Business servers (Stellar Business and old Business SSD plans).
For managing PHP settings on Shared servers (Stellar, Stellar Plus plans and old Value, Professional, Ultimate plans), please check
this article.
Our Business servers are running with LiteSpeed module and have PHP 7.0 - 7.4, and 8.0 - 8.5 versions available. To change the PHP version for your domains, follow these steps:
1. Log in to your cPanel.
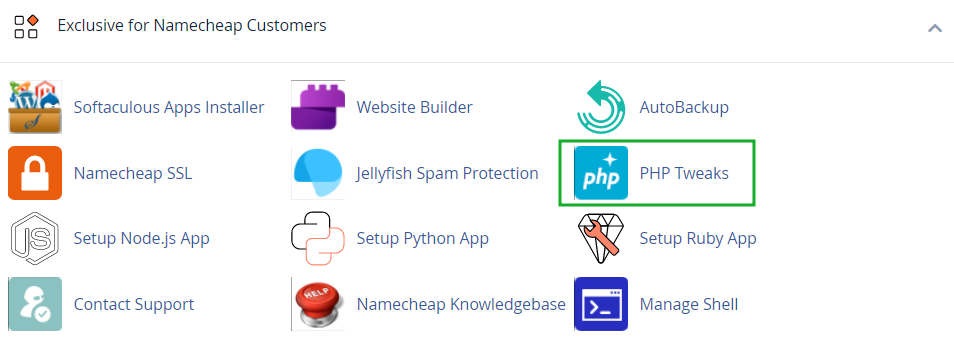
2. Go to the Exclusive for Namecheap Customers section >> the PHP Tweaks menu:
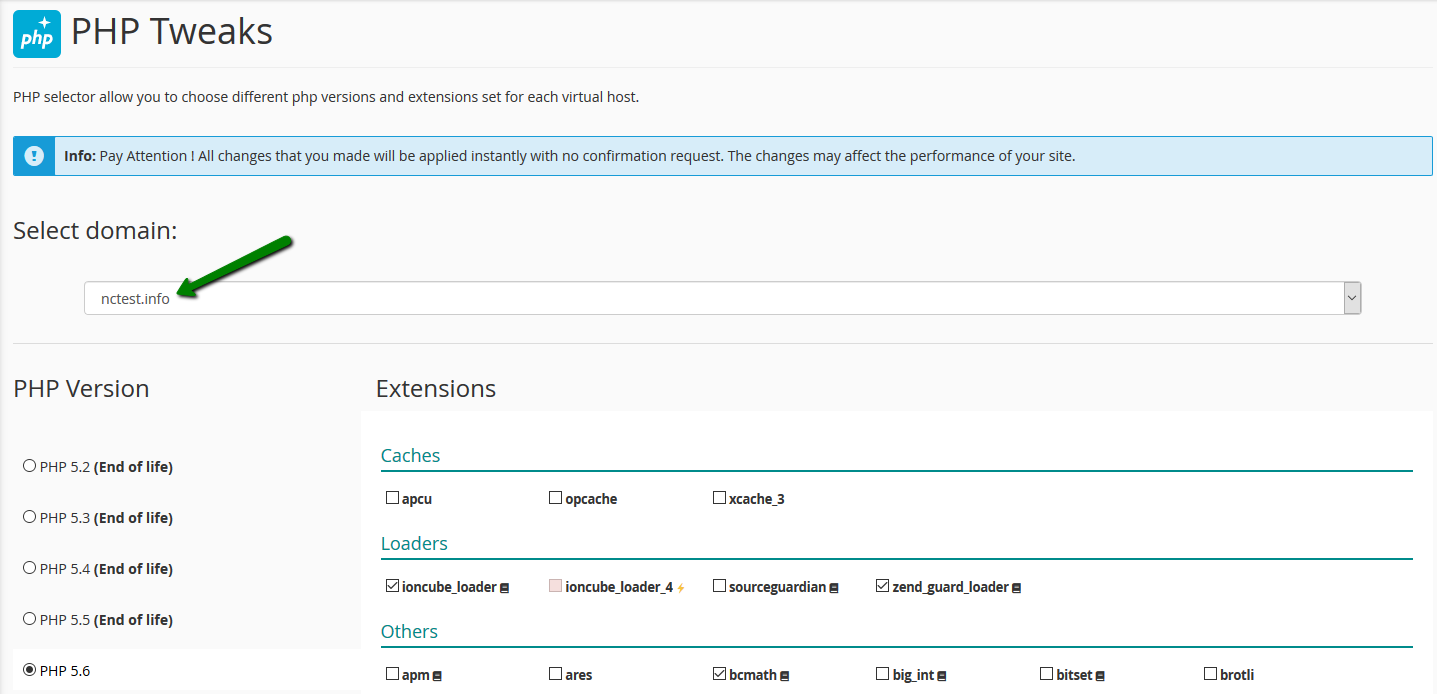
3. You can select the domain from the corresponding drop-down menu and manage the following group of settings:
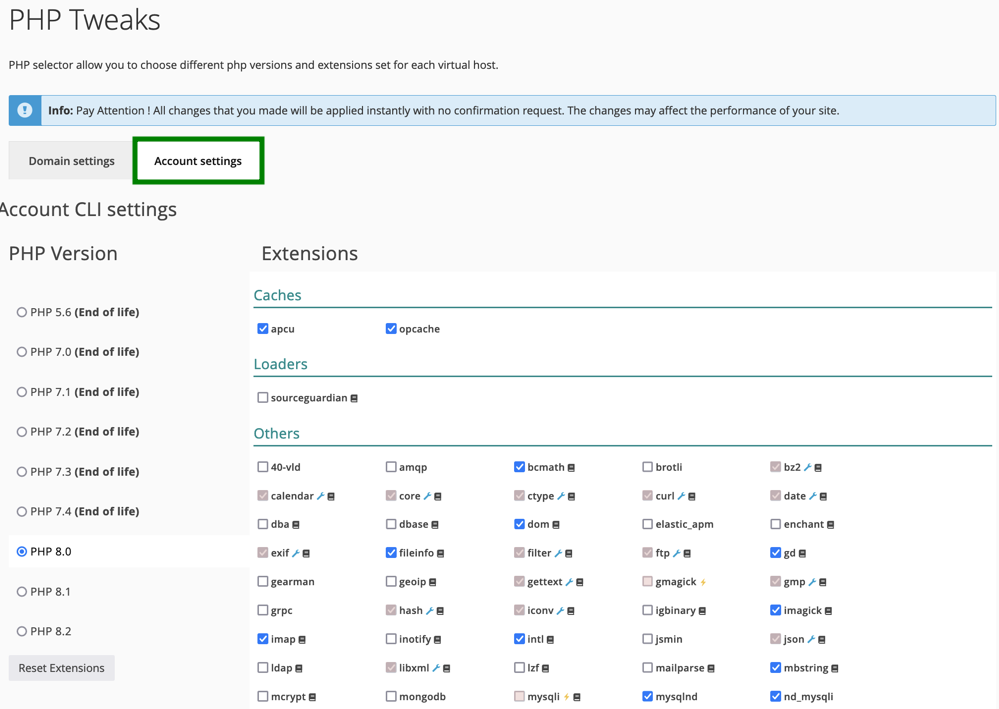
It is also possible to apply PHP settings for the whole cPanel account (for all hosted domains) in the Account Settings tab:
The PHP version section allows you to check the version that is currently used and set the required one.
NOTE: If it is needed to set up the PHP version <7.0 for the account, please contact our Support Team.
NOTE: The list of the available modules varies depending on the PHP version you select.
NOTE: Applied PHP changes may require several minutes to take effect, so if the changes do not display immediately, please allow it some time to update.
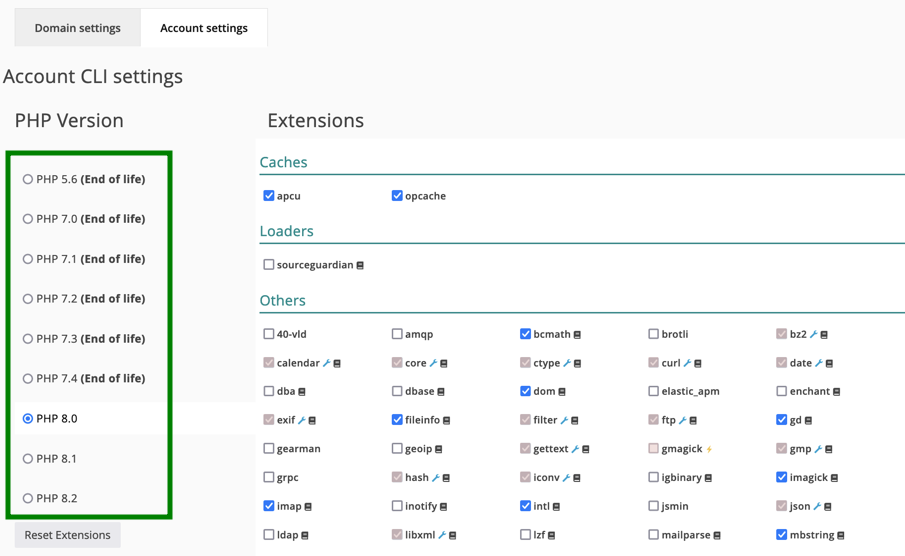
NOTE: For a PHP version set in the "Account Settings" to be actual for a domain added to cPanel, its PHP version should be the same in the "Domain Settings" tab because the PHP version set in the "Domain Settings" tab has priority over the "Account Settings" tab.
The Loaders and Caches sections allow you to choose the PHP loader for your scripts and the PHP accelerator for caching the compiled bytecode of your PHP scripts.

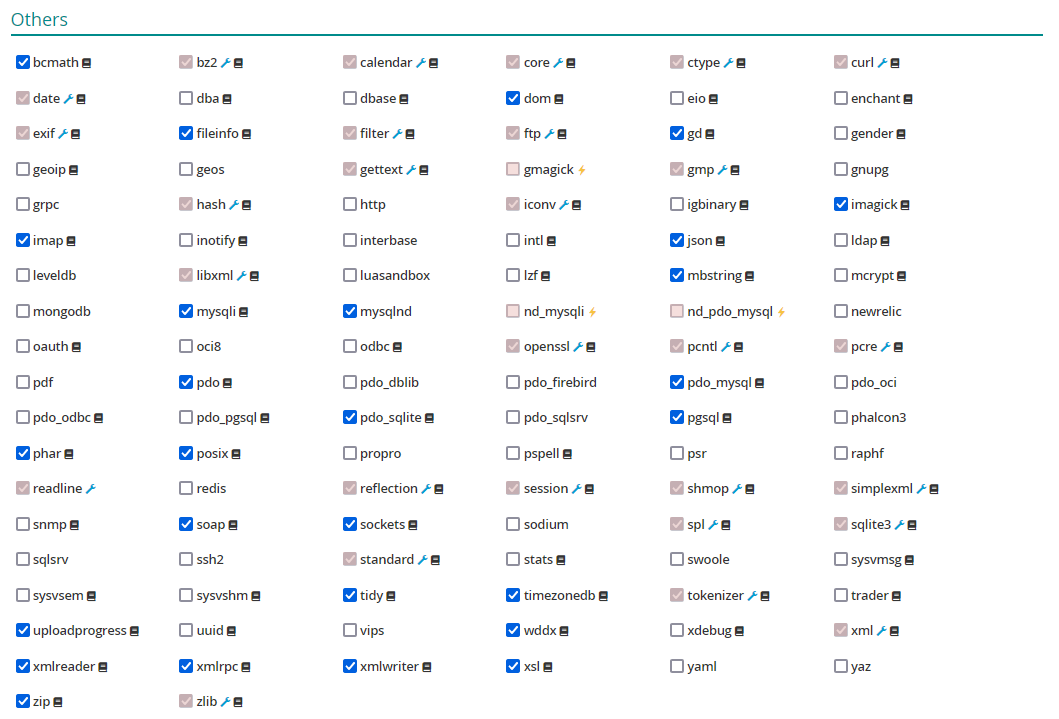
The Others section provides you with the list of additional modules and extensions which can be enabled according to your needs:
PHP extensions enabled via PHP Tweaks are active for scripts processed by a web-server. In case you encounter any PHP-related issues when you are working via a command line or installing scripts through Softacuous, please contact our
Support team for further assistance.
NOTE: There are the following modules conflicts:
- nd_mysql conflicts with mysql;
- nd_mysqli conflicts with mysqli;
- nd_pdo_mysql conflicts with pdo_mysql;
- gmagick conflicts with imagick.
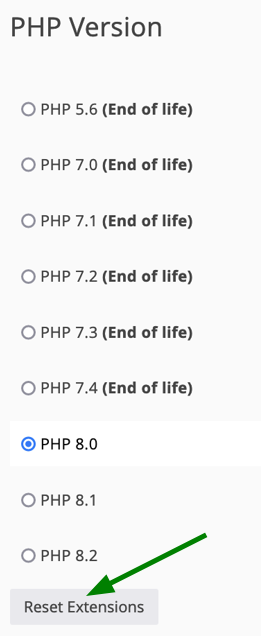
4. Should you need to reset PHP configuration you currently have, select the domain name and hit Reset Extensions. That will revert all the changes and roll your PHP settings for the domain in question back to the default state:
How to work with a php.ini file
Apart from the PHP Tweaks plugin, you may need to alter some of the settings using a php.ini file. One of the most common requests is to increase memory_limit, post_max_size, and upload_max_filesize limits which can be done with the help of a php.ini file. You may edit the system php.ini file following this guide:
If you prefer text guidelines, please use the below steps:
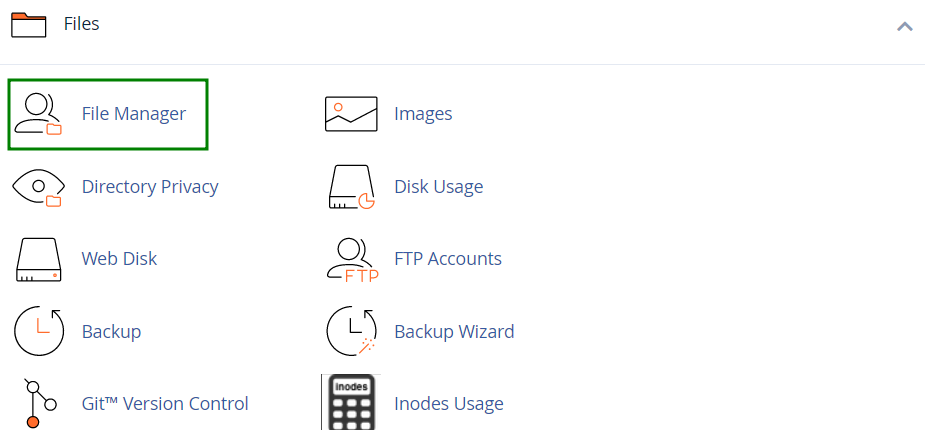
1. Log in to your cPanel account and navigate to the Files section >> the File Manager menu:
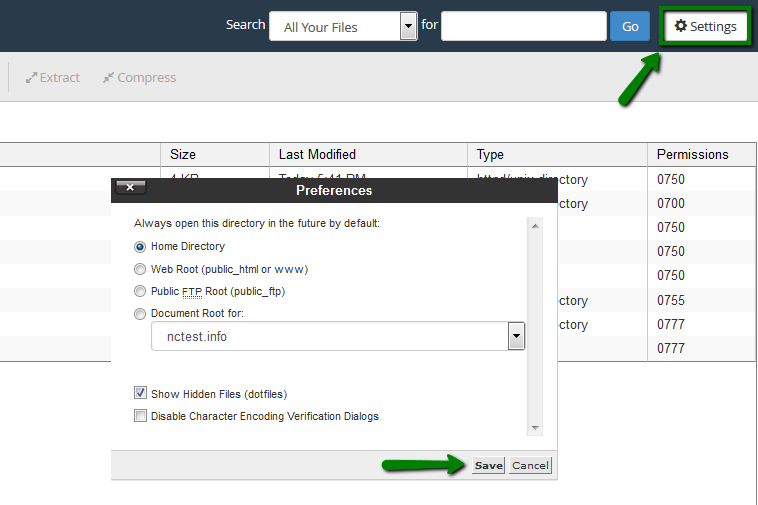
Make sure that you enabled the Show Hidden Files (dotfiles) option in the Settings menu:
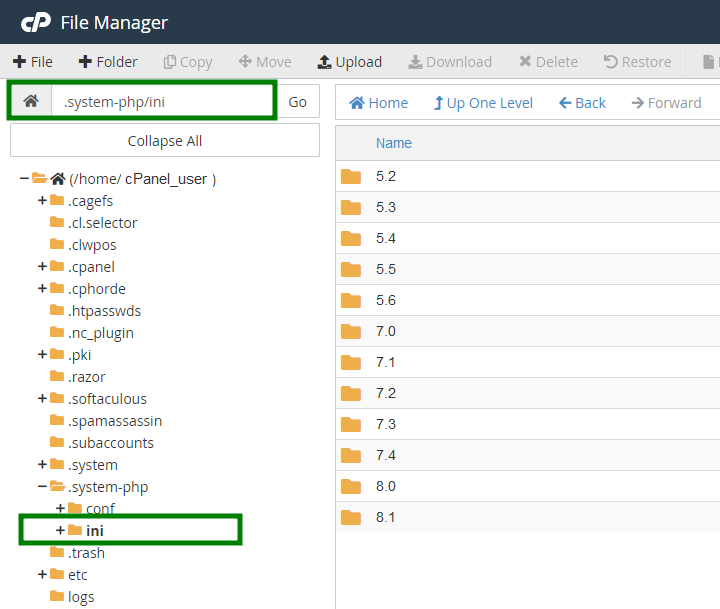
2. Navigate to the following directory /home/cPanel_user/.system-php/ini:
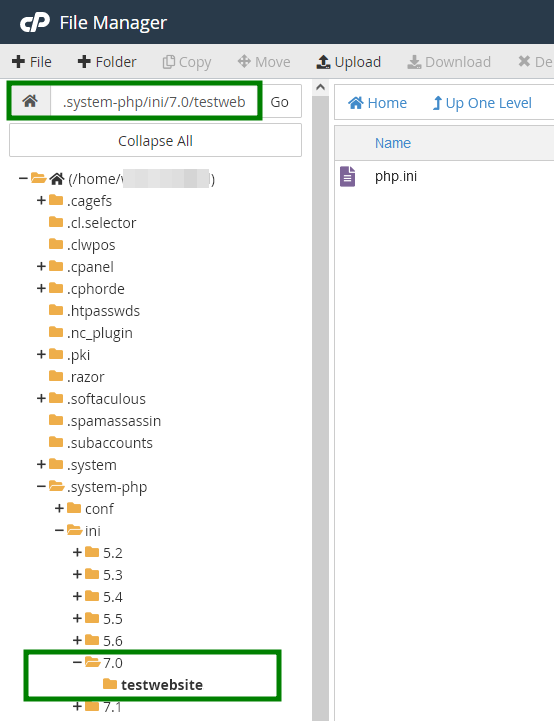
3. Here you need to select the PHP version you have set for your domain and the domain name itself. Thus, in our case, the full destination path will look like /home/cPanel_user/.system-php/ini/7.0/testwebsite.com:
NOTE: If you need to edit the php.ini file for an addon domain, you should also select the PHP version you have for the addon domain and navigate to the addon's subdomain directory. It is the subdomain that was created while adding the addon domain to the hosting account. The subdomain can be checked in the Domains cPanel menu. In this case, the full path will look like /home/cPanel_user/.system-php/ini/7.0/AddonSubdomain.
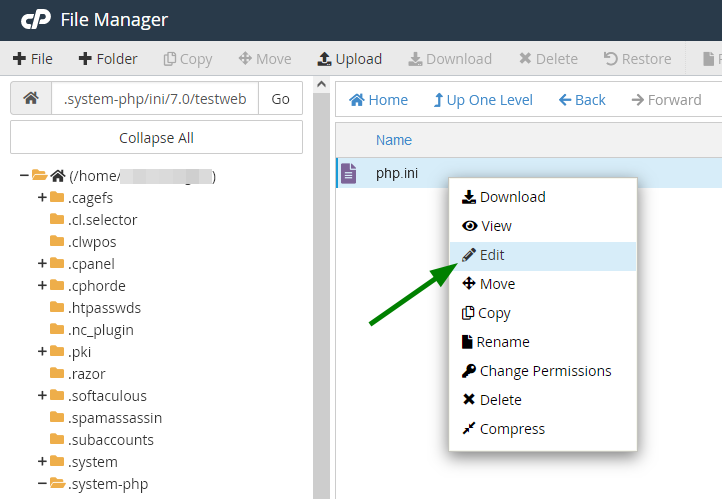
4. Now, right-click on the php.ini file and select Edit:
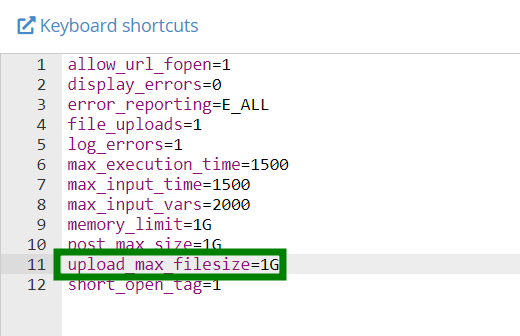
5. Here, you can find and edit the needed value or/and add a new necessary limit. In this example, it is upload_max_filesize:
6. Once all the required changes are performed, hit Save.
To check the current PHP configuration, refer to this article.
That's it!
Need any help? Contact our HelpDesk