
No time to install SSL? Try our installation service.
PrefaceAfter the SSL certificate is issued, it should be implemented on the web server to enable HTTPS connections. Upon issuance, the Certificate Authority (Comodo/Sectigo) will email the certificate files; these files will also be available for download from your Namecheap account as described here.
This article will cover certificate implementation for Node.js and Express. You can jump to the appropriate sections from the Table of Contents below.
Table of ContentsCurrently, the LTS version of Node.js is 10.15.0 and the latest version of Express is 4.16.4. These versions will be used and referred to throughout this guide.
Note: This guide also assumes basic understanding of JavaScript since Node.js is a JavaScript runtime environment, as well as basic Node.js and/or Express concepts.
These files should be uploaded to your server (or wherever the Node.js application is located) before proceeding to the next steps:
The private key is generated prior to certificate activation, typically at the same time as the Certificate Signing Request (CSR). Even if you have the private key, it is worth checking that it is the correct one by matching it with your SSL certificate in this tool.
Please note: While the files can be placed into any directory, make sure the directory that holds the private key is not public. The private key is meant to be stored securely on the server without any public access.
If you are unsure where to find the private key, we suggest checking out this article. In case the private key is lost or there is no way to retrieve it, you can always reissue your certificate with a new CSR and key pair.
Important: When downloading certificate files from your Namecheap account, you will also receive a .p7b (PKCS#7 certificate) file. This file is not the private key and will not be needed for installation.
In most cases, the most straightforward way is preferred, which is reading the SSL certificate files from the file system as shown below:
const fs = require('fs'); const cert = fs.readFileSync('./path/to/the/cert.crt'); |
The paths to these files can be relative or absolute. Feel free to use the Path module to create the paths instead of using simple strings.
Below is an example setup when the files are being loaded:
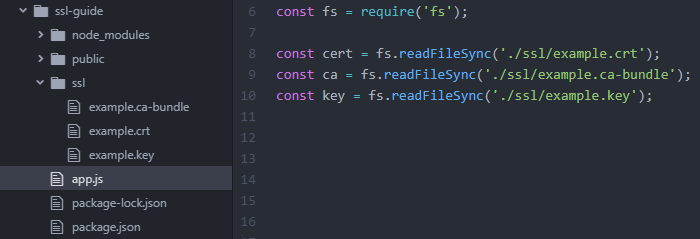
In this example, the ssl directory was created specifically for SSL-related files, and the files are read from it. The cert, ca and key constants hold the respective representations of the SSL certificate, CA bundle, and private key files.
Important: Several certificates in a single file (which is typically needed for the CA bundle file) are supported from Node.js version 5.2.0. If you are using an earlier version of Node.js, you will need to provide an array of CA certificates as shown below.
The version of Node.js you have installed can be checked by running node -v.
If you are using Node.js 5.2.0 or higher, you can skip this section and jump straight to the HTTPS on Node.js or HTTPS on Express.
In case you are using a version of Node.js prior to 5.2.0, you can follow the instructions below to split the CA bundle into separate SSL certificates.
You can manually separate the .ca-bundle file into separate certificate files using any text editor and load them into an array. Or, you can separate the .ca-bundle file within your app. Examples of both are provided below:
Using multiple CA certificate files:
const ca = [ |
If you separate the files manually, make sure to provide them in the same order they are in the .ca-bundle file.
Separating the file within the app:
const caBundle = fs.readFileSync('./ssl/example.ca-bundle', {encoding:'utf8'}); |
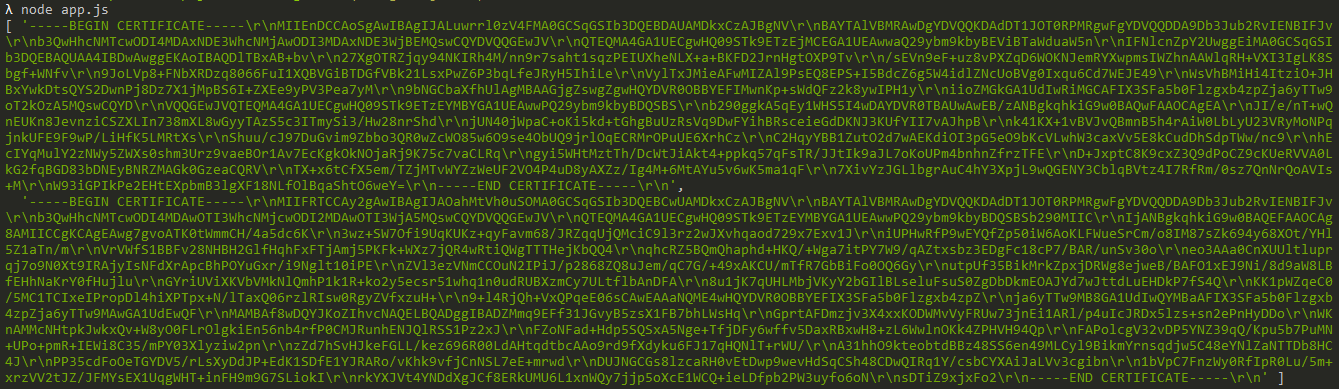
The result of running the above code should be an array of certificates as shown below:
The HTTPS server is created using the https.createServer() method, which takes in an options object as its first argument, and the request listener callback as the second one. The options object should contain the following properties:
Additional options can be added to the object if needed.
Please note: If you have the certificate in .pfx (PKCS#12) format, you can use it by providing an options object with the pfx property containing the pfx file, and a passphrase property if needed.
As always, you can create the object before calling the method, or you can pass an anonymous object with the required properties, shown below:
let options = { |
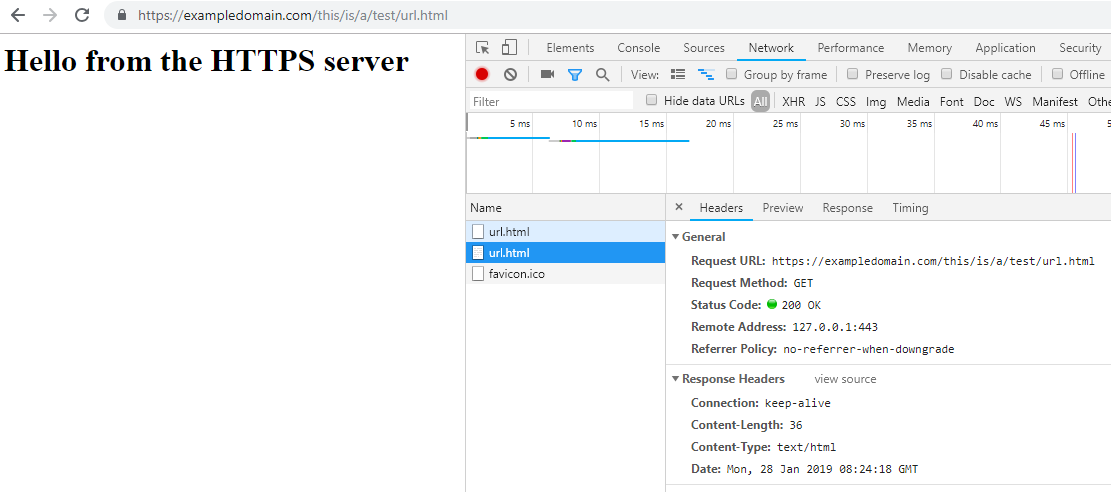
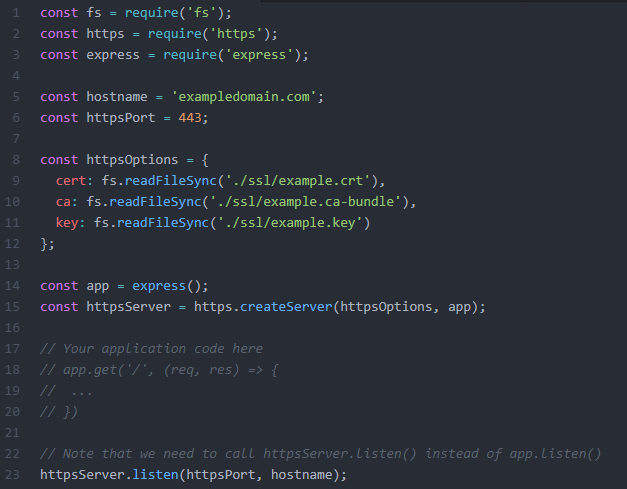
In the end, the boilerplate server code should look something like this:
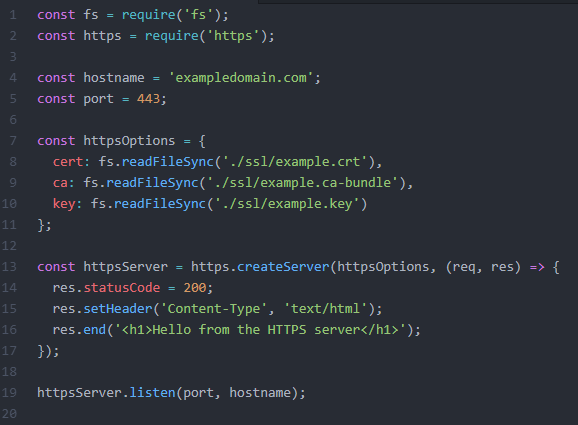
Here we import the certificate files into an object on lines 7-11, then pass this object to the createServer method on line 13 which creates the HTTPS server, and finally call the listen() method on line 19 to start the server.
Make sure to restart your Node.js application if it was already running to apply the changes.
To start the application, you can simply run node
This completes the setup! You can use the following tool to check the SSL certificate installation by entering the corresponding hostname and port you are using: https://decoder.link
Redirecting to HTTPS
To redirect HTTP requests to HTTPS, you will also need to set up an HTTP server with the HTTP module.In essence, redirecting an HTTP request to another URL requires two things: the corresponding response code (301 or 302) and the “Location” HTTP header with the URL that should be used instead.
Below you can find an example of how such an HTTP server can be set up:
const http = require('http'); |
In the above example, we also pass the requested URL from req.url.
If you were serving all content via HTTP before and would like to switch to HTTPS and set up the redirect, the easiest way should be just changing your HTTP server to an HTTPS server, and creating an additional HTTP server that will redirect the requests.
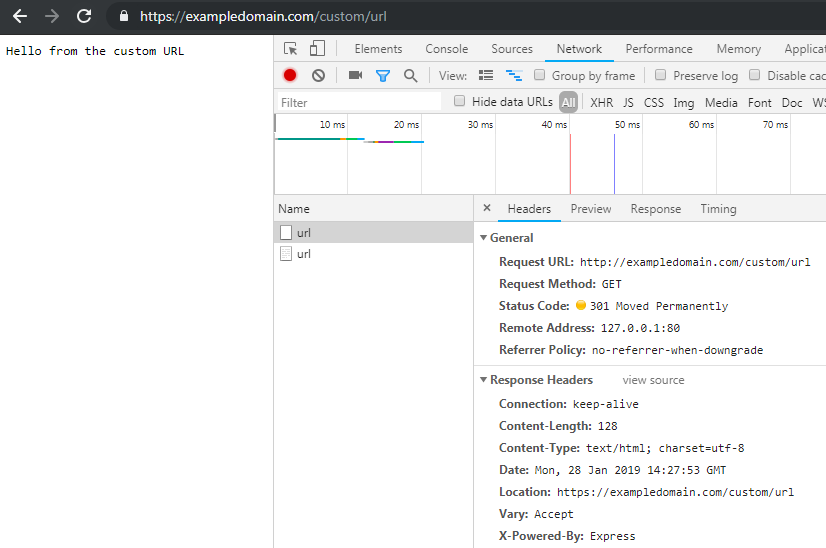
Below you can see a request made to such an HTTP server with a custom URL:
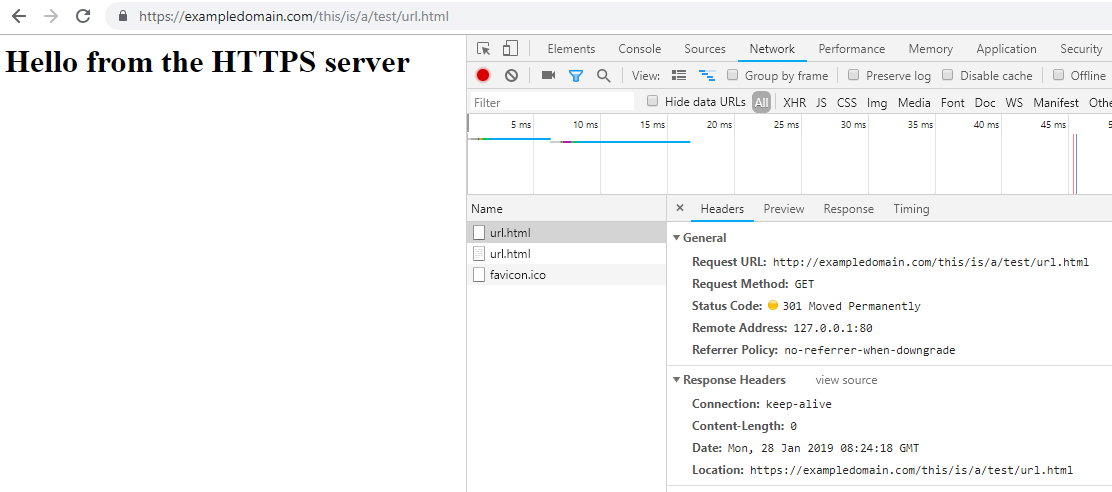
And then correctly passed to the HTTPS server:
Using HTTPS with Express requires creating an HTTPS server with the HTTPS module from Node.js. Your Express app should be passed as a parameter to the https.createServer() method:
const https = require('https'); |
The httpsOptions parameter is an object identical to the one used in this section of the guide: Creating an HTTPS server.
An example of the full code to create an HTTPS Express app is shown below:
At this point, you will have an Express app that is accessible via HTTPS. Note that the aforementioned example application will listen only to HTTPS requests on the specified port. If you also need your app to listen to HTTP requests, you will need to set up an HTTP server in a similar manner using http.createServer() from the HTTP module.
Make sure to restart your application if it was already running to apply the changes.
To restart the application, you can simply run node
This tool can be used to check SSL certificate installation: https://decoder.link
Redirecting to HTTPS with Express
To redirect any HTTP requests to HTTPS, you will also need to have an HTTP server running that can listen to HTTP requests. The server should be created using the HTTP module, and passed your Express app as a parameter in the same way the app was passed for the HTTPS server.To create a redirect to HTTPS, you can set up a middleware function that will check if a request is made via HTTP and redirect it to HTTPS if it is. Below is an example of such middleware using the built-in redirect() method from Express:
app.use((req, res, next) => { |
Below is an example of a full Express app code that uses HTTPS and redirects all HTTP requests to HTTPS:
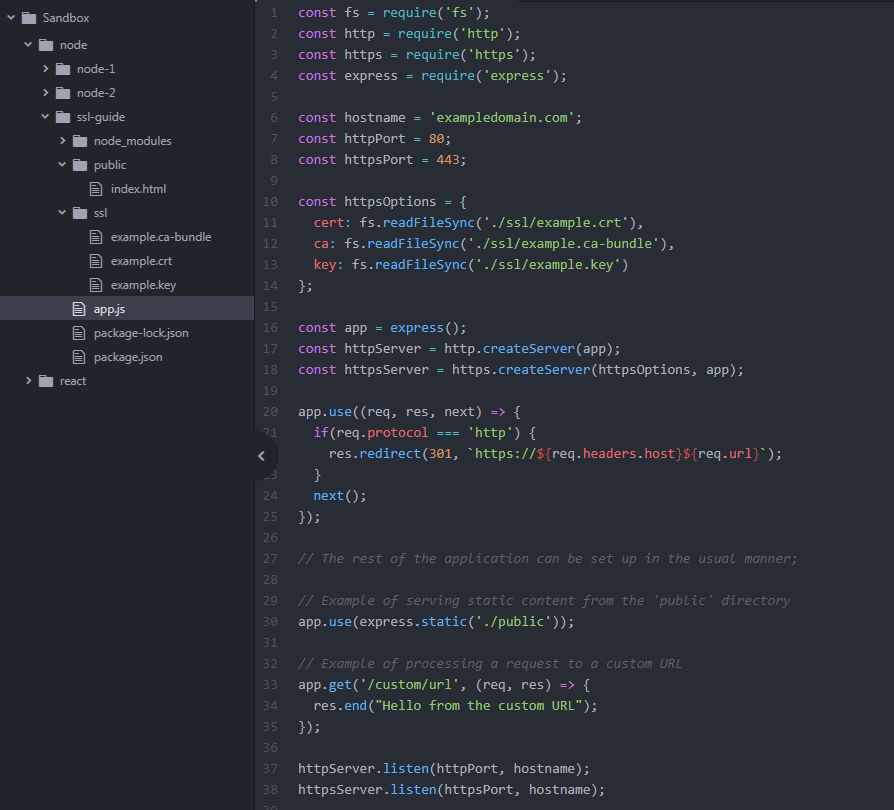
In the code above, we set up our Express app on line 16, then created HTTP and HTTPS servers on lines 17 and 18. Lines 20-25 create the middleware that redirects the HTTP requests to HTTPS. Lastly, as an example, we set up some server code on lines 30-35, and start the HTTP and HTTPS servers by calling their listen() methods on lines 37 and 38.
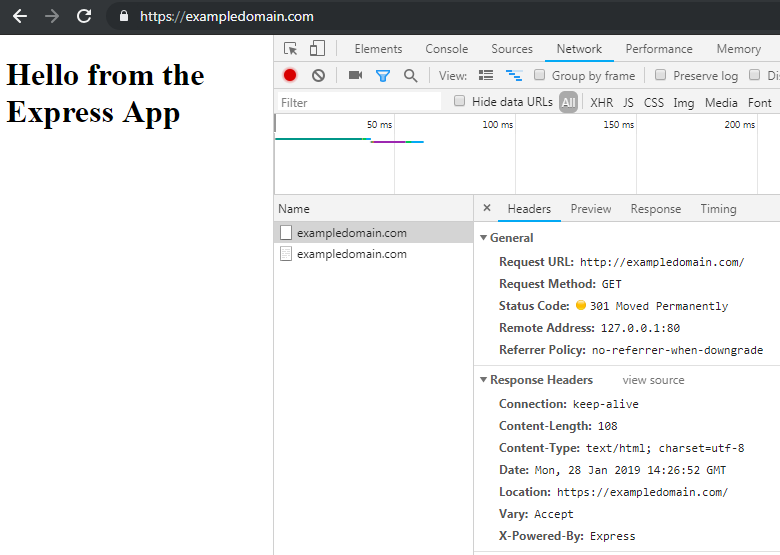
Below you can see the screenshots that illustrate the HTTP requests for both static files and custom URLs, which are redirected correctly.
Static files:
Custom URLs:
Need help? We're always here for you.