| Subtotal | $0.00 |
USD
U.S. DollarEuroBritish PoundCanadian DollarsAustralian DollarsIndian RupeesChina Yuan RMBMore Info →

| Subtotal | $0.00 |
It is possible to have scheduling and contact information synchronized with a single ActiveSync exchange account. However, if partial configuration is required, this article will provide you with step-by-step instructions on how to setup CalDAV/CardDAV accounts on an android device running Android 5+
NOTE: Before setting up email account this way, make sure you already have required DNS records and mailbox created.
NOTE: If you've set up a Two Factor Authentication (2FA) for your mailbox and wish to set up CalDav and/or CardDav, you will need to set up an Application Specific Password. Please refer to this article for more information.
This tutorial will explain how to configure CardDAV and Caldav accounts using DAVdroid application.
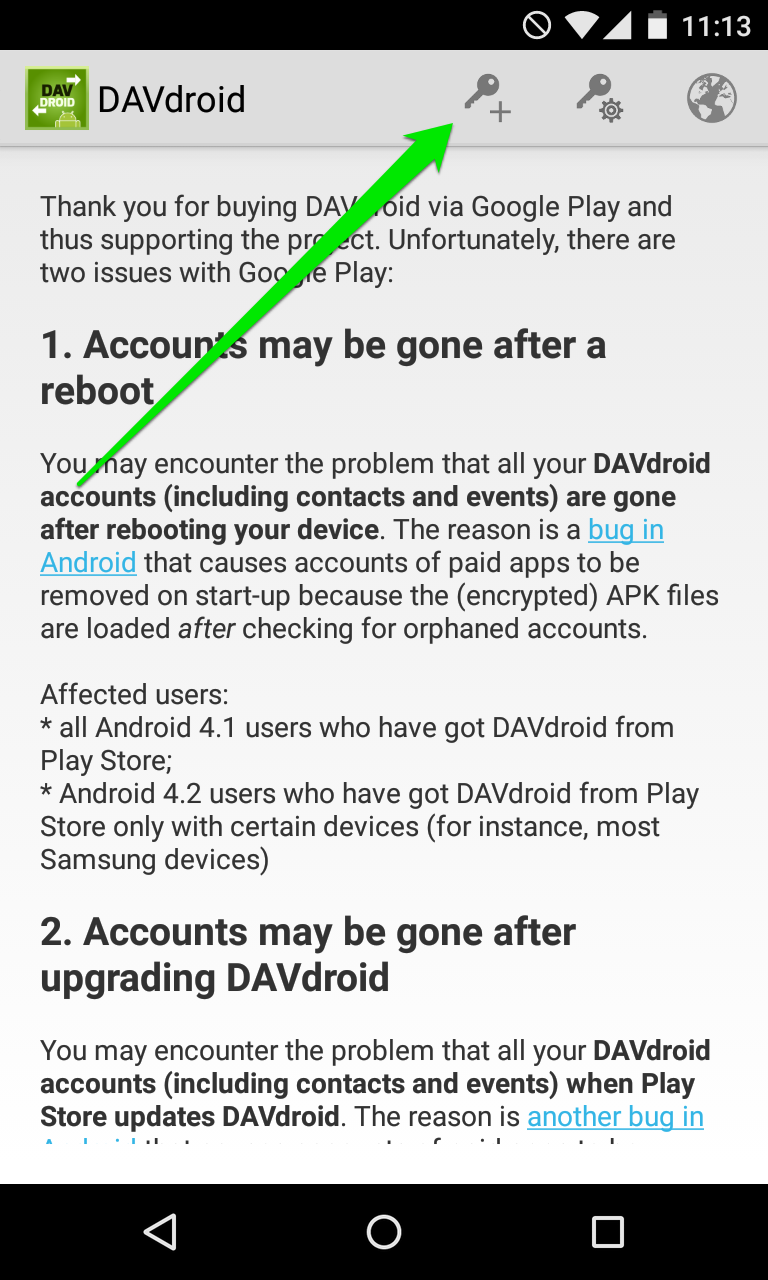
1. To start with, open the application and tap the icon that is shown on the screenshot:
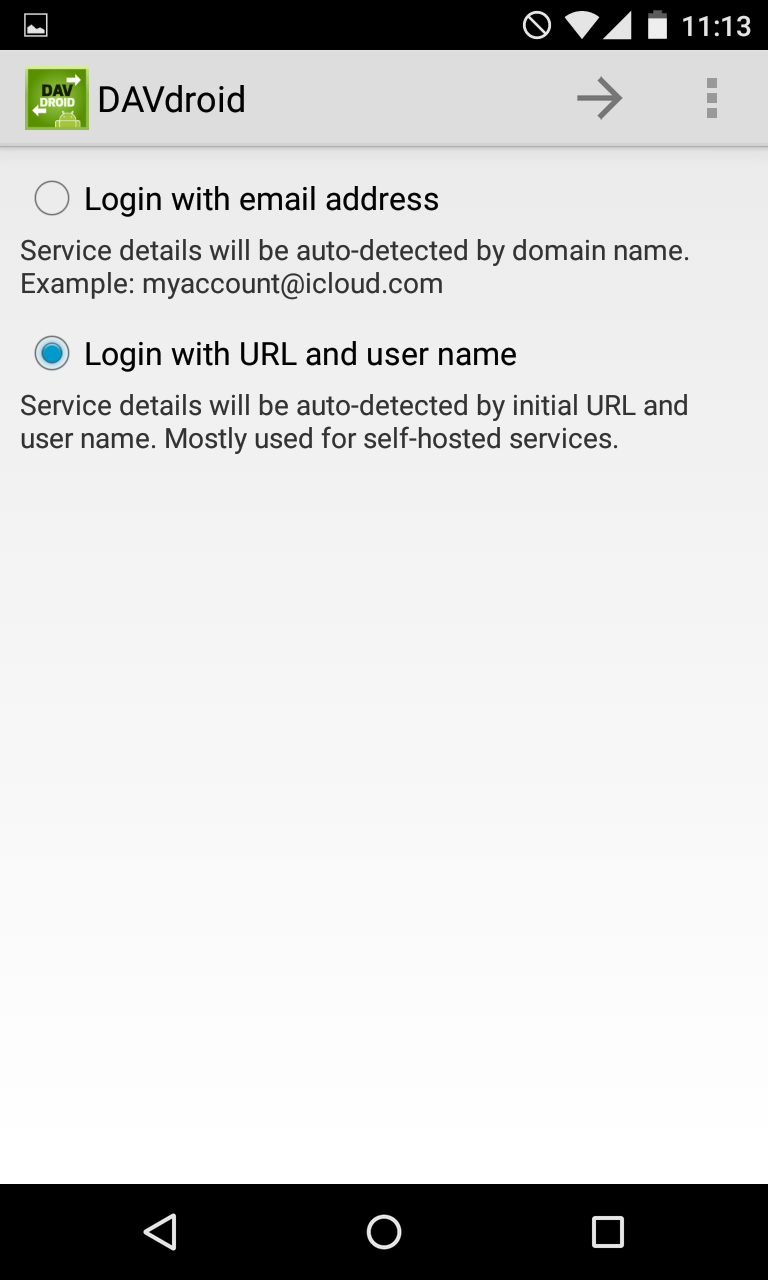
2. You will be redirected to the screen prompting to choose from two options.
Make sure to select the second one, Login with URL and user name and tap the arrow icon on the top of the screen to proceed to the setup menu:
3. Here you will be prompted to indicate the server settings. Make sure to use the following:
Server: https://dav.privateemail.com
Username: full email address
Password: password for this mailbox
NOTE: if by any chance you do not remember your password, you can easily reset it using the following tutorial.
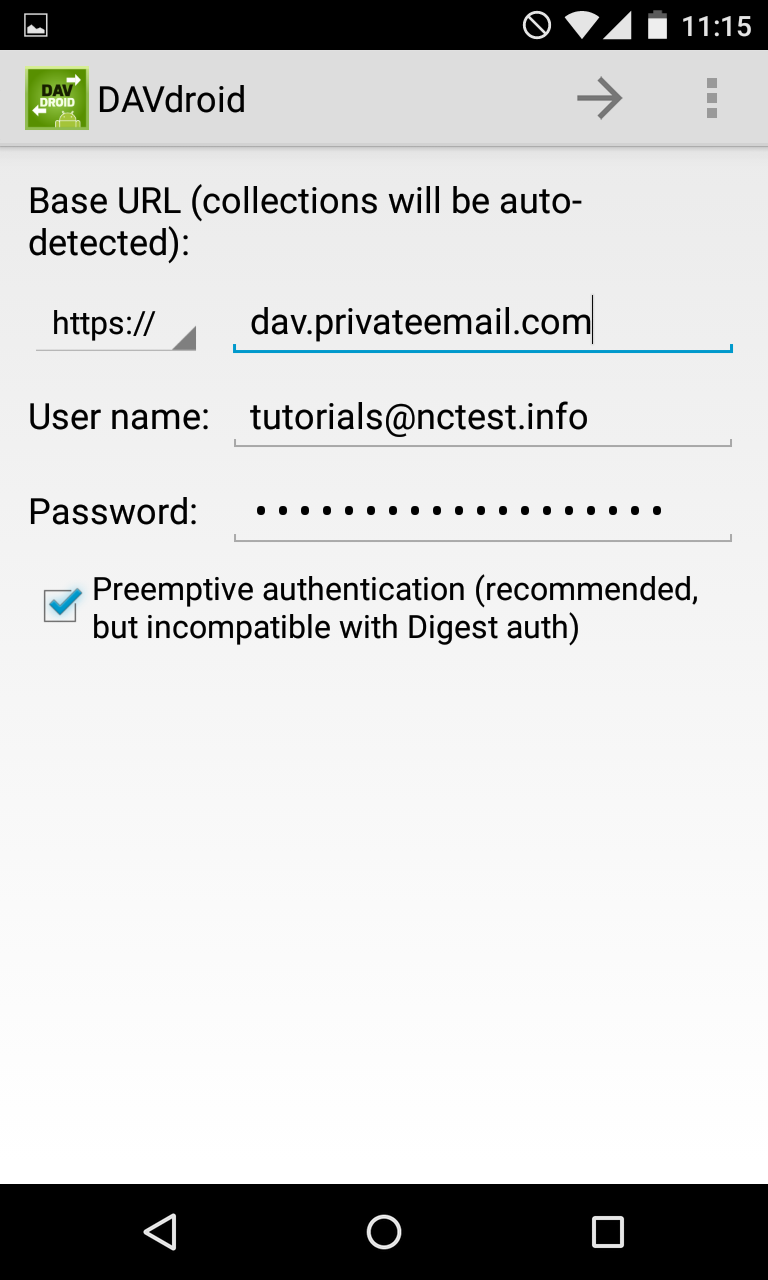
4. Once done, tap the arrow icon to proceed to the next step.
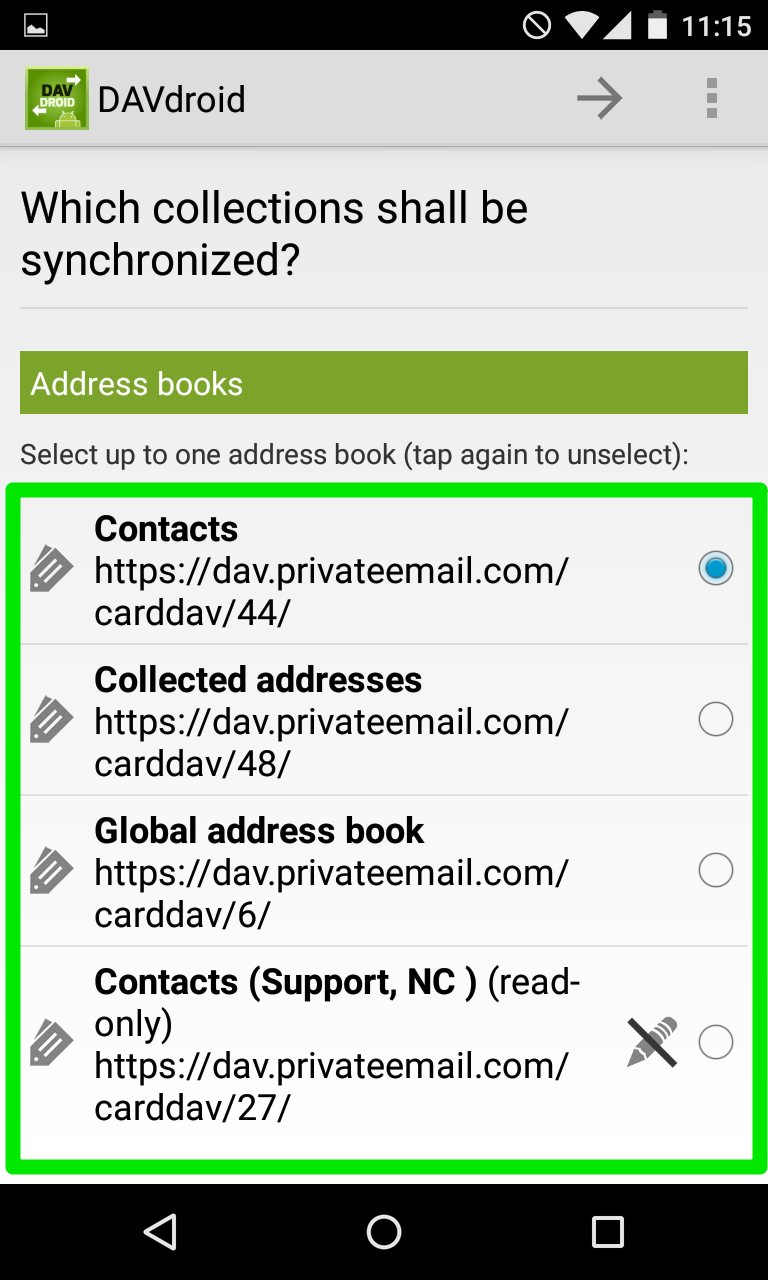
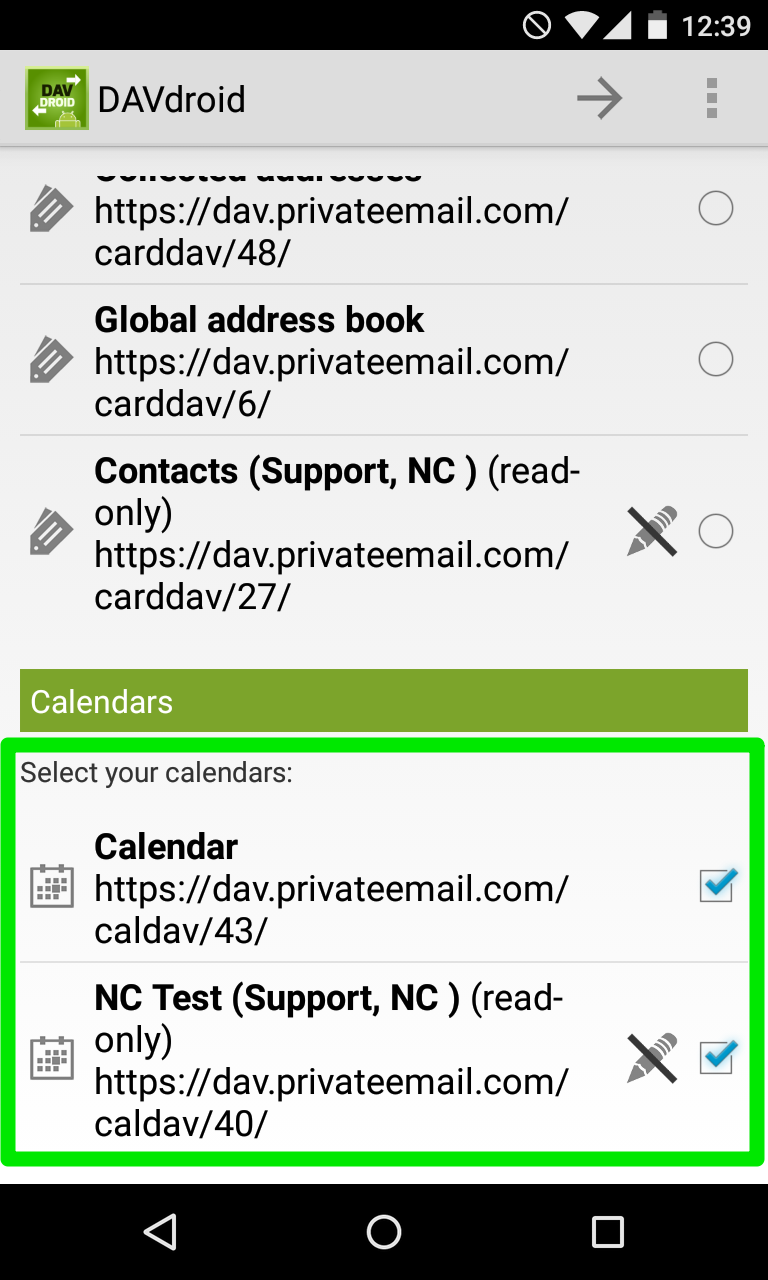
5. Once the settings have been verified, you will be asked to choose which calendars and contact groups to synchronize.
Simply choose the desired options here:
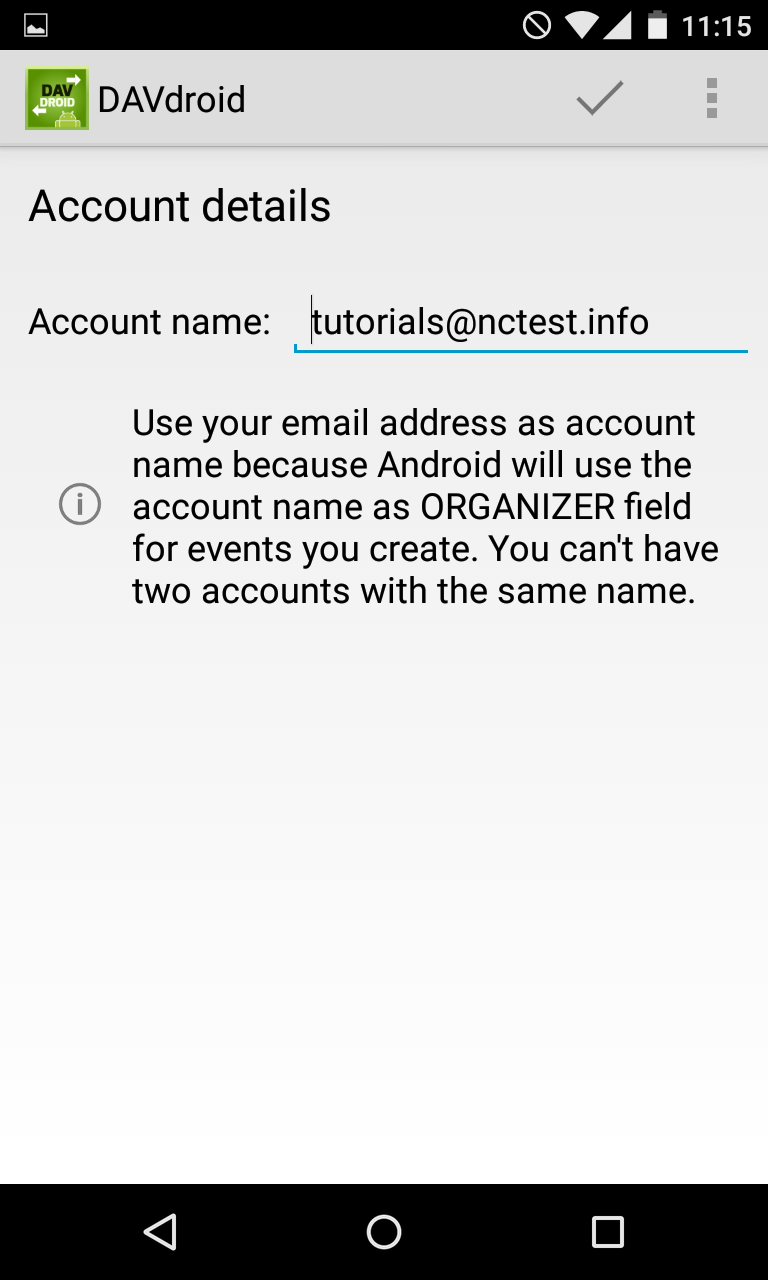
6. Once ready, tap the arrow icon to choose the account name and finish the setup:
That's it!
Need any help? Contact our HelpDesk
Need help? We're always here for you.