
The following article provides with step-by-step instruction on how to configure CalDAV/CardDAV accounts on iPhone device.
It is still possible to have scheduling and contact information synchronized with a single ActiveSync exchange account, however if partial configuration is required, follow the steps below.
NOTE: If you've set up a Two Factor Authentication (2FA) for your mailbox and wish to set up CalDav and/or CardDav, you will need to set up an Application Specific Password. Please refer to this article for more information.
CalDAV account setup
1. Open Settings >> Mail menu:

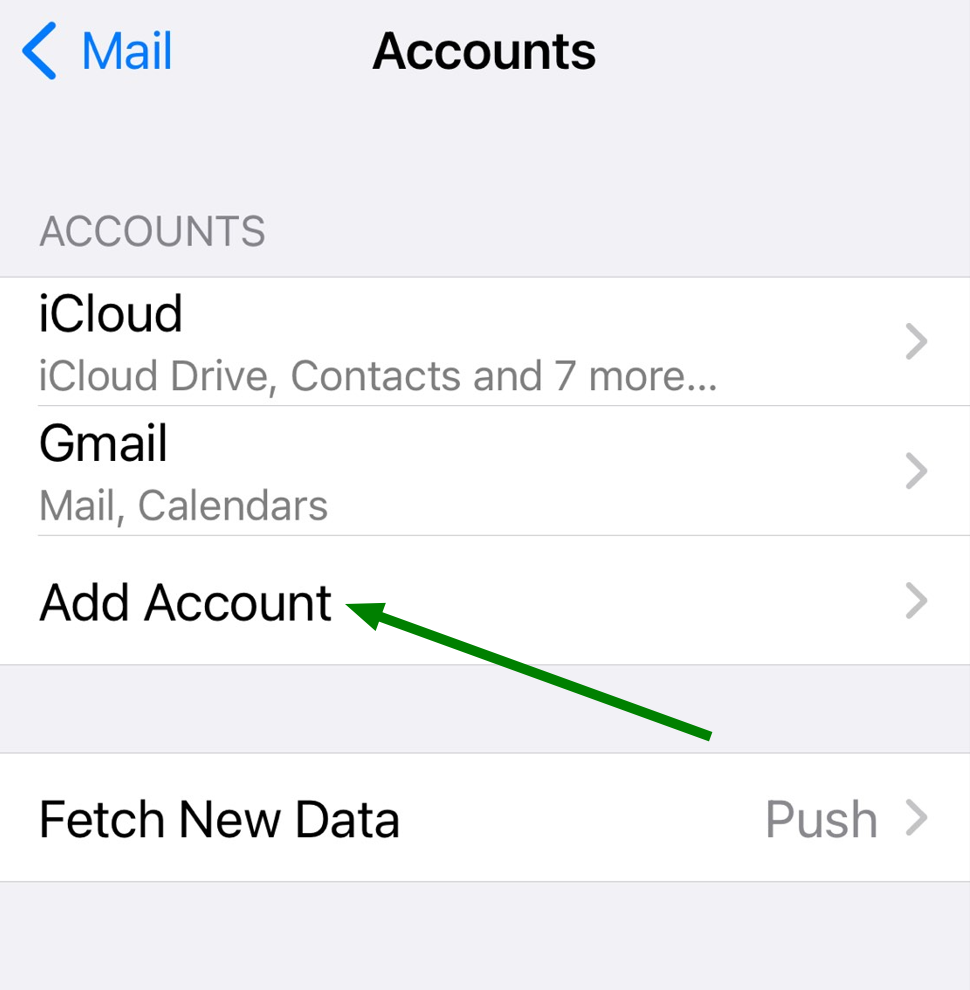
2. Then tap on Accounts menu:

3. Next, click on Add Account menu:
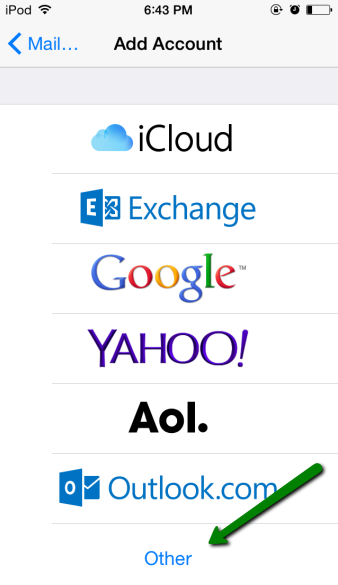
4. Choose Other option:
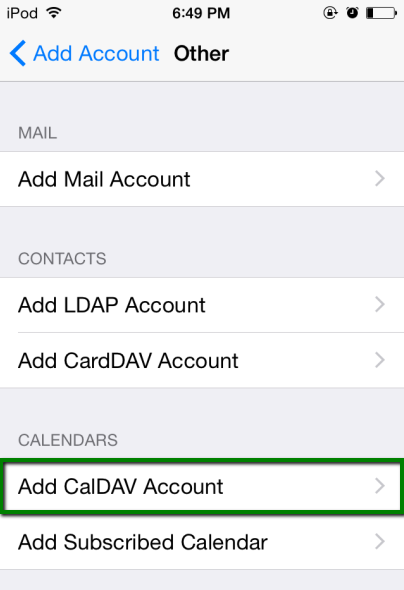
5. Once there, tap on Add CalDAV account menu:
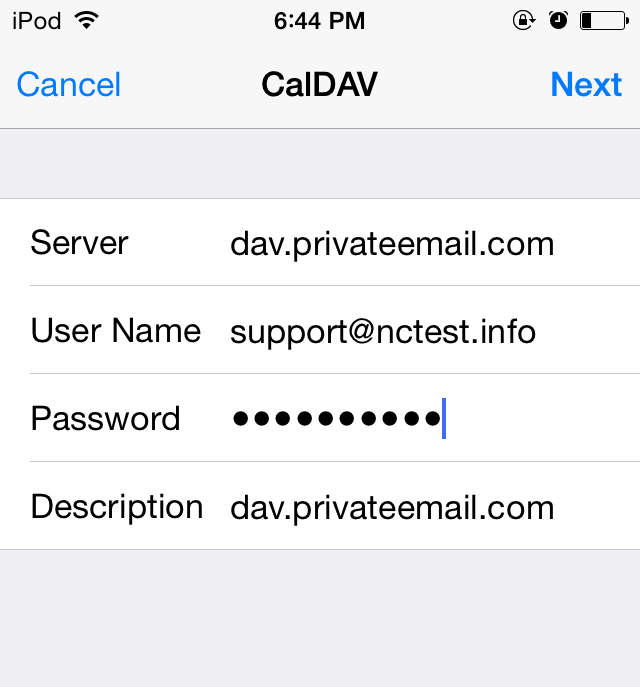
6. Use the following settings for your account setup:
Server: dav.privateemail.com
User Name: full email address
Password: password for this mailbox
Description: any description you wish
CardDAV account setup
1. Open Settings >> Mail menu:
2. Then tap on Accounts menu:
3. Next, click on Add Account menu:
4. Choose Other option:
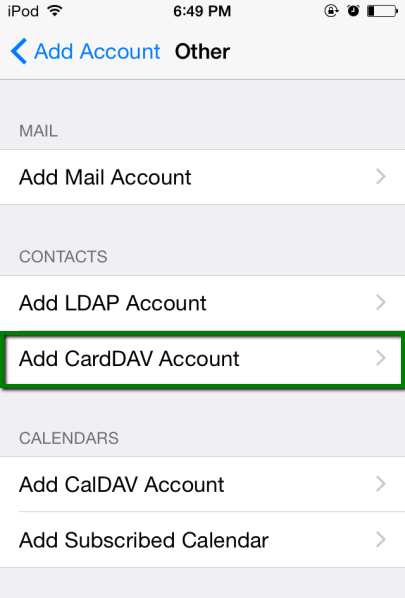
5. Once there, tap on Add CardDAV account menu:
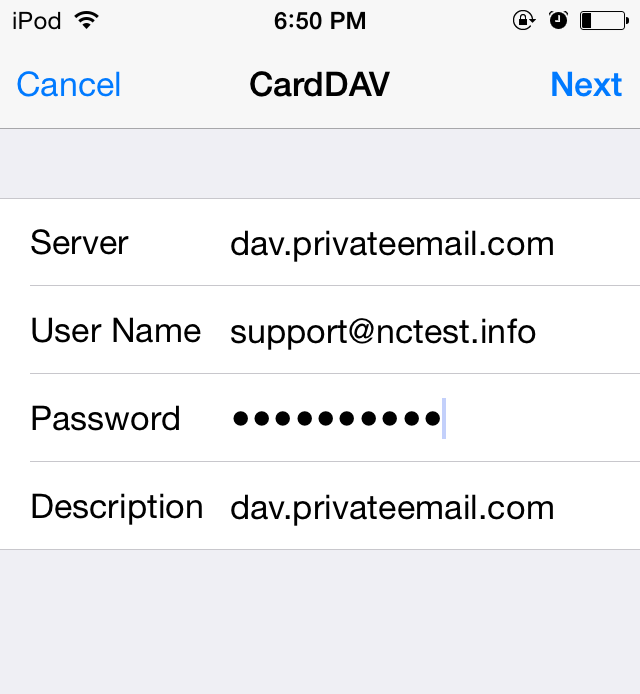
6. Use the following settings for your account setup:
Server: dav.privateemail.com
User Name: full email address
Password:password for this mailbox
Description: any description you wish
That's it!
Need any help? Contact our HelpDesk
Need help? We're always here for you.