The mail service from Google allows you to send emails using your unique domain name.
NOTE: Before proceeding with DNS configuration, make sure to order a Google Workspace subscription and pass ownership validation for your domain.
NOTE: Customers who subscribe to Google Workspace after April 2023 use one MX record. It has no impact on mail delivery or reliability. You can set Google Workspace MX records manually following the next steps:
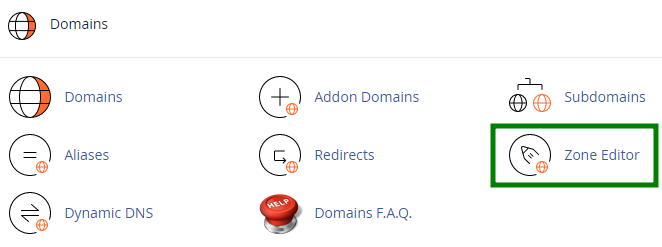
1. Log in to your cPanel account >> Zone Editor menu:
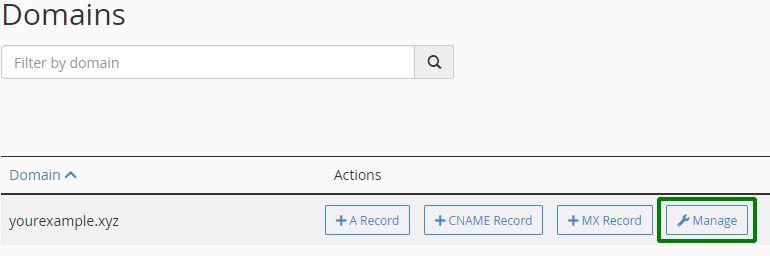
2. Click the Manage button next to the domain which DNS zone you would like to edit:
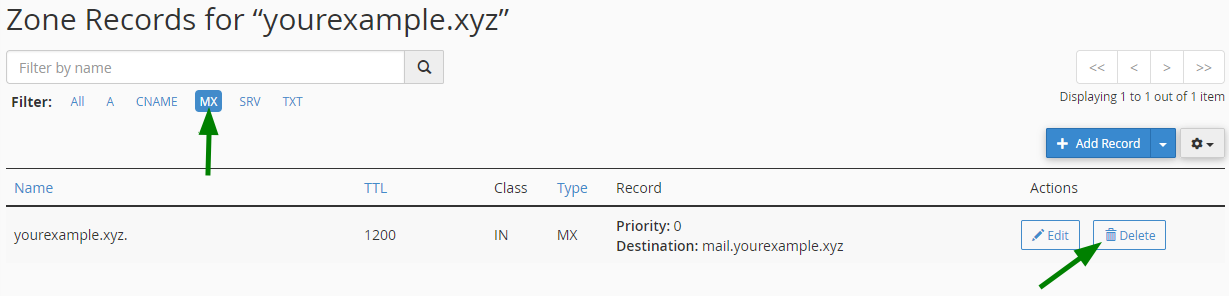
3. Switch to the MX tab and delete the existing MX records by clicking Delete next to the record:
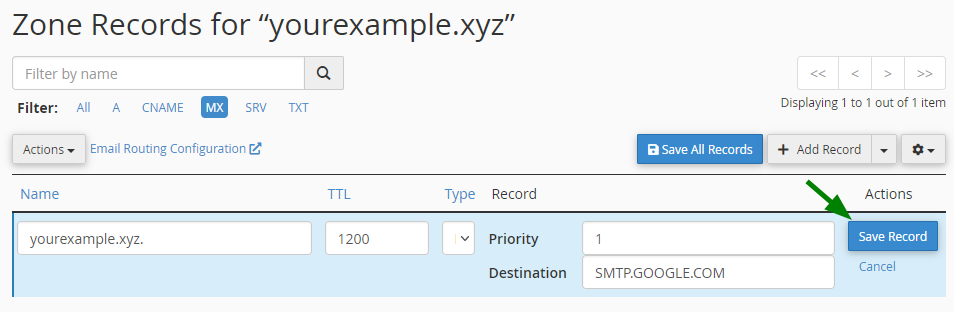
4. Add the following Google MX record using the +Add Record button:
| Priority | Value |
|---|
| 1 | SMTP.GOOGLE.COM |
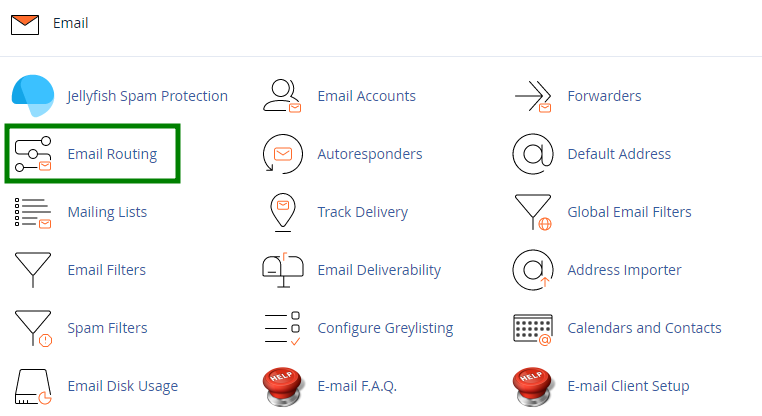
5. Next, go to Email section in cPanel >> Email Routing menu:
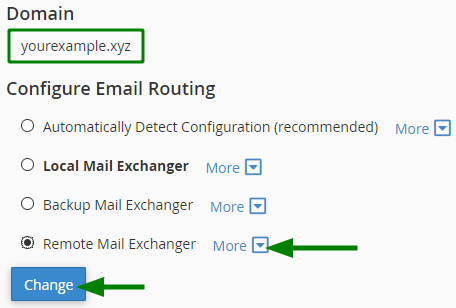
Make sure the required domain or subdomain is selected and set Email Routing to Remote Mail Exchanger >> click Change:
Wait 20-30 minutes for the new records to propagate and then test your mail service.
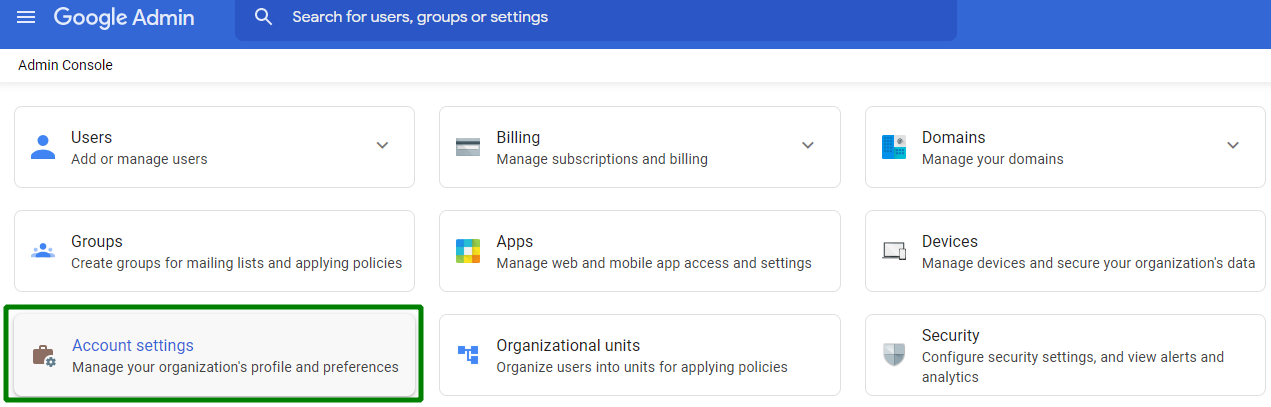
2. Scroll down to the Custom URLs option:
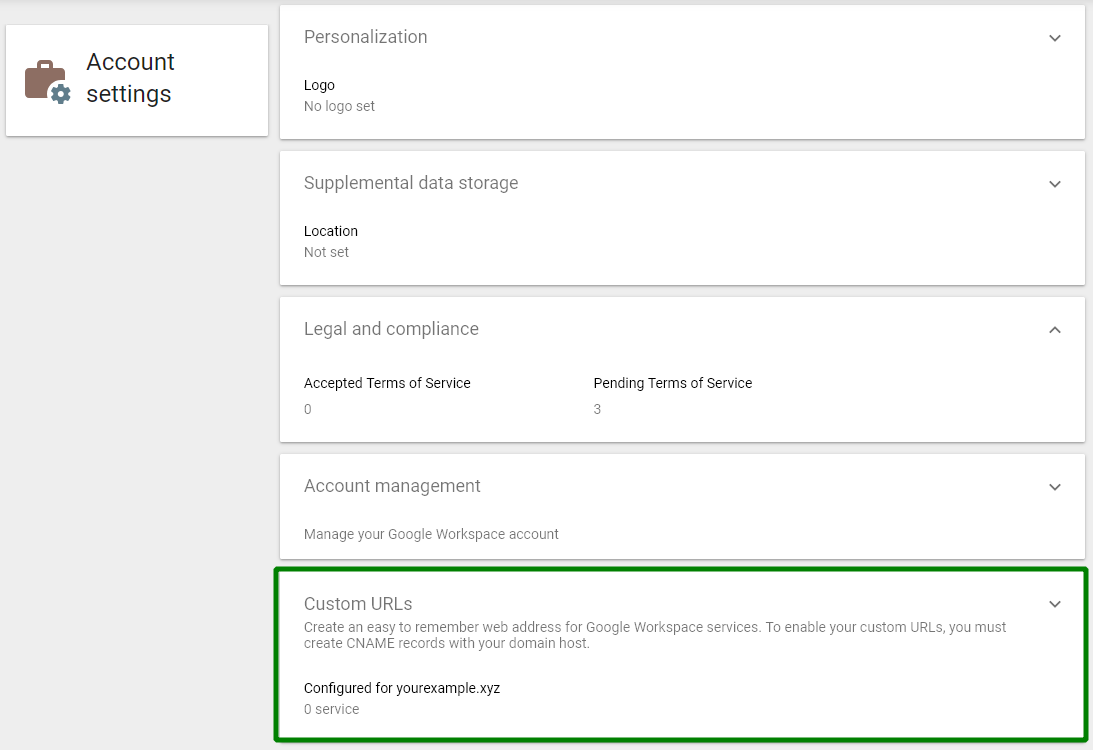
3. Locate Gmail section, switch to the custom option, specify the desired subdomain and hit Save to confirm the change:
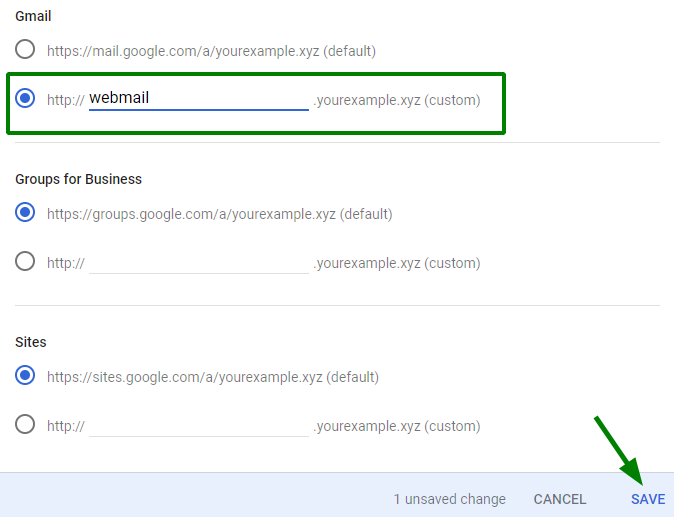
From now on, you will be able to access your email accounts following http://webmail.domain.com link.
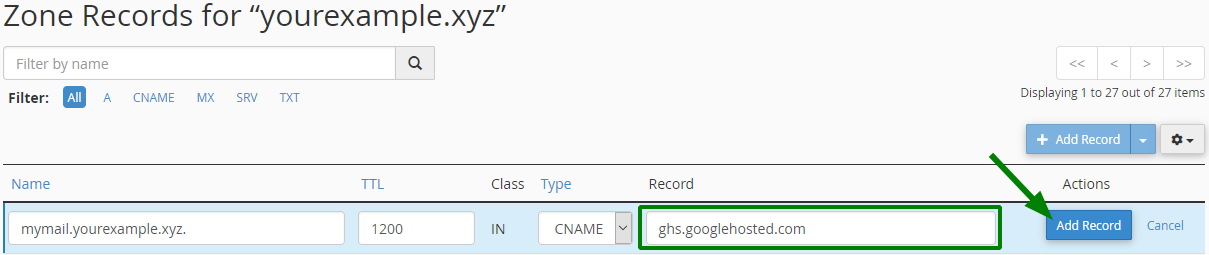
If you wish to use another subdomain for mail access, make sure that you create the corresponding subdomain in Zone Editor menu in cPanel and add a CNAME record with the following value – ghs.googlehosted.com:
That's it!
Need any help? Contact our HelpDesk
