This article is valid for Private Email subscriptions purchased before June 2, 2026.
Email clients are tools which allow you to easily access your email without using the web browser interface.
This tutorial will help you to configure your Namecheap Private Email account using the Microsoft Outlook 2007-2010 email client.
NOTE: before configuring your email through any client, please make sure you first have the required
DNS records and mailbox set up.
Our Private Email service supports the autodiscover feature, which allows you to set up your email account automatically in Outlook. To do this, follow these steps:
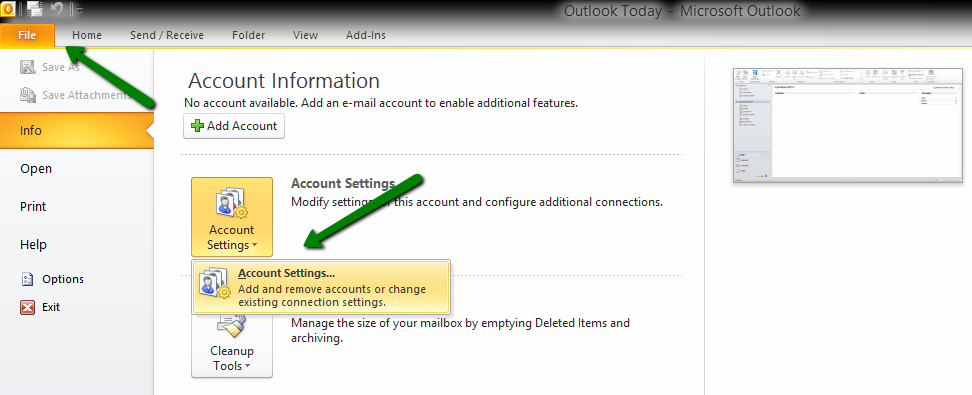
1. After creating a new Outlook account, go to the File tab and click Account Settings; choose Account Settings from the drop-down menu:
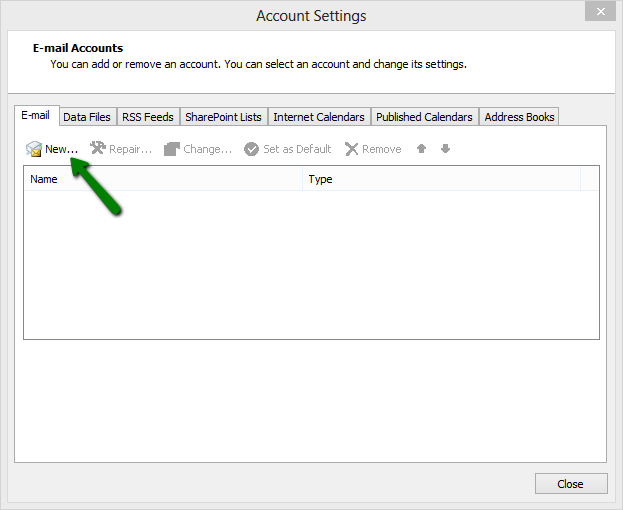
2. Click New in the Email tab:
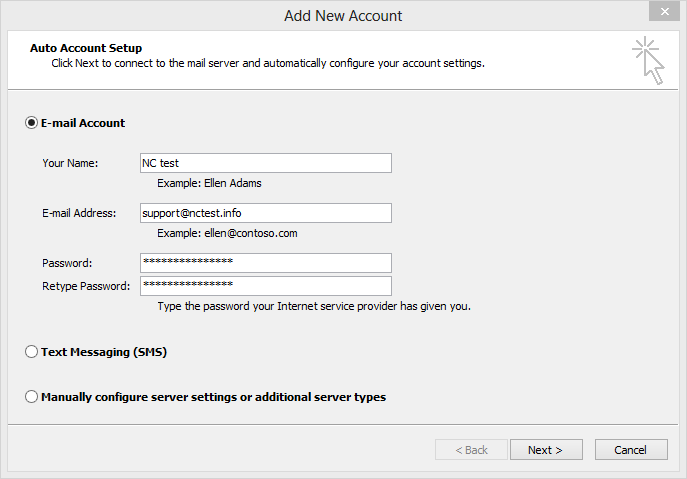
3. Select E-Mail Account and enter your information:
Your Name – the name you would like the recipients of your emails to see
E-Mail Address – your full Private Email address
Password – password for your Private Email account
NOTE: if you have trouble remembering your password, you can easily reset it by following these instructions.
4. Once all the fields are completed, click Next. Disregard any warnings that appear and proceed to the next step.
If you are not able to proceed, you may need to repeat the setup process. You can also try to set up the account manually. To manually set up your email account in Outlook, complete steps 1 and 2 (above), then follow the instructions below:
1. Choose Manually configure server settings or additional server types option and click Next:

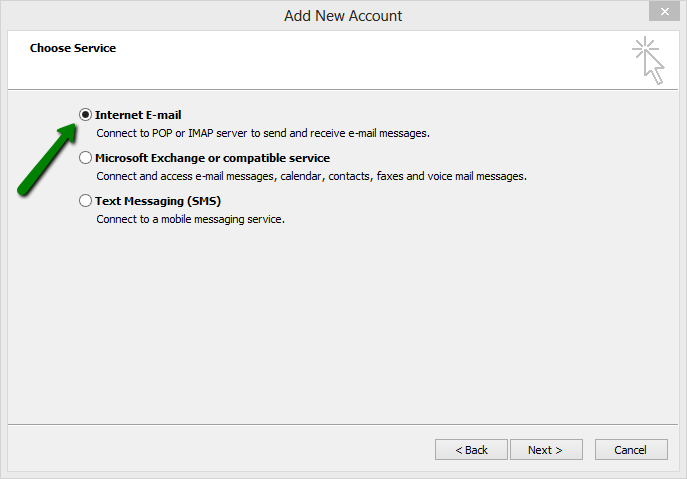
2. Choose Internet E-mail and click Next:
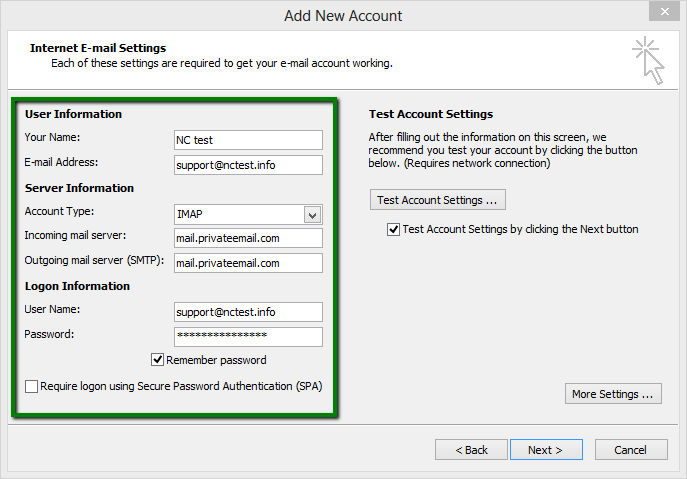
3. Enter/select the following information:
Your Name: the name of your account in Outlook
E-mail Address: your Namecheap Private Email email address
Account Type: select IMAP or POP3 from the drop-down menu
Incoming mail server: mail.privateemail.com (it should not be changed)
Outgoing email server: mail.privateemail.com (it should not be changed)
User Name: your full Namecheap Private Email email address
Password: the password for this email account
Require logon using Secure Password Authentication (SPA): should be unchecked
Or, if you are using a POP3 account:

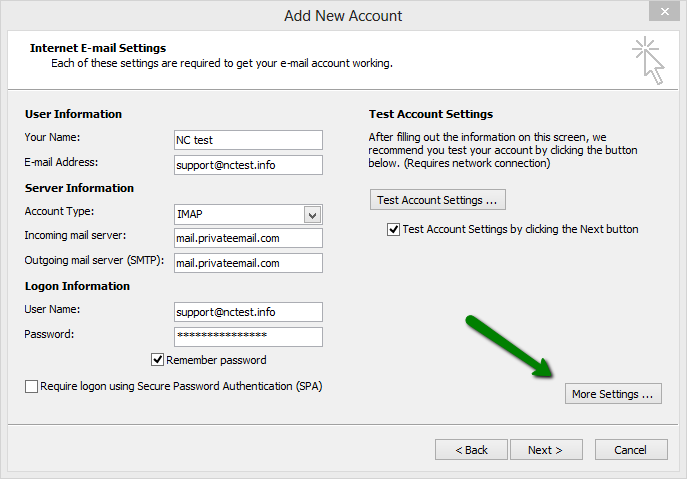
4. Then click More Settings:
5. Go to the Outgoing Server tab and select My outgoing server (SMTP) requires authentication:

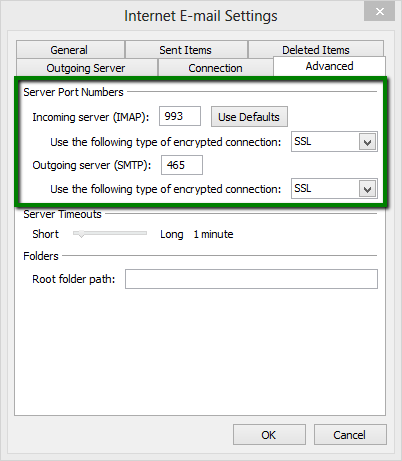
6. Go to the Advanced tab and enter the following Server Port numbers:
Incoming server (if you are using IMAP): 993 port for SSL, 143 for TLS
Incoming server (if you are using POP3): 995 port for SSL
Outgoing server (SMTP): 465 port for SSL, 587 port for TLS
7. Click OK to return to the main window.
8. Click Test Account Settings. If the submitted information is correct, the Status column will display Completed:
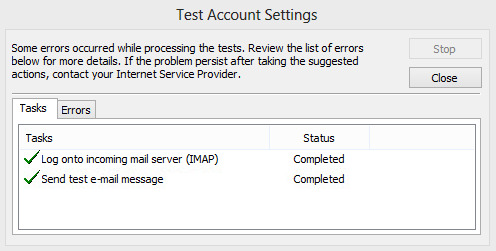
9. If the test was successful, click Close to return to the previous window,
then click Next to finish the setup.
NOTE: If you added a large email account to the Outlook email client, it can cause the application pauses. In order to resolve the issue, please follow this guide.
That's it! Need any help? Contact our HelpDesk
