If you would like to purchase a hosting package, this guide is just for you.
Please follow these simple steps to purchase a hosting plan.
2. Click on the Hosting tab.
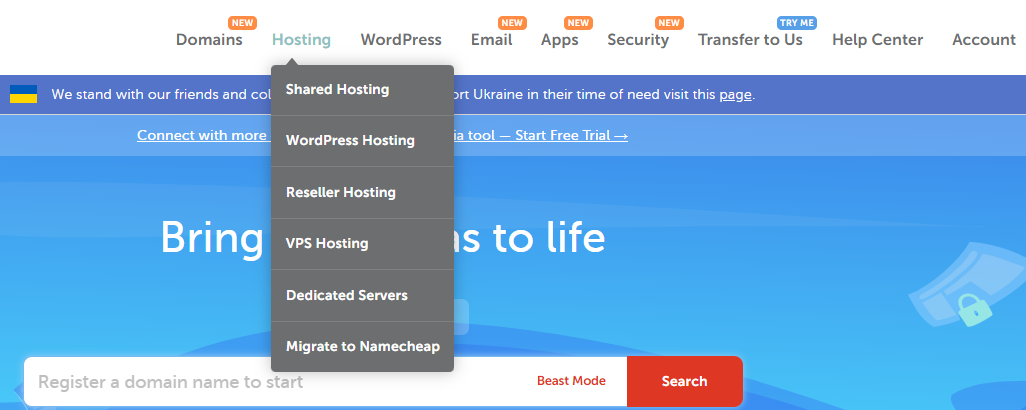
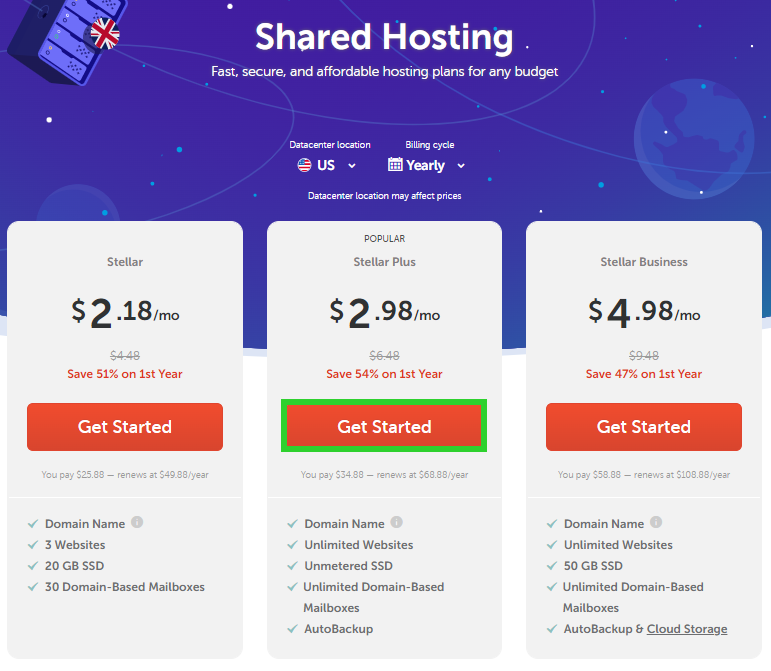
3. Choose the service/package you require, the billing cycle (monthly or yearly) and datacenter location (US, UK, EU or SG) and click Get Started:
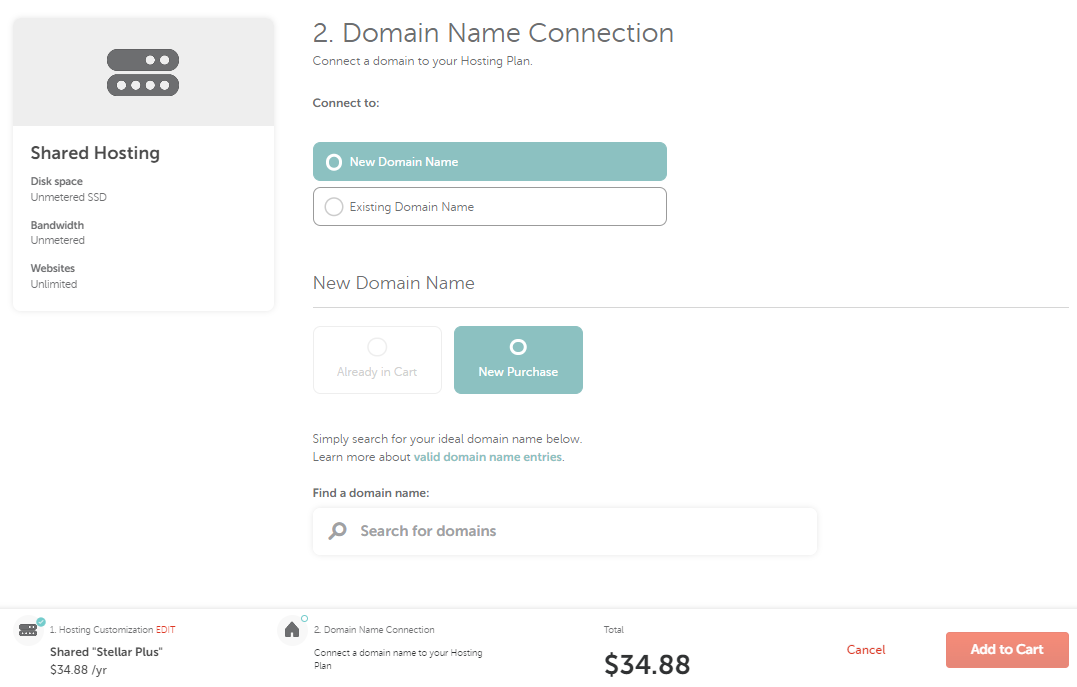
4.Once the plan is selected, you will be redirected to the Domain Name Connection step:
Here you have an ability to connect an already existing domain (Namecheap or third-party) or register a new one.
The New Domain Name option provides a possibility to search for a new domain on that step or connect a domain that might be already present in one's Shopping cart.
NOTE: The Already in Cart option will be greyed out and not clickable if there is no domain in the Cart.
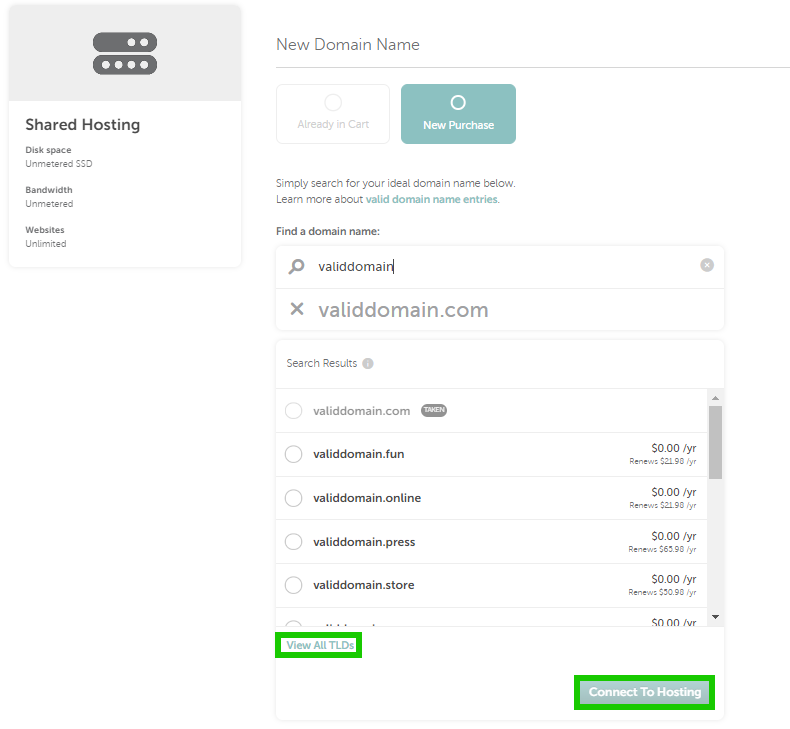
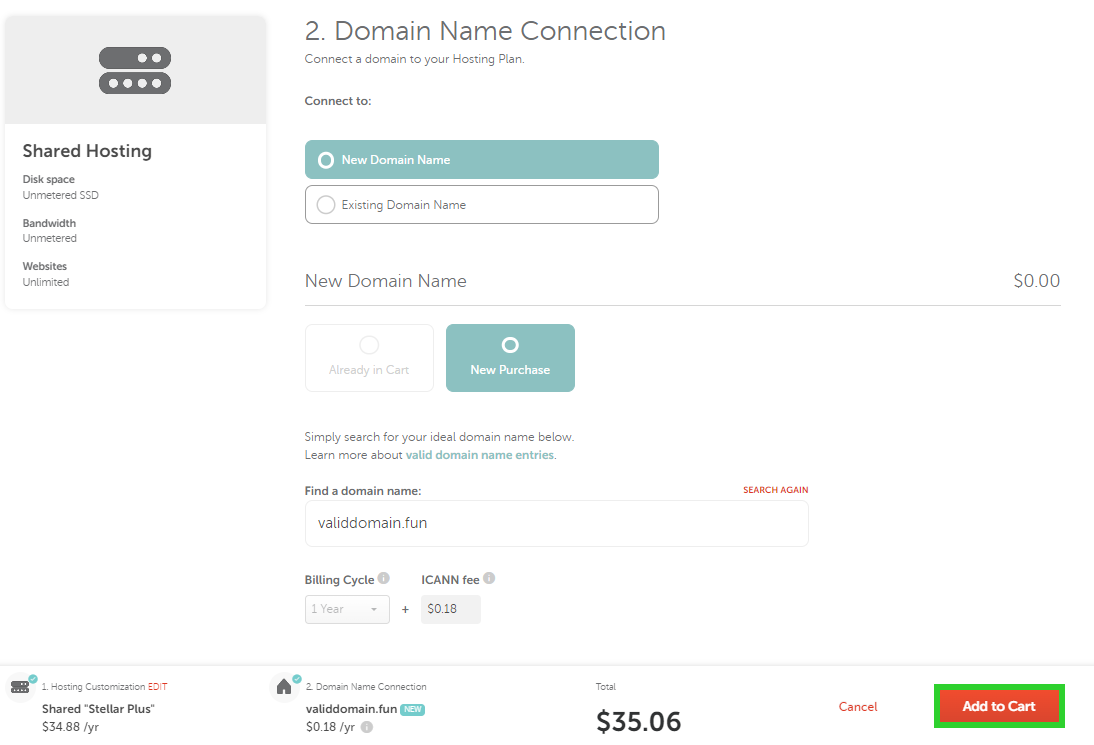
If you choose the New Purchase option, the domain selection will be within one page.
Type the domain into the Search field and then select one of the offered domains or click View All TLDs to select one of them.
5. Click Connect To Hosting to proceed:
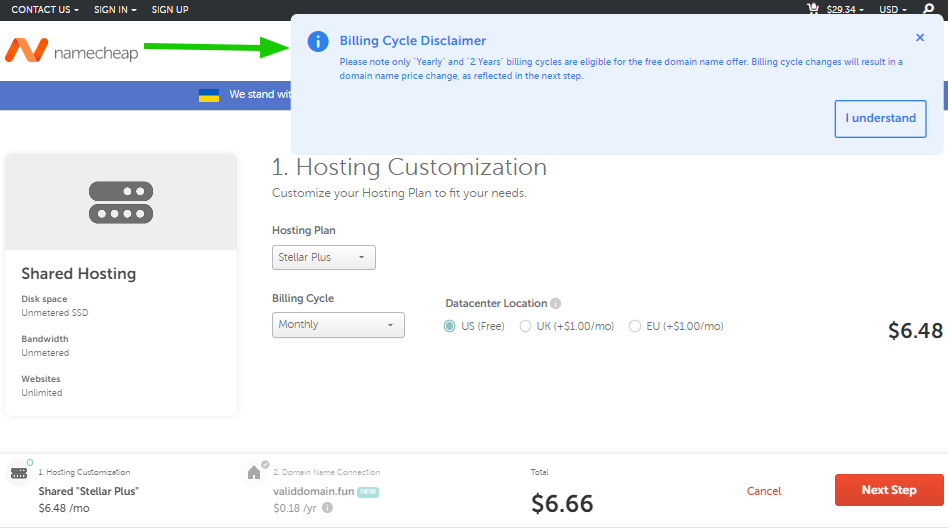
NOTE: In case you decide to change the hosting billing cycle to a monthly one, the price for the domain will be changed. In this case, you will get the corresponding warning:
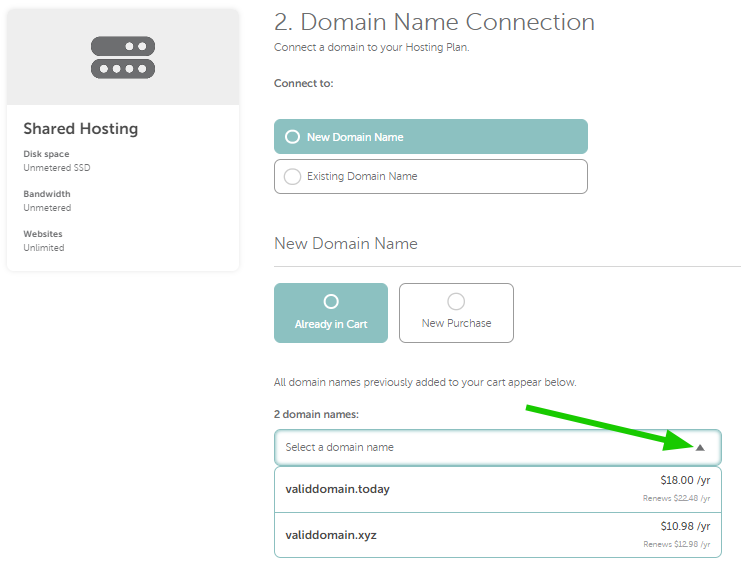
If you have added one or more domains to the Shopping Cart and want to have one of them as the main domain for their hosting, you can use the Already in Cart option.
If there are two or more domains, you will be able to choose which of the domains should be the main domain for the hosting package:
6. After the domain and a hosting package are added, you can proceed with the purchase clicking on the Add to Cart button:
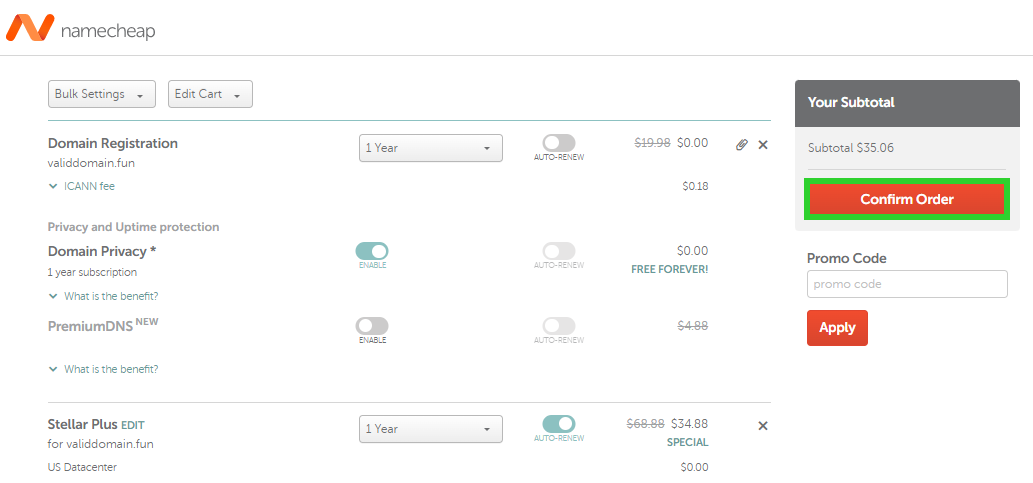
7. On the next step, you can review your order details and apply a coupon if you have one. Click on Confirm Order to proceed to the checkout:
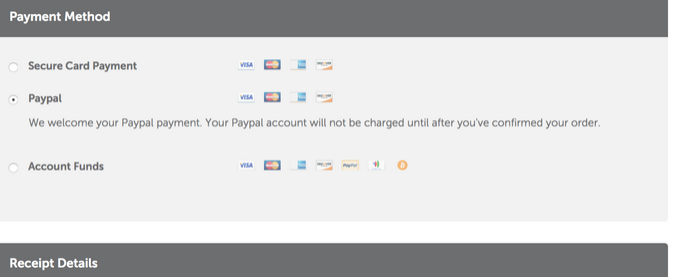
8. Once done, choose the payment method for your hosting package. You can choose one of three payment methods – Credit Card, Paypal or Account Funds:
9. On the next page, you will see the final order listing and will need to agree to our Terms and Agreements. When ready, click on Pay Now:

A Shared hosting account is usually activated instantly, however, in some cases it might take 30 - 60 minutes.
Once your account is activated, you will receive your Hosting Welcome Email
– it will have all your account’s login details, settings, and instructions.
NOTE 1: Before purchasing a new hosting package, make sure that you do not already have a hosting package for the same domain name – this will help you avoid any future confusion.
NOTE 2: If you want to upgrade your current package, please reach out to our Billing/Sales team via Live Chat or billing@namecheap.com email address.
That's it!