$ U.S. Dollar€ Euro£ British PoundC$ Canadian DollarsA$ Australian DollarsRs Indian Rupees¥ China Yuan RMBMore Info
How to remotely connect to a MySQL database located on our shared server
Due to security reasons, remote MySQL connection is disabled on our Shared Hosting servers. However, you can easily set up an SSH tunnel between your computer and our server using an SSH client with the MySQL port 3306 forwarding.
After doing this, you will have port 5522 on your local machine that listens to and forwards to your remote server's localhost on port 3306. Now you can effectively connect to the remote server's MySQL database as if it were running on your local box.
NOTE: If you are trying to connect to PostgreSQL databases, use port 5432 instead of 3306.
Below you can find the steps on how to configure a third-party SSH client (PuTTY) and MacOS and Linux built-in one (Terminal).
NOTE: Make sure that the SSH access is enabled for your account. Feel free to follow this guide to check the settings.
Here is a list of details you will need in the process:
SSH connection details:
Server hostname: server168.web-hosting.com
Port: 21098
cPanel username: tunneltest
cPanel password: cpanel_password
Your server hostname will be different for your account. You can check it in your Welcome Email for your hosting plan.
Your cPanel username and password are what you use to log in to your cPanel account.
The port will be the same for all Shared Hosting servers.
Server-side MySQL details:
Server hostname: 127.0.0.1
Port: 3306
Database name: tunneltest_db
Database user: tunneltest_user
Database password: db_user_password
Your server hostname and port will be the same for all Shared Hosting servers.
Your database name, user, and password are what you’ve specified while creating the database in the MySQL Databases menu. If you are not familiar with this menu, feel free to check this article.
Tunnel details:
Local IP: 127.0.0.1
Local Port: 5522
Remote IP: 127.0.0.1
Remote Port: 3306
Your local IP address and port may be changed, according to your preference.
Since some of our customers are running local MySQL servers on the 3306 port, let’s use the 5522 port in this example to ensure that the Local Port is not used by any service.
Your remote IP address and port should match the server hostname and port from Server-side MySQL details and cannot be changed.
Client-side MySQL details:
Server hostname: 127.0.0.1
Port: 5522
Database name: tunneltest_db
Database user: tunneltest_user
Database password: bCsLHA5xs8AQ
These are the access details you will use at the end of the app or website you are trying to connect to the database remotely.
Your server hostname and port should match Local IP and Port from the Tunnel details.
Your database name, user, and password should match corresponding values from Server-side MySQL details.
1. Run the application.
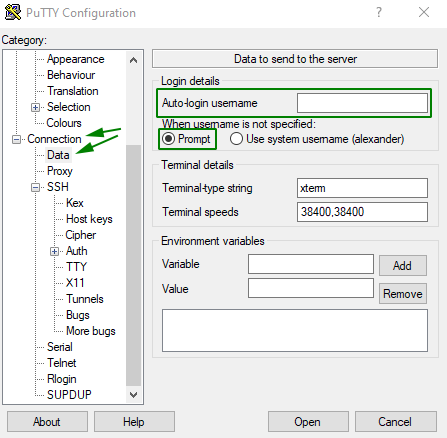
2. Go to the Connection tab of the 'Data' section and make sure that the Auto-login username field is empty (you can also fill in your cPanel username there), and the 'Prompt' option is checked:
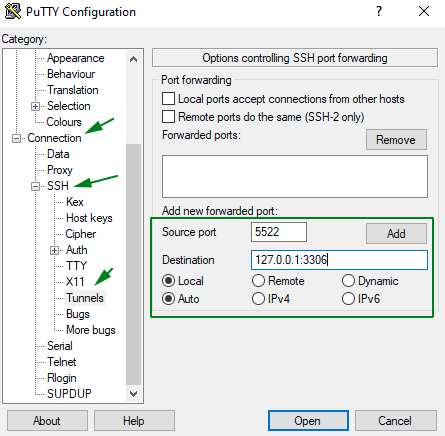
3. Go to the Connection >> SSH >> Tunnels section and fill in the values mentioned in Tunnel details as follows:
Source Port = Local Port
Destination = RemoteIP:RemotePort
Make sure that the 'Local' mode is checked and then click Add:
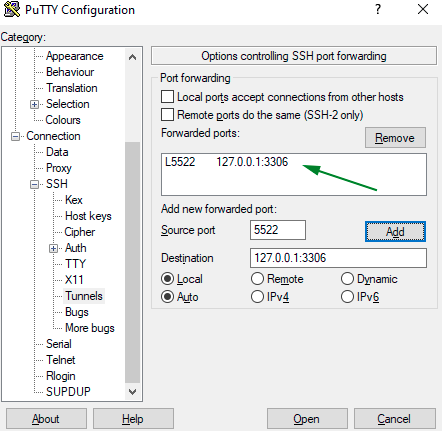
Once you’ve done this, you should see the tunnel in the field above:
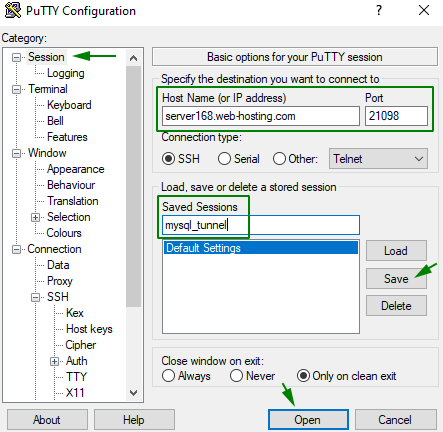
4. Go to the Session tab and fill in the Host Name and Port using the server hostname and port from your SSH connection details. Now choose a name for this preset and type it in in the Saved Sessions field. Click Save to save this configuration.
5. Now click on Open to establish a connection to the server.
NOTE: Since you’ve already saved your session settings, you can skip steps 1-4 next time you wish to open an SSH tunnel.
Simply select the saved preset from the list, click Load and Open to use it.
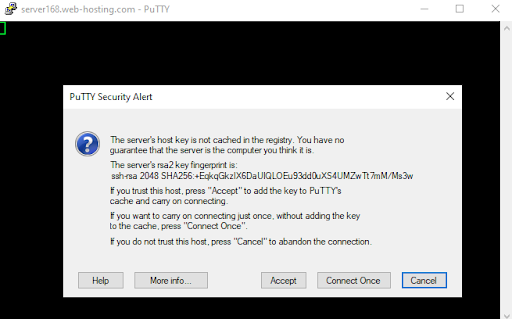
6. When you connect to the server for the first time, a security alert will appear. Click Accept to proceed.
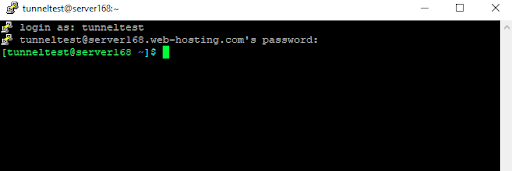
7. You will now be prompted to enter in your cPanel username and password found in your SSH connection details.
NOTE: Symbols won’t appear in the terminal when you type in the password. It's Terminal's way of keeping your password secure.
Once the password is accepted, a server prompt will appear. The SSH tunnel is now established and all connections to localhost over the port 5522 will be forwarded to your hosting account.
NOTE: The SSH tunnel will work as long as this window is active. Do NOT close this window until you are done working with the database.
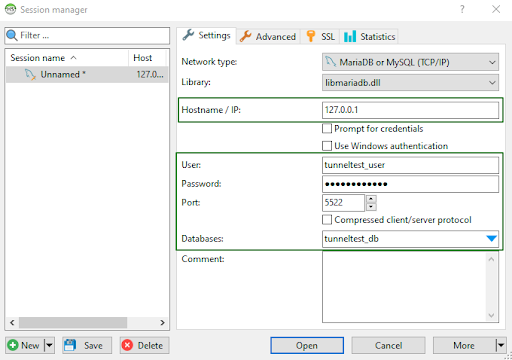
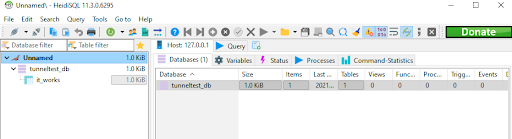
We can now connect to a database on the Shared Hosting server using the Client-side MySQL details with any MySQL client. For example:
"tunneltest@server168.web-hosting.com -p21098" is filled using SSH connection details:
[cpanel account]@[server hostname] -p[port]
"-L 5522:127.0.0.1:3306" is filled using Tunnel Details:
[Local Port]:[Remote IP]:[Remote Port]
The local IP address is not specified in this case and defaults to 127.0.0.1
2. Hit Enter and specify your cPanel password (symbols won’t appear in the terminal when you type in the password - it's Terminal's way of keeping your password secure).
If this is your first time connecting to this server, the following prompt will appear:Are you sure you want to continue connecting (yes/no)?Type yes and press enter to proceed.
3. Once you’ve done this, all connections to localhost over the port 5522 will be forwarded to your hosting account.
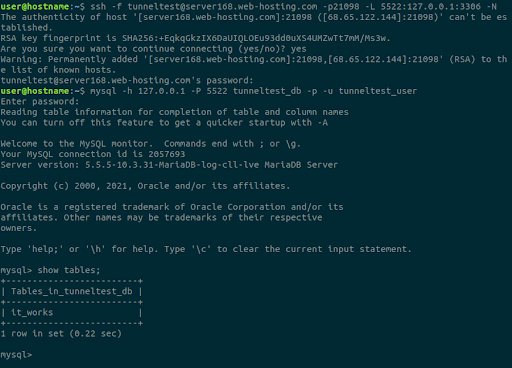
We can now connect to a database on the Shared Hosting server using the Client-side MySQL details with any MySQL client.
Here is an example using a command-line MySQL client:
mysql -h 127.0.0.1 -P 5522 tunneltest_db -p -u tunneltest_user