This tutorial describes the process of creating and managing MySQL and MariaDB Databases in cPanel.
There are two cPanel tools that allow creating databases:
Manage My Databases
menu and
Database Wizard. Let’s find out how each of them actually works.
Manage My Databases menu can be quickly accessed via
cPanel Shortcuts in the Namecheap account.
1. In order to start, log into cPanel and click on the Manage My Databases menu in the Databases section:

2. Once there, find the Create New Database section, then simply indicate the name of the future database and click on the Create Database button:

3. The database is created and ready to use. Now, in order to be able to fill and maintain the database, a Database User should be created and assigned to the database with the correct privileges.
To create a Database User, find the section called Database Users > Add New User and choose the username you wish to assign to your database. Once done, choose a secure password for the User and type it into the corresponding fields:

It is highly recommended to use the built-in Password Generator to create a secure password as shown below:
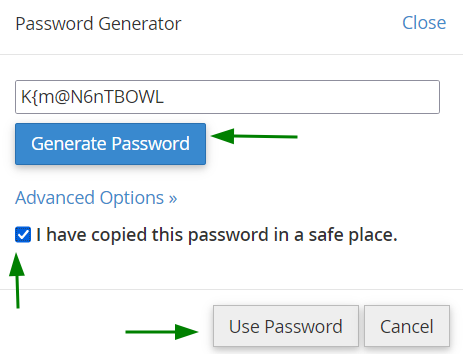
Make sure that you save the password, as you will need it to maintain the Database in the future.
4. After the password is chosen, simply click on the Create User button to finish the process:

5. Now, when you have both Database and User created, we need to assign User to the Database and set proper privileges. To do this, find the Add User To Database section and make sure that you choose the correct Database and User correspondingly. Once done, simply click on the Add button:

6. In the next window, you will need to set the correct privileges for the Database User. In this example, we shall grant all privileges to be able to maintain our Database without any restrictions, so you simply need to choose the All Privileges option and click on the Make Changes button:

NOTE: It is important to remember that multiple Users with different sets of privileges can be assigned to the same Database.
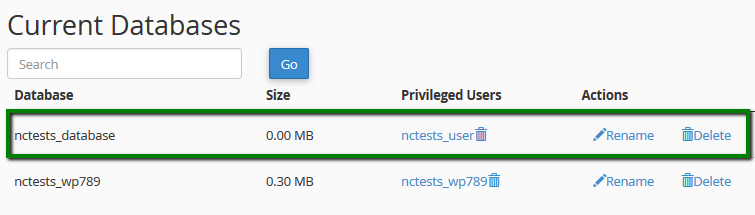
7. Once finished, you will get the message stating that the User was successfully added to the Database:

To check this, you can simply go back to the MySQL Databases menu and check the Current Databases section:
Creating a database with the Database Wizard tool
Database Wizard brings the same step-by-step process which is described above, but in a more simplified way. Let’s check how it works:
1. To find the tool, log into cPanel and click on the Database Wizard option under Databases:

2. Once done, indicate the name of the new database and click on the Next Step button:

3. At Step 2 you will be prompted to indicate Database User and choose a password for it, reciprocally to the process described before:

4. After the username and password are indicated, simply click on the Create User button:

5. The next windows will allow you to set privileges for the newly created Database User, similarly to the process described previously.
Accordingly, you will need to choose the All Privileges option and click on the Next Step button after that:

6. Once done, you will get a confirmation that the User was successfully added to the Database:

That's it!
Need any help? Contact our HelpDesk
