
If your current Hostinger plan no longer matches your website's needs, migrating to Namecheap can give you a different combination of hosting features, control-panel tools, migration assistance, and long-term pricing.
Common reasons for migrating from Hostinger to Namecheap include:
To help you choose the most suitable hosting plan, review the comparison table below. It highlights the main differences between Namecheap's Stellar Shared Hosting plan and Hostinger's Premium plan, including pricing, migration options, downtime guarantees, and customer support.
| Feature | Namecheap Stellar | Hostinger Premium | Key difference |
|---|---|---|---|
|
Price
*Prices as of October 2026 |
30-day free trial; then $2.28/mo advertised for the first year (annual billing). Annual renewal: $55.88/year (~$4.66/mo). Monthly renewal, if selected: $5.88/mo. | $2.99/mo for a 48-month introductory term ($143.52 paid upfront). Advertised renewal rate: $10.99/mo; check the renewal term at checkout. | The advertised rates use different commitments: 12 months for Namecheap and 48 months for Hostinger. These are not like-for-like monthly prices; compare the full upfront payment, billing term, and renewal rate. |
| Migration | Free migration assistance; 24-hour completion guarantee applies to eligible transfers under published terms | Free migration is available for all plans, with unlimited transfers | Both providers offer free migration. Namecheap additionally provides a specific completion-time guarantee for eligible migrations. |
| Downtime | A maximum of 15 minutes of downtime is guaranteed only for eligible transfers, subject to exclusions and terms | Hostinger notes that some downtime may occur after migration during DNS propagation; no comparable downtime guarantee is published | Namecheap's published downtime guarantee has eligibility restrictions and does not apply to every manual migration. |
| Support | 24/7 live chat and email/ticket support; no phone support | 24/7 live chat; no phone support listed on the hosting page | Both providers offer 24/7 support primarily through online channels. |
| Websites | 3 | 3 | Same website allowance |
| Storage | 20 GB SSD | 20 GB SSD | Same storage allowance |
| Email accounts | 30 mailboxes included | 2 mailboxes per website; free for 1 year | Namecheap includes more mailboxes; Hostinger's free email offer is time-limited |
Migrating a website from Hostinger to Namecheap involves moving your website files and database, updating your domain’s DNS settings, and verifying that everything works correctly after the switch.
Keep in mind that Hostinger uses hPanel as its hosting control panel, while Namecheap Shared Hosting uses cPanel, so the interface and some tools you use during the migration will be different.
Note: Since the plugins described below are third-party tools, we are not responsible for their functioning or the ability to properly migrate a website. If a plugin-generated backup fails or you are unable to restore your website using the plugin, you can use the manual backup to restore your website.
All-in-One WP Migration is a versatile plugin built specifically for moving websites. It works with numerous WordPress hosting providers, operating systems (OS), and PHP versions, and it even handles older WordPress releases. Import size limits and hosting configuration may affect the migration process. Keep in mind, though, that the free edition caps the size of the data you can import.
If you plan to move your WordPress site from Hostinger to Namecheap Shared Hosting using All-in-One WP Migration, follow our step-by-step guide.
Duplicator lets you back up your site as a copy or clone it and deploy it directly to a new server. Its guided setup can simplify migration, although some technical knowledge may still be required. The plugin also runs website checks before and after the migration to confirm that everything transferred correctly.
If you plan to move your WordPress site from Hostinger to Namecheap Shared Hosting using Duplicator, follow our step-by-step guide.
To migrate a website manually from Hostinger to Namecheap, complete these three main stages:
To download a backup of your WordPress website files and its database, log in to your Hostinger hPanel account and navigate to Websites > Manage site. Then, locate and select Backups in the sidebar.
To download the backup of website files, navigate to the Restore and download tab > select Website backup > select the backup date from the drop-down > click on Download website: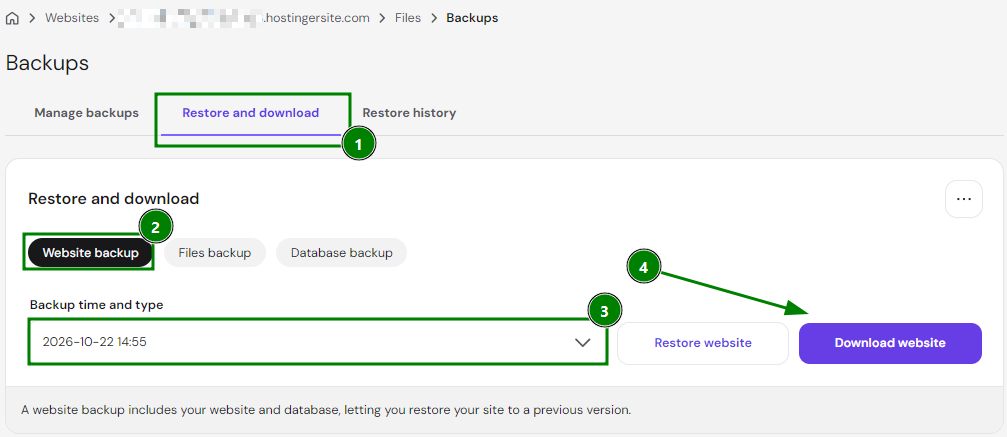
After clicking Download website, a confirmation window will appear. Click Send link to email to receive download links for your website files and database at the email address registered with your Hostinger account.
Once you receive the email, follow the provided links to download the backups to your computer.
For detailed instructions on downloading a backup of a specific WordPress website, refer to Hostinger’s guide on downloading website backups.
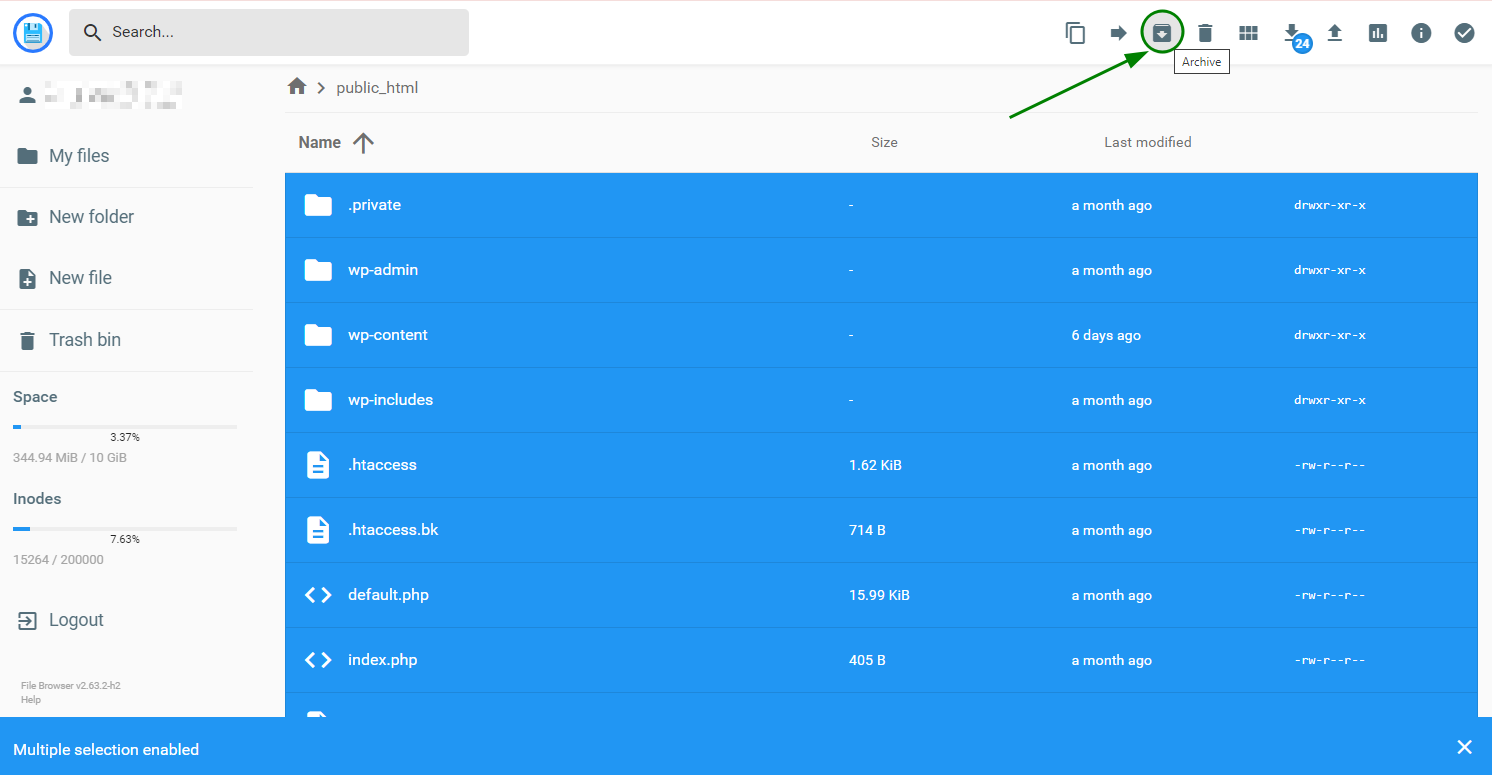
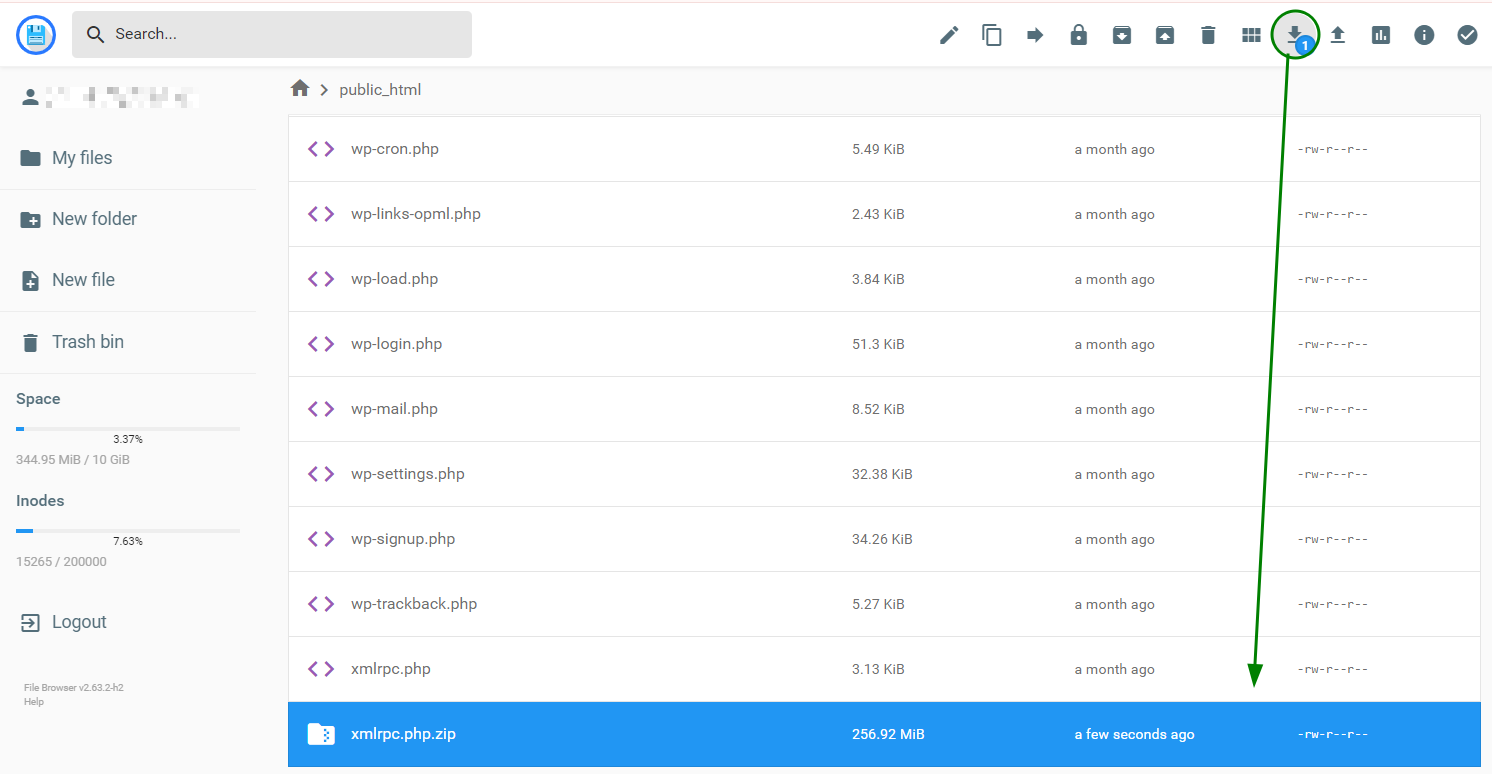
If you’re going to migrate a non-WordPress-based website, you need to download its files separately using the Hostinger “File manager” menu.
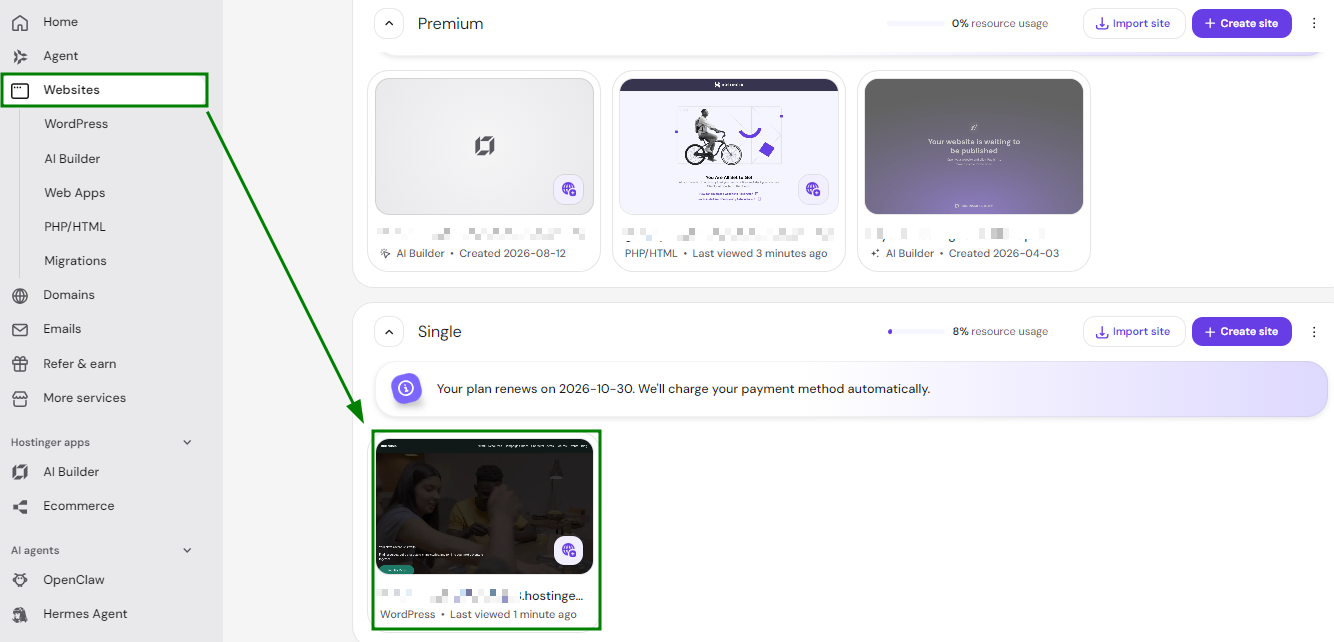
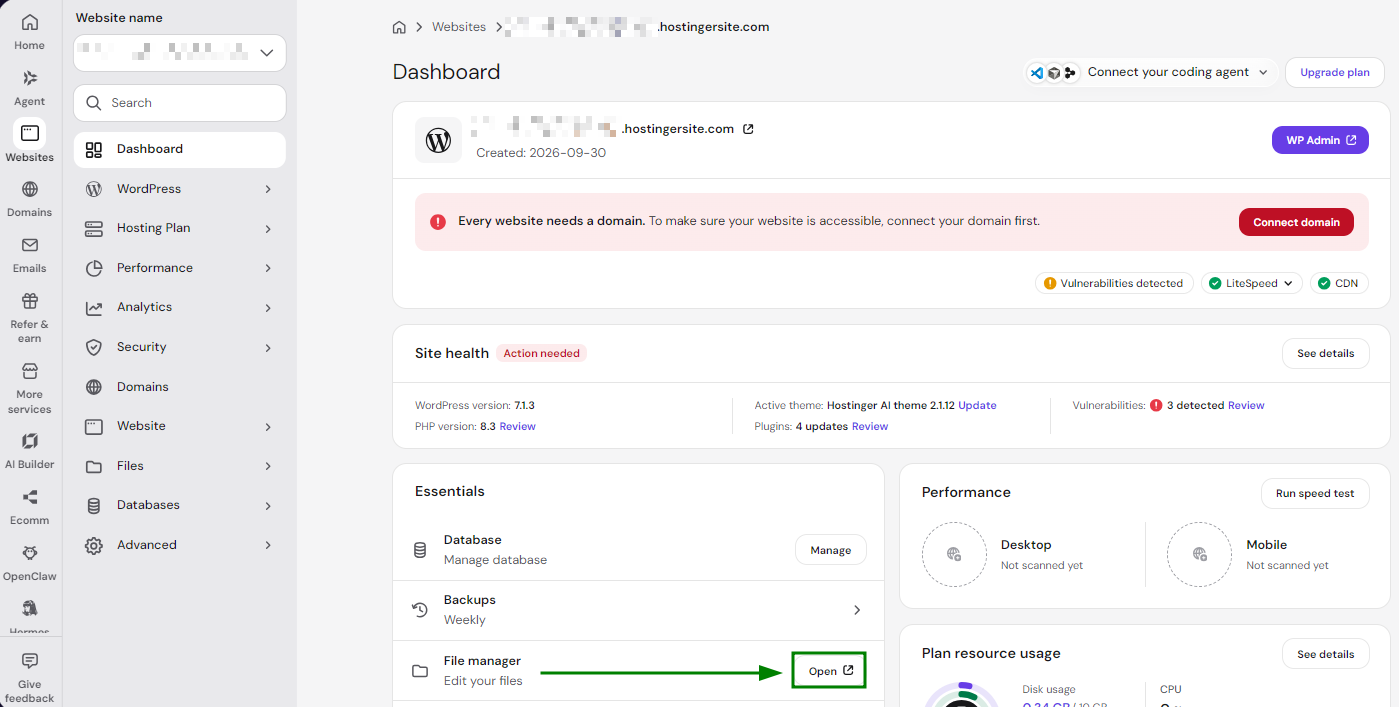
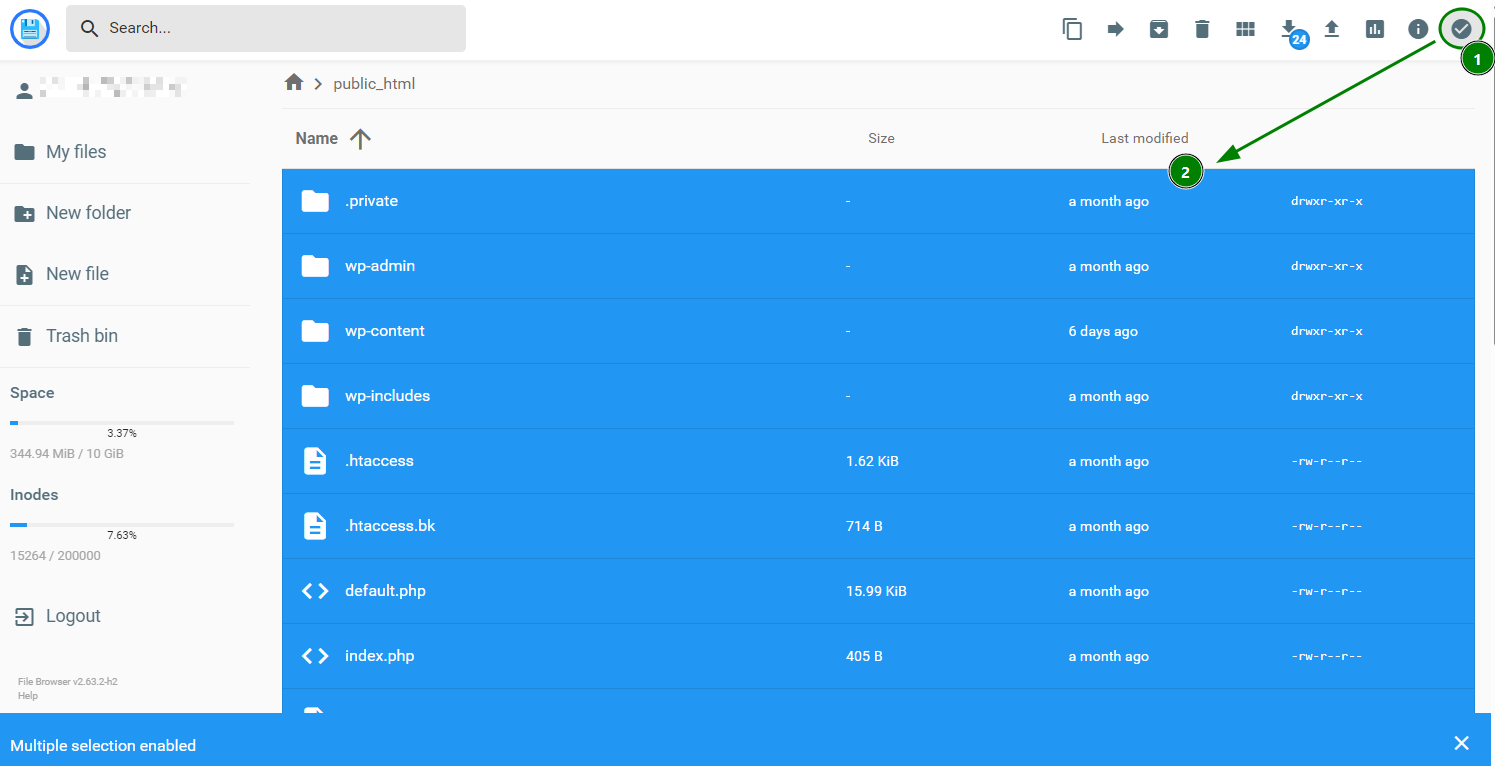
Once you have exported your website files and database, upload them to your Namecheap hosting account.
You can upload website files using cPanel’s File Manager, FTP, or SSH. For detailed instructions, see How do I upload my site?.
After uploading your website files, extract them into the correct document root and configure the website on your Namecheap hosting account.
For additional guidance and screenshots illustrating how to restore website files, import databases, and update configuration files in Namecheap cPanel, refer to our How to restore cPanel backups for addon domains. Partial cPanel transfer guide.
Please note that this guide uses a full cPanel backup as an example, so some steps may differ when restoring website files and databases exported separately from Hostinger.
Before changing your DNS settings, preview the website on the Namecheap server and confirm that it works correctly. Once testing is complete, point your domain to the Namecheap hosting server by updating its nameservers or the relevant DNS records, depending on your DNS setup.
Note: DNS changes may take up to 24-48 hours to propagate globally. Keep your Hostinger hosting account active until you confirm that your website and other services work correctly on Namecheap.
If you would prefer assistance, Namecheap offers free hosting migration services. Our migration team will review your request and confirm the available transfer options.
Submit a migration request using the instructions linked here. Our team will review your request and contact you with the next steps.
Before submitting, make sure the following conditions are met:
Downtime depends on the migration method, website configuration, and DNS changes. Namecheap's 24-hour completion and no more than 15-minute downtime guarantees apply to eligible full cPanel migrations. Hostinger uses hPanel instead of cPanel, so these guarantees do not automatically apply to Hostinger transfers. The migration team assesses each request individually and confirms the available options.
To minimize disruption, keep the original website active on Hostinger while transferring and testing the copy on Namecheap. Preview the new website before changing DNS, and avoid making changes to the old website during the final cutover unless you can synchronize them.
Namecheap offers both Shared Hosting and EasyWP Managed WordPress Hosting for WordPress websites.
EasyWP is a managed hosting service designed specifically for WordPress. It provides a dedicated dashboard and simplifies common website management tasks, while Shared Hosting offers cPanel and supports a broader range of applications.
For a detailed comparison, see our guide to the differences between Managed WordPress Hosting and Shared Hosting.
If you choose EasyWP, you can use its “WordPress Migration Tool” to transfer an existing WordPress website. To get started, you need an active EasyWP subscription, your website URL, and administrator access to the existing WordPress installation.
Follow the EasyWP WordPress Migration Tool instructions to start the transfer and monitor its progress.
Is Namecheap cheaper than Hostinger after the first renewal?
It depends on the plans and billing terms. Compare the total cost over the same subscription period, including promotional rates, renewal prices, and add-on services. Do not compare a 48-month introductory rate with a monthly renewal rate.
How do I migrate my site from hPanel to Namecheap?
Download your website files and export the database from Hostinger's hPanel. Upload the files to Namecheap cPanel, create and import the database, update your site's database credentials, test the website, and then update DNS. WordPress users can alternatively use a migration plugin or request assistance.
Will my Hostinger email accounts transfer automatically?
No. Website files and database migration do not automatically move mailboxes or email messages. Arrange a separate email migration or retain your current mail provider, and check the relevant MX, SPF, and DKIM records before changing DNS.
How long does a Hostinger-to-Namecheap migration take?
The time depends on website size, complexity, and the transfer method. Namecheap aims to complete eligible migrations within 24 hours; hPanel-based transfers may require additional manual work. DNS propagation can take up to 24-48 hours.
Does Namecheap offer 24/7 support like Hostinger?
Yes. Namecheap provides 24/7 customer support through live chat and its ticket-based support system.
Need help? We're always here for you.