$ U.S. Dollar€ Euro£ British PoundC$ Canadian DollarsA$ Australian DollarsRs Indian Rupees¥ China Yuan RMBMore Info
How to configure Jellyfish for a domain
Jellyfish is an email filtering tool that protects your account from both incoming and outgoing spam. According to the score received by the system, an email can either be moved to spam if it's potentially malicious or even rejected if it’s 100% harmful.
The connection to the Jellyfish server is established through configuring your domain`s MX records. Jellyfish MX records are configured in cPanel for all our Shared Hosting plans by default.
If you wish to re-configure existing Jellyfish MX records again or configure them in the remote DNS Zone you can set up the required host records manually by following these instructions.
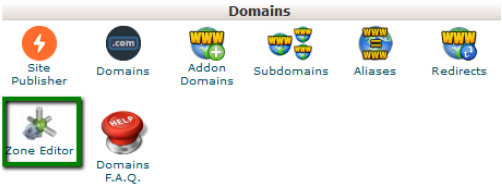
Access your cPanel > go to the Domains section and click on the Zone Editor menu:
For cPanel Basic Theme:
For cPanel Retro Theme:
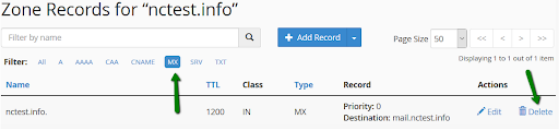
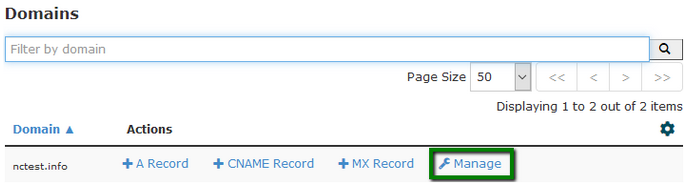
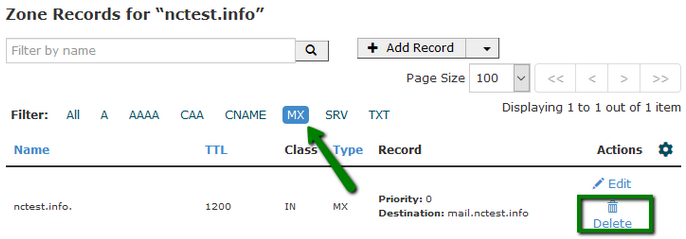
Click the Manage button next to the domain whose DNS zone you would like to edit. Choose the MX option and remove all existing MX records.
For cPanel Basic Theme:
For cPanel Retro Theme:
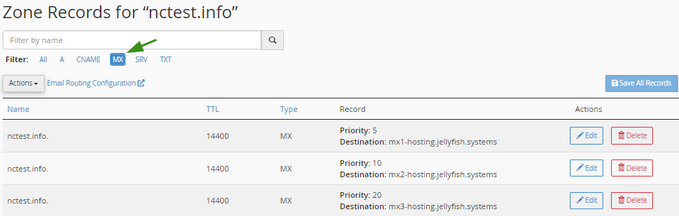
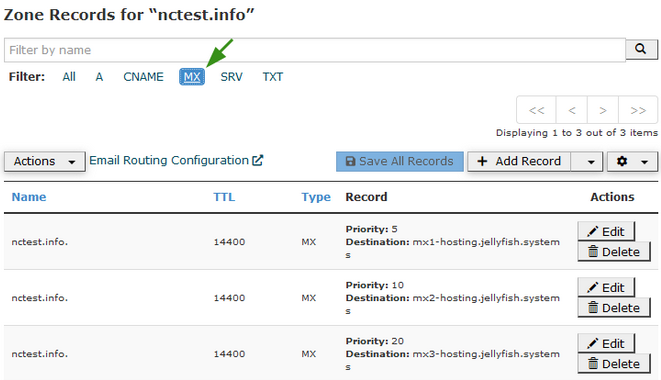
Using +Add Record box add three new MX records:
Priority
MX record
5
mx1-hosting.jellyfish.systems
10
mx2-hosting.jellyfish.systems
20
mx3-hosting.jellyfish.systems
For cPanel Basic Theme:
For cPanel Retro Theme:
NOTE: Allow up to 30 - 40 minutes for the records to propagate before you check the work of your mail service. Also, you can check whether MX records are applied using this tool.
If the records do not appear after an hour, please contact our Support Team.
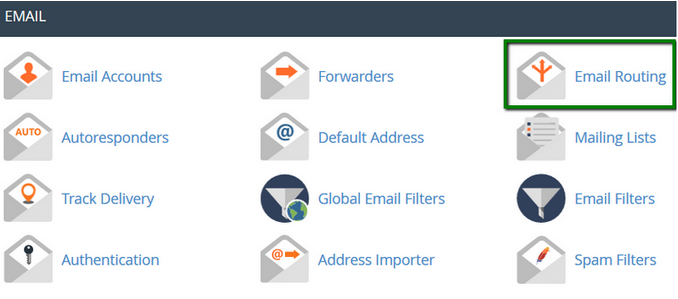
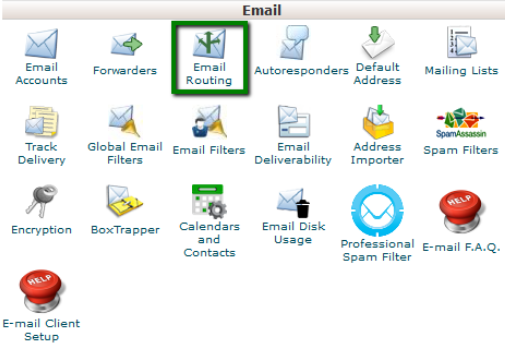
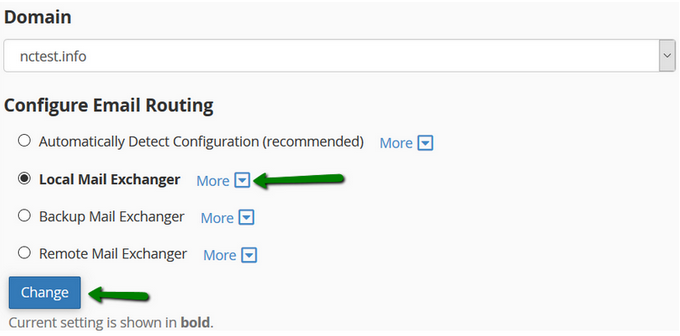
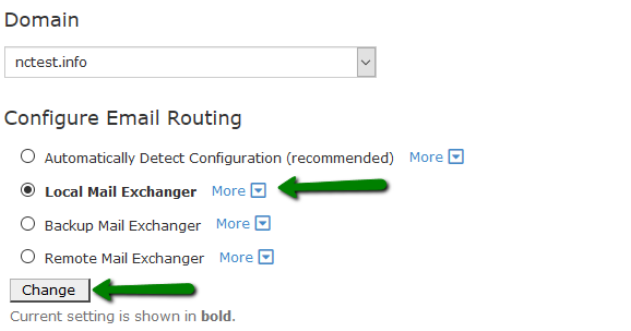
Next, go to the Email section in cPanel > Email Routing menu.
For cPanel Basic Theme:
For cPanel Retro Theme:
If you have several domains or subdomains, choose the correct domain from the drop-down list and set Email Routing to Local Mail Exchanger > click Change.
For cPanel Basic Theme:
For cPanel Retro Theme:
NOTE: It is still possible to use third-party nameservers (or use CloudFlare nameservers) with our hosting and mail service in cPanel and still benefit from Jellyfish. In order to make it work, you need to set up Jellyfish MX records from the side of your DNS provider. Also, we recommend you copy the SPF and DKIM records from the Email Deliverability menu in cPanel and create them on your DNS provider side to ensure proper deliverability.
Now you can check whether the domain is present in the Jellyfish Spam Protection menu in cPanel.