
This article is an overview of the functionality of the SSL Installation checker available via the following link: https://decoder.link/sslchecker/
This tab allows you to check your SSL status and other needed information about your domains. To check a domain/subdomain and its SSL certificate, paste the fully-qualified domain/subdomain name (FQDN) (e.g. namecheap.com) in the "Hostname" field and make sure to select the appropriate port (443 is used by default). If your SSL is viable, a blue window will appear under the "Report" section.

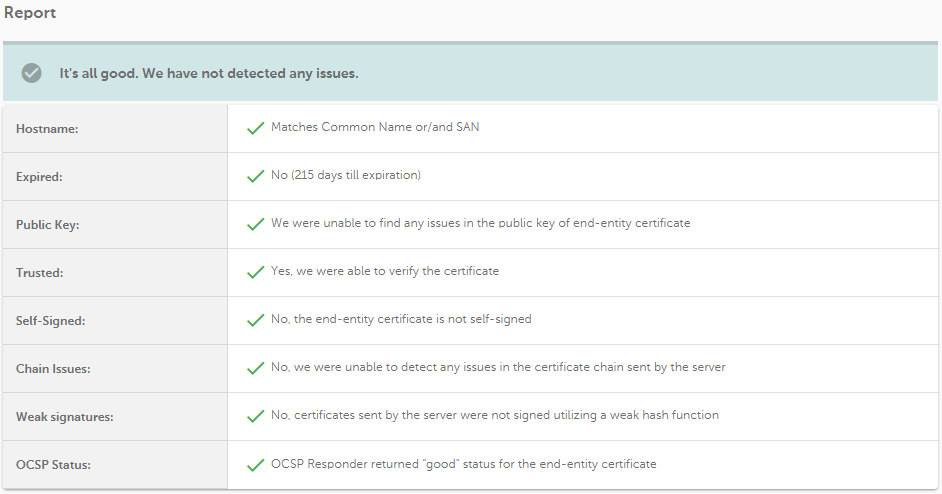
This section summarizes the analysis performed and gives a general picture of the domain settings.
Below is the table listing the possible results in the fields mentioned above and their meaning
| Field | Positive result | Negative result |
| Hostname | Matches Common Name or/and SAN | Doesn't match Common Name or/and SANs |
| Expired | No (X days till expiration) | Yes (expired X days ago) |
| Public Key | We were unable to find any issues in the public key of end-entity certificate | RSA key size is too small, current industry standard for RSA keys is 2048 bits |
| Trusted | Yes, we were able to verify the certificate | We were unable to verify this certificate |
| Self-Signed | No, the end-entity certificate is not self-signed | The end-entity certificate is self-signed |
| Chain Issues | No, we were unable to detect any issues in the certificate chain sent by the server |
The chain doesn't contain any intermediate certificates The order of certificates is invalid or certificates cannot build certification path |
| Weak Signatures | No, certificates sent by the server were not signed utilizing a weak hash function | End-entity or/and intermediate certificate(s) was signed utilizing a weak hash function |
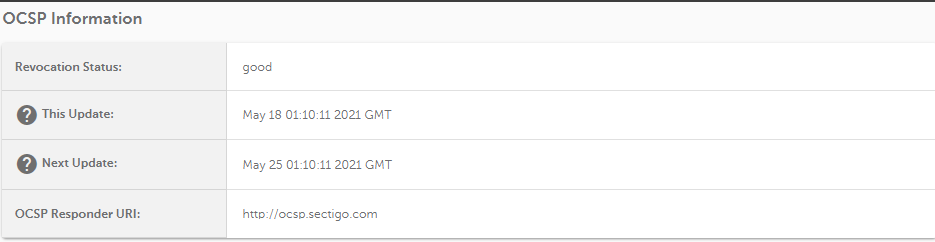
| OCSP Status | OCSP Responder returned "good" status for the end-entity certificate | Certificate has been revoked |
The function responsible for DNS lookup is executed independently from the function that tries to perform an SSL/TLS handshake. This means that if there’s no SSL installed on the server, some DNS-related information will still be displayed, even if a handshake can’t be established. Below is an example of a case when the server doesn't send certificates in response:
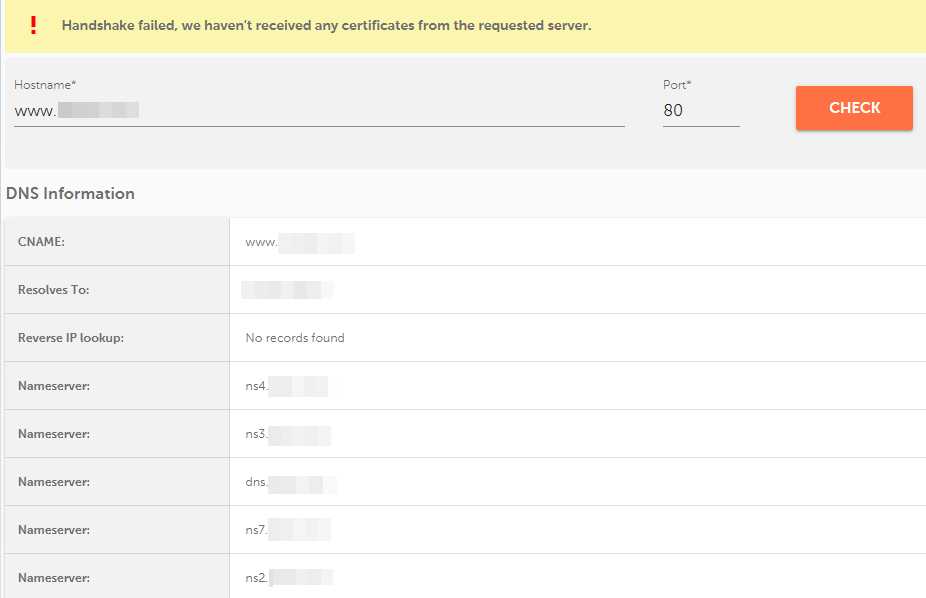
The reason for this kind of result is to simplify troubleshooting when the issue is caused by DNS issues (e.g., incorrect CNAME/A records, FQDN resolution issues, etc).
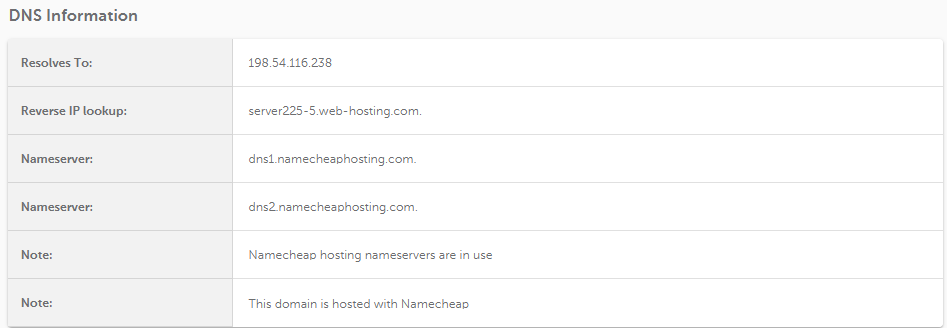
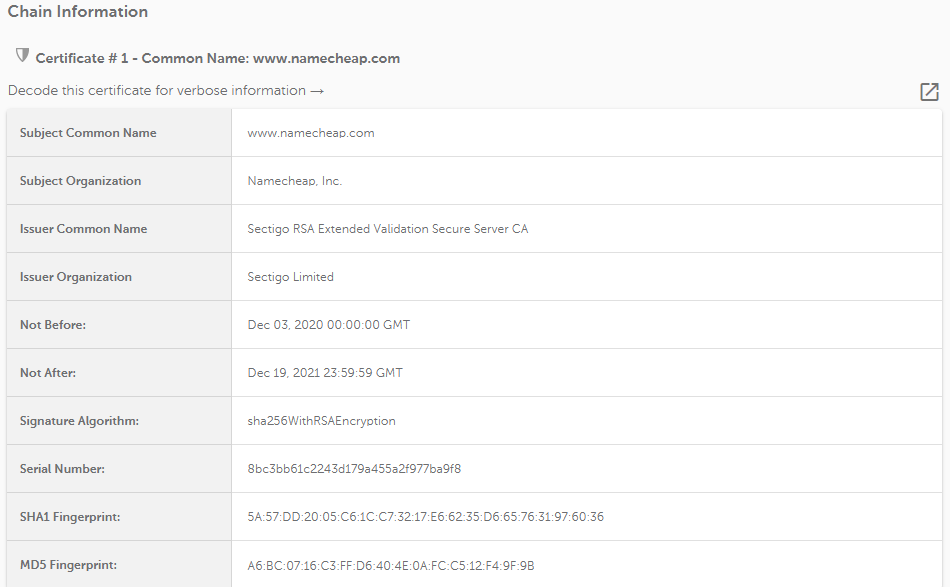
The following information about the SSL certificate can be found in this section:
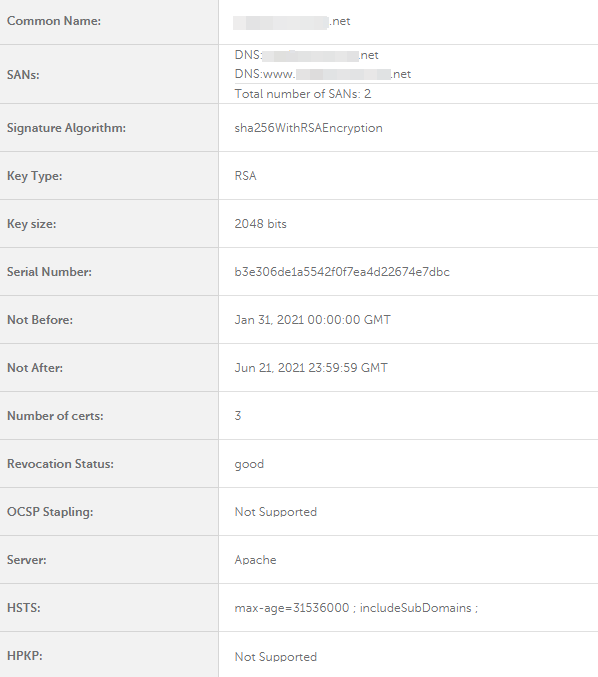
Describes every certificate listed in the certificate chain separately by the following parameters:
This section contains the output of an OpenSSL command that directly checks the server's SSL configuration, including the full chain, certificate information, SSL/TLS handshake, TLS protocols defined, cipher suites enabled and so on:
openssl s_client -showcerts -connect example.com:443 -servername example.com
Generally, it is the main source of the information used for the "Report", "General Information", "Chain Information" sections.
This tool helps decode the SSL certificate or CSR code and analyzes it to detect issues. When everything is correct, the following message will appear:

Once you paste the CSR/certificate and click the "Decode" button, a unique link for sharing it will appear.

Note that the result will differ depending on whether the CSR or the certificate code was pasted.
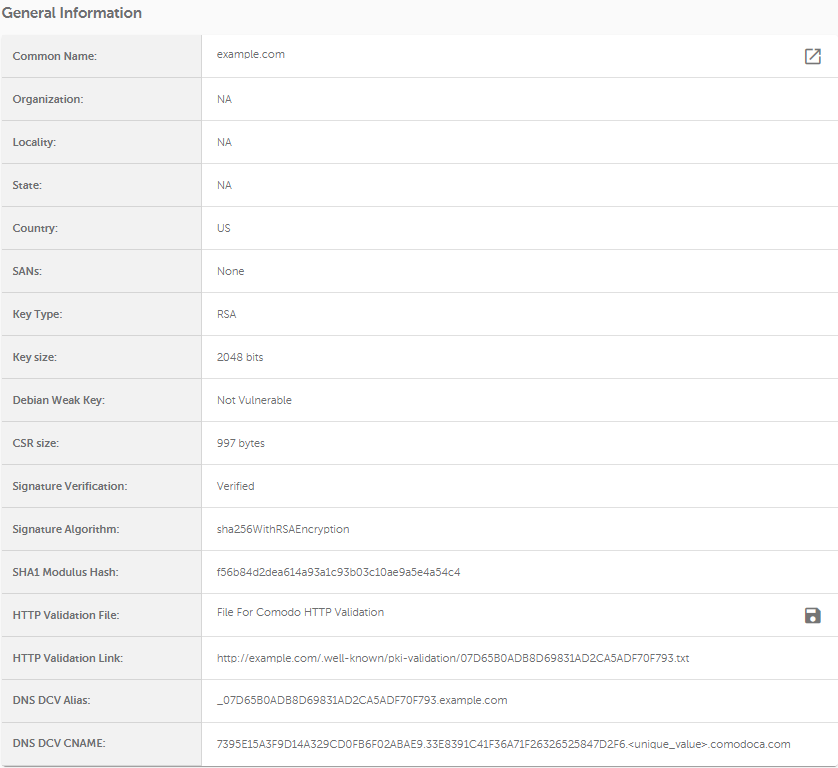
This section describes general information about the generated CSR code, such as:
Here you can download the validation file and upload it to the server right away to validate the certificate. However, this validation file won't have a unique value (unique values are randomly generated by CAs after the certificate is activated) included, so it will be necessary to update this information manually. You might need to contact our SSL Support for assistance.
Additional sections that are included when the report is for an SSL certificate:

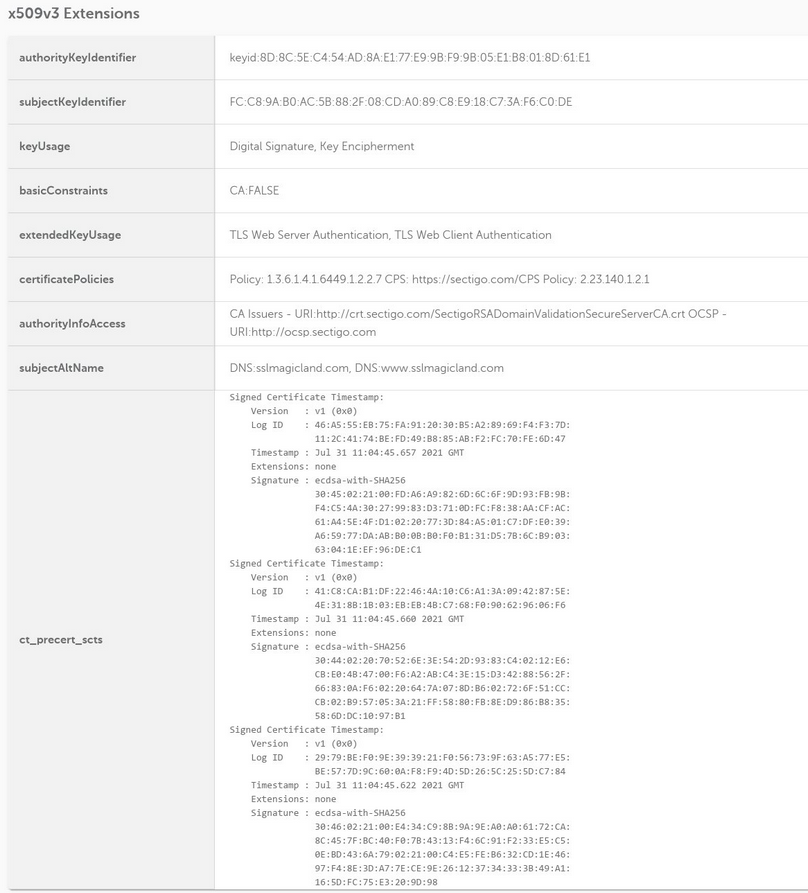
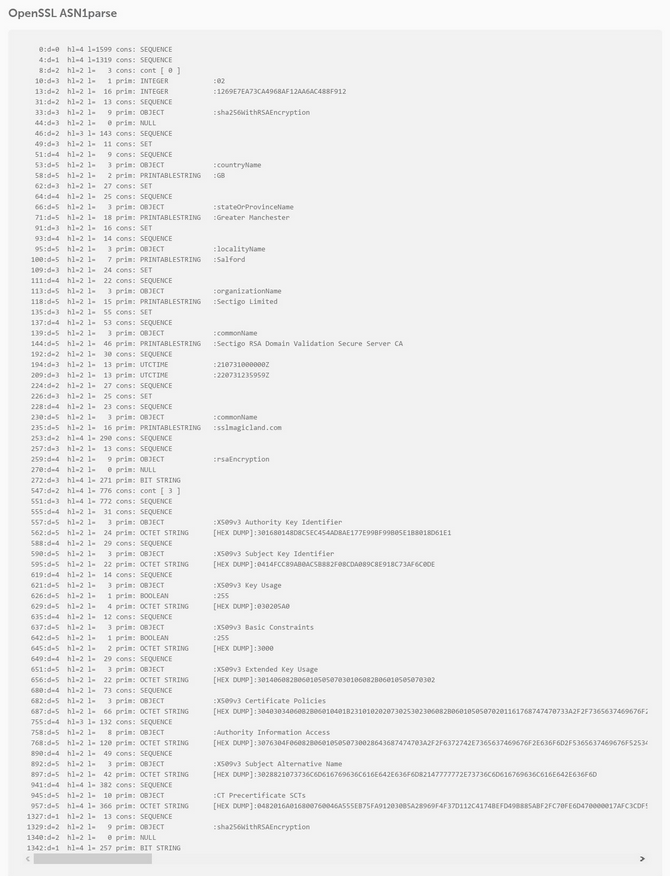
This section describes what x509v3 extensions are in use. These kinds of extensions mostly fall into advanced SSL peculiarities and are usually only interesting to the tech-savvy. More information can be found in this official document.
Documentation about the peculiarities of the OpenSSL ASN1parse feature can be found here.
The "Raw OpenSSL Data" tab shows the result of OpenSSL checks without the certificate chain included.
If you can’t generate a CSR code on your server or you’re facing difficulties with certain custom settings, an online CSR generator tool is a lifesaver. We have added one in the decoder.link tool:

Default restrictions for fields apply: do not use any of the following characters during the CSR generation: < > ~ ! @ # $ % ^ * / \ ( ) ? & ,
You can also change such settings as:
Note: Nothing should be changed in advanced settings if you want to issue a regular certificate. Only use this if you are an advanced user and want to enable additional secure options on your server and want to set custom parameters for CSR generation.
Once you click the "Generate" button, a new window will pop up:
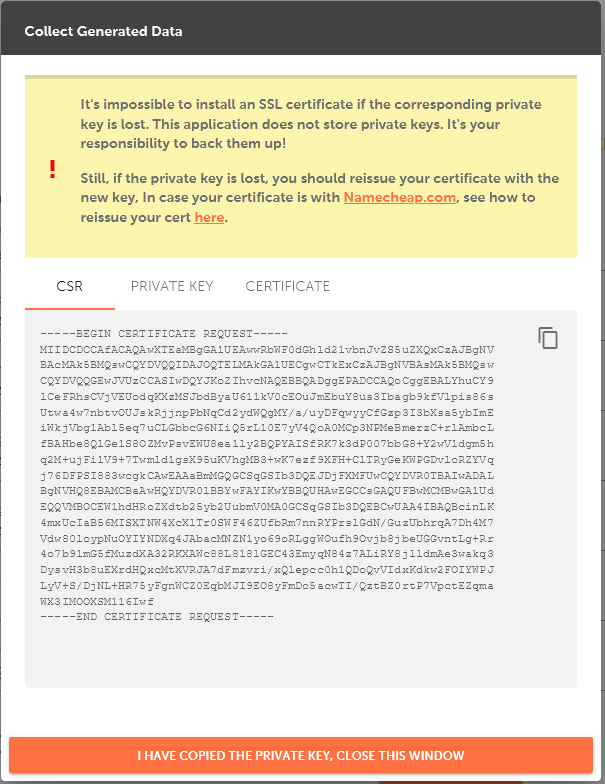
The "Collect Generated Data" window contains a warning about the importance of saving a Private key file and three codes:
Make sure to save the CSR code and Private key before you click the "I have copied the Private key, close this window" button to close the window.
The converter tool (https://decoder.link/converter) was designed to convert general certificate formats to other formats. Here is a list of file formats for reference:
Different server types require different certificate file formats. The certificates we provide are issued in an x.509 format, a version of the ASN.1 file encoding standard. This certificate can be downloaded from your account in the PEM format with a .crt extension and CA bundle or in the PKCS#7 format with a .p7b extension. It will download in an archive file which you should unzip. It contains three files: a certificate (.crt), a CA bundle (.ca-bundle), and the certificate in PKCS#7 file format (.p7b).
The following tool options will help convert the certificates to the needed format:
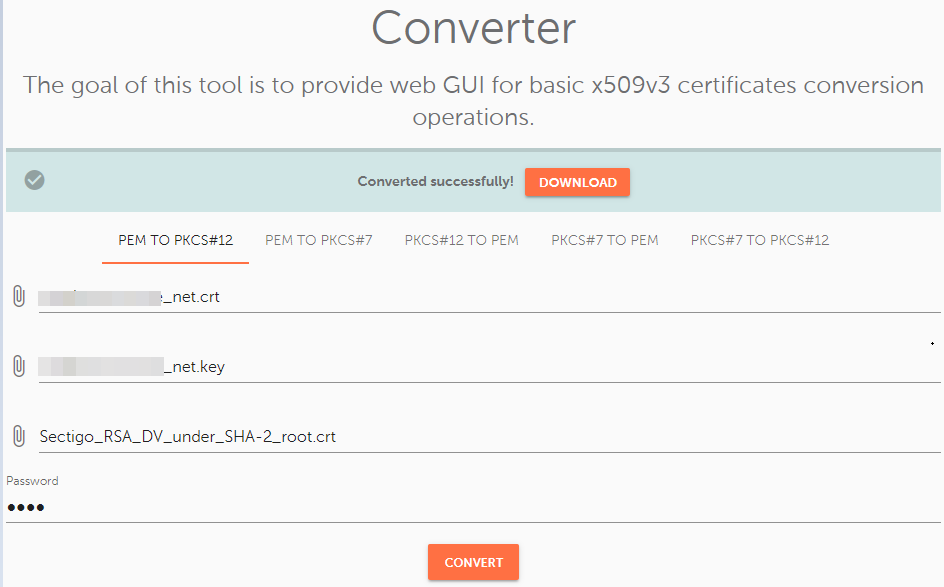
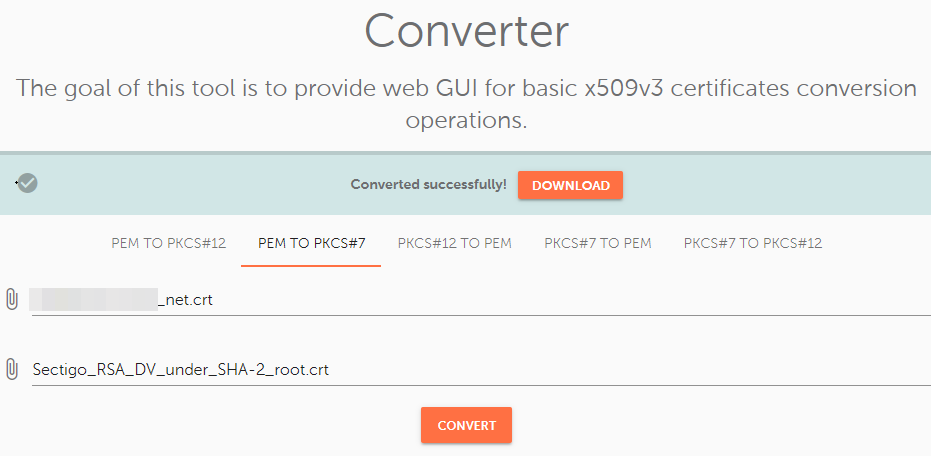
Choose the "PEM TO PKCS#12" option and upload these files:
Make sure to set a password for the PFX file. You will be prompted to type your password when importing the certificate to the server. So, make sure to save the password somewhere until then.
When you’ve uploaded all the files, click the "Convert" button to finish the process and press the "Download" button to download the converted certificate.
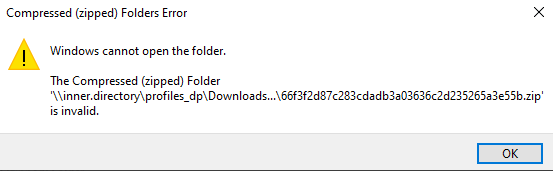
If you uploaded incorrect certificate or Private key, when you try to open the .zip archive that contains the PFX file, you will encounter the following error:
If this happens, you should check that:
-----BEGIN CERTIFICATE----- & -----END CERTIFICATE-----
For the private key:
-----BEGIN RSA PRIVATE KEY----- & -----END RSA PRIVATE KEY-----
Add the following files to the corresponding boxes:
Note: If you provided the incorrect files, the .zip archive will open with a warning message about invalid content. It will not be possible to view the content of the .zip archive. However, this will only happen if you accidentally upload completely irrelevant files, like a Private key. At the same time, if you uploaded the wrong files but in an accepted format, such as no matching CA bundle/certificate, the .zip archive will open without error. So, be sure to use the correct corresponding files.
The opposite of the "PEM to PKCS#12" option, this tool Converts .pfx files into .crt, .ca-bundle and .key files.
To convert a PFX file into separate files, upload it to the "PKCS#12 File (*.pfx, *.p12)" field.
Then, type in the password in the "Password" field.
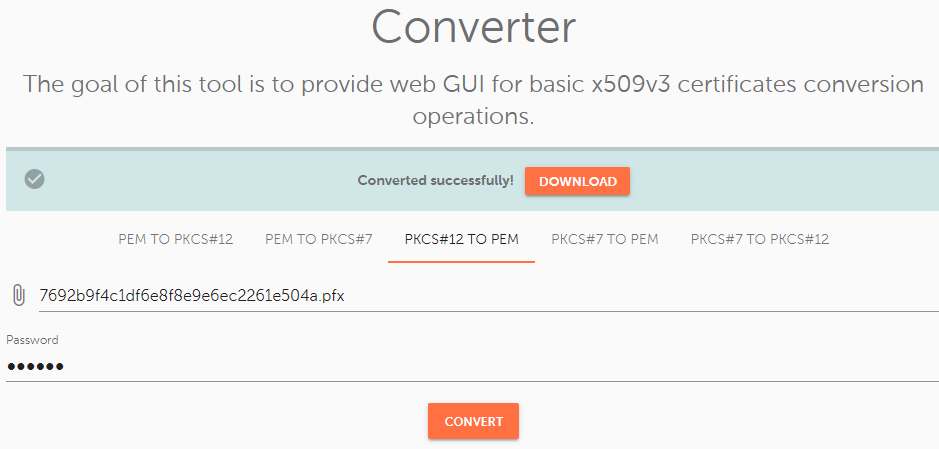
To complete the process, press the "Convert" button and download the generated files.
Note: If the incorrect password is used, the file will still be generated and downloadable, but it will be invalid. The .zip archive will not open after being downloaded.
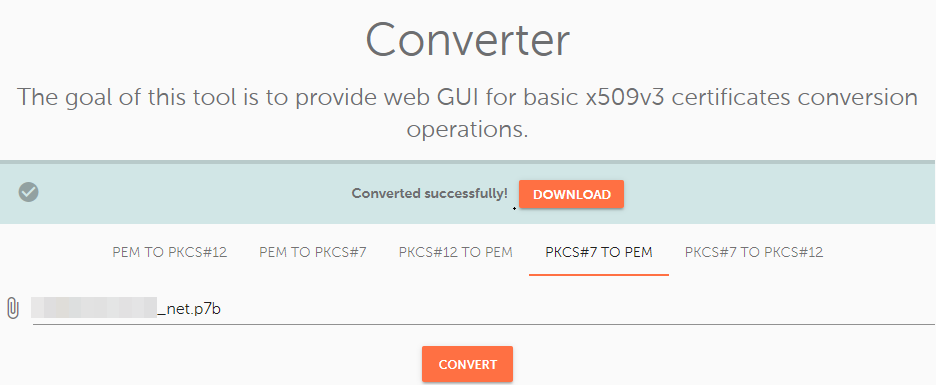
Upload the .p7b/.cer file with the certificate to the "PKCS#7 File (*.cer, *.p7b, *.p7s)" field and press the "Convert" button.
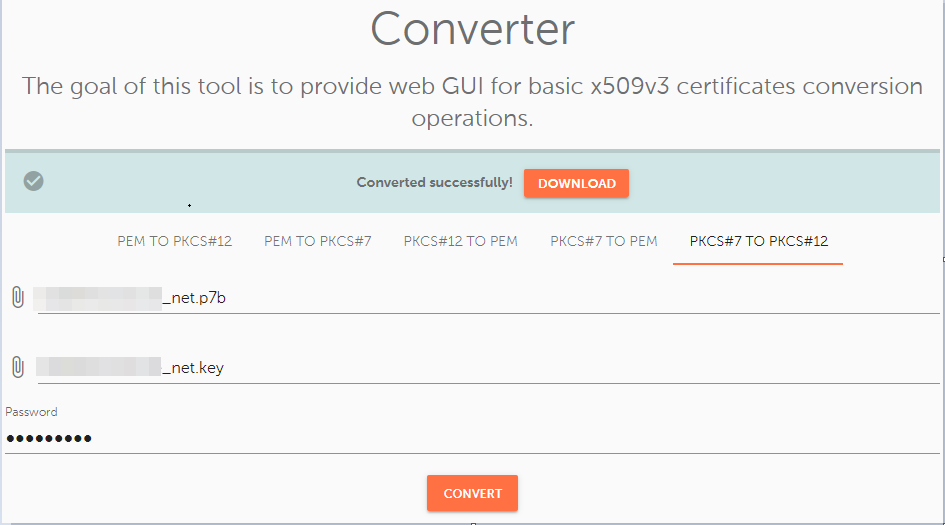
Upload the following files:
Type in the password and press the "Convert" button to finish the process.
A tool for checking the revocation status of SSL certificates. This tool can check SSLs purchased from Namecheap and third-party ones.
Paste the certificate in PEM format to the box and press "Check". If your revocation status is good, you will receive a result similar to the image below:
If an invalid certificate (like a self-signed one) is submitted for an OCSP check, the result will be:

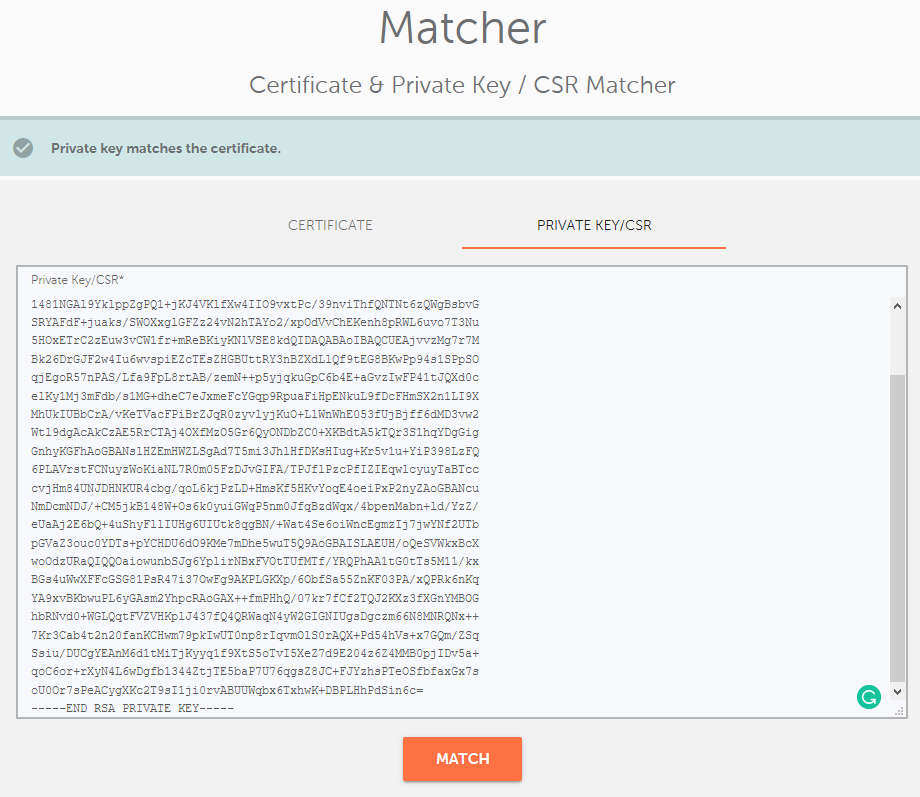
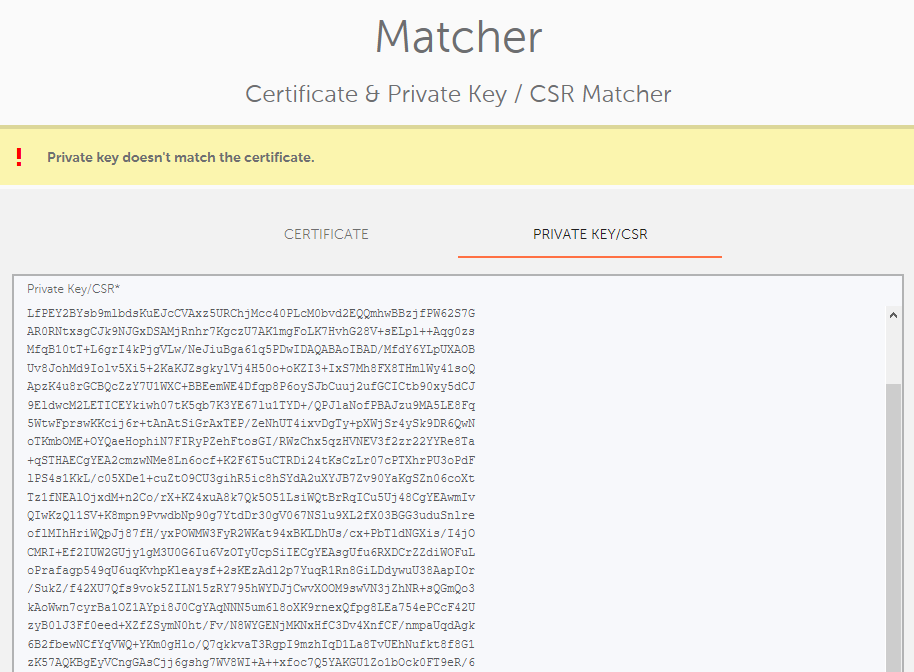
A tool designed to verify whether a certificate and Private key/CSR match: https://decoder.link/matcher.
A successful result will show one of the following messages: "Private key matches the certificate." or "CSR matches the certificate."
Even if the certificate/CSR/Private key is pasted without its corresponding headers, the tool will accept it with no issue.
An unsuccessful result will show the message: "Private key doesn't match the certificate." or "CSR doesn't match the certificate."
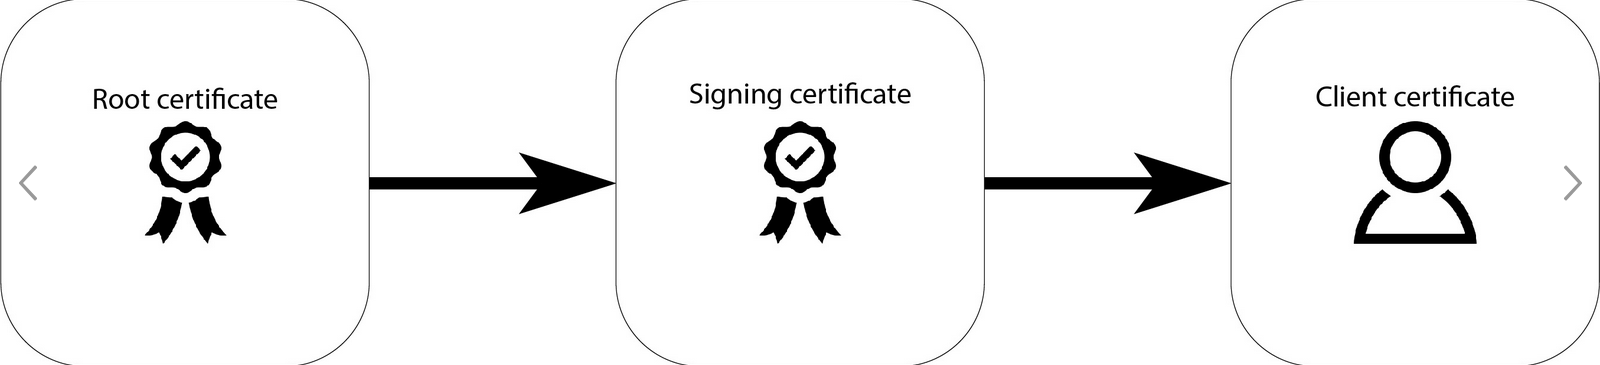
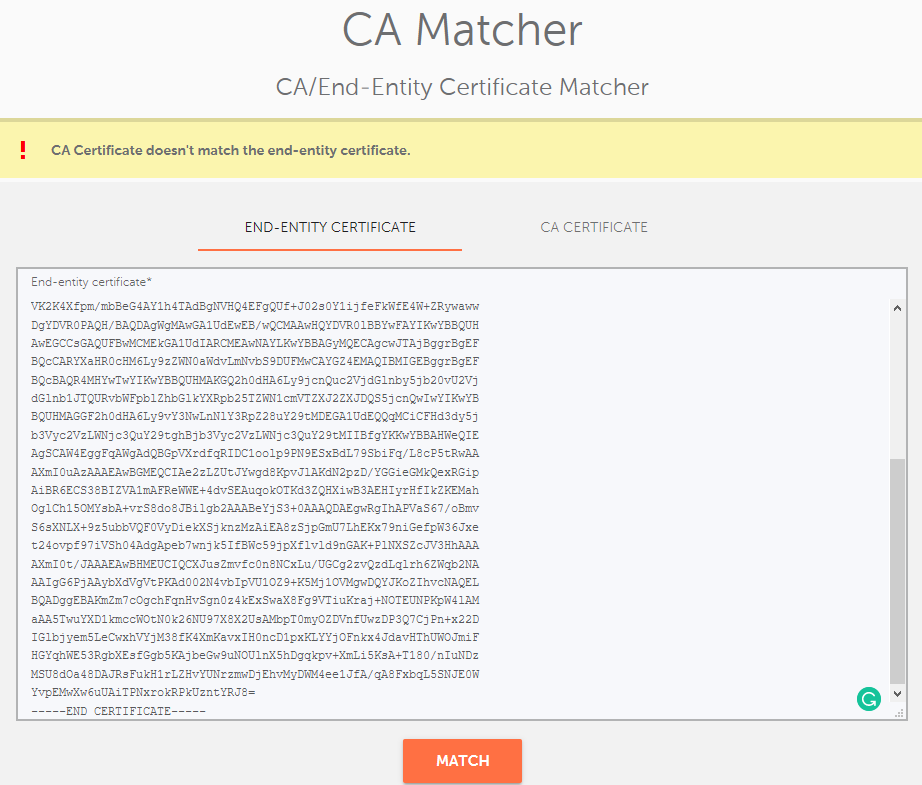
The " CA Matcher" tool is used to check if the CA certificate directly verifies the end-entity one. In other words, it shows whether your installed CA Bundle matches the end-entity certificate on the server. You can use this checker to ensure that you are using the correct CA Bundle for your SSL installation.
Note: The whole CA chain cannot be pasted into the "CA Certificate" field, as the tool can parse only one certificate from the chain.
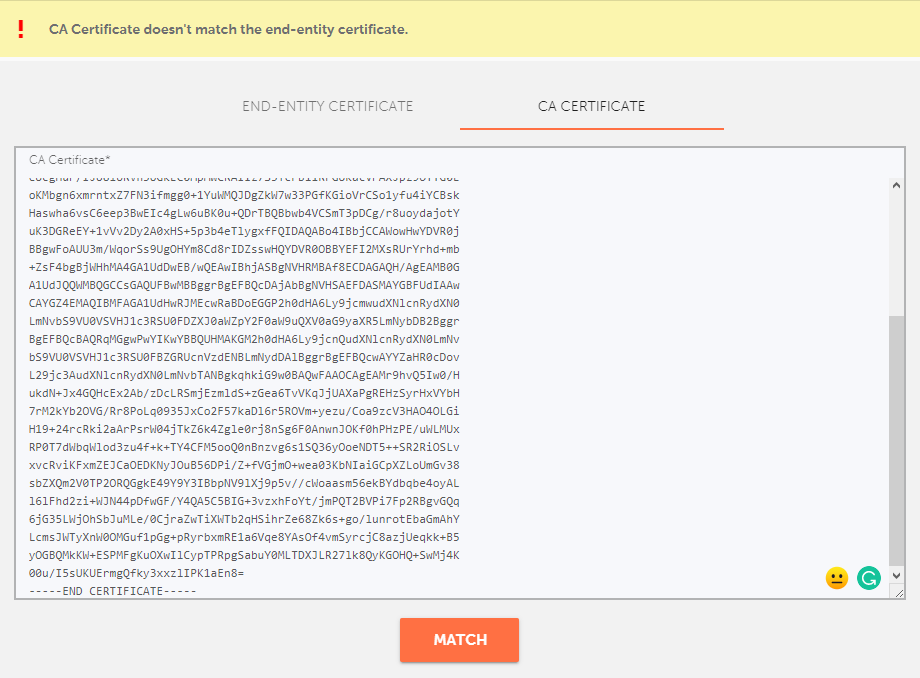
Due to peculiarities of how certificate chains work (see below), only an intermediate certificate will be considered a match for the end-entity certificate because it directly signs it.
Thus, the first certificate from the provided chain file should be checked.
This means that if you paste either the "USERTrust RSA Certification Authority" or "AAA Certificate Services" root certificates into the "CA Certificate" field, the following error will appear:
Here you can download the needed intermediate certificate or the corresponding CA Bundle.
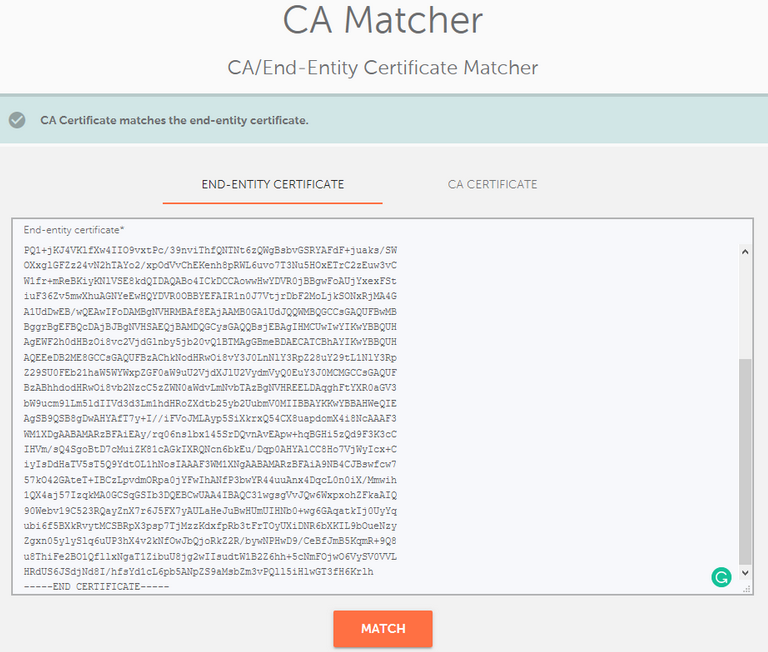
Once you paste a correct end-entity certificate in the "End-entity certificate" field and the correct intermediate certificate into the "CA Certificate" field, press the "Match" button. If the check was successful, the message: "CA Certificate matches the end-entity certificate." will pop up.
A tool for checking Certificate Transparency logs: https://decoder.link/certificate_transparency.
Paste the PEM certificate into the "Certificate" field and press the "Check" button. Afterward, the result will appear at the bottom of the page in the "CT Information (info source: crt.sh)" section.
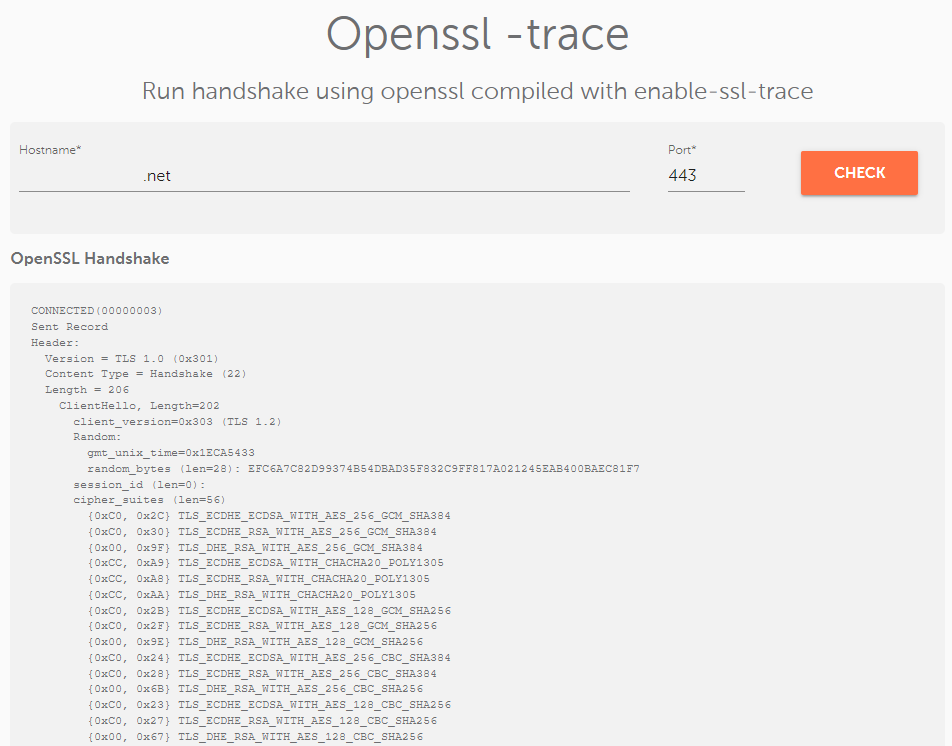
A tool for observing a detailed SSL/TLS handshake using OpenSSL enable-ssl-trace (trace output of protocol messages): https://decoder.link/trace
Write your domain name, set the desired port number, and press the "Check" button.
You may experience a situation where you generate a Private key in an incorrect format that your server doesn’t accept. In such an instance, the server may not recognize the Private key and state that it does not match the certificate. If this happens, you’ll need to fix the key’s formatting using this tool: https://decoder.link/rsa_converter.
Simply paste the Private key, including headers, into the box, and press the "Convert" button.

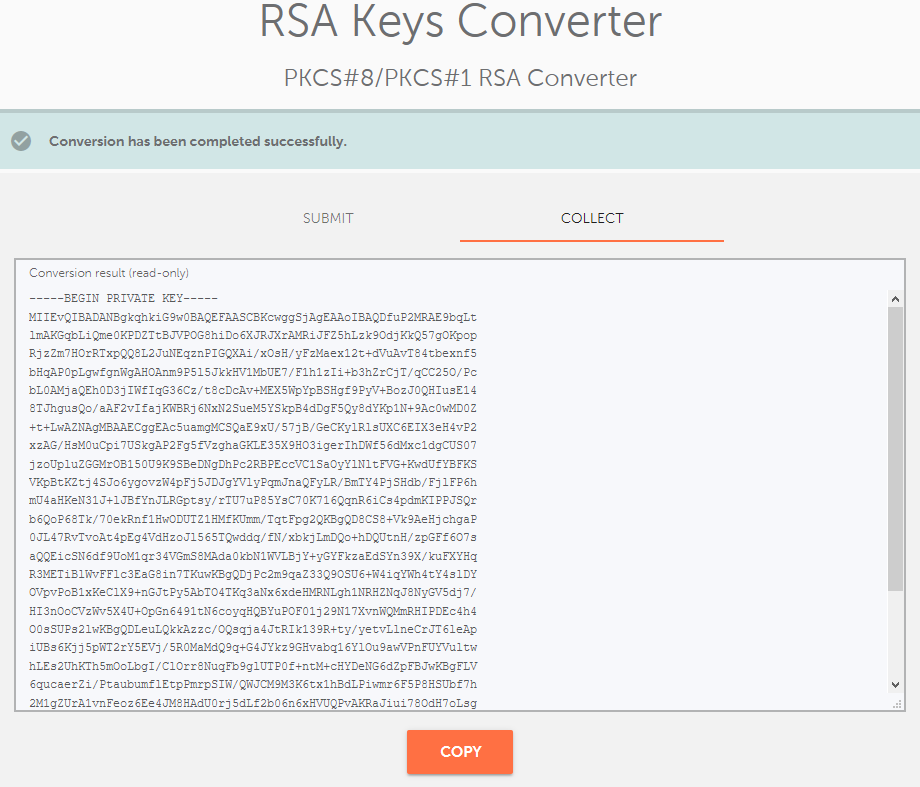
PKCS#1 vs PKCS#8 Private key formats
The only difference between these formats is that the PKCS#8 format is the key object from PKCS#1 but without the version or algorithm identifier in front. "BEGIN RSA PRIVATE KEY" is PKCS#1 and indicates that the key type is also included in the key data.
Note: Some servers may not accept #PKCS1 format (mostly Java-based servers).
PKCS#1:
-----BEGIN RSA PRIVATE KEY-----
BASE64 ENCODED DATA
-----END R
-----BEGIN PRIVATE KEY-----
BASE64 ENCODED DATA
-----END PRIVATE KEY-----
PKCS#8 is the more popular format, but generally, both formats are accepted, and it’s rare that a server won’t accept PKCS#1. However, if you ever experience a server not accepting a matching certificate and Private key, try to change your private key format using the key converter tool.
This tool can check multiple domain names simultaneously: https://decoder.link/bulk.
The result will show a short description of the SSL connections for the domains/subdomains listed in the field box. If an SSL certificate is installed correctly, you will see a green checkmark next to the domain and the message, "All is good".
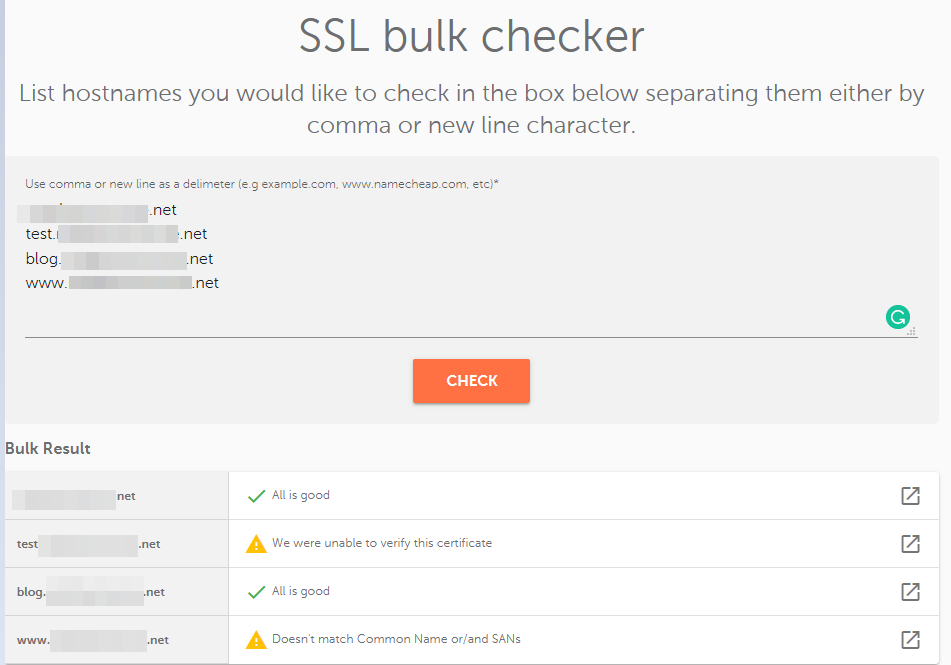
If you click the arrow icon on the right, you will be redirected to a https://decoder.link/sslchecker/ tool with a full SSL report in another browser window.
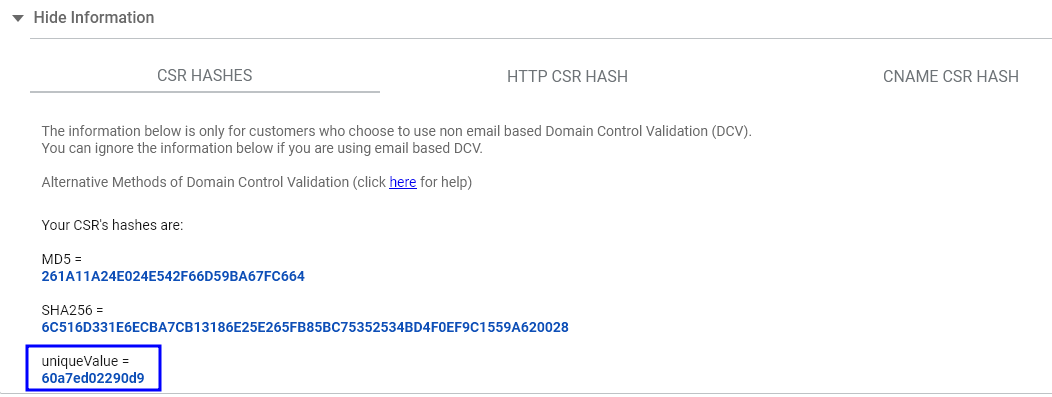
This tool checks HTTP, HTTPS, and DNS validation information and its completion status for Sectigo SSL certificates.
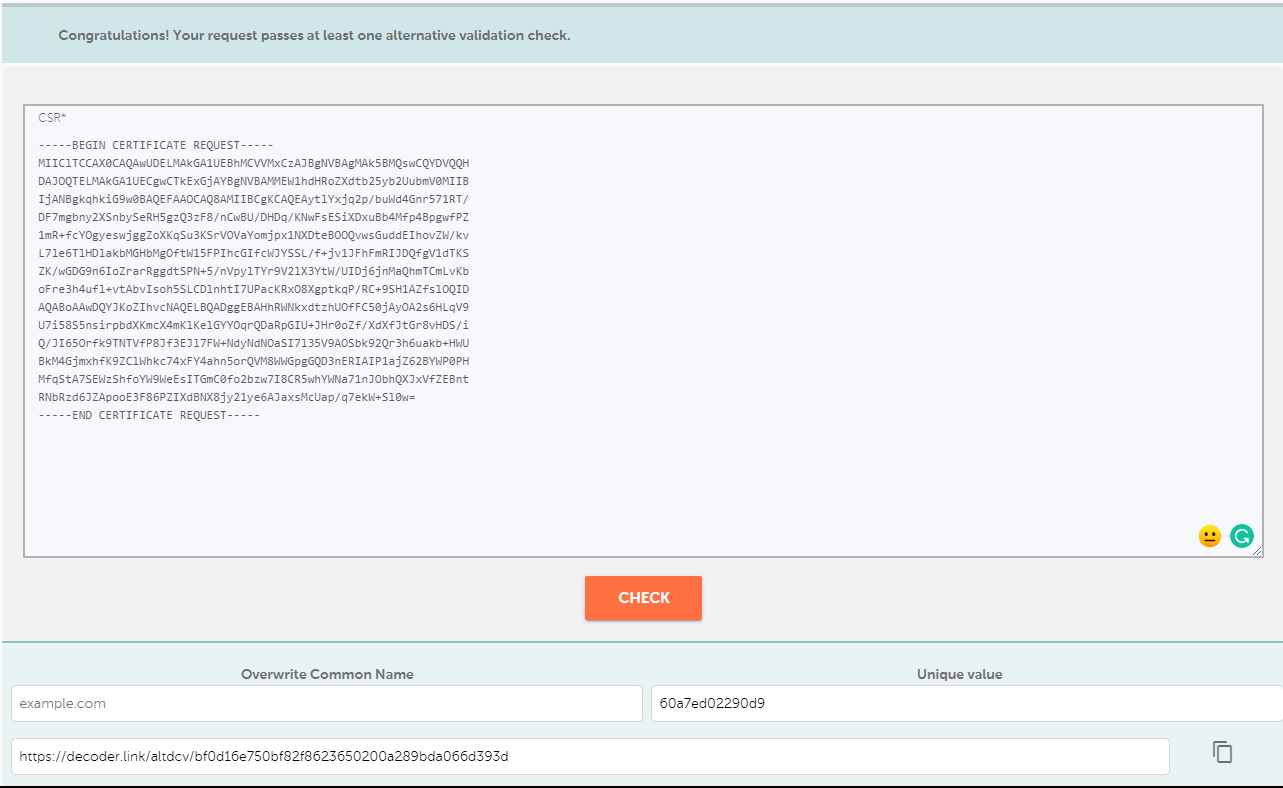
Although there are three fields, it is enough just to paste the CSR code and the unique validation value you can get from the Sectigo InstantSSL admin panel:
After you specify CSR and the unique value, press the "Check" button.
If the validation is successful, you will receive the message: "Congratulations! Your request passes at least one alternative validation check."
If validation hasn’t passed, you’ll see the message: "None of the alternative domain control validation checks passed."
Scroll down to see 3 detailed reports about each validation check:
You can then fix the validation file or record accordingly based on your results.
That’s it! If you have any questions or require assistance with the Decoder.link tool, please leave a comment below or contact our SSL Support.
Need help? We're always here for you.