In some cases, you might need to re-assign the Supersonic CDN you purchased from one domain to another. In this article, we’ll take you through the process step-by-step.
Let's assume that you have a Supersonic CDN subscription for nctest.us and want to connect it with another domain name.
1. To access the Supersonic CDN account, go to the Apps menu on the left sidebar of your Namecheap account, and click the Supersonic CDN logo:

2. You will be redirected to the app's login page. Click
Login with Namecheap to proceed:

3. Once redirected to the CDN dashboard, you will see the list of domains currently connected with Supersonic CDN. Click the three dots to the right of the domain name in question:

4. You will see a drop-down list. Click
Remove to disconnect the domain name from your Supersonic CDN subscription:
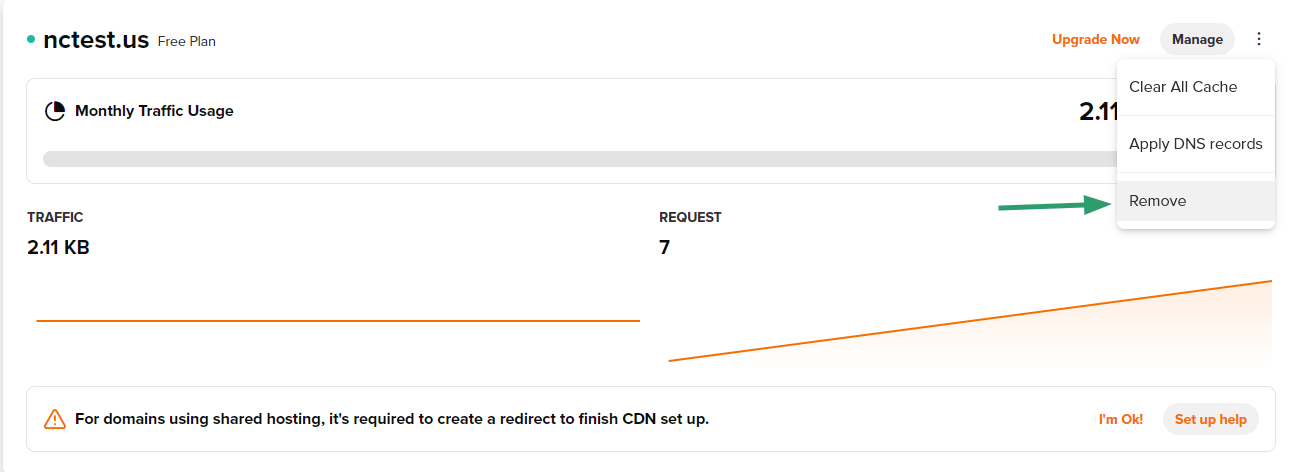
NOTE: The domain will remain connected to its hosting — Supersonic CDN Alias records will be replaced with the ones that were used before the CDN was set up.
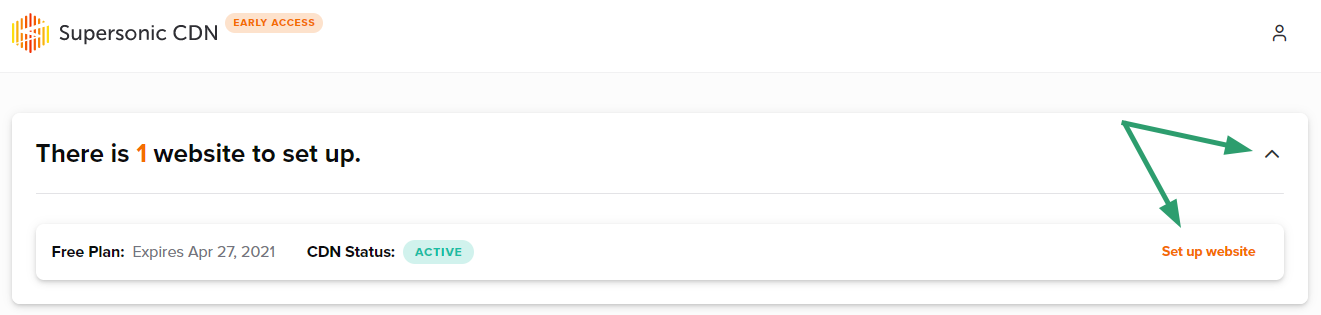
5. Once the domain name is disconnected from the CDN, you will see an option to set up a new website:

PLEASE NOTE: When the domain name is removed, all modifications set inside the Supersonic CDN dashboard that were assigned to that domain name were removed completely.
6. Click the arrow to the right of
There is 1 website to set up and then, click on
Set up website:
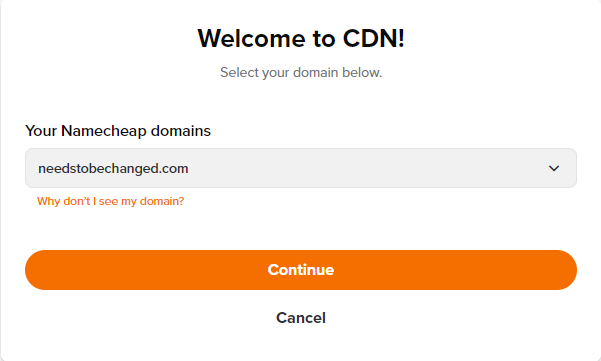
7. Select the new domain name for your Supersonic CDN subscription and press
Continue:
8. The final step in the setup will be to paste the Origin address:
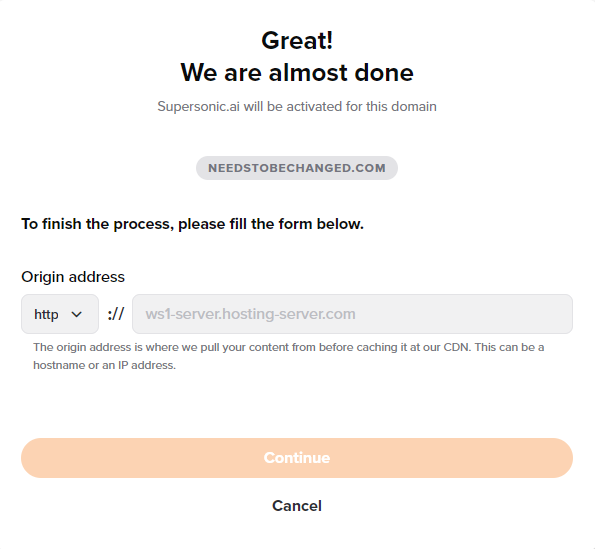
In case the domain name in question is hosted on Shared hosting, you will need to enter the IP address. This information can be checked in the Hosting Welcome Email, in the Namecheap account >> Hosting management page, or in the cPanel account >> General information section.
For domains connected with EasyWP, it will be necessary to enter the ALIAS record. You can find this in your
EasyWP dashboard. Feel free to use
this guide for reference.
You can also contact our
Customer Support if you need assistance with any part of the process.
Once the details are added, click
Continue.
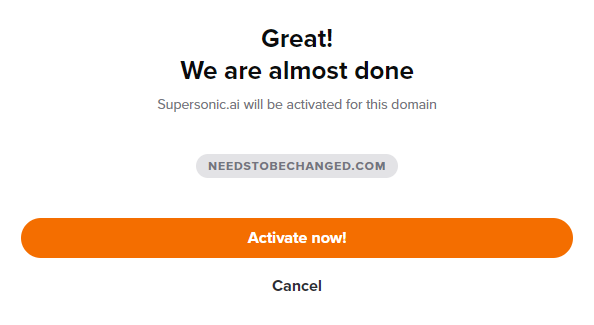
9. Confirm your actions on the next page by clicking
Activate now!:
NOTE: Usually, propagation takes up to 30 minutes (in rare cases it may take up to 24 hours).
That’s it!
