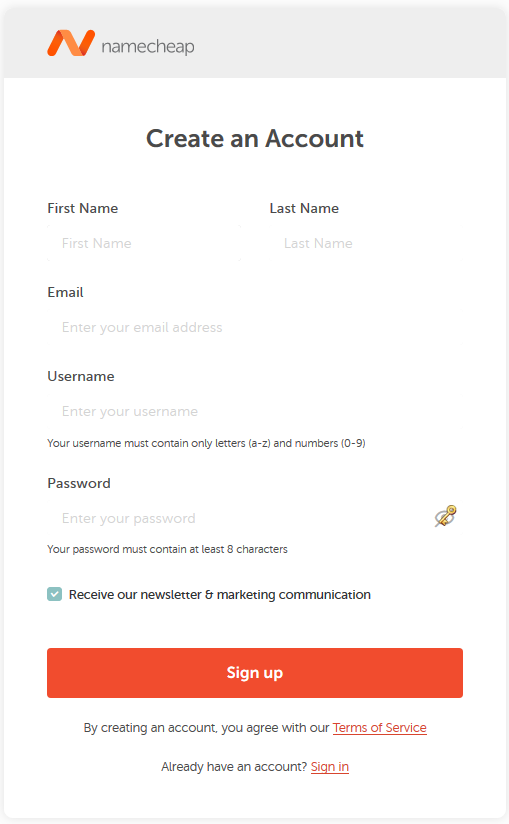
Once you click Get started, you will be prompted to sign into your Namecheap account or to create a new account:
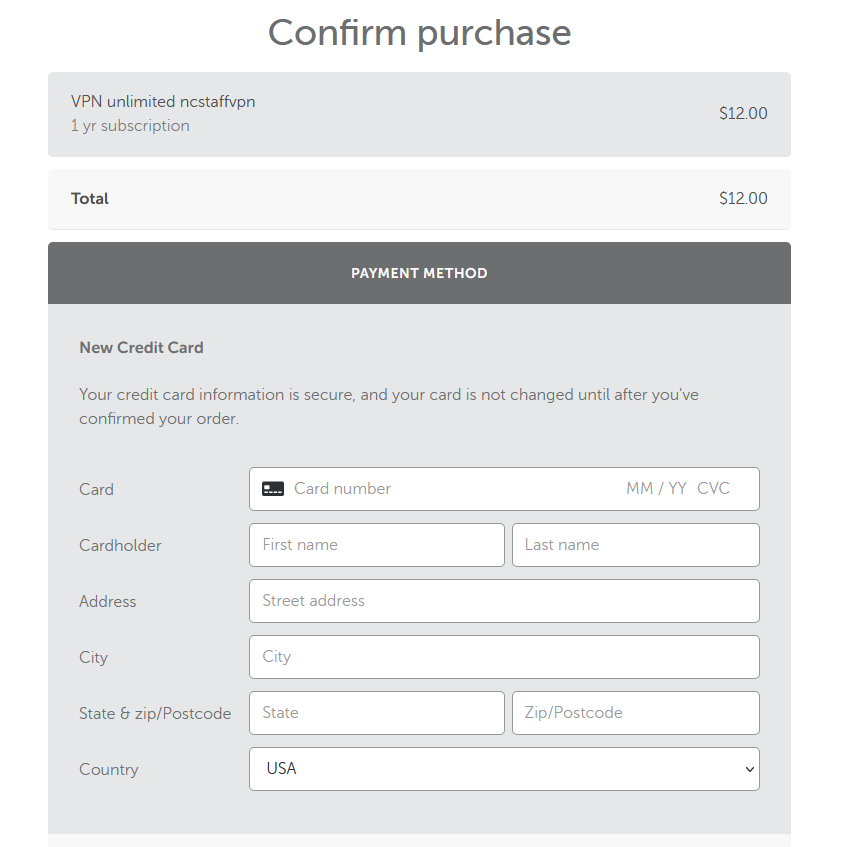
Once you are logged in, enter payment details and confirm your purchase of the FastVPN application:
To install the app, you can use the link directly from the
FastVPN for Mac page by clicking the
Download on App Store button in the Download VPN for MacOS section:
Once the app is successfully installed, the FastVPN icon will appear in the menu bar. Click this icon and sign into your existing Namecheap account:
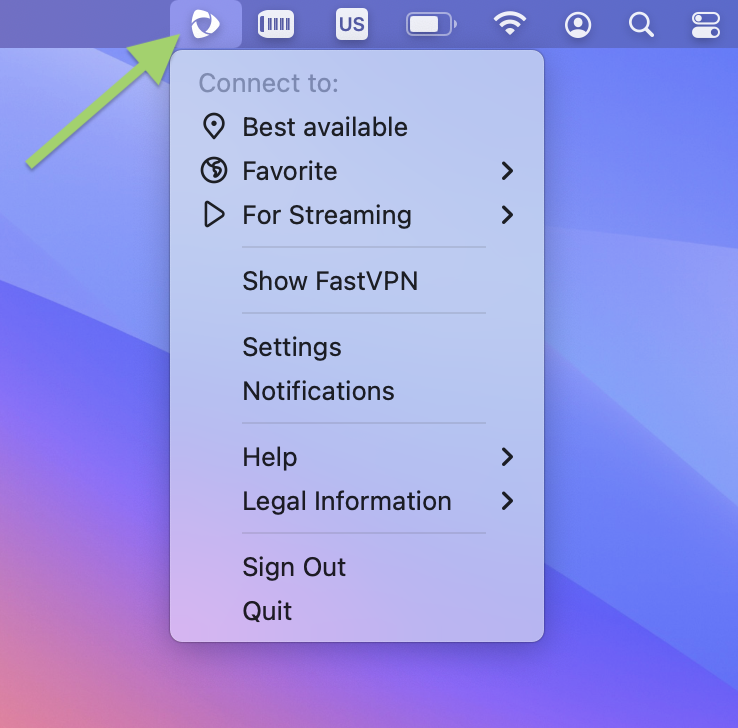
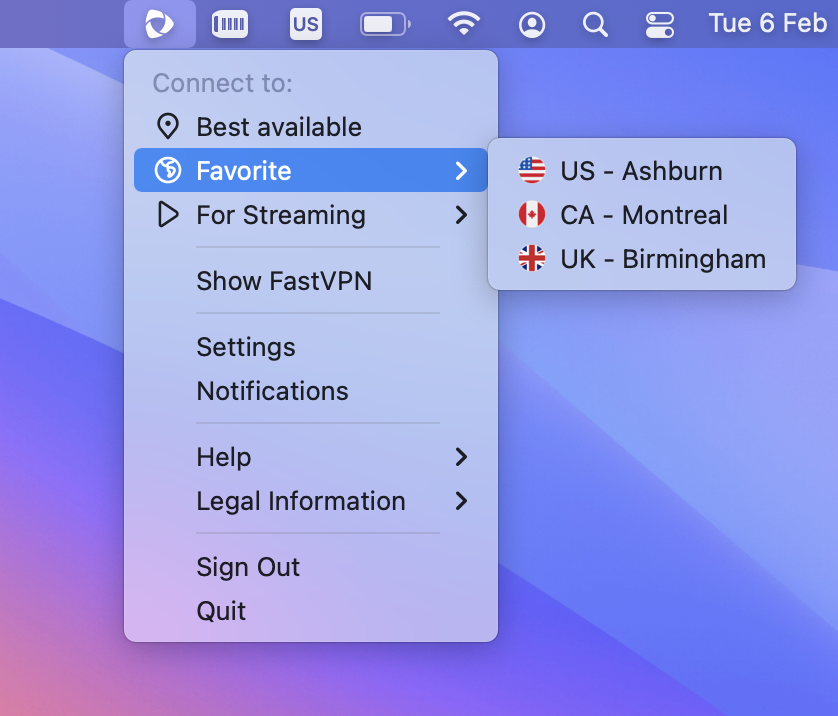
Once signed in, you will see the FastVPN system tray icon with Compact mode:
Under
Compact mode, you will have:
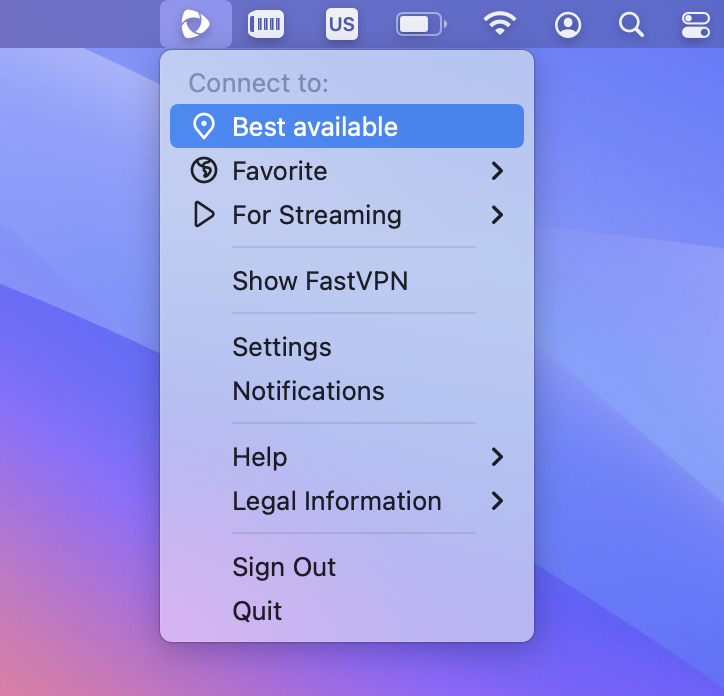
- Best Available - from here you can connect to the "Best Available" location:
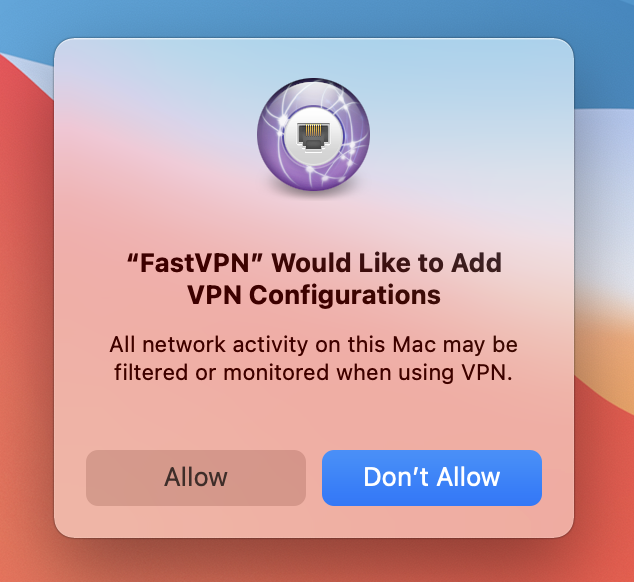
The next step allows FastVPN to be added to the VPN configurations on your Mac. Click Allow to proceed:
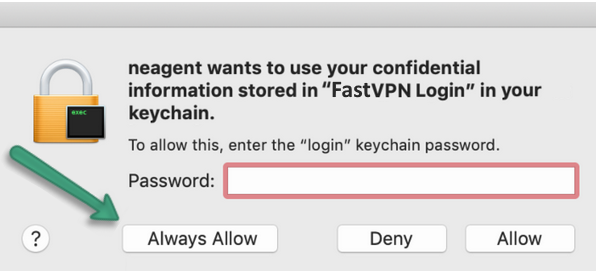
Once confirmed, you will be asked twice to enter your Mac user password in order to modify your settings. Click Always Allow:
- Favorite - from here you can connect to your favorite locations. Note that you will be able to add your favorite location if you have not chosen any before:
-
For Streaming option offers convenient access to streaming servers, allowing you to quickly connect to your preferred streaming services with just a few clicks:

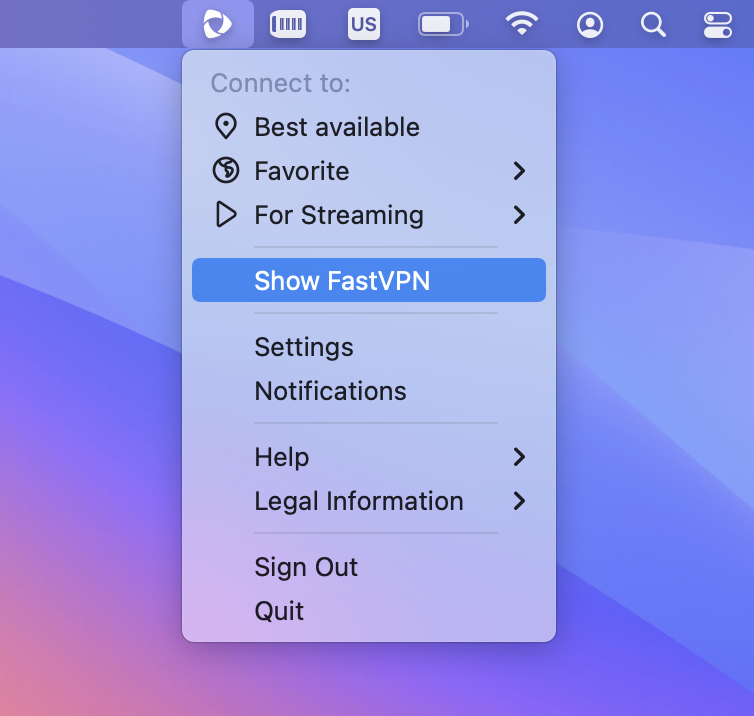
-
Show FastVPN will redirect you to the expanded view with more options where you
can see all locations, add/remove the favorite country or city, connect
to country or city:
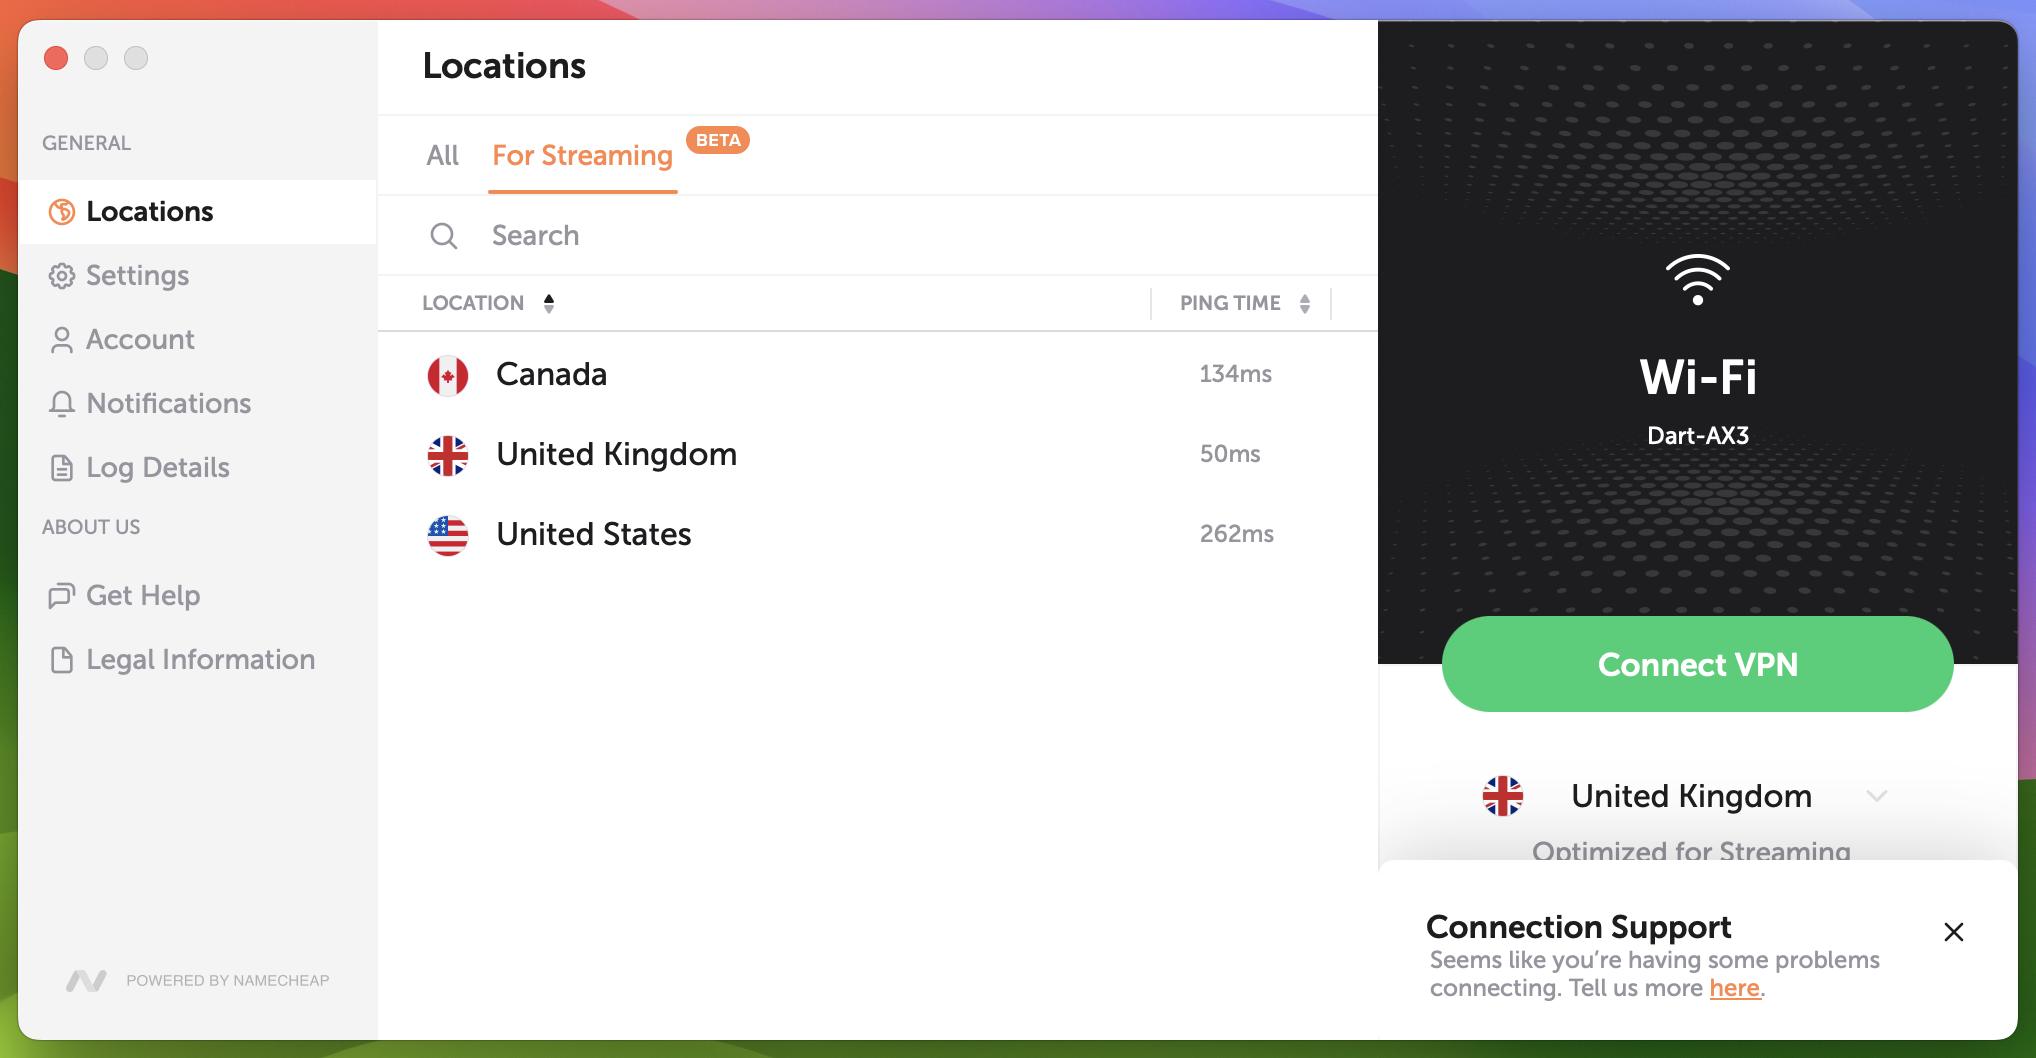
Here you'll find two modes: "All" servers and "For Streaming". All servers include our full range of servers for private browsing while Streaming servers are optimized specifically for streaming services, providing smoother and faster streaming experiences.
In the "All" servers mode you can favorite a country:
Or favorite a city:
You can have multiple levels of connections, either connect at a country level:
Or connect to a city location:
On the main screen, you can see your download and upload stats, the selected protocol, and the current IP. To change the IP, just click "Switch IP".
"Shuffle IP" gives you a new IP address without changing your selected location. It's useful if a site blocks your IP or you want a fresh connection.
When you click "Switch IP", the VPN briefly disconnects, reconnects to another server in the same area, and gives you a new IP - usually in just a few seconds.
This feature can help bypass IP blocks, fix slow speeds, or improve privacy without manually picking a new location.
In the "
For streaming" mode, you'll find locations optimized specifically for streaming services, ensuring smoother and faster streaming experiences. For more details, please refer to the "
How to Use FastVPN Streaming Mode" article.

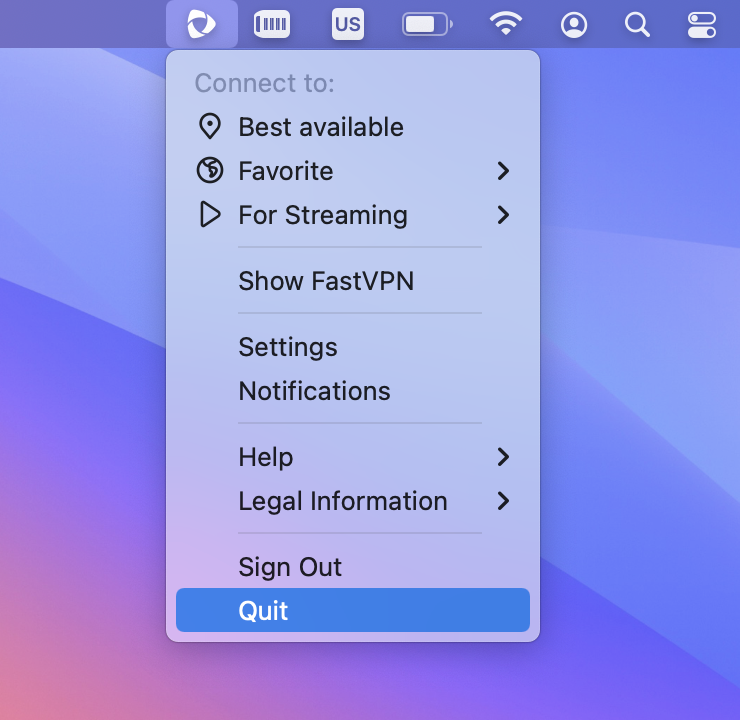
-
Settings will redirect you to the expanded view where you will have more options:
Settings are categorized into
General and
Advanced sections.
In the
General settings, you will find options that are commonly used, providing essential controls for your VPN experience. Here, you will find the following.
- Options for Protocol selection:
- IKEv2 - a secure, stable and mobile-oriented protocol. It is faster than other protocols but only supported on limited platforms.
- WireGuard®* - fast, secure, easy-to-use protocol that has strong encryption, perfect forward secrecy, and minimal attack surface.
*All Rights Reserved. "WireGuard" and the "WireGuard" logo are registered trademarks of Jason A. Donenfeld.
- Theme Appearance allows you to choose light or dark themes for the FastVPN app or
automatically adjust the theme from light to dark during the day.
- FastVPN section with the Version number of the app that you are using.

NOTE. To use WireGuard® protocol:
- update your FastVPN app to the latest version;
- choose the WireGuard® protocol from the app settings;
- allow FastVPN to install WireGuard® System Extension;
1. If the Extension is blocked, click "Open Security Preferences" to approve.
2. In the macOS settings, unlock Security & Privacy with a click on the lock, then press "Allow" to run the Extension.
3. Lastly, approve the VPN configuration installation.
- select a server location;
- once you connect to the server, FastVPN will automatically establish a secure VPN connection using WireGuard®.
Under
Advanced Settings you will have:
- Auto-Protect option - it will always keep your traffic protected when you use the Internet on your device.
- Network detection notification - will ask to connect to VPN upon a new network detection.
- Trusted WiFi networks - allows you to add a current
network to trusted. Trusted WiFi networks are the WiFi networks that you
trust or do already have a VPN connection on, for which you do not want
to use the FastVPN.
- Ad Blocker allows you to browse safely by blocking ads, preventing online tracking, and reducing access to malicious content (Wireguard® Protocol Required).
- Kill Switch will disconnect your internet connection when FastVPN is not available, ensuring your online security (Wireguard® Protocol Required).
*Note: in the occurrence when Kill-Switch is on and you are not connected to VPN, the ping information cannot be retrieved. In such case, what you need to do is:
- Turn Kill-Switch off;
- Connect to VPN;
- Then turn Kill-Switch back on;

NOTE: To enhance user experience, Streaming Mode features a simplified interface with fewer settings, making it easy to use for everyone. While in Streaming Mode, Advanced settings and Protocols are not available for customization.
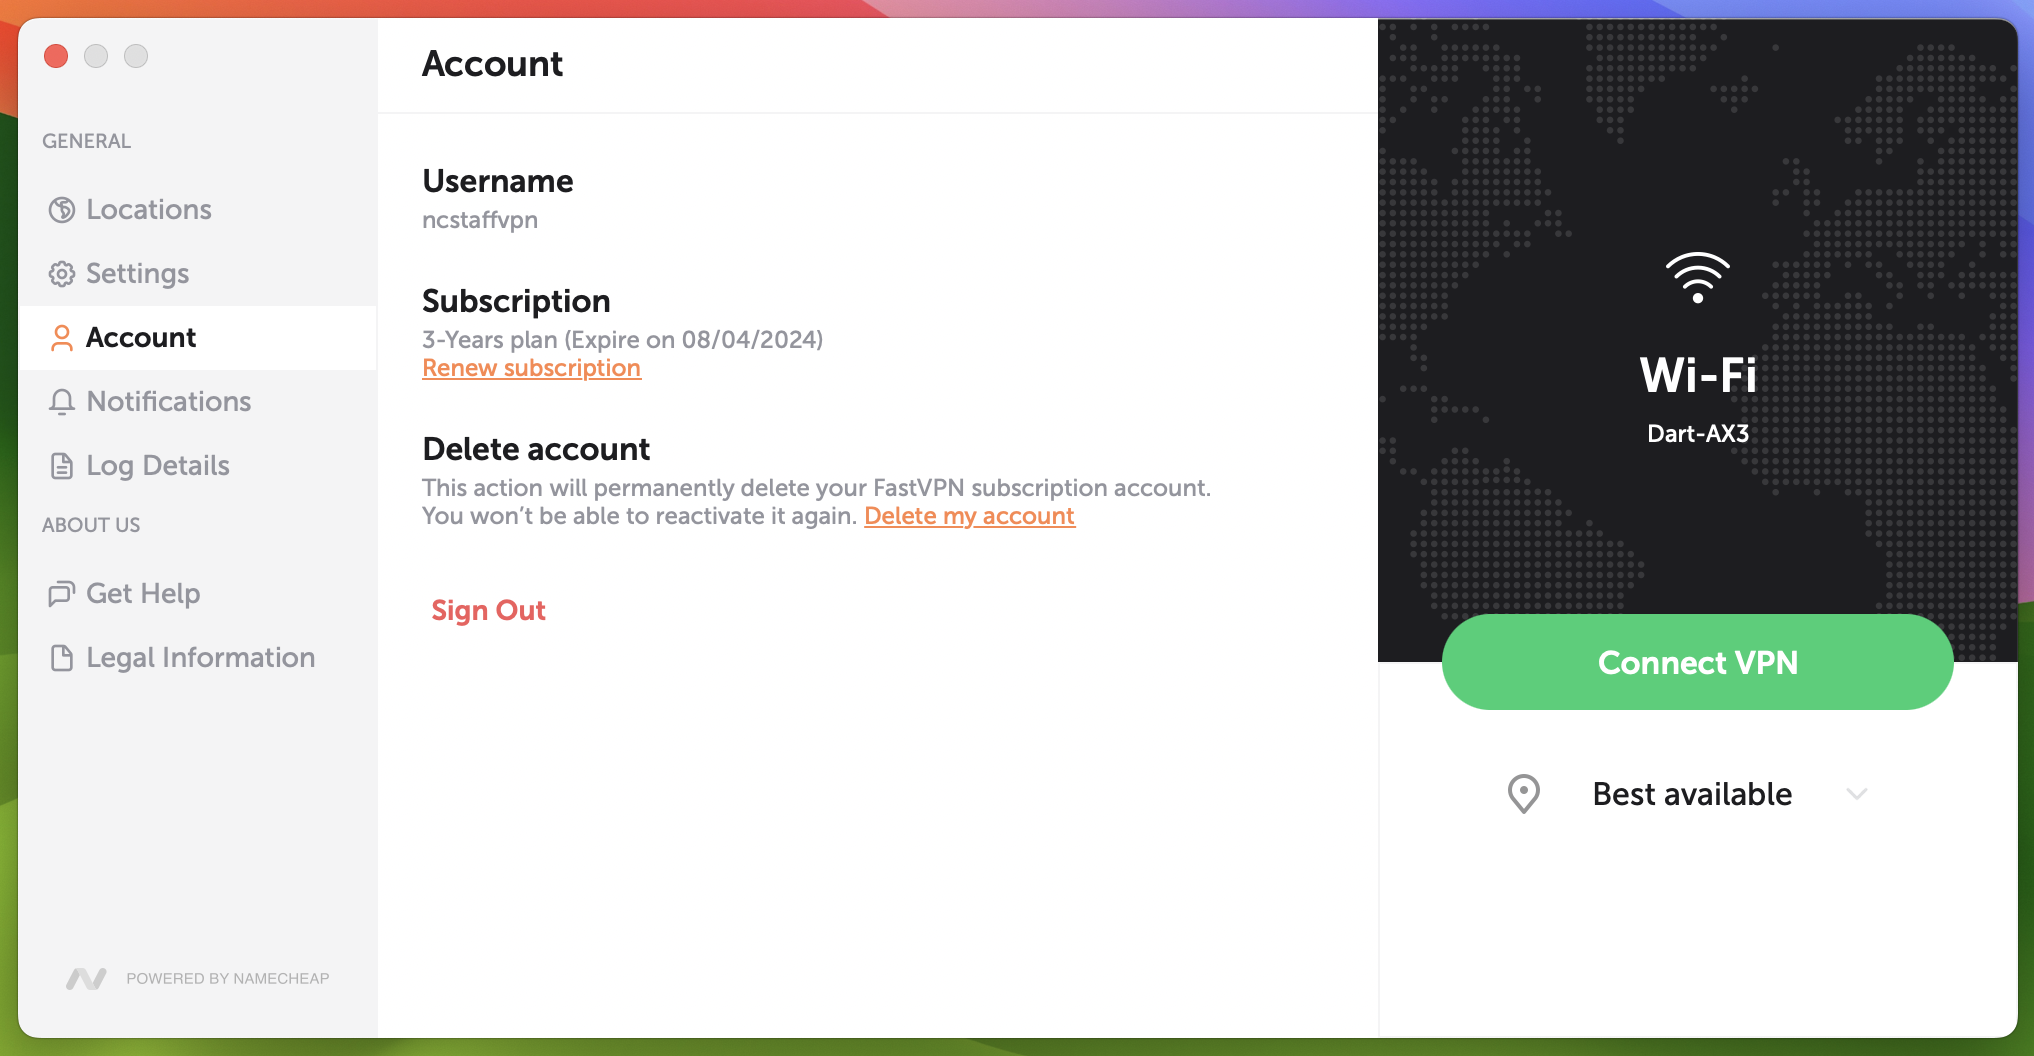
Under
Account you will have:
- Username;
- Subscription information;
- Delete account request;
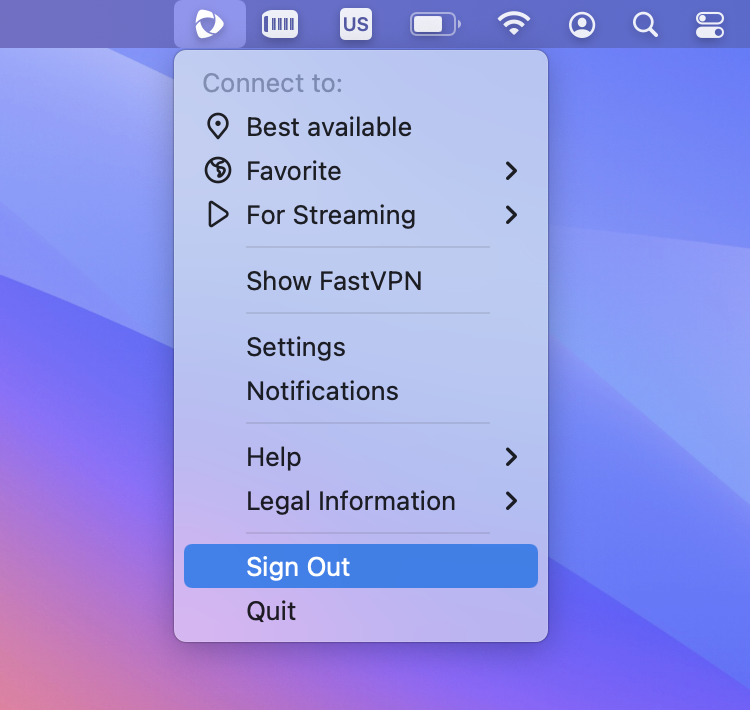
- Sign Out option.
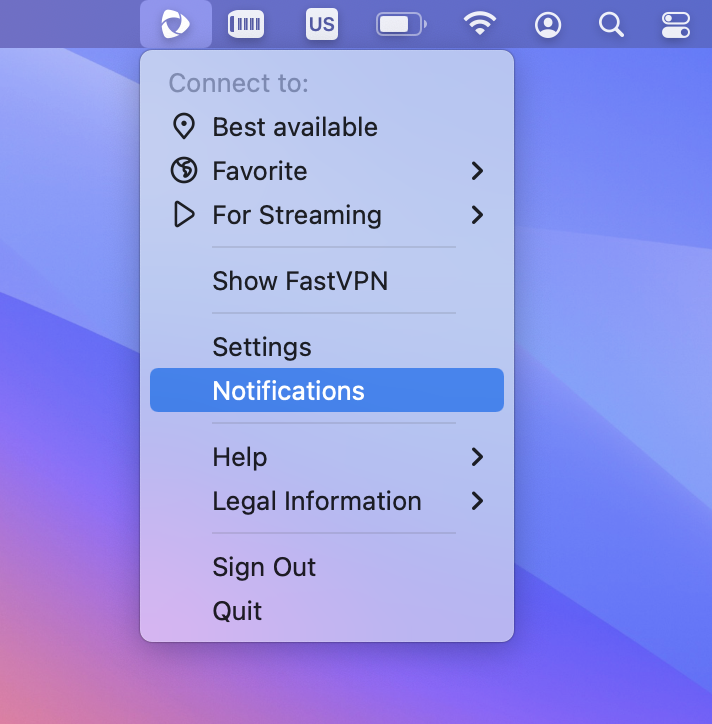
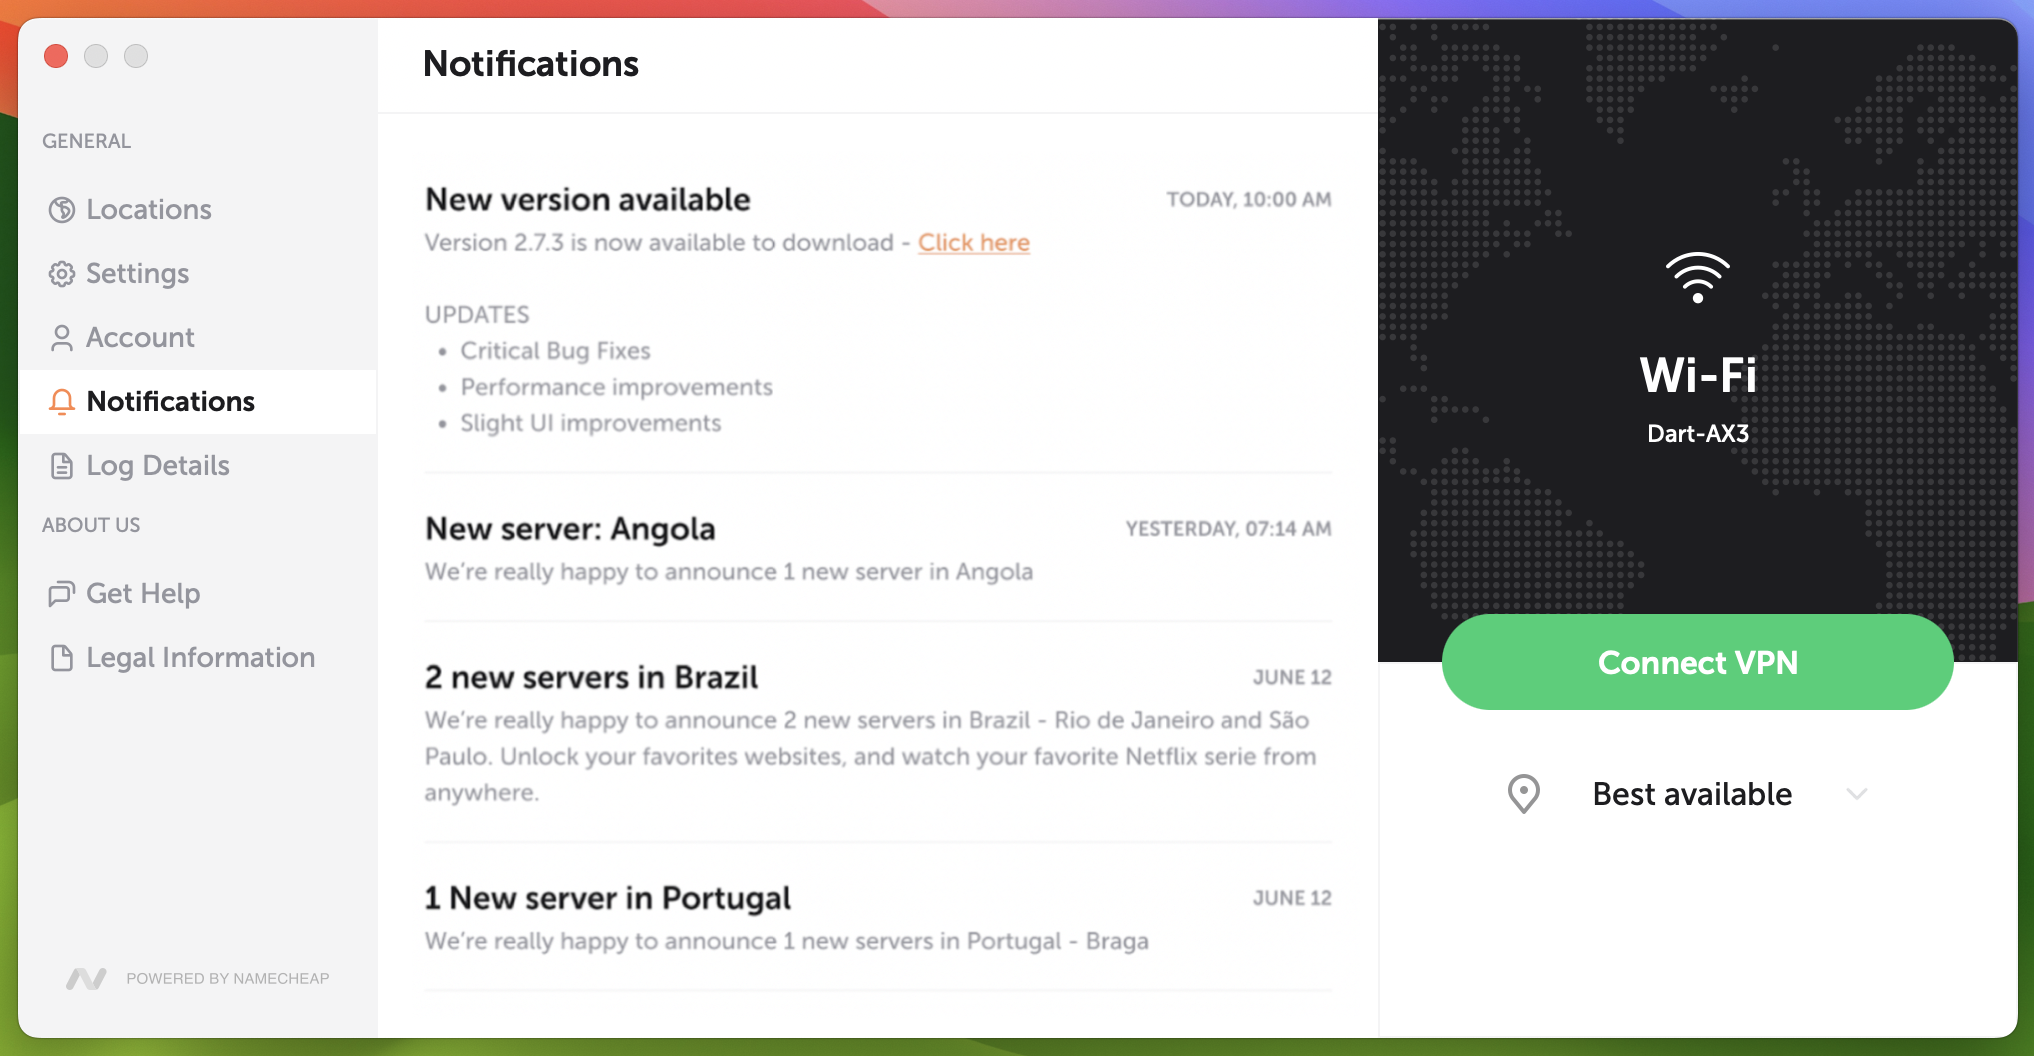
Under Notifications, you will be notified of important announcements and alerts:
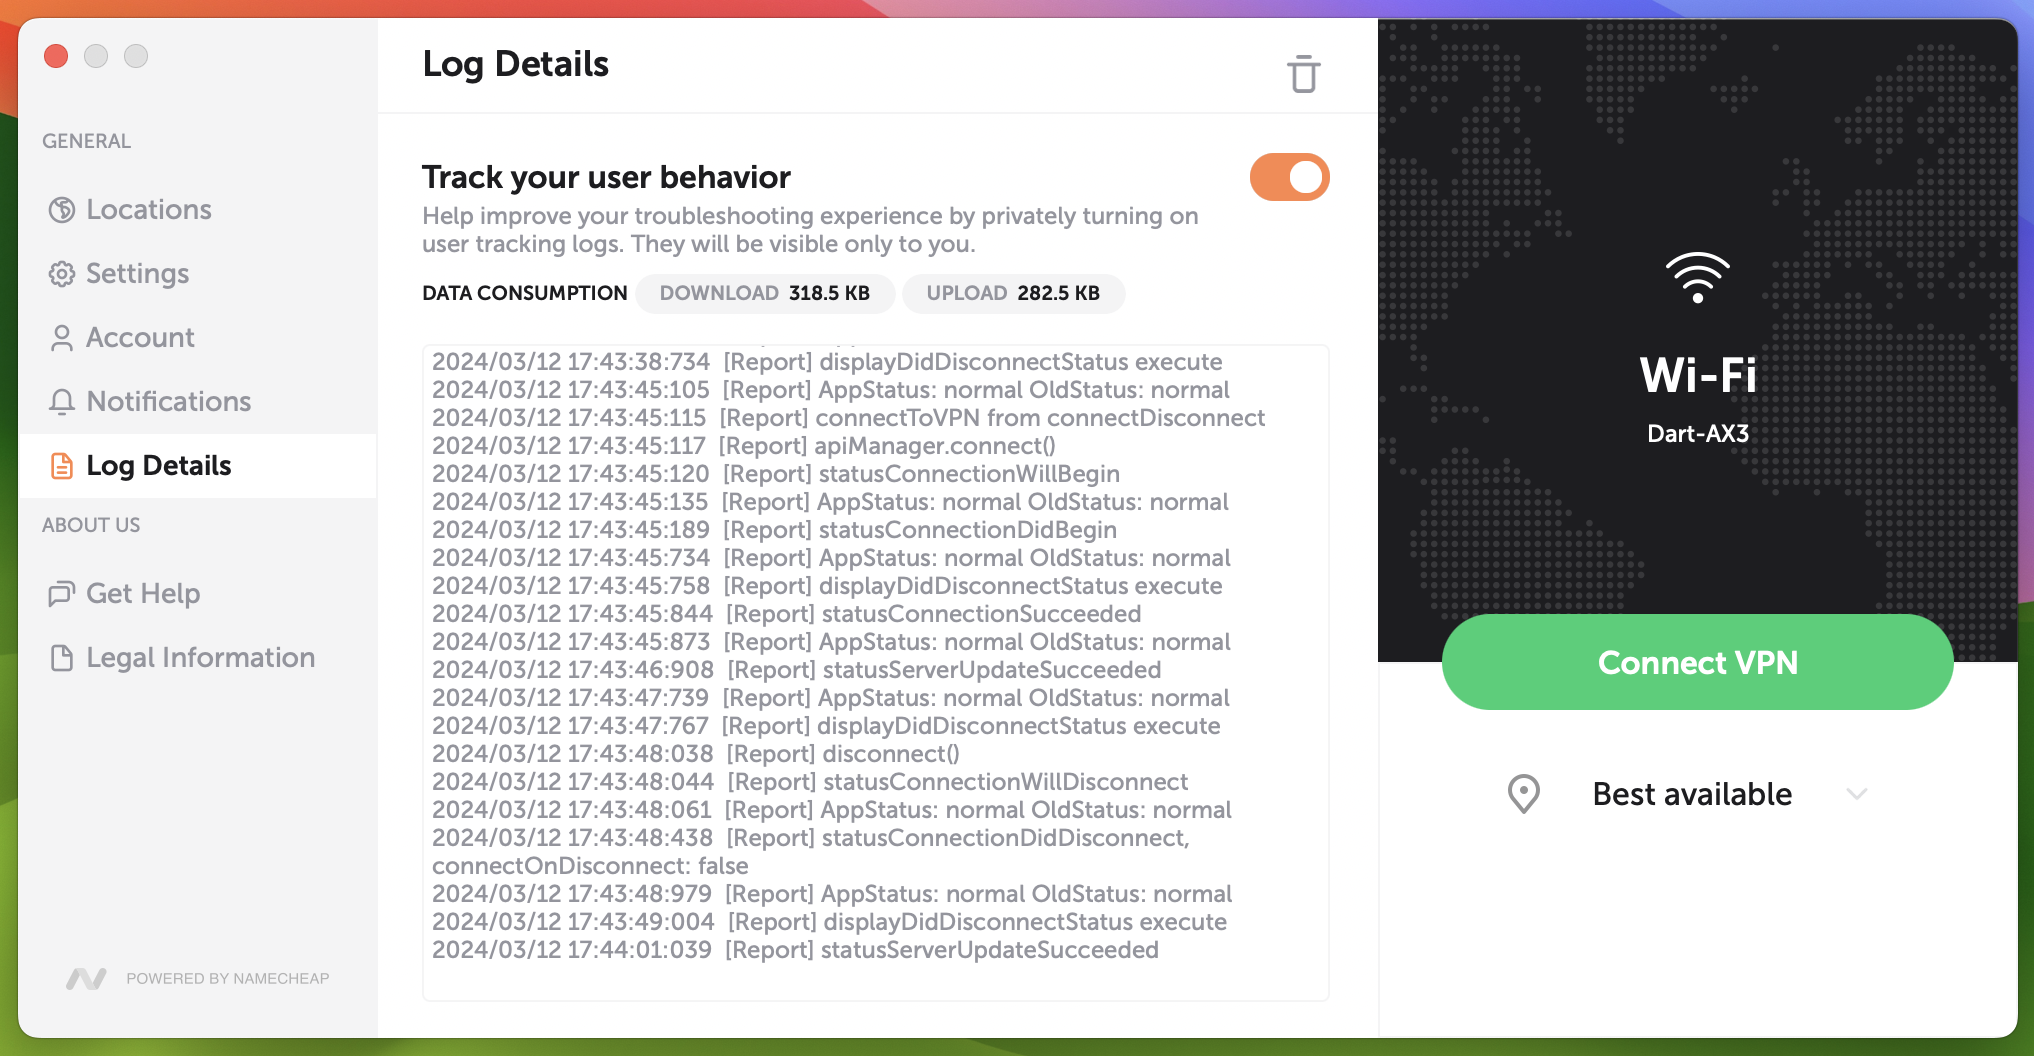
Under Log Details, you will have:
- The Track Your User Behavior option that allows you privately turning on user tracking logs. They will be visible only to you.
- Data Consumption section that allows you to track Downloads and Uploads.
- Log Details section to improve your troubleshooting experience.
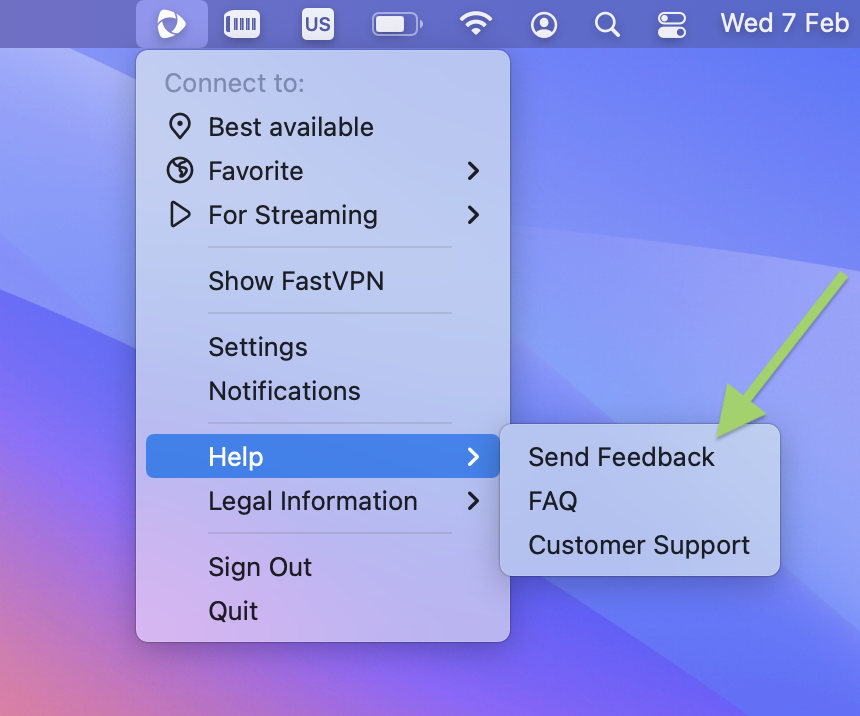
Under
Get Help you will have:
- Share feedback or report a problem - allows you to send feedback or report a problem directly from the app.
- Online chat support - allows you to contact our support directly by clicking the “Start live chat” link.
- Frequently Asked Questions - to access our Knowledgebase.
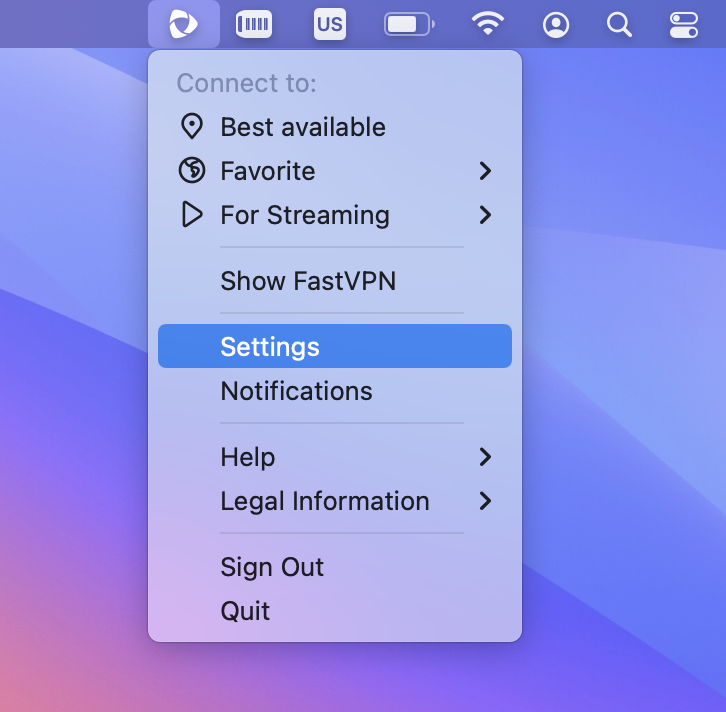
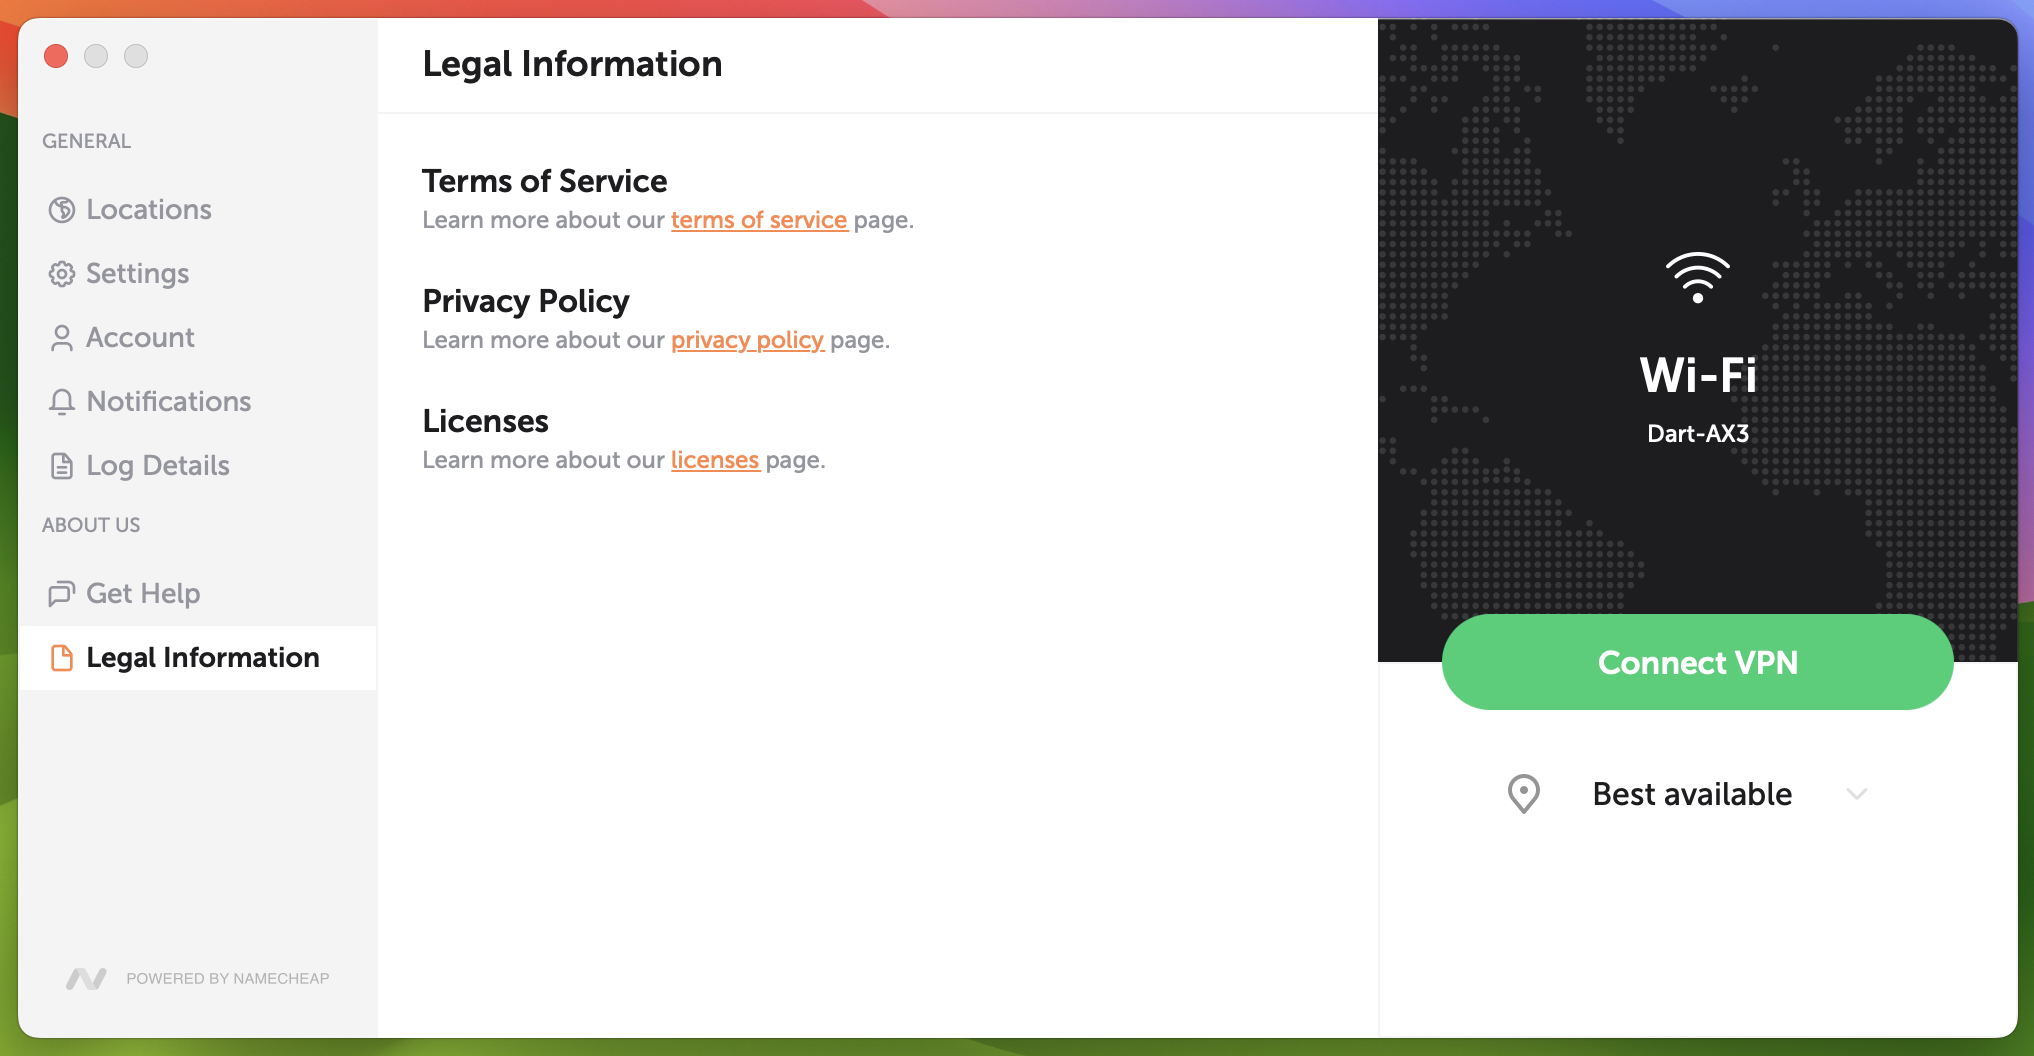
Under Legal Information you will have:
- Terms of Service.
- Privacy Policy.
- Licenses.
- Send feedback allows you to submit feedback from the app.
In case of failure in using the FastVPN application, you will be
able to send a Problem Report to let us know about the issues you are
having with FastVPN.
The corresponding pop-up will appear if there is a problem:
And that's it! If you need any further assistance, please contact our Support Team.