To set up OpenVPN to work on Ubuntu. you will need:
- A secure FastVPN connection (Don’t have one? Sign up here!);
- Access to your FastVPN account panel to get your network credentials;
- A working installation of Linux Ubuntu (this guide uses Ubuntu 22.04 LTS version).
Follow the steps below to configure FastVPN OpenVPN client in Ubuntu:
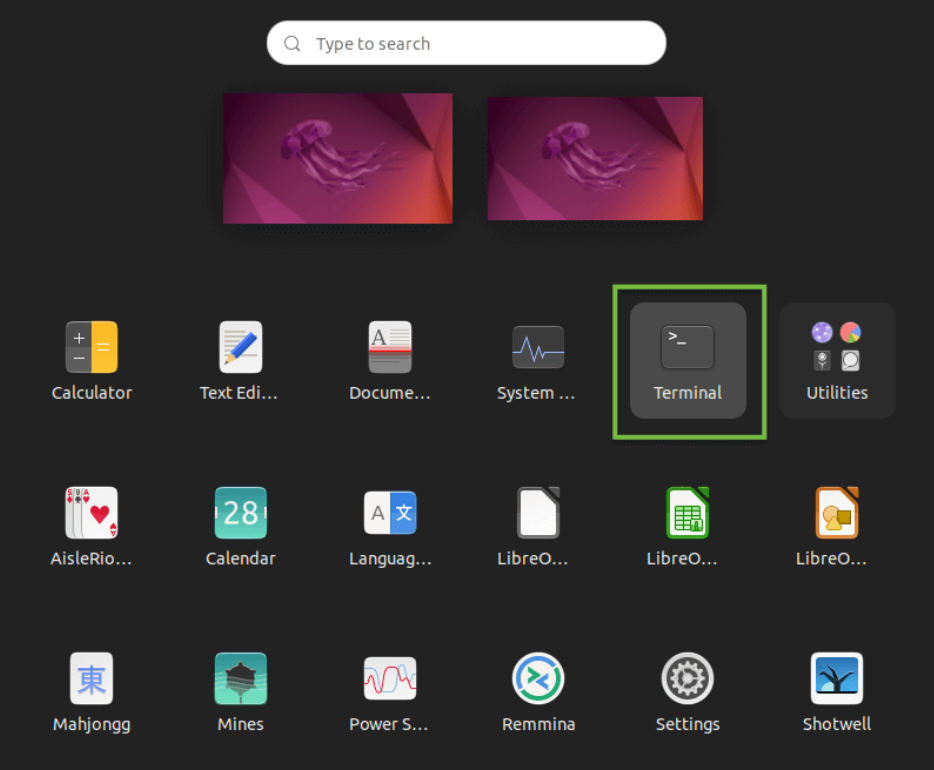
1. Choose an administrator-enabled account and login to your main desktop. Select and click the Terminal icon from the screen:
2.
You will be redirected to a Terminal window spawning a new shell and
waiting for further input. Make sure the terminal window is in focus
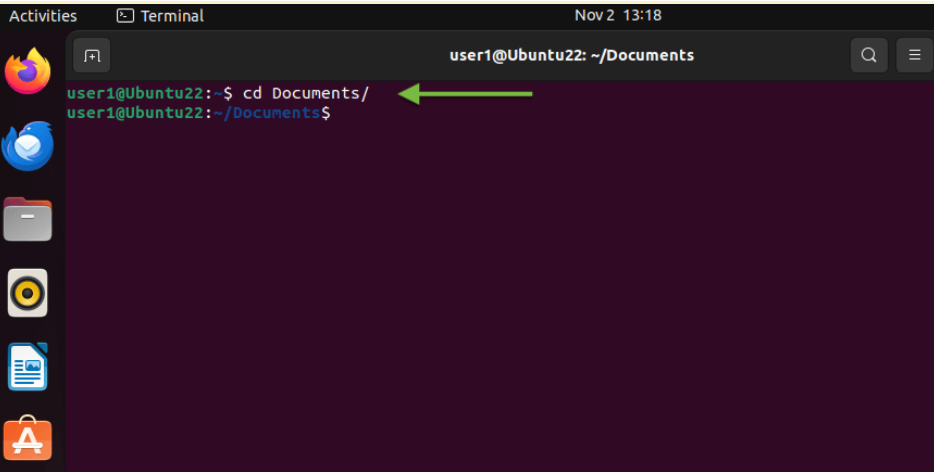
and enter the following command:
cd Documents/
Press the Enter key:
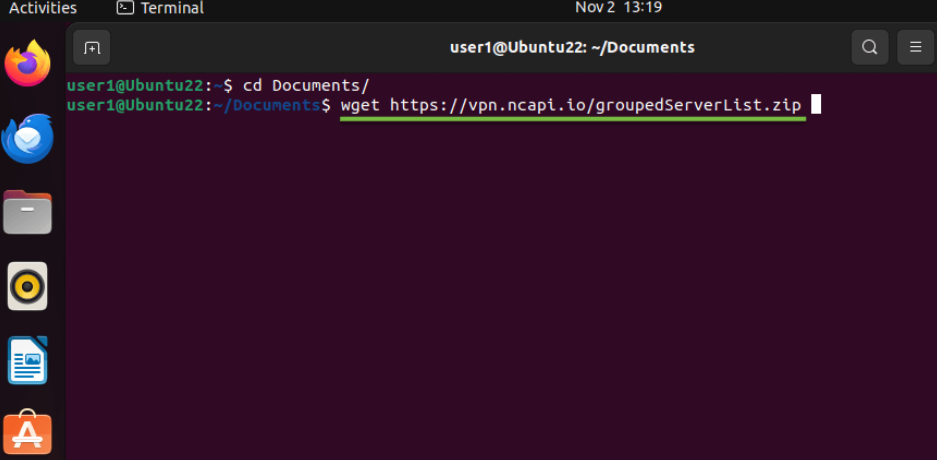
3. Enter the following command in the terminal window:
wget
https://vpn.ncapi.io/groupedServerList.zipThis
will download and save the FastVPN OpenVPN configs zip file from
our repository. Click the Enter key and proceed to the next step:
4. Unzip the configs files into your Documents directory by entering the following command:
unzip groupedServerList.zip
Press the Enter key:
5.
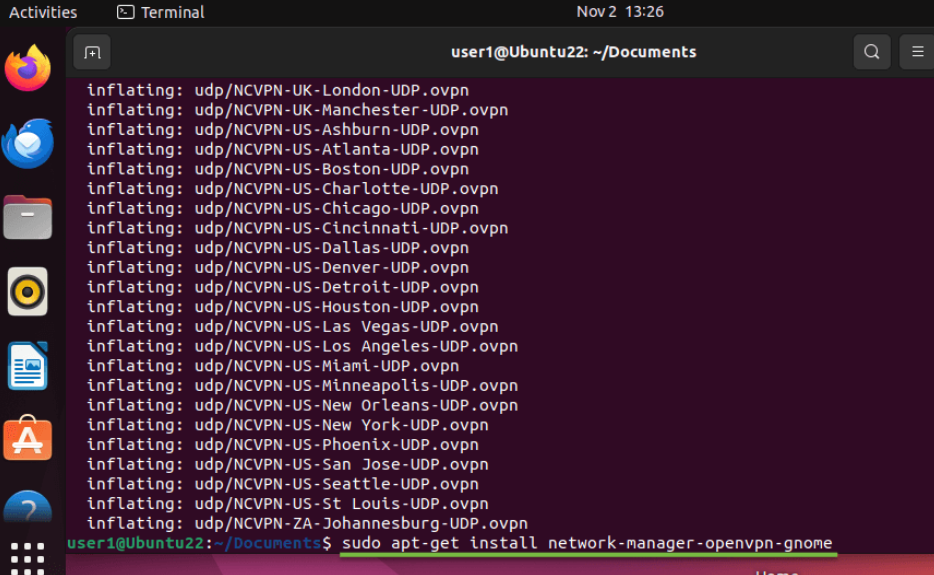
The previously entered commands will unzip the downloaded configuration
files and they will be shown in the terminal window. Read the output and report any error
messages to our
Support Team. After the download is complete and the prompt appears, move to the next step:
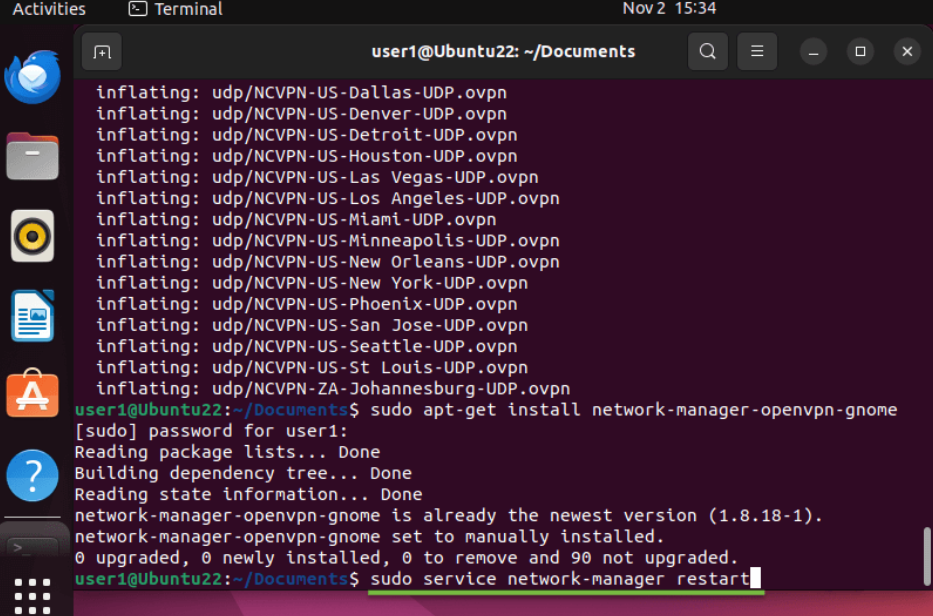
6. Now you need to install a mandatory package required to import and use
the OpenVPN config files you have downloaded previously. This package
will allow you to import the config file(s) via the graphical user
interface (GUI) very easily. To proceed, use the following command:
sudo apt-get install network-manager-openvpn-gnome
Press the Enter key and continue to the next step:
7. Type your Linux Ubuntu 22 password and press the
Enter key. Check if there are any error messages in the resulting output and report them to our
Support Team for further assistance. Once the prompt appears, the terminal may be closed:
8. To restart the network manager and apply your VPN configuration, use the following command:
sudo systemctl restart NetworkManager.service
Note: For older Ubuntu versions, use this alternative command instead:
sudo service network-manager restart
Note: During the restart process, networking will be temporarily unavailable until the network manager fully restarts.
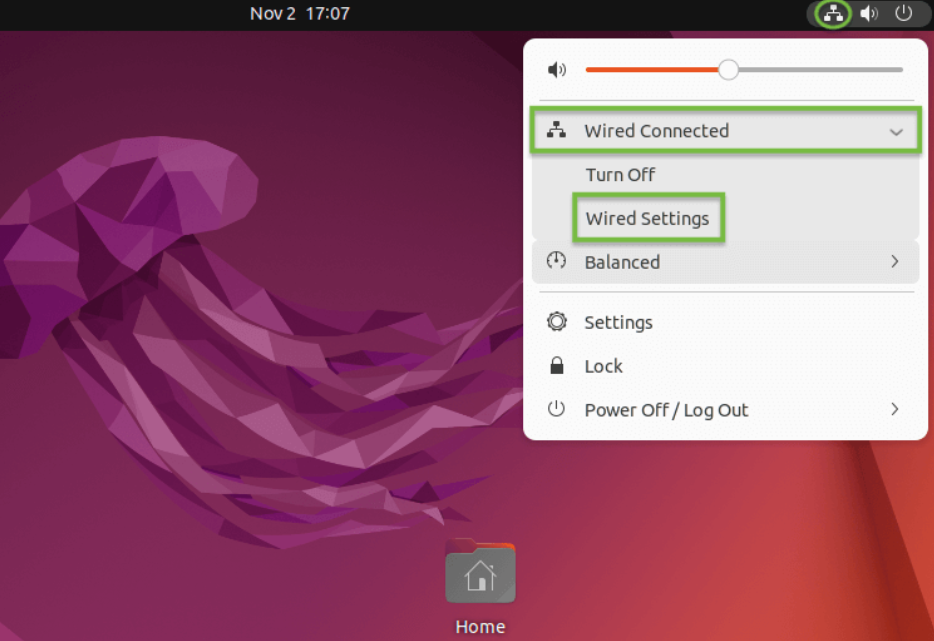
9.
Navigate to the home screen and click on the Network icon in the top
right of the screen as shown below. Click on the Wired Settings option under the Wired Connected menu:
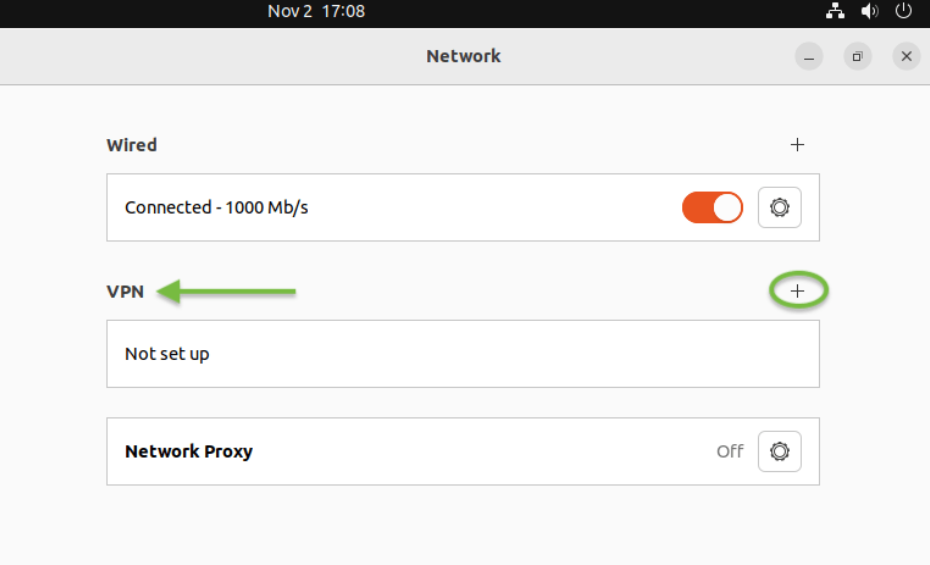
10. Click the Add (+) button on the right from VPN:
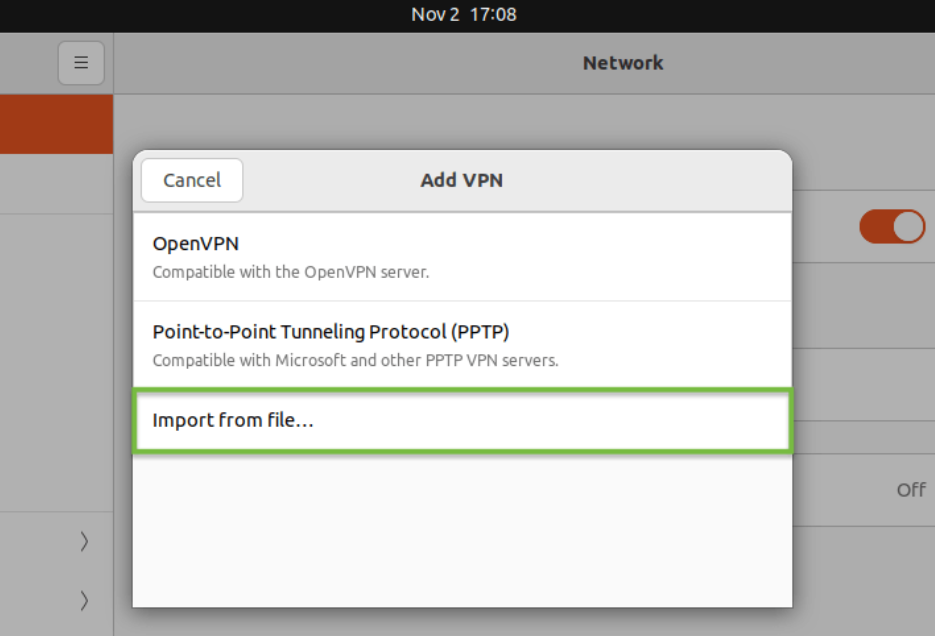
11. Once the Add VPN window pop-ups, click on the drop-down menu and select the Import from file… tab:
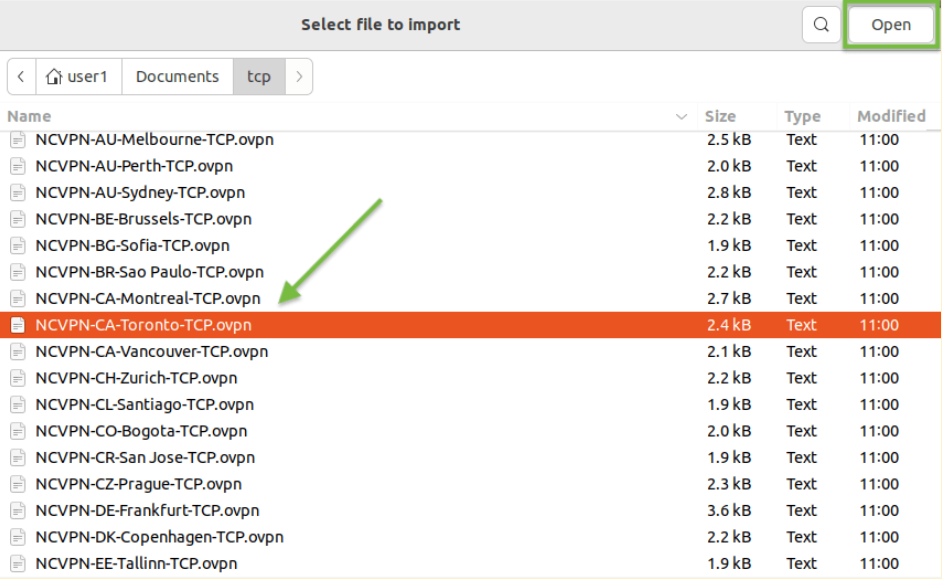
12. Select your preferred OpenVPN configuration file downloaded earlier from your Documents folder. In our example, we selected the NCVPN-CA-Toronto.ovpn
item. The servers can be selected based on your preferences. Our server
naming format is Country-Location-Server address. Once the
configuration file has been chosen, click the Open button in the top-right corner:
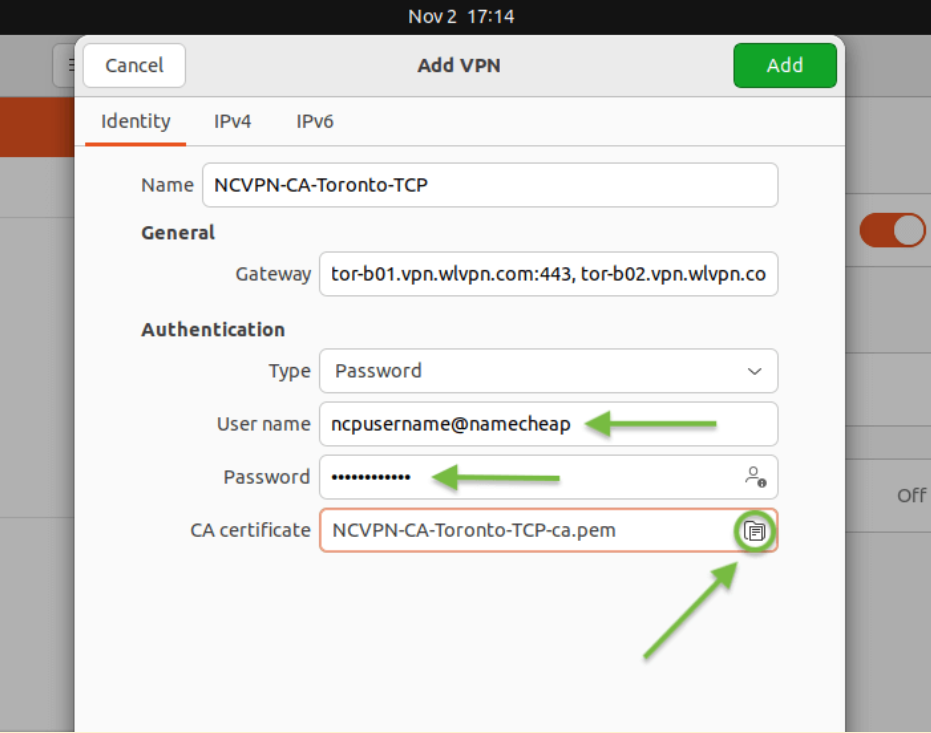
13. The previously selected OpenVPN config file will be imported into the
Network Manager as an unsaved session. Make sure the server address is correct in the
Gateway field and enter your credentials from the FastVPN
Account Panel into the
Username and
Password fields.
Select the Store the password for all users option in the password field. Once you've entered all required details, click on the Add button on top right of the window:
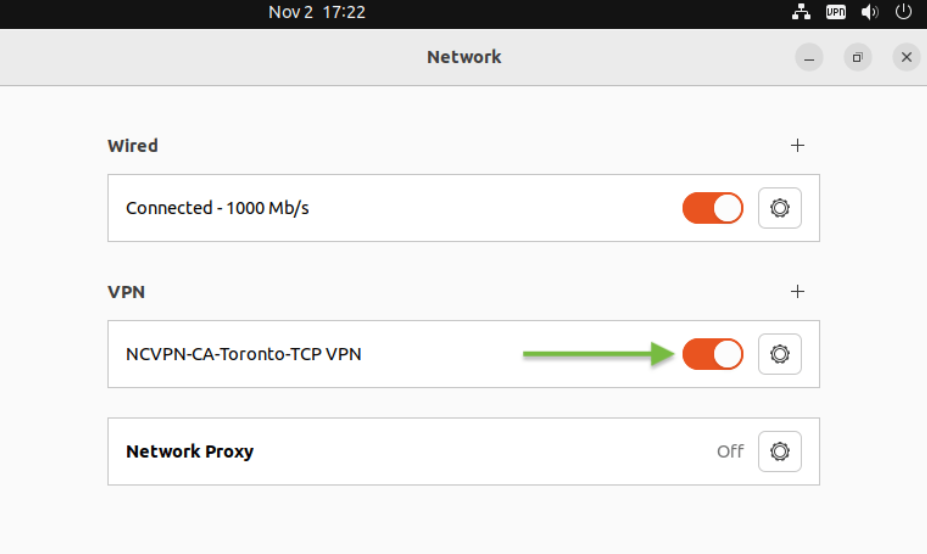
14. Now you should see the newly created FastVPN OpenVPN session listed in the main selection area of the VPN menu. Put the button in the VPN section to the position ON to connect to FastVPN:
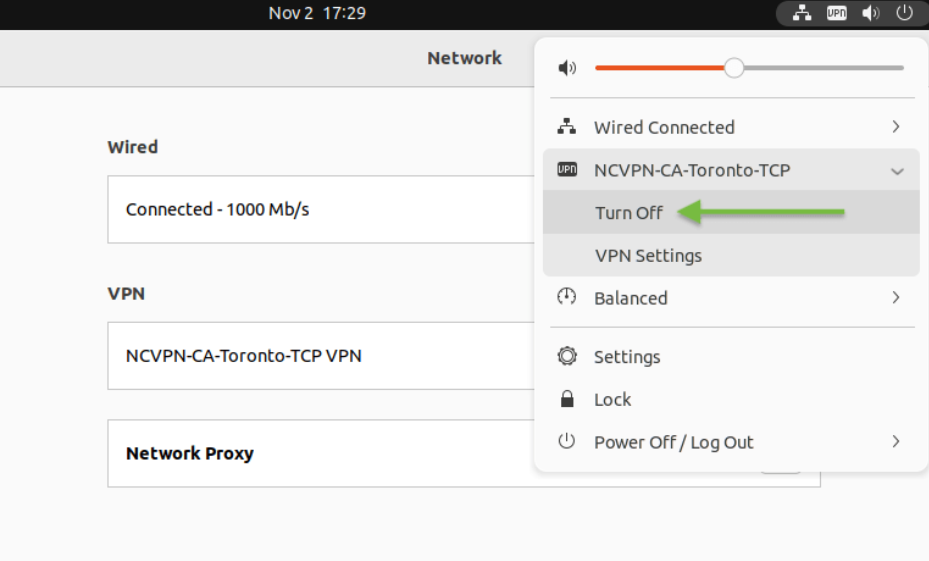
15. You can also enable/disable the VPN connection from your home screen as shown below:
If you need any further assistance, please contact our
Support Team.