This guide provides a detailed walkthrough on how to configure the OpenVPN client on OpenWrt router.
Requirements
To ensure a proper work of FastVPN with the OpenVPN client on OpenWrt router, you will need:
Setup of the OpenVPN client on OpenWrt 19.07 router
Open
your OpenWrt web interface by entering the IP-address of the admin
panel in the address line of your browser. To do this, you need to enter
in your browser the following address: http://192.168.1.1 (if
this doesn’t work, please refer to your router’s manual to find out what
is the Default Gateway Address). Also you have to set your network
connection to get an IP address automatically if you connect to your
router via Ethernet.
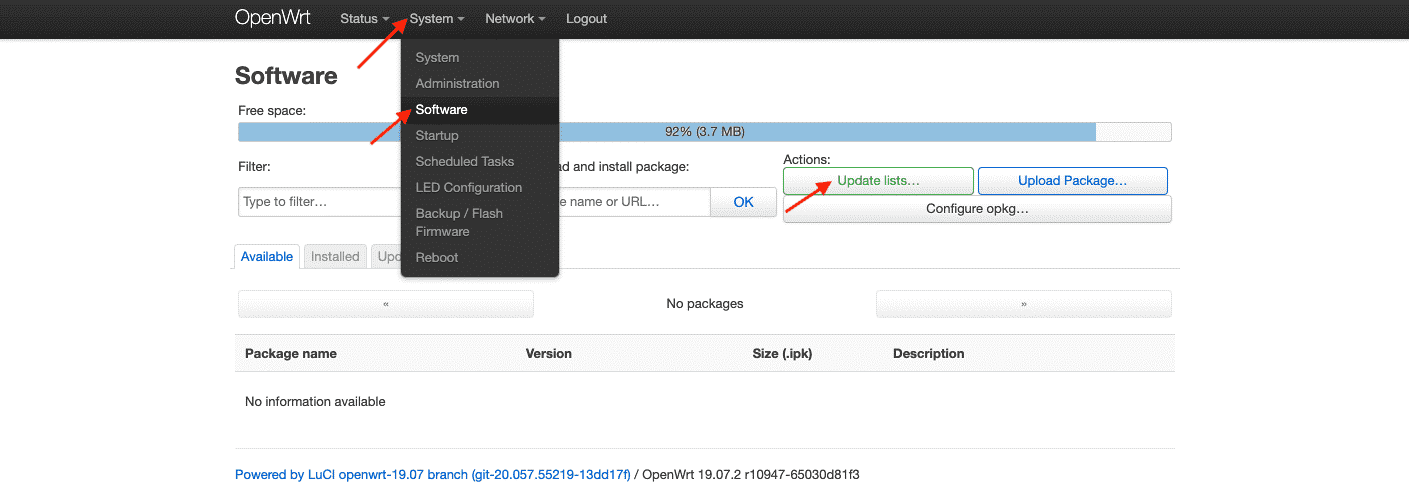
1. Go to the System > Software and click Update lists:
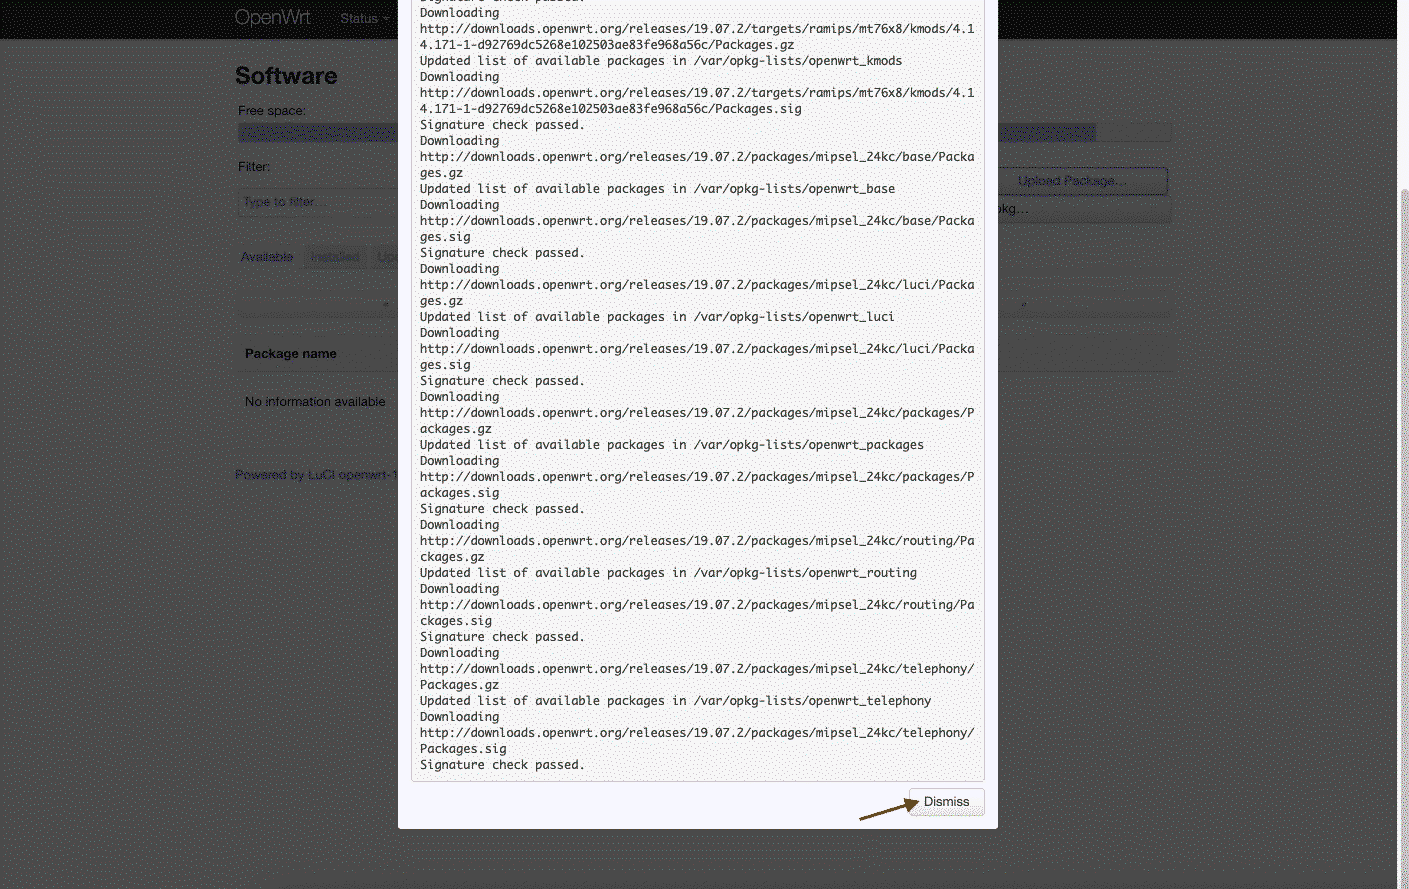
2. Wait until the action is completed and press Dismiss:
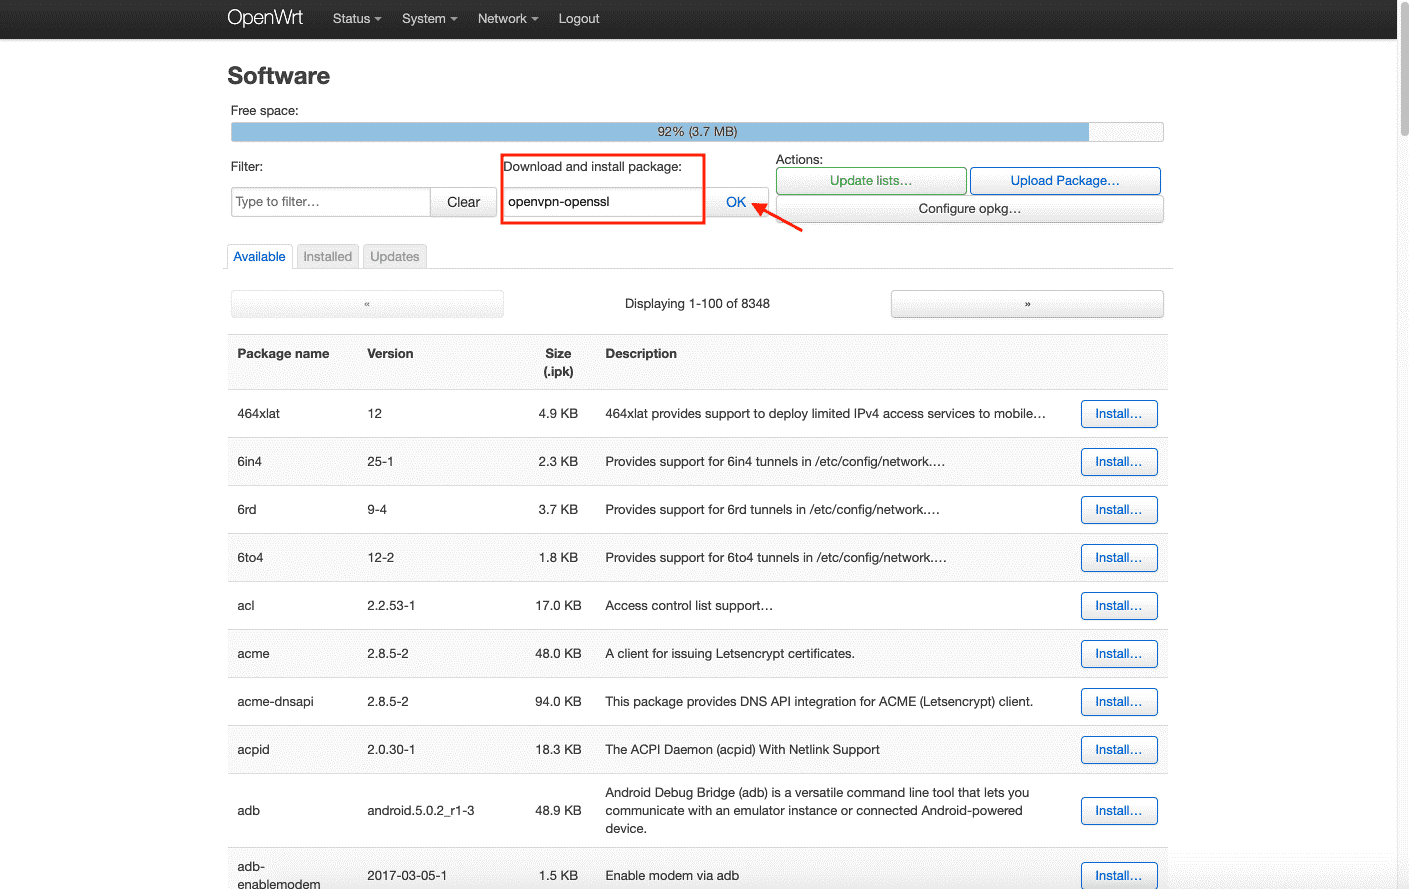
3. Enter openvpn-openssl in the Download and install package field and press OK:
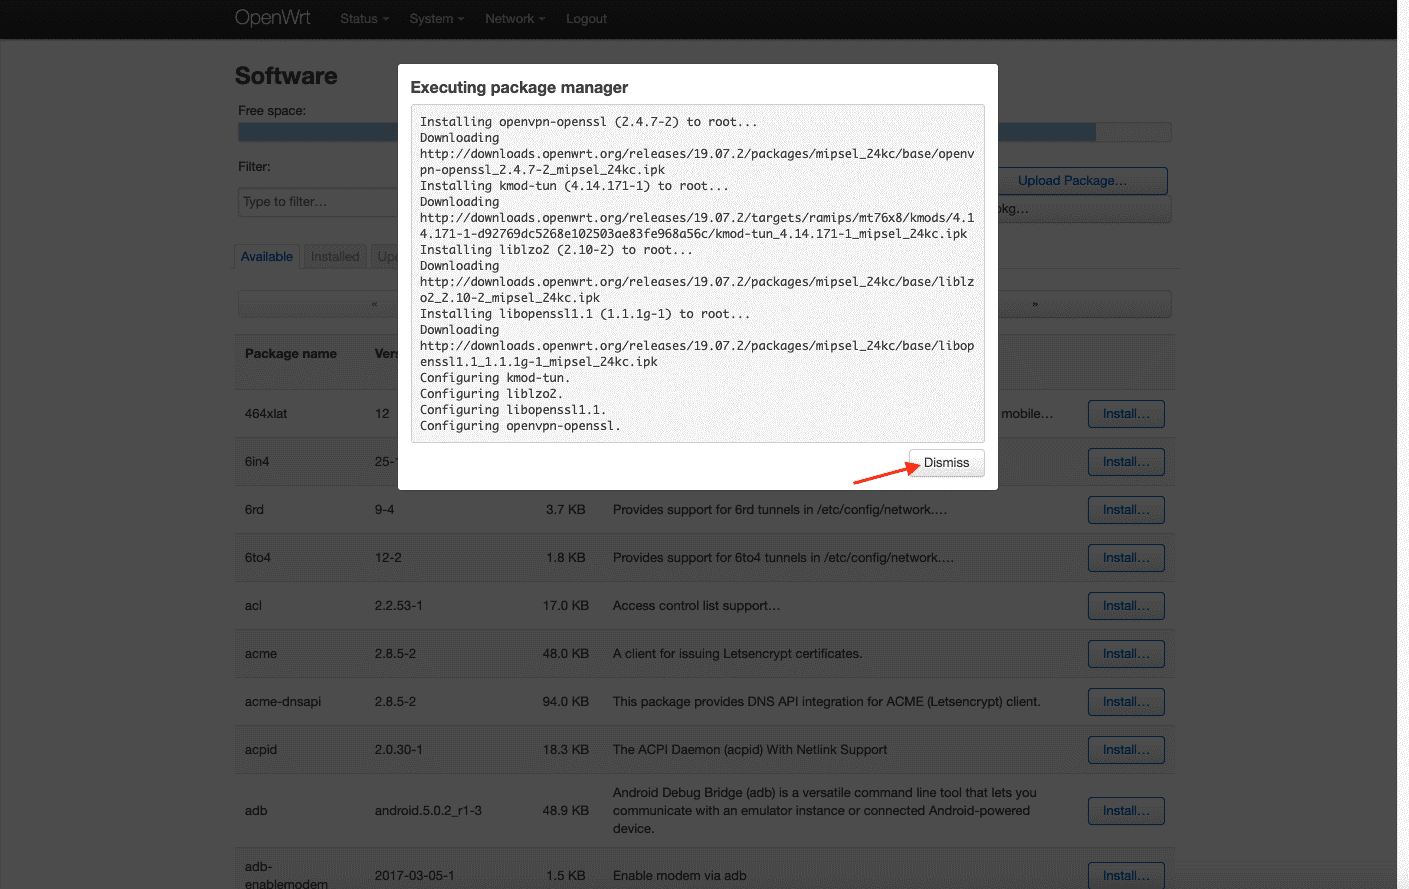
4. Click Install and wait until the package is downloaded. Once done, press Dismiss:
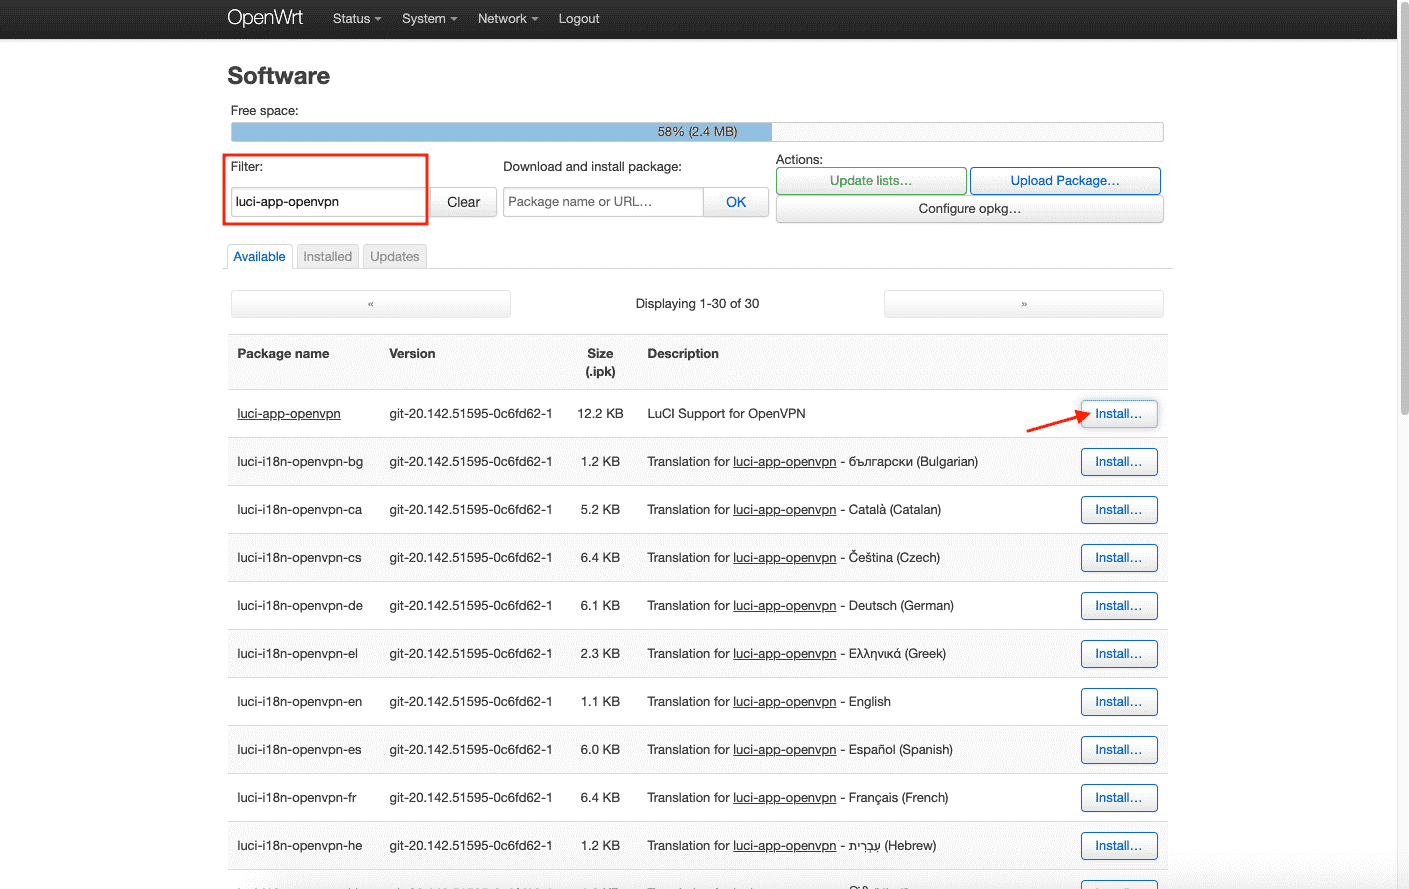
5. Enter luci-app-openvpn in the Filter field and click Install:
Then type luci-i18n-openvpn-en in the Filter field and click Install.
6. Put the check-mark next to the Overwrite files from the other package(s) and press Install:
7. Wait until both packages are installed and press Dismiss.
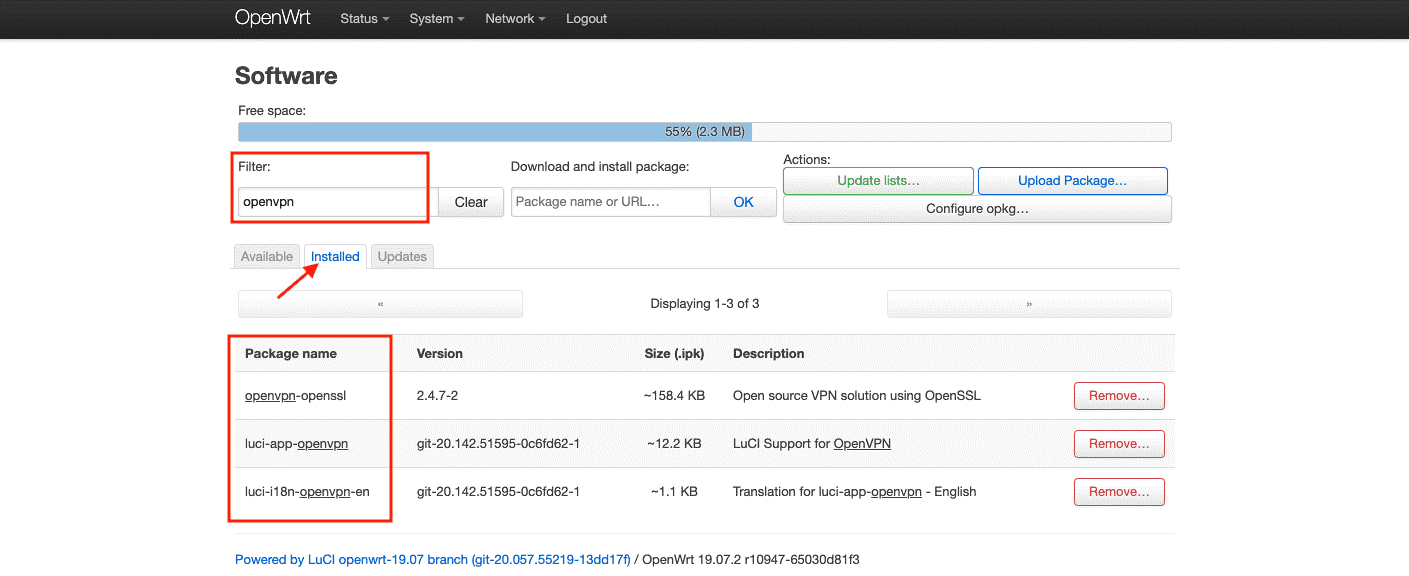
8. Make sure that all the packages were successfully installed. To do this, select the Installed tab and enter openvpn in the Filter field:
9. To apply the changes, go to the Status tab and reboot your router.
Configuring OpenVPN connection on OpenWrt 19.07 router
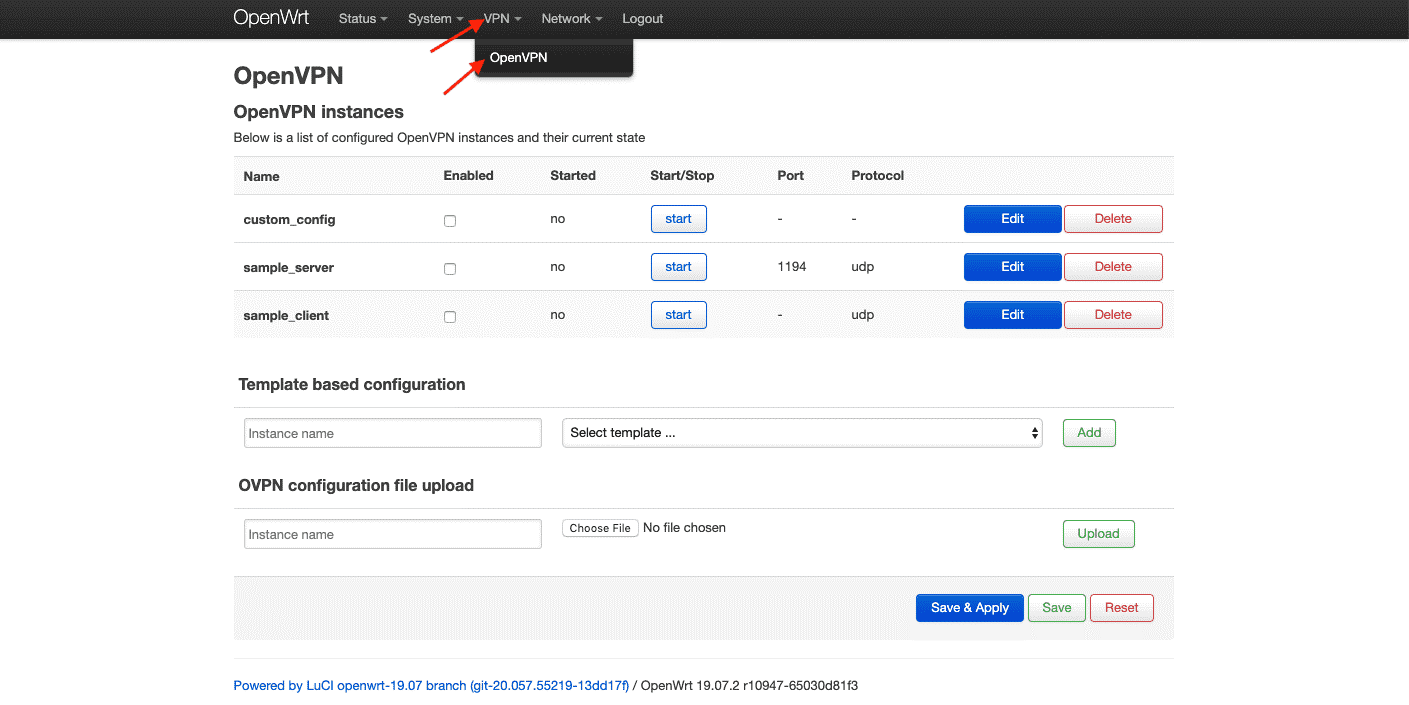
1. Go to the VPN tab > OpenVPN:
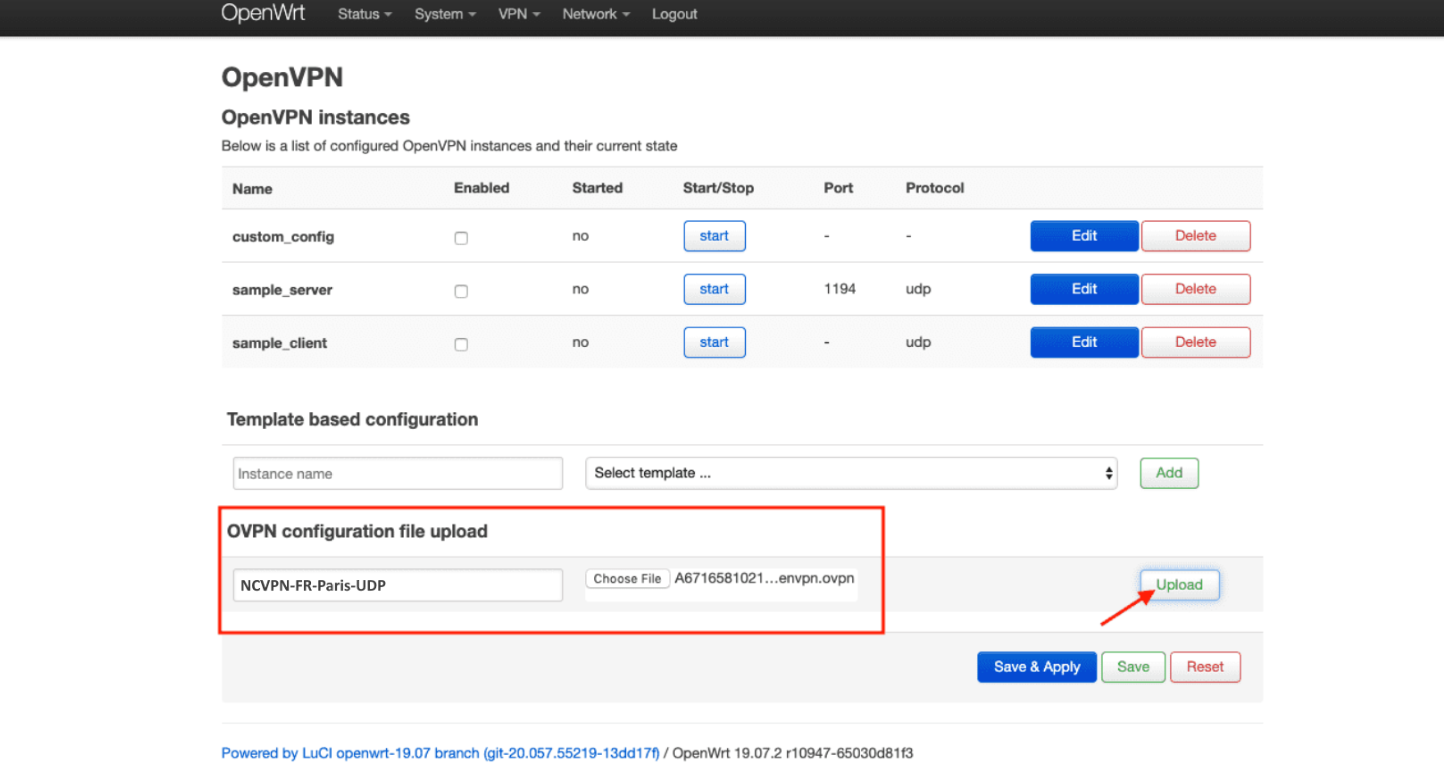
2. Find the
OVPN configurationfile upload field, fill in it’s custom name (
for example, NCVPN...) and choose the preferred
.ovpn file that you can download from your FastVPN
Account Panel.
Then press Upload:
On the newly-created OpenVPN configuration, click Edit:
In
the text field at the bottom, insert your VPN credentials. Enter your
username in the first line and your password in the second line. You can
find your VPN username and password in the FastVPN
Account Panel:
Now edit the line beginning with auth-user-pass
in the first text box to include the full path to the username/password
.auth file. The full path is visible just above the second text box.
For example:
auth-user-pass /etc/openvpn/NCVPN.auth
Click Save.
Click Save & Apply.
Adding OpenVPN interface and configuring DNS settings
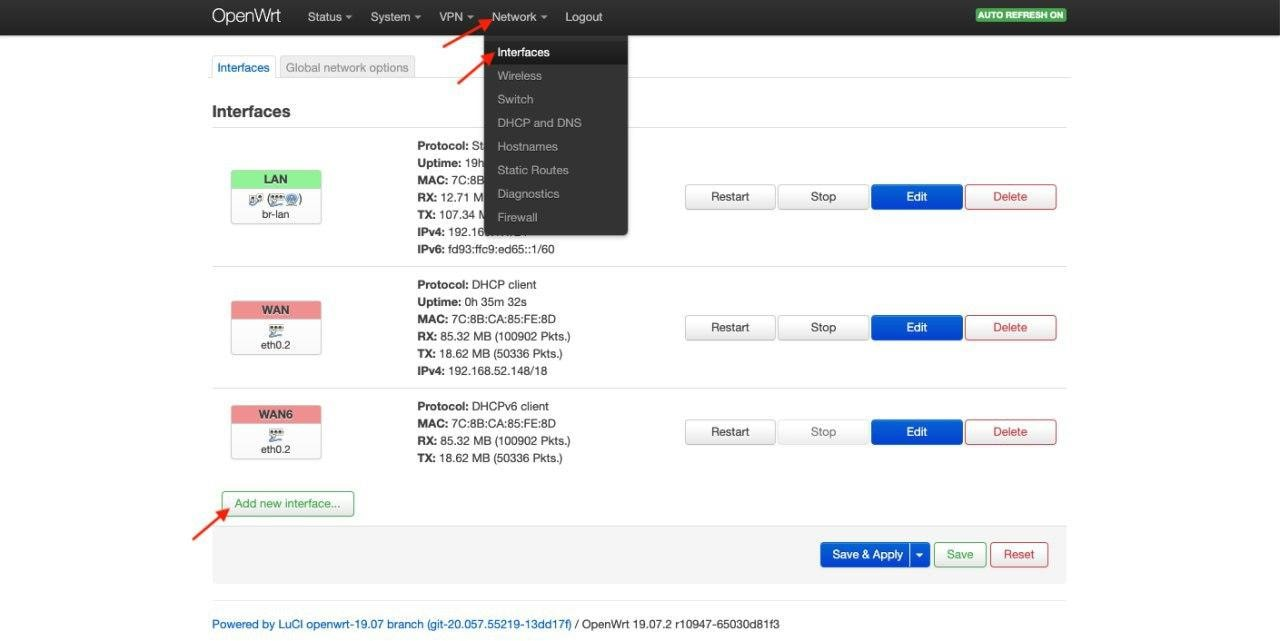
1. Go to Network > Interfaces. Click the Add new interface… button:
2. Enter the following ddetails and click Submit:
- Name: VPN_U
- Protocol: Unmanaged
- Interface: Custom Interface: tun0
Click Create Interface:
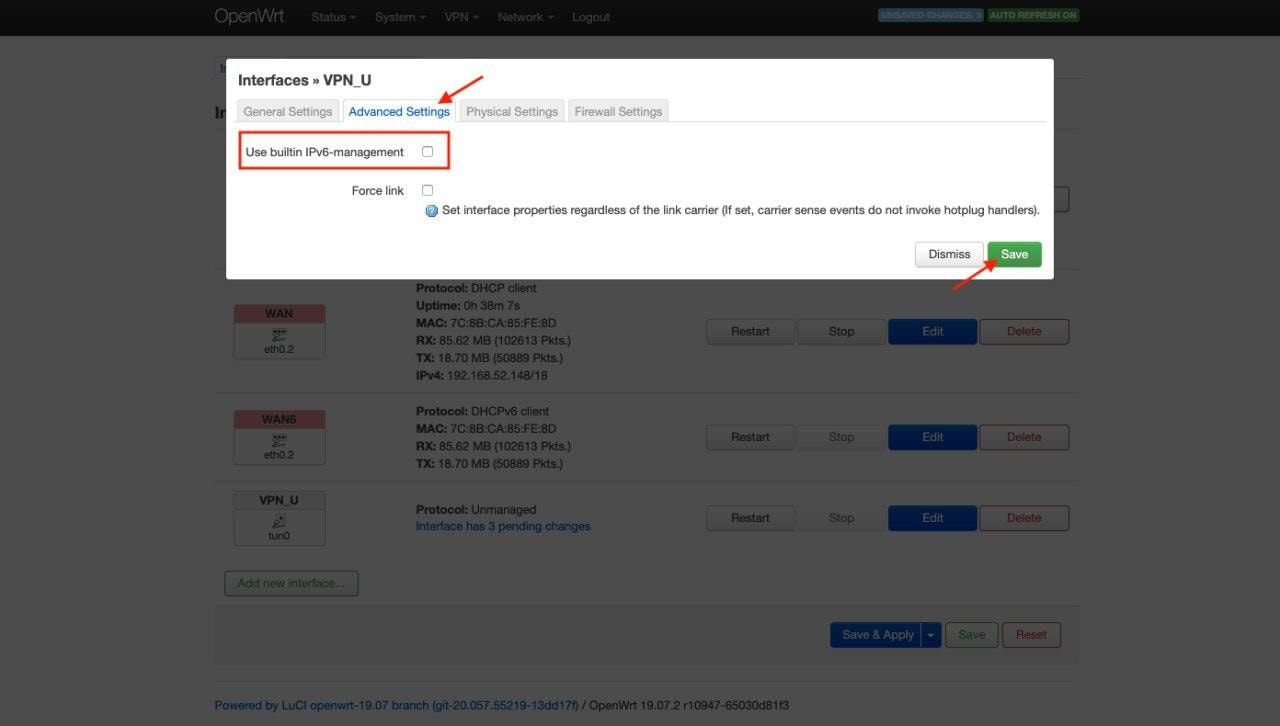
3. Enable the Bring up on boot parameter.
4. Go to the Advanced Settings tab and disable Use built-in IPv6-management.
5. Click Save:
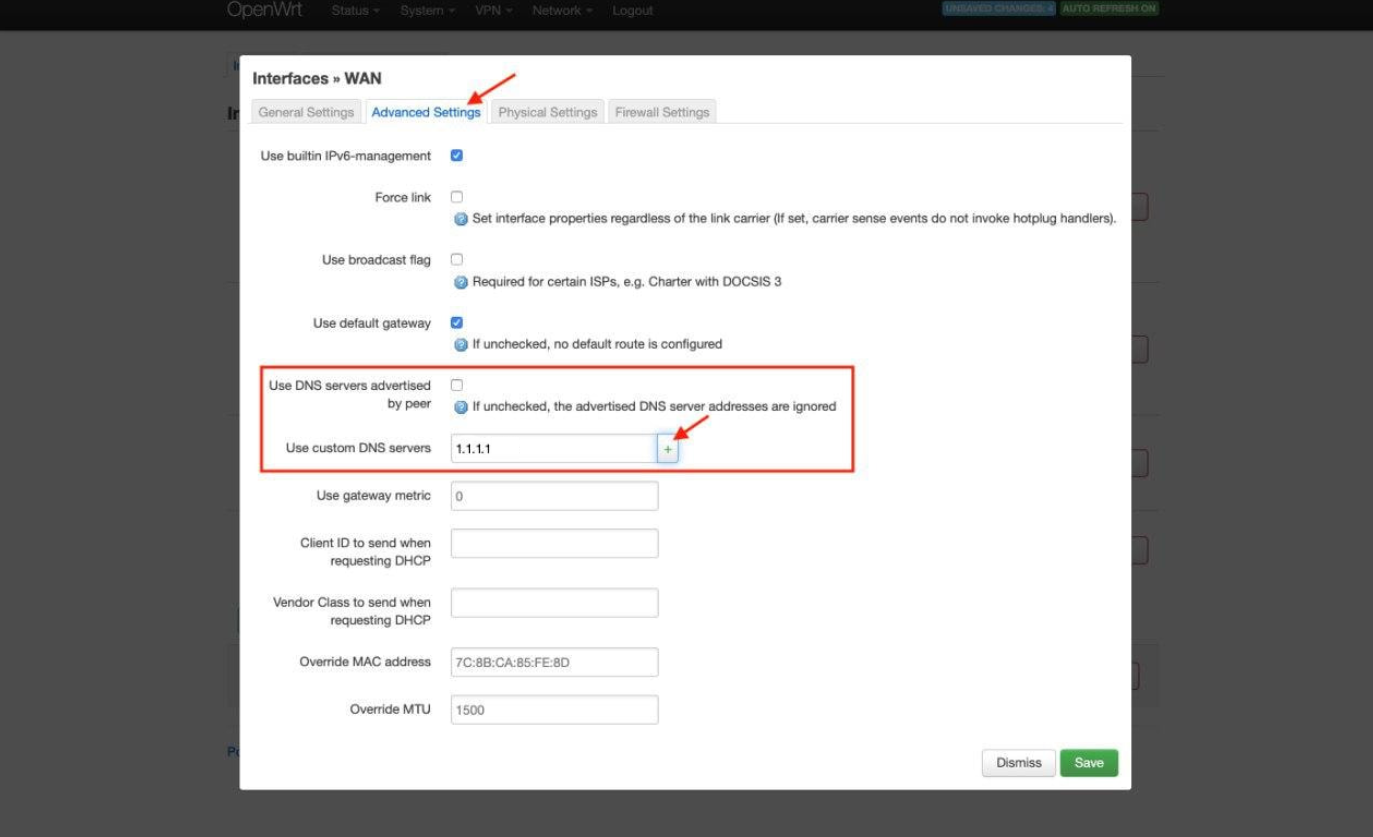
6. Navigate to WAN > Edit > Advanced Settings. Uncheck the Use DNS servers advertised by peer parameter and set 1.1.1.1 value for Use custom DNS server. Press the + button:
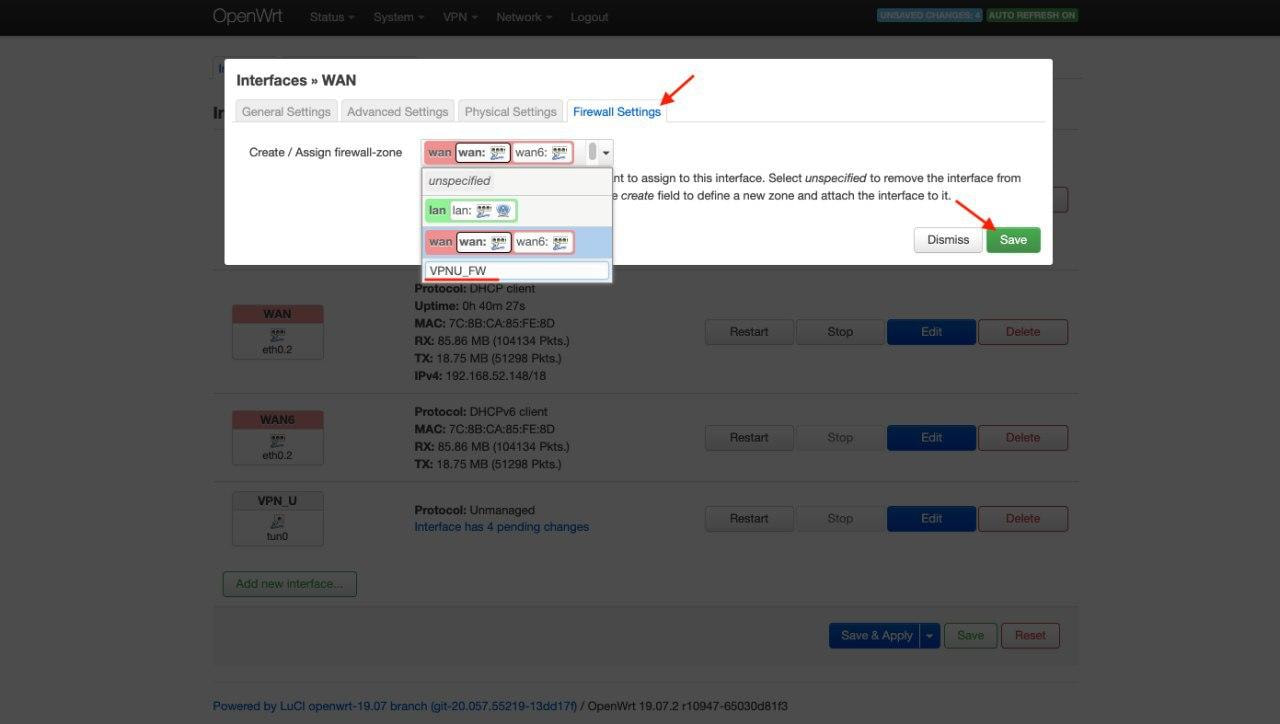
7. Go to the Firewall Settings tab.
8. In the Create/Assign firewall-zone field enter VPNU_FW.
9. Click Save:
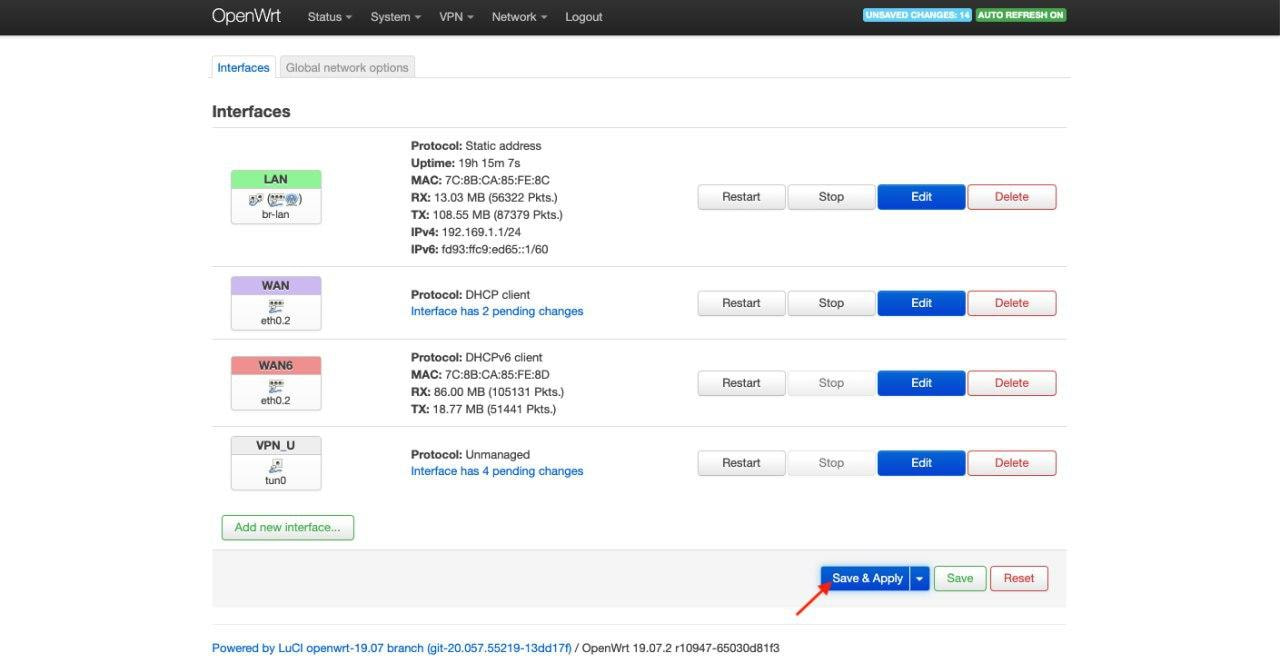
10. Press Save & Apply:
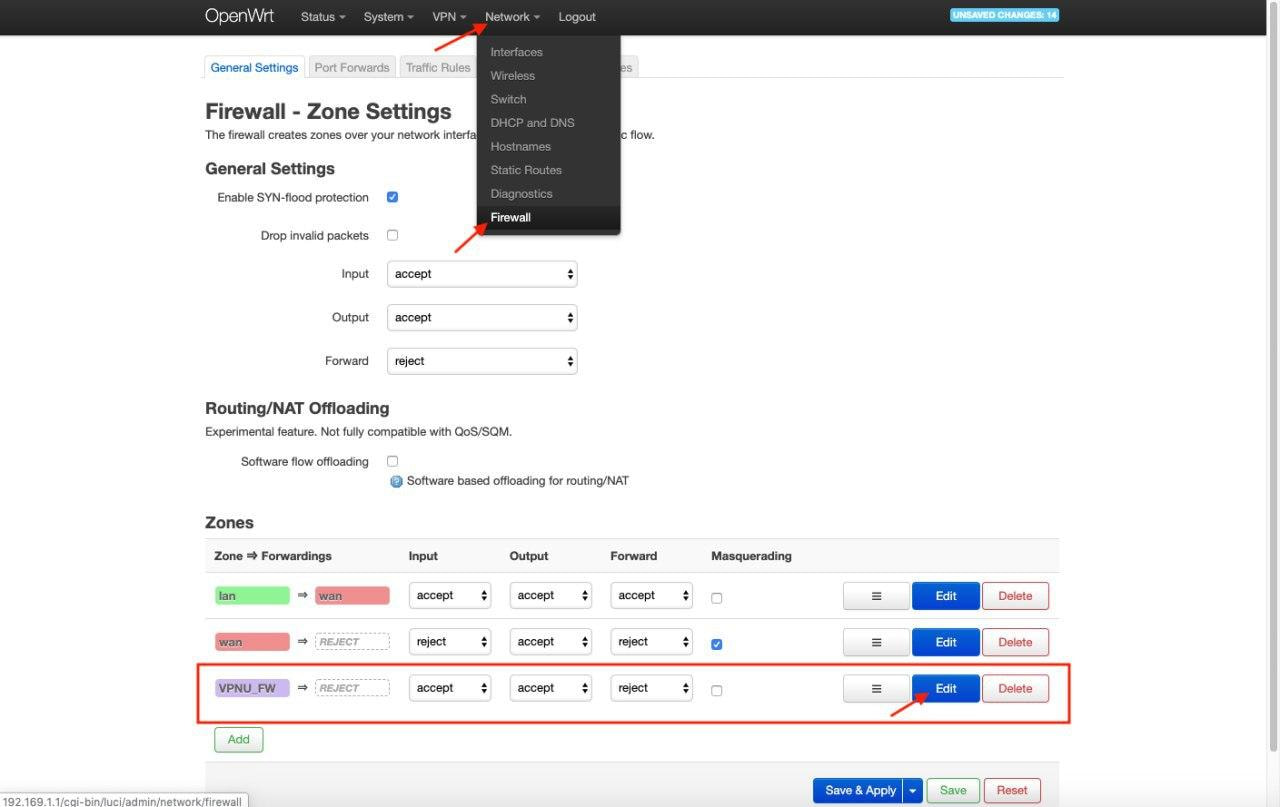
11. Go to Network > Firewall, select VPNU_FW and click Edit:
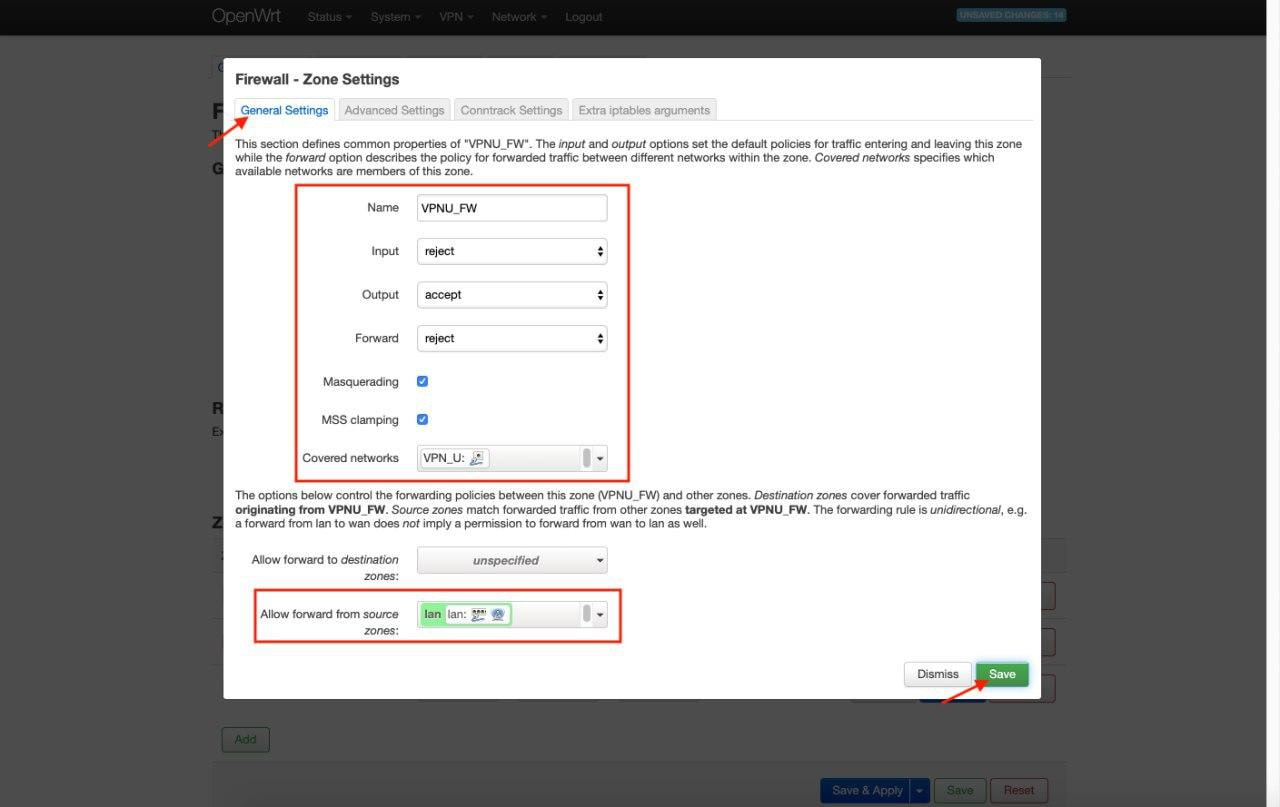
12. In the General Settings tab, configure the following settings:
- Input: reject
- Output: accept
- Forward: reject
- Masquerading: checked
- MSS clamping: checked
- Covered networks: checked VPN_U
- Allow forward from source zones: check lan
Click
Save:
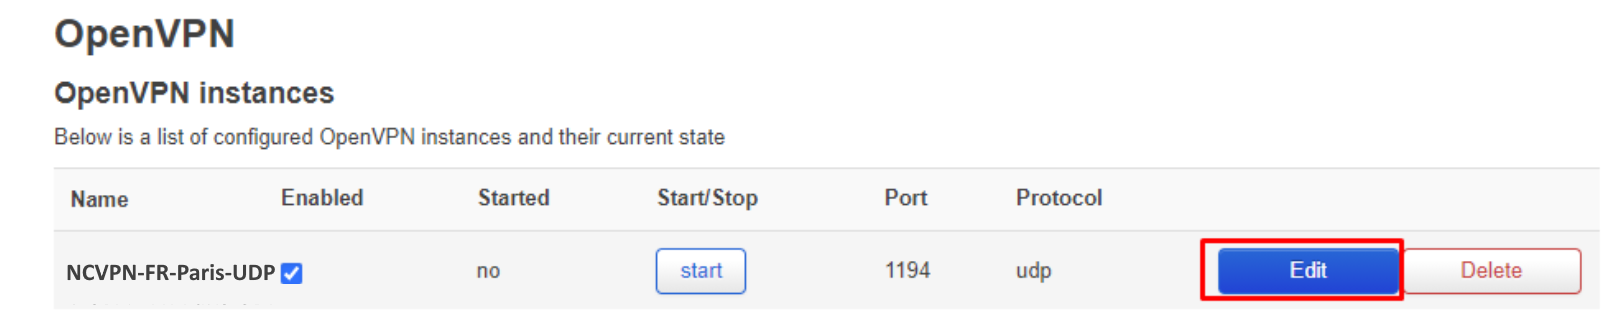
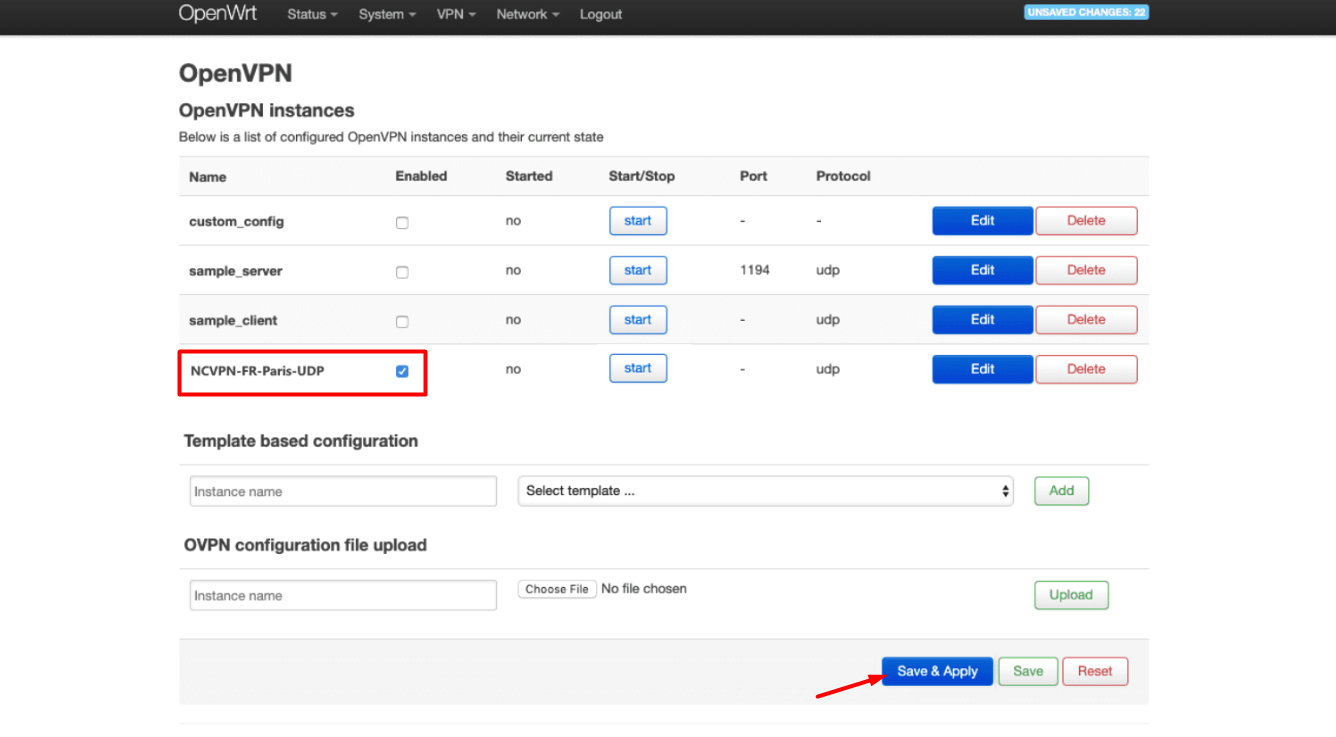
13. Go to VPN > OpenVPN.
14. Put the check-mark next to Enabled for FastVPN and press Save & Apply:
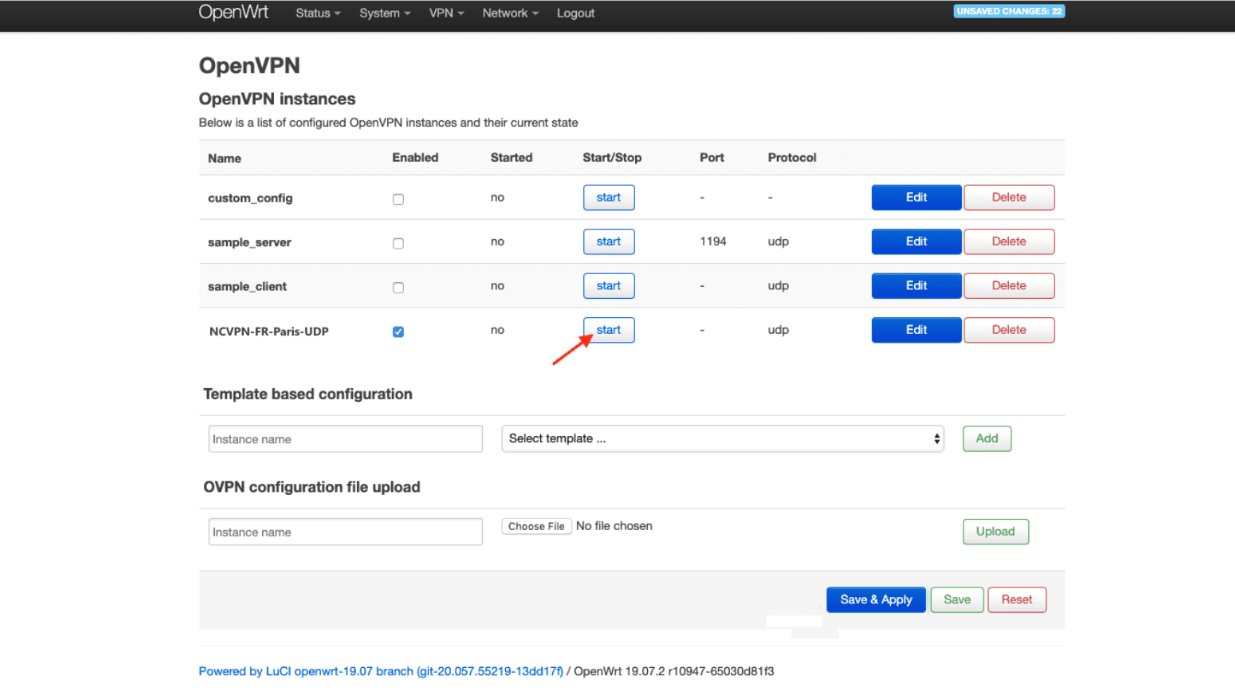
15. Wait for a minute and click Start:
If you need any further assistance, please contact our
Support Team.