In order to set up IKEv2 VPN connection on
Windows 10, you will need:
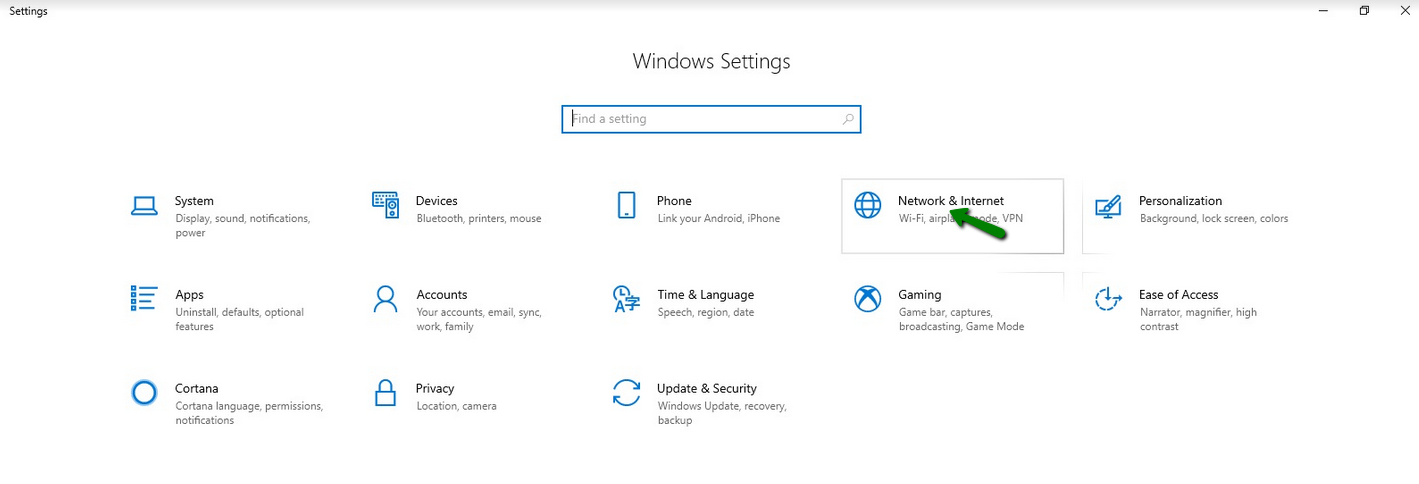
1. Open the Settings menu from the Windows icon on the bottom left of your device as shown below:
2. Select the Network&Internet option from the Settings menu:
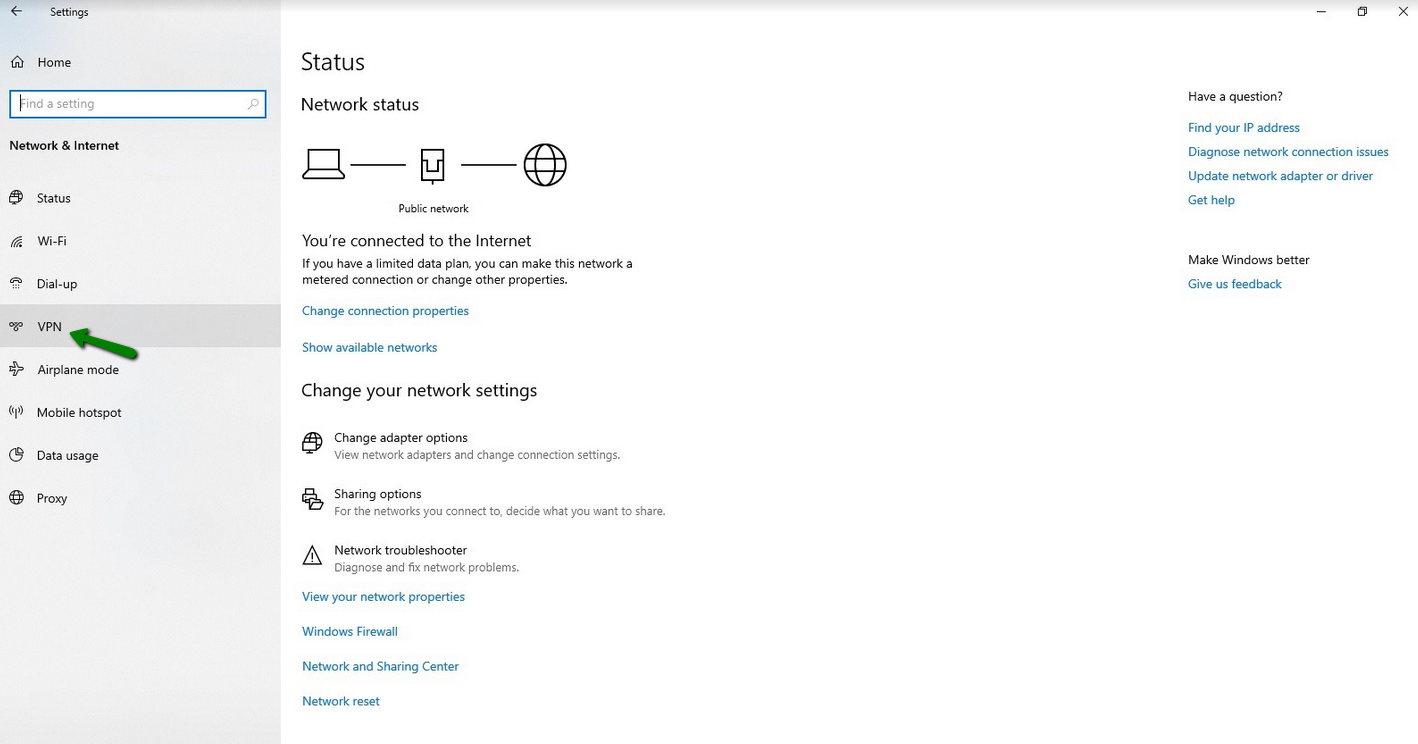
3. Select the VPN tab from the Network & Internet menu on the left side:
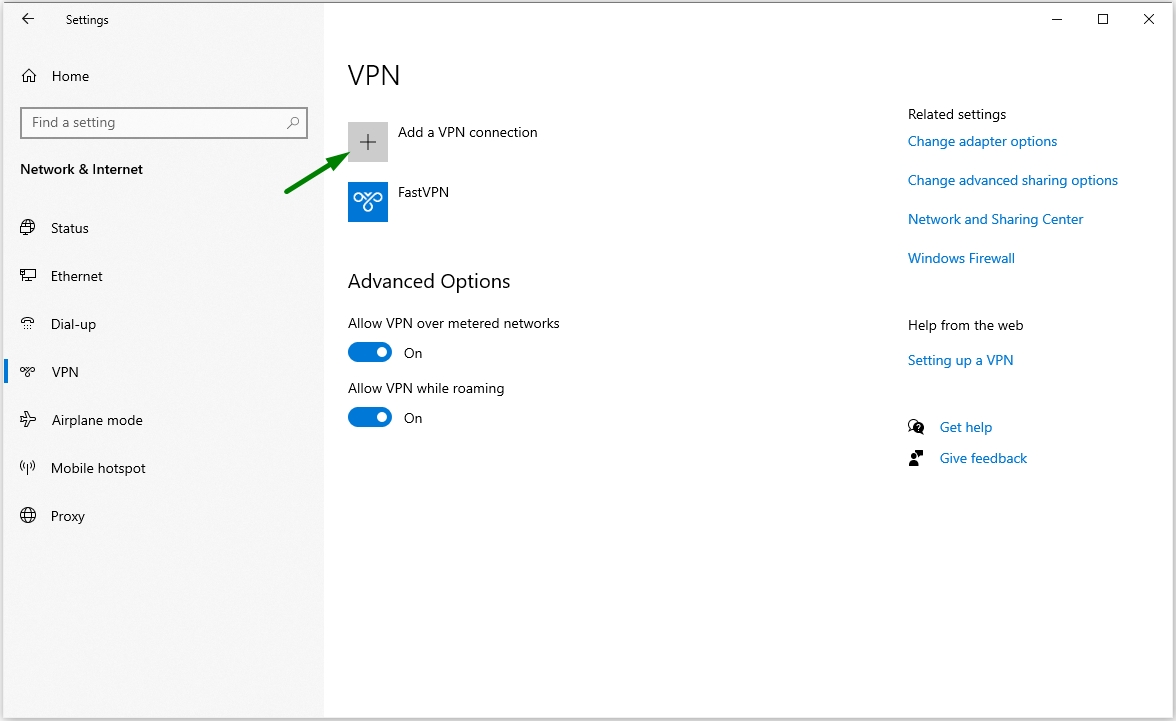
4. Click on the Add a VPN connection button below VPN:
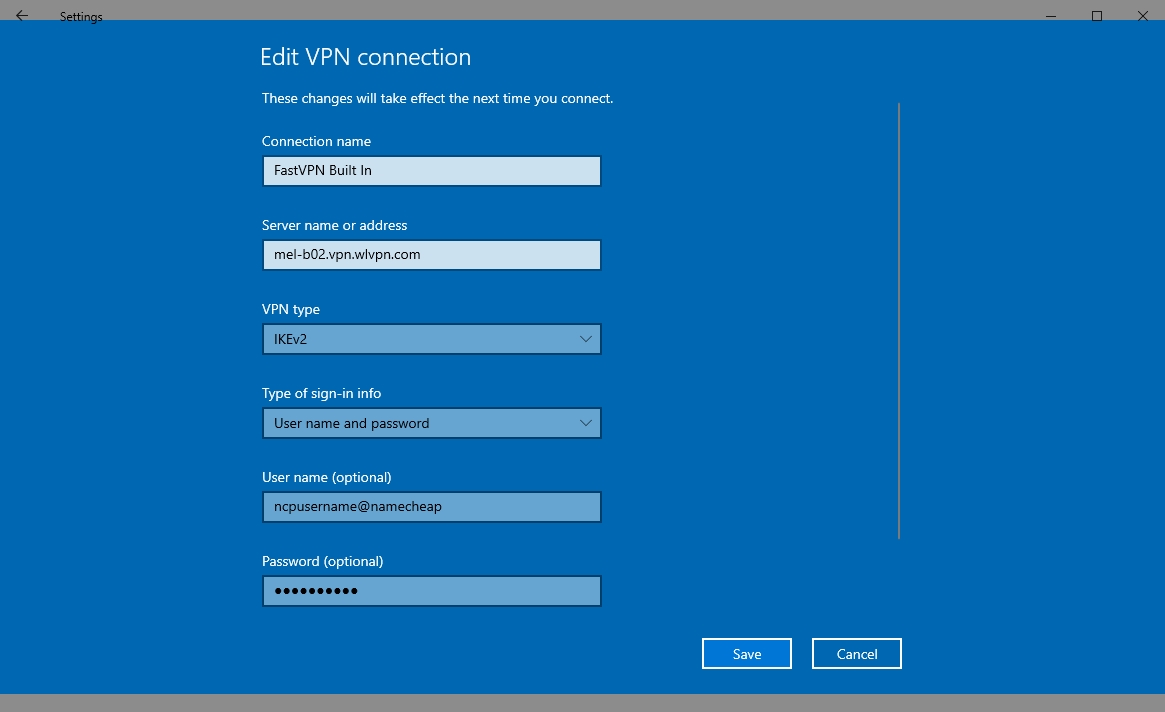
5. Enter the following details:
- VPN Provider: Windows (built-in)
- Connection Name: FastVPN Built In.
- Server name or address: Select your preferred server from the FastVPN Account Panel (e.g. sea-a24.vpn.server.com)
- VPN Type: IKEv2
- Type of sign-in info: Username and password
- User Name: your FastVPN account username from the FastVPN Account Panel
- Password: your FastVPN accout password from the FastVPN Account Panel
NOTE: If you are copying your credentials from Account panel and pasting it to the login fields, please make sure there are NO spaces before or after the entries.
Once all the settings are configured, click the Save button:
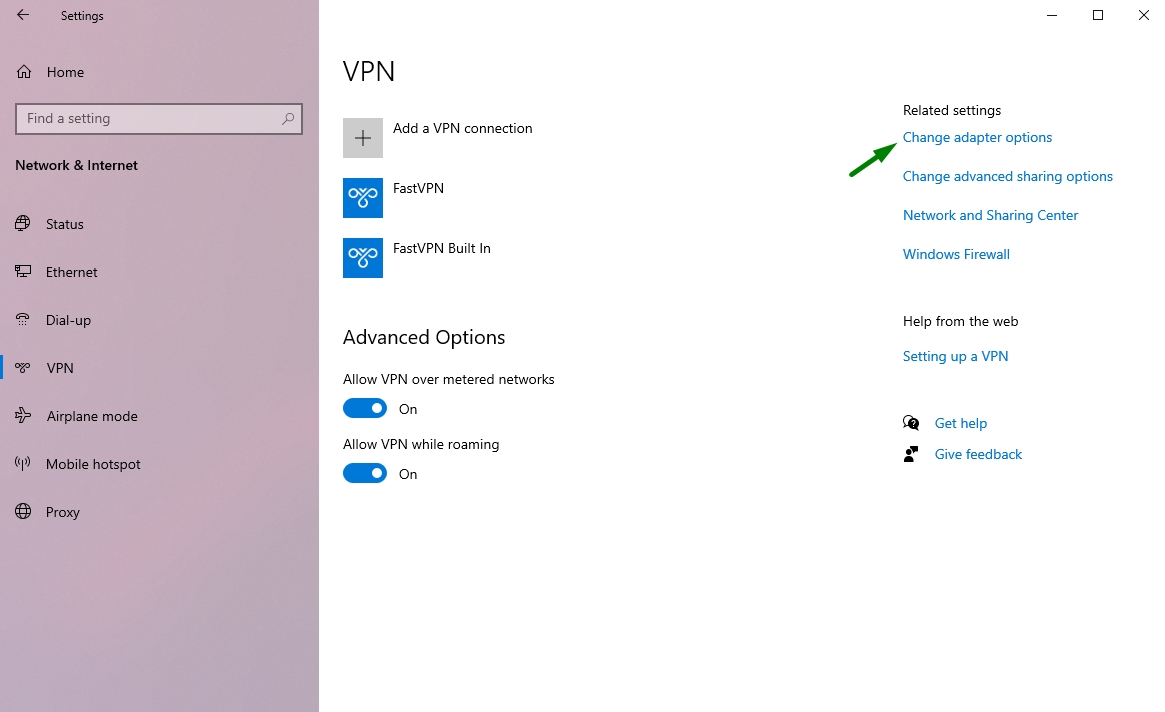
6. Navigate back to the VPN tab and click Change adapter options listed below Related settings:
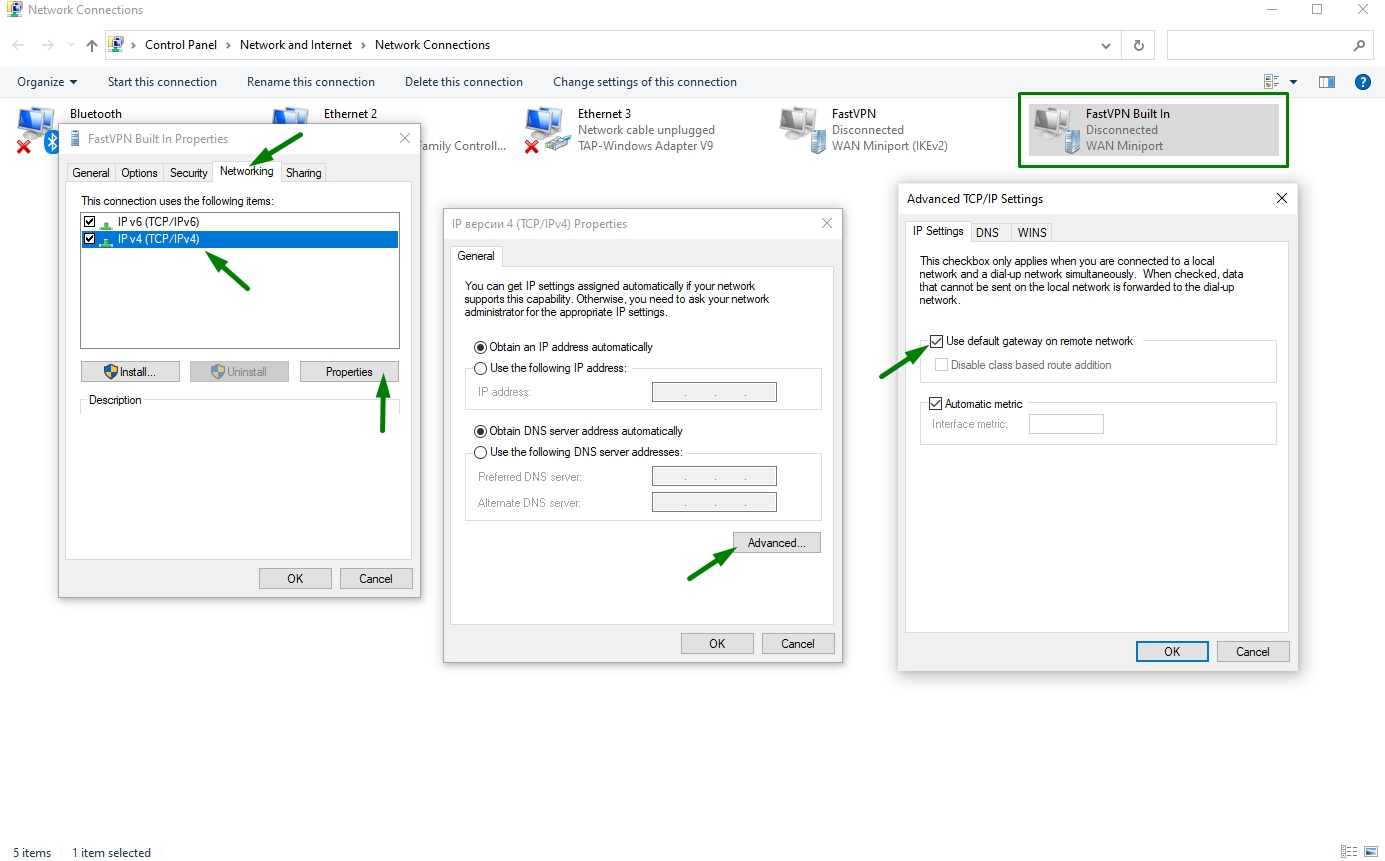
7. You will be redirected to the Network Connections. Find the IKEv2 VPN connection you established and right click it. Select Properties >> Networking >> IPv4 >> Properties >> Advanced and put the check mark next to Use default gateway on remote network:
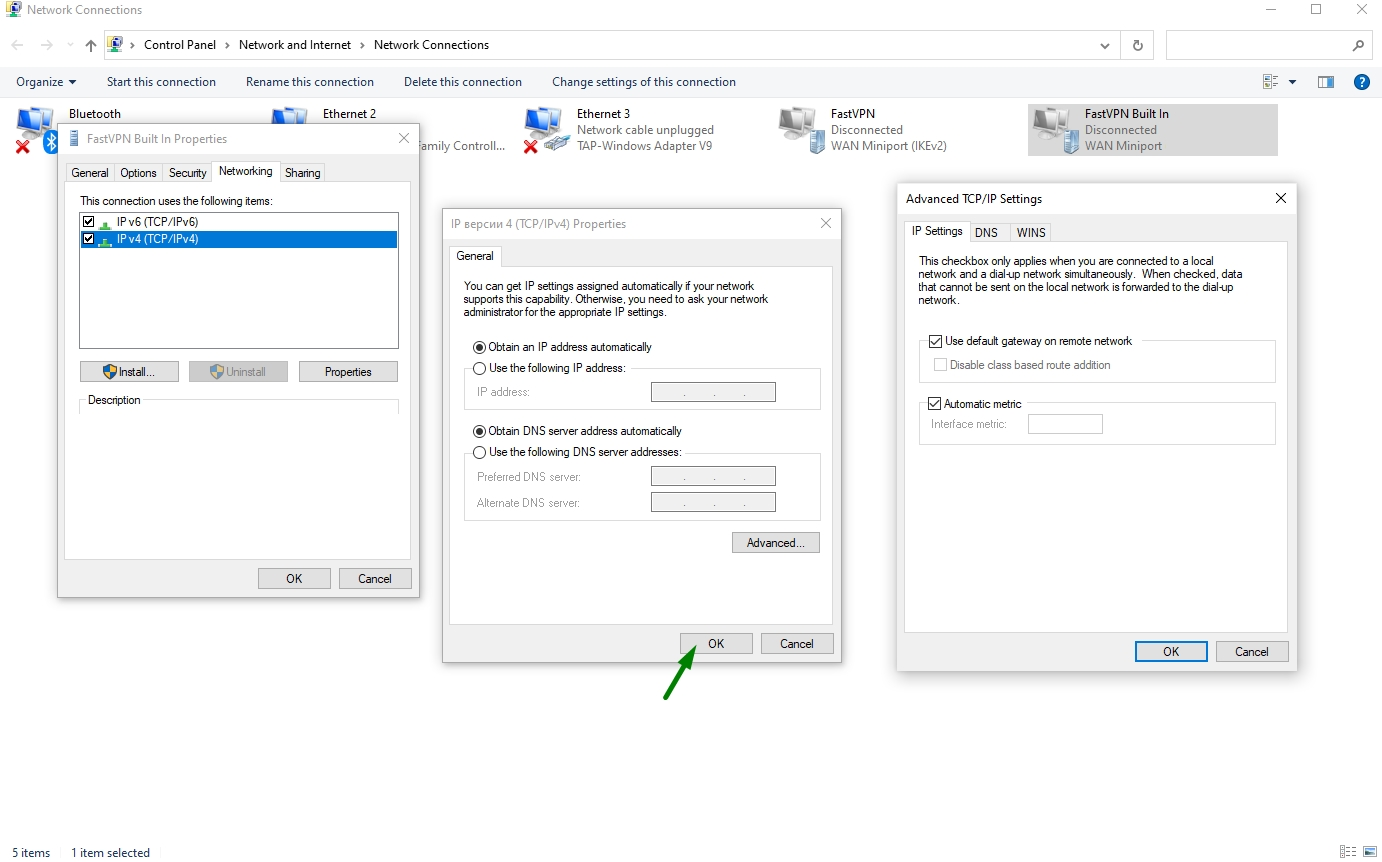
8. Click OK and close the Network Connections window:
9. Click the Connect button to establish the IKEv2 VPN connection from your VPN settings window.
If you need any further assistance, please contact our
Support Team.