This article is valid for both new plans (purchased on or after June 2, 2026) and legacy Private Email plans (purchased before June 2, 2026).
If your domain uses the web builder Wix’s nameservers (e.g. ns10.wixdns.net / ns11.wixdns.net), these are the steps you’ll follow to setup your Private Email DNS:
1. Sign into your Wix account.
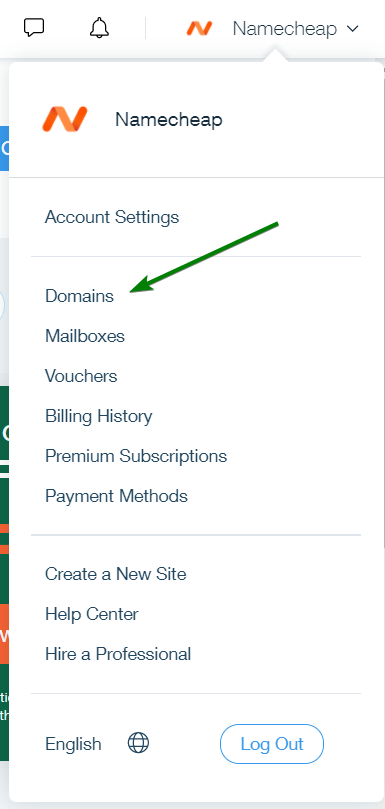
2. Click on your Wix account username (right-upper corner of the page) and choose the Domains section:
3. Locate the needed domain >> expand the overflow menu >> choose the Edit MX Records option:
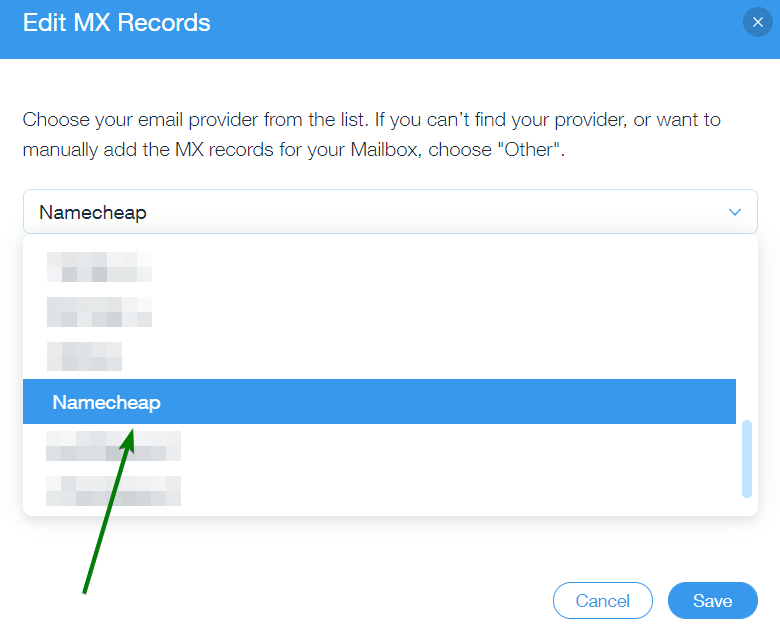
4. For the Your Email Provider section, choose Namecheap from the drop-down list:
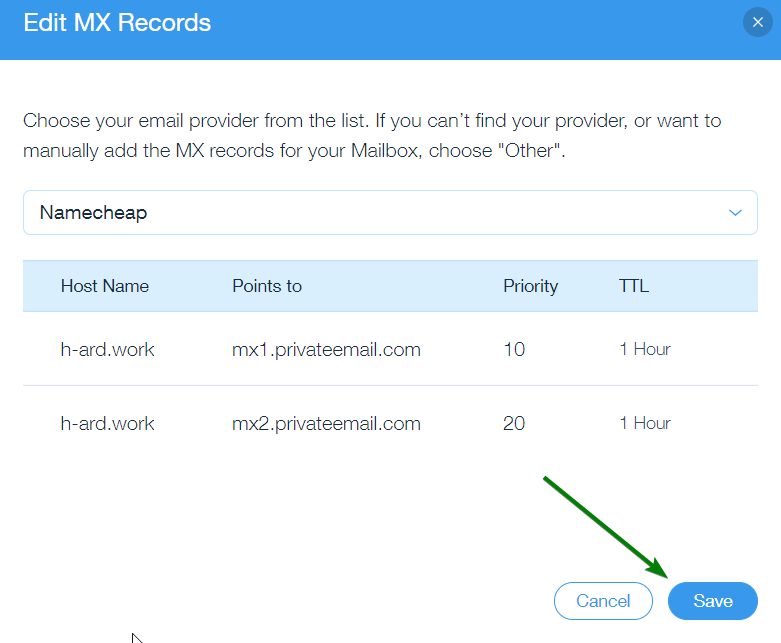
You should see the next MX records configured for your domain automatically:
Host Name: should be blank | Points to: mx1.privateemail.com | Priority: 10 | TTL : 1 hour
Host Name: should be blank |
Points to: mx2.privateemail.com |
Priority: 20 |
TTL : 1 hour
Be sure to apply the changes by clicking on Save:
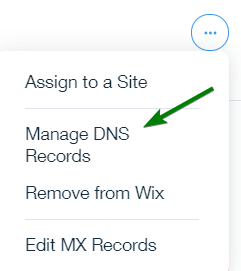
5. Next you’ll set up the SPF, DKIM and DMARC authentication records i.e. as a domain name owner, you’ll confirm the list of IP addresses that are authorized to send mail from your domain name. Go to the overflow menu again and click on the Manage DNS Records option:
You’ll see a popup which says "Editing or deleting your domain’s default A or CNAME records may cause your site to go offline". Click "Got it" and proceed with the SPF record setup.
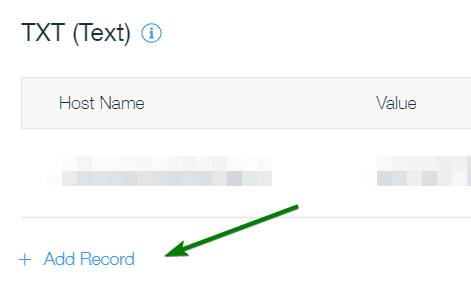
NOTE: SPF record type is no longer used. For this reason we
recommend adding SPF records in the TXT section of your DNS records:
Host Name: should be blank | TXT Value: v=spf1 include:spf.privateemail.com ~all | TTL: 1 hour
NOTE: DKIM record is a mandatory entry to ensure outgoing mail works correctly. A DKIM record contains the information about the domain which is published by the domain owner. Emails that are signed with DKIM appear more legitimate to recipients and are less likely to end up in the junk or spam folders. The DKIM can only be generated after a mailbox has been created:
Host Name: default._domainkey |
TXT Value: should be generated and copied using
this guide.
NOTE: For Private Email subscriptions purchased on or after June 2, 2026, DKIM record's hostname is privateemail._domainkey. This DKIM record is available immediately upon ordering the PE subscription - creating a mailbox is no longer required.
Host Name: _dmarc |
TXT Value: v=DMARC1; p=reject; rua=mailto:postmaster@yourdomain.com

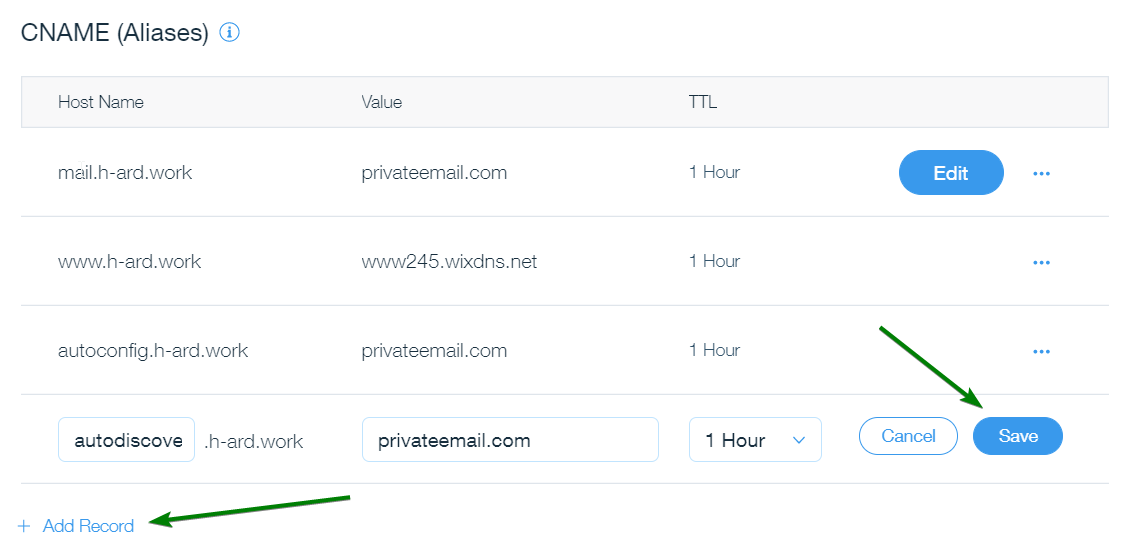
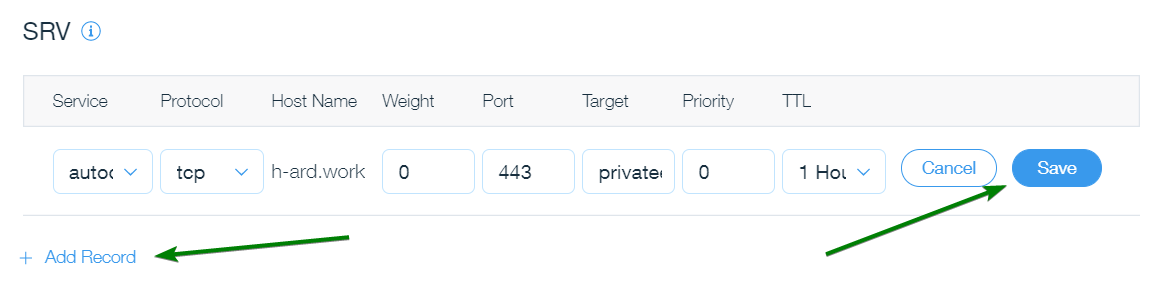
6. You can add also add CNAME and SRV records. They will not affect email delivery itself and can be skipped:
Host Name: mail | Points to: privateemail.com | TTL: 1 hour
Host Name: autoconfig | Points to: privateemail.com | TTL: 1 hour
Host Name: autodiscover | Points to: privateemail.com | TTL: 1 hour
Autodiscover and autoconfig DNS records enable email clients to automatically discover and configure access to your mail accounts.
The SRV record is used for publishing services and service discovery. Its main use is to allow services to run easily on non-standard ports and to reduce the configuration burden when setting up email clients.
7. Be sure to save all the changes one-by-one via the Save button.
Allow up to 60 minutes for the new records to propagate.
That's it, you’re all done!

.png)