The Git Version Control menu allows you to create or import Git repositories and host them in your cPanel account. You can check this article for more information on Git itself. The cPanel menu lets you create, clone, view, and deploy repositories without the need to access your account via SSH.
Please note that Git Version Control will only display Git repositories that were created using the cPanel menu itself. So creating or removing repositories via SSH will lead to inaccuracy in the list of the repositories that are shown here.
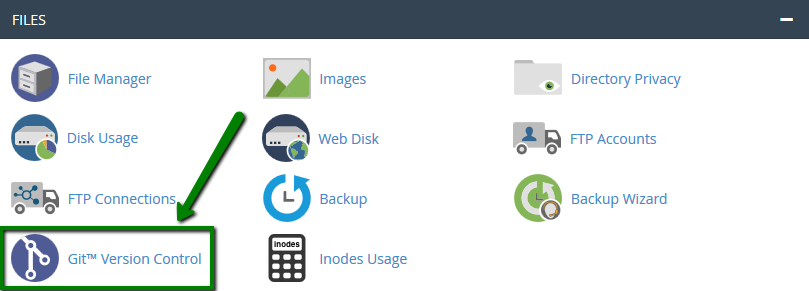
The Git Version Control menu can be located in the Files section of your cPanel:
List of repositories
Creating a new repository
Managing an existing repository
Deployment of a repository
Gitweb
List of repositories
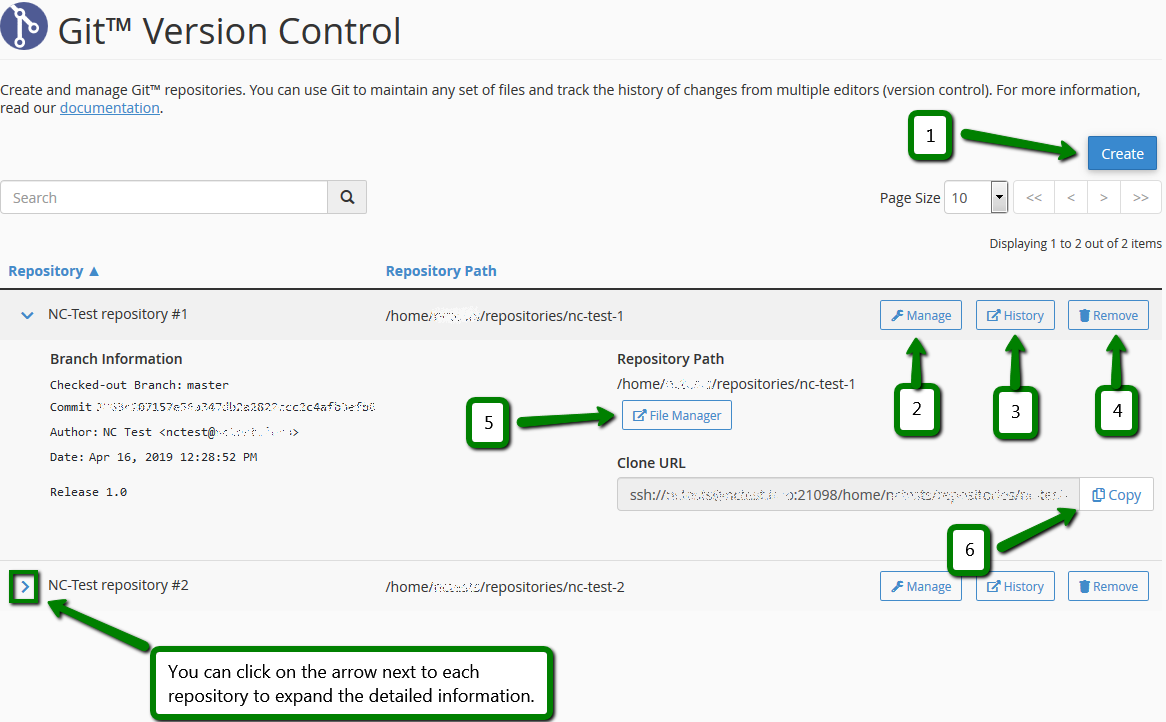
The main view of this menu shows basic information on your current repositories: the display name of the Repository and Repository Path (its location in your account).
You can also expand the detailed information on each repository that contains additional information, such as:
- The name of the Checked-out Branch
- The SHA-1 value of the HEAD Commit
- The name of the Author of the HEAD commit
- The Date of the HEAD commit
- The commit message of the HEAD commit
From the overview you can:
1. Create a new Repository.
2. Manage an existing repository.
3. Check the History version of the repository in the Gitweb interface.
4. Remove the repository.
PLEASE NOTE:
This button will only remove the repository from the list. All the
files of the repository will remain intact in your hosting account and
you will need to remove them manually from a File Manager or over FTP.
5. Open the repository in File Manager.
6. Copy the clone URL of the repository.
Creating a new repository
After pressing the Create button you will be redirected to a Create Repository page where you can either start a new repository from scratch or clone an existing repository from a remote location to your cPanel.
This process will create the /.git folder in the newly created repository. Please make sure that you do not modify or delete the /.git directory or its contents. Any changes to this folder can irreversibly break the repository and lead to a data loss.
Creating an empty repository
To create an empty repository you will need to:
1. Disable the Clone a Repository toggle button.
2. Enter the Repository Path – this is the actual location of the files that will be managed with Git.
3. Specify the Repository Name.
4. Once you fill all the fields, press the Create button at the bottom and the repository will be created.
PLEASE NOTE: The repository path cannot contain empty spaces, instead, you can use - or _ characters while naming your directories.

After that, you will be forwarded to another screen with the commands that you can use to push a Git repository from your PC to cPanel. You can also
refer to this article for such information.
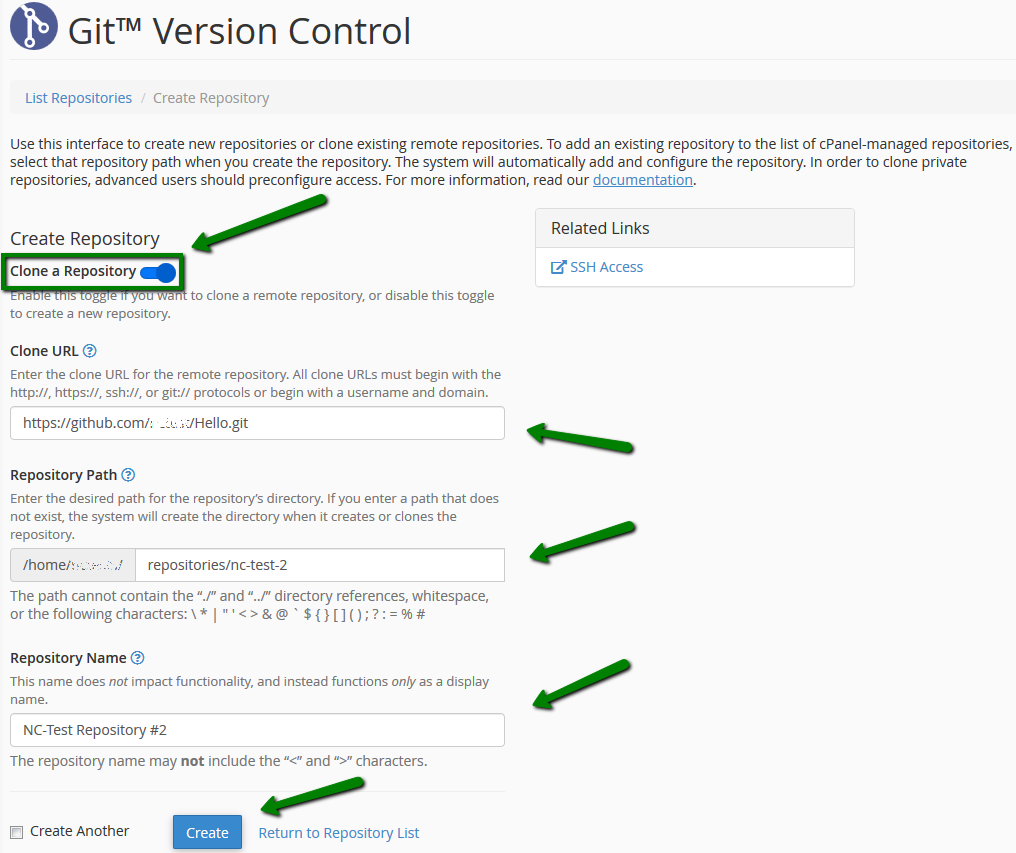
Cloning an existing repository to your cPanel account
To clone an existing repository you will need to:
1. Enable the Clone a Repository toggle button.
2. Specify the Clone URL of the remote repository that you wish to clone.
The Clone URL of the repository should be obtained from the source repository, for example, it should look like this on GitHub:

This URL should include http://, https://, ssh://, git:// protocols or use the user@domain.tld/path format.
PLEASE NOTE: You cannot specify the password in the URL so an SSH key should be used for the SSH connection instead.
3. Enter the Repository Path – this is the actual location of the files that will be managed with Git.
4. Specify the Repository Name.
PLEASE NOTE: The repository path cannot contain empty spaces, instead, you can use - or _ characters while naming your directories.
5. Once you click Create you will be redirected to the list of your repositories and the cloning process will begin.
It may take some time depending on the size of the repository, and all the options for this repository will be disabled during the process, so you will not be able to manage or remove it until the cloning is completed.
Managing an existing repository
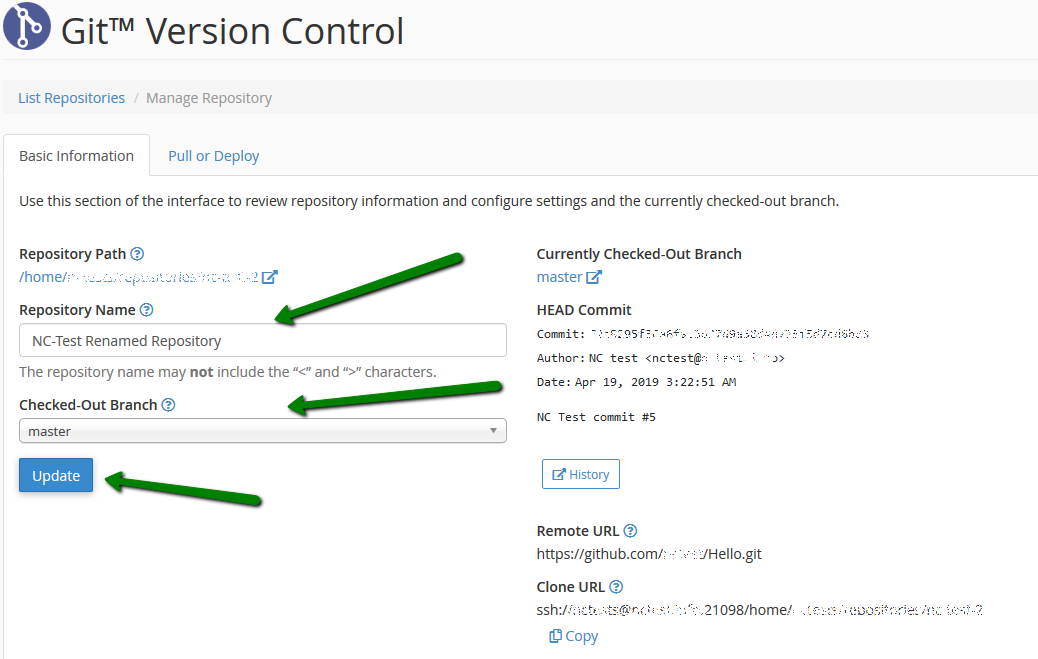
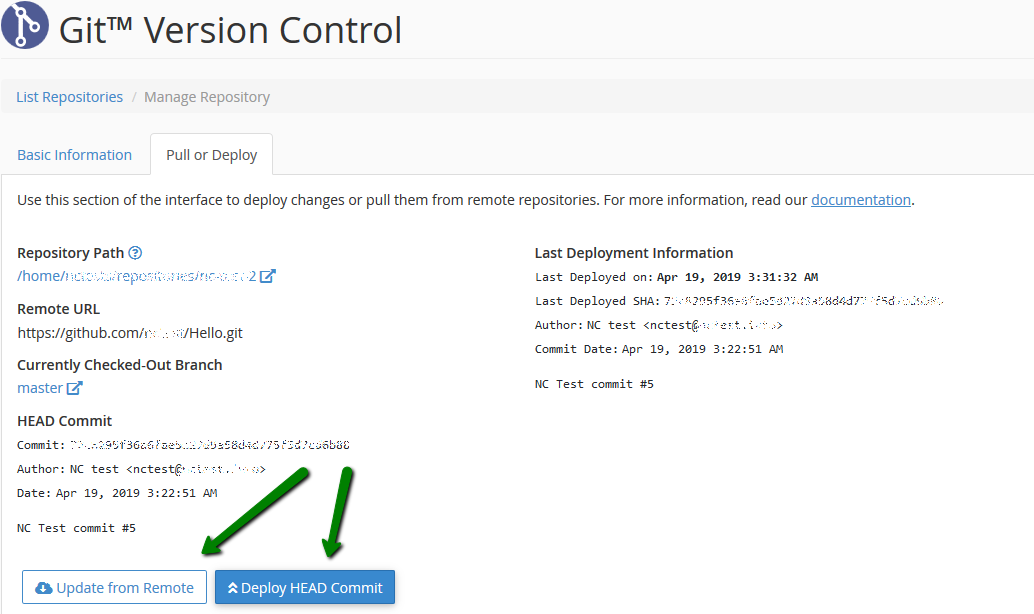
The Manage option is divided into two tabs: Basic Information and Pull or Deploy.
Both tabs share the following elements:
- Repository Path shows the directory where the repository is located and allows you to open it in File Manager.
- Remote URL is only available for the repositories cloned from other sources and it specifies the location of the origin repository.
- Currently Checked-Out Branch shows which of the branches you have checked out for this repository. Also, it allows accessing it in Gitweb interface.
- HEAD Commit shows the information on the last (HEAD) commit to this Git repository.
In the Basic Information tab, you can also change the Repository Name and select different Checked-Out Branch. Either of these changes should be confirmed by pressing the Update button.
In the Pull or Deploy tab you can also see the Last Deployment Information. This is the information on the commit that is deployed at the moment, and the date of the deployment.
There are also two buttons present here:
- Update from Remote, which is available for cloned repositories
only, and can be used to pull the updates from the remote repository to
cPanel’s repository.
- Deploy HEAD commit, which can be used to manually deploy the last commit.
Deployment of a repository
If you are using Git to manage your website’s files, you will also need to deploy these files from the repository to the root folder of your website. This is done through the Deploy HEAD commit feature of the Git Version Control menu.
First, you will need to create a .cpanel.yml file that can be placed into the root folder of your repository. The file should be started with the following lines:
---
deployment:
  tasks:
After that, you will need to add a list of BASH commands to be executed on the deployment.
For example, you can use the following code snippet to deploy the index.php file to the /home/nctests/git.nctest.info/ directory:
---
deployment:
  tasks:
# Next line defines a DEPLOYPATH with the path to the document root of your website so that you will not have to enter it in each command manually:
    - export DEPLOYPATH=/home/nctests/git.nctest.info/

# This line copies the index.php file to deploy path - the document root of your website:
    - cp index.php $DEPLOYPATH
Here are some more examples of how to deploy various files and folders:
#Copy the specific file to the destination from root:
    - cp <file_name> $DEPLOYPATH

#copy the specific file from source subfolder:
    - cp ./<sub_folder>/<file_name> $DEPLOYPATH

#copy all from the root (note that this command will not copy hidden files or folders located in the root folder, such as ".git" or ".htaccess"):
    - cp -r * $DEPLOYPATH

#copy all from sub folder root:
    - cp -r ./<sub_folder> $DEPLOYPATH
To deploy a repository, you will need to go to the Manage Repository menu and press Deploy HEAD Commit button in the Pull or Deploy tab.
PLEASE NOTE: cPanel automatically adds a post-receive hook to all new repositories which will trigger the deployment each time you push updates to the repository.
Cloned repositories can only be deployed manually.
Gitweb
You can access the Gitweb interface by clicking on the History button next to the repository in the Repositories List view or in Manage Repository >> Basic Information >> the Currently Checked-Out Branch section.
Gitweb will provide you with a list of all commits to the selected repository. Next to each commit, you will find a list of links that will provide you with various information on the selected commit:
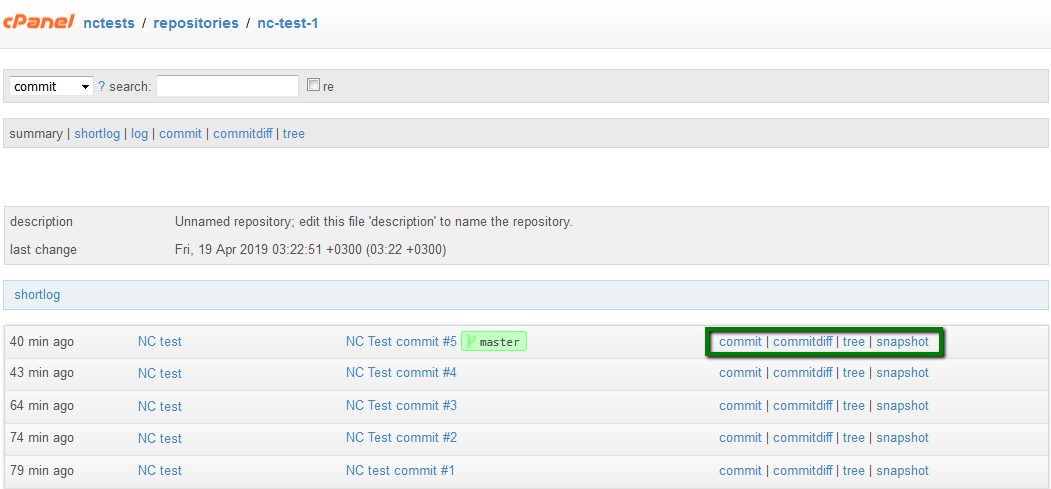
- Commit will open a page with the name of the author and committer, the date of the commit, its comment, and the list of added/modified files.
- Commitdiff will show all the changes made to the file (newly added, removed or modified lines).
- Tree will show the structure of the files in the repository on the moment of the selected commit. You can also check the content of each file by clicking on them in this view.
- Snapshot will initiate a download of all the files that were present in the repository on this commit in a .tar.gz archive.
