To duplicate the database, follow these steps:
1. Log into cPanel >> Databases section >> phpMyAdmin menu.

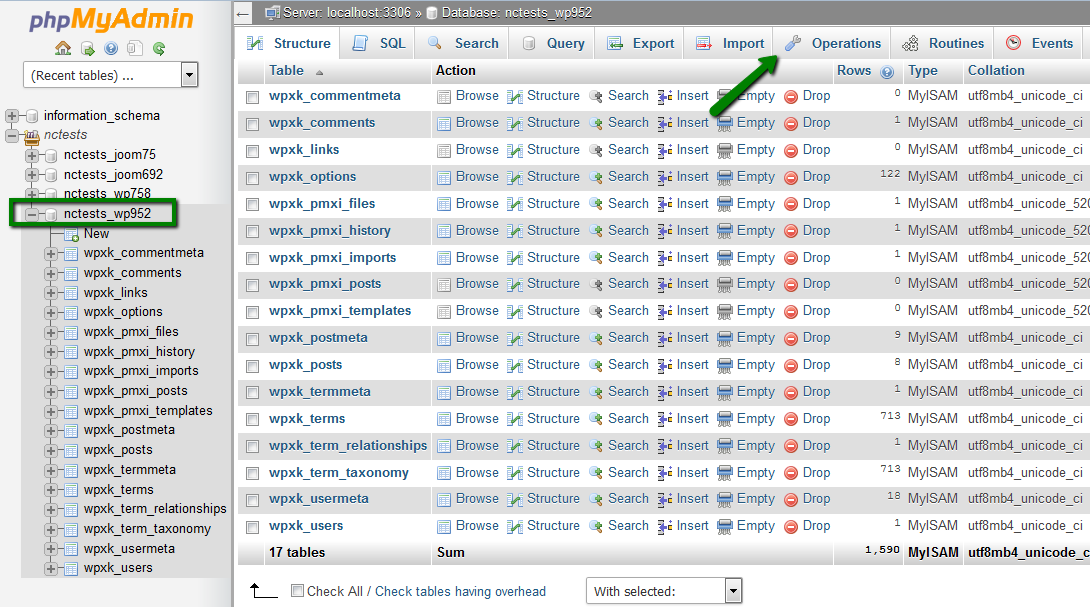
2. Select the database from the list on the left and click the Operations option from the top bar:
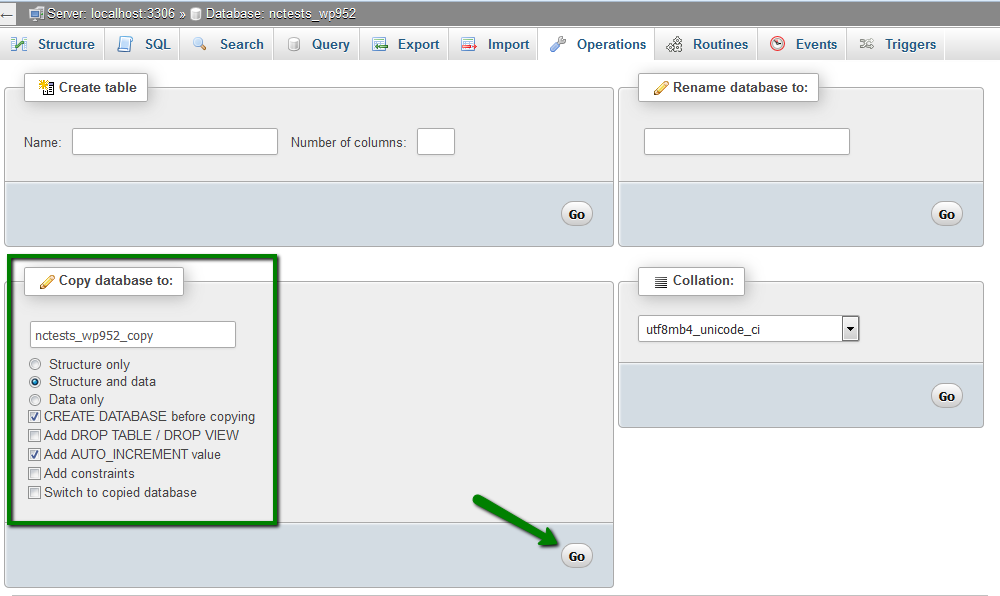
3. On the next step, you need to specify a name for the new duplicate database in the Copy database to field.
Make sure the following options are selected:
'Structure and Data'
'CREATE DATABASE before copying'
'Add AUTO_INCREMENT value'
and then click the Go button:
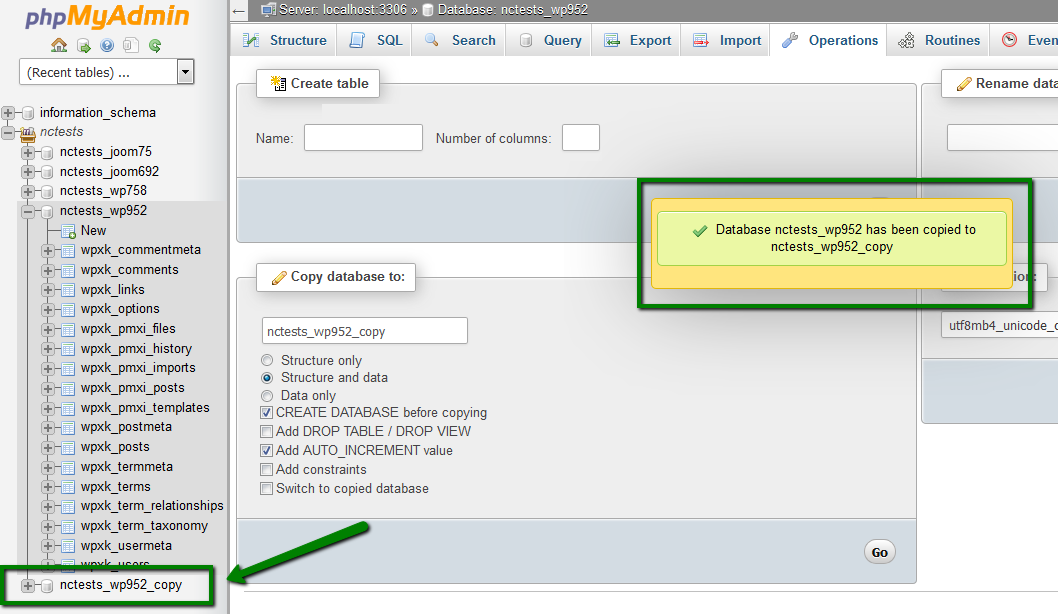
4. Once the process is completed, you will see a message, and the new database will appear in the list of databases on the left side:
It’s also possible to copy the database manually. You need to follow these steps:
1. Log into cPanel > Databases section > Manage My Databases menu:

2. Create a new database following this article. We will use “nctests_wp952_copy2” database as the newly created one.
3. Once the database is created, navigate to phpMyAdmin menu:
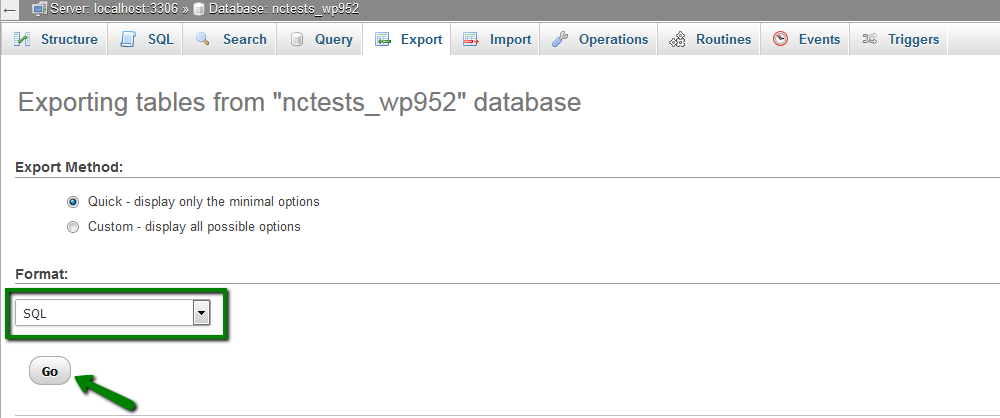
4. Choose the database that you need to copy. (to select the tables, checkmark Check All under the tables) > click Export option from the top bar:

5. Select Export Method: Quick and Format: SQL
Click Go:
The selected database will be saved to your computer.
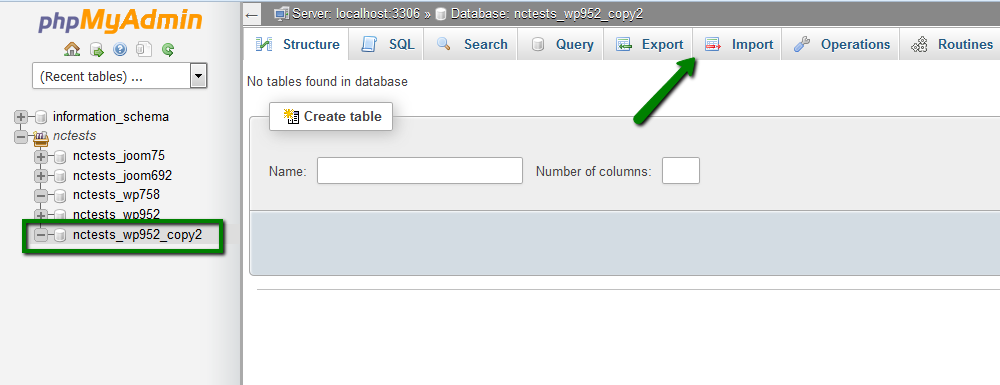
6. After that, select the newly created database from the left side of phpMyAdmin and click Import from the top bar:
7. Select the exported sql file from your computer using the Browse button and then click the Go button:

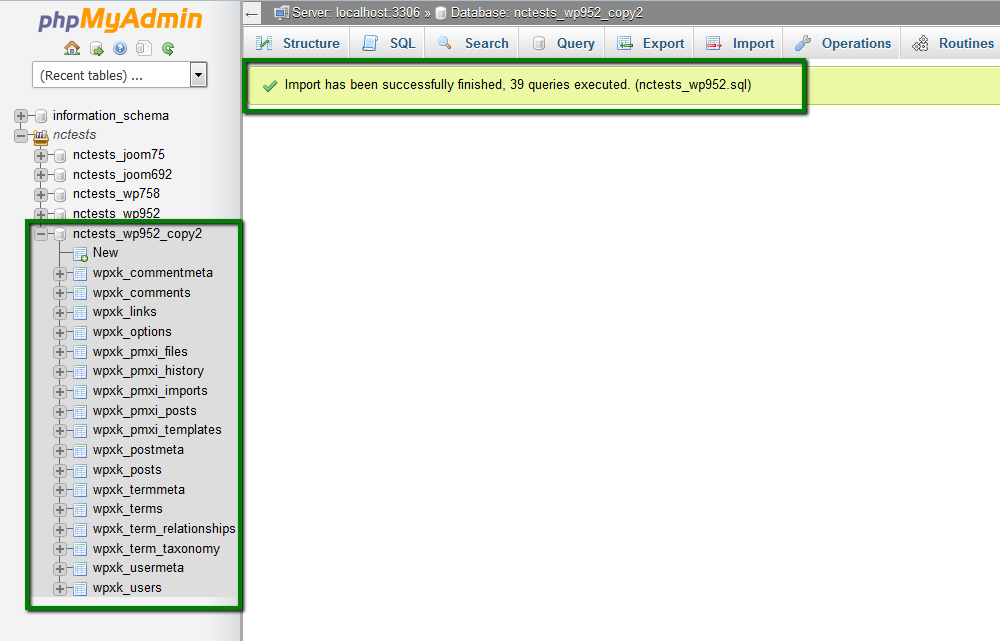
8. Once done, you will see a notification that your database was successfully imported and all the tables will appear in the new database:
NOTE: Maximum size of the database that can be imported in phpMyAdmin is 1GB. Larger databases have to be imported/exported via SSH.
That's it!
